Answers to Frequently Asked Questions About Google Classroom
Unless you have been hiding under a rock for the last five years, you know what Google Classroom is and what it does. Every week, we receive emails from Tech Edvocate readers looking for tips, tricks, and hacks to maximize this amazing app’s potential. Instead of letting all of the questions and answers go to waste, we decided to compile them into an article so that this helpful information can be readily available to all of our readers.
What is Google Classroom?
Google Classroom is an interactive collaboration app for educators and learners that can be used through the web or on a mobile device. It provides an online platform to make digital learning more organized and streamlined. It consists of four sections that each have distinctive features and purposes:
⦁ Google Classroom offers a live “Class Stream,” where educators can make important announcements and students can see what assignments have been posted. This is the go-to place for educators to post messages or share information in the form of a link, video, or document.

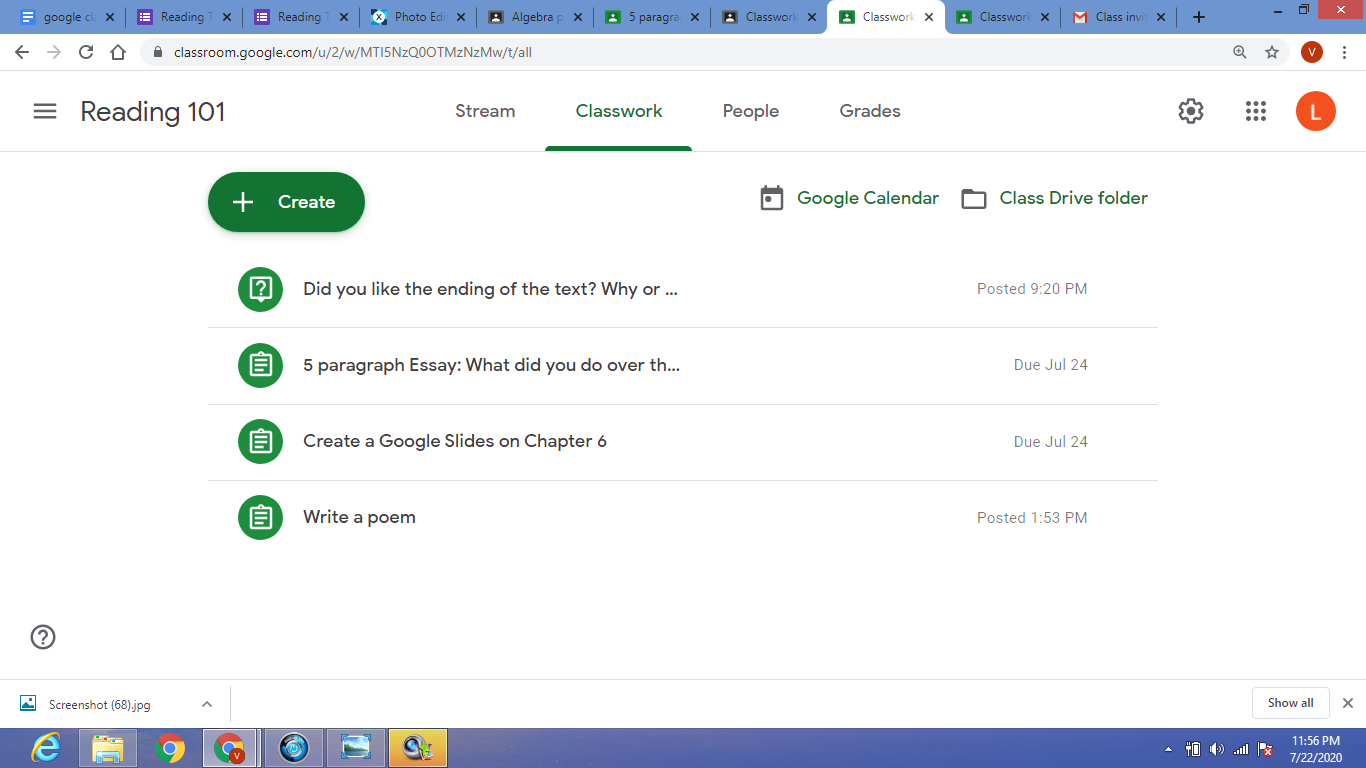
⦁ Under the section titled “Classwork“, educators can post assignments or quizzes, share educational material, or ask a question to the Class.
⦁ The “People” section will provide the name of the teachers and a list of all the students enrolled in the Class. This is where you would go to send an email to a student or guardian, as well as check to see what assignments a particular student has turned in by clicking on their name.
⦁ The “Grades” section, which is only for educator’s accounts, provides a quick and easy format to assign grades to students for each assignment you create.
The app also automatically develops Drive folders for each assignment, Class, and learner. This handy feature provides a central location for all of your Classroom files, including any digital materials you shared, each assignment that has been created, and completed student work. This helps to keep you organized and frees up your time so that you can concentrate on more important things.
Google Classroom’s time-saving elements contain:
⦁ One-click copies: Instead of having to recreate new documents for each learner, you can make a copy of a Google Doc for every learner in your Class with just one click of a button.
⦁ Assignment and grade management: With this app, you can assign due dates for each assignment and return grades quickly and efficiently. You also have the option to select no due date so that students can take their time without pressure. Once you have graded an assignment, you can return it to the student, which allows them to immediately view their grade as well as any written feedback you have provided.
⦁ Progress monitoring: Check which learners have completed an assignment at a glance by clicking on the assignment link. This will show you how many students turned it in, and who is missing their work. You can also go to the “People” section and click on an individual student’s name to see which assignments are assigned to them, and what work they have completed.
⦁ Instant feedback: Comment directly on shared documents and learner posts to provide timely feedback. There also is an option to leave a comment on any assignment that has been turned in so that you can provide positive praise for a job well done, or provide tips for necessary corrections.
Have G Suite for Education but cannot access Classroom? Ask your admin to enable it!
What is G Suite for Education?
G Suite for Education brings together several Google products that promote collaboration among learners and educators. These Google apps can be used for free in the browser. The shareable documents auto-save and learners can even edit them without WiFi.
Educators can use these products to create interactive learning materials that are not only paperless but also provide an engaging digital format to teach content. Learners can work together, in Class or at home, to complete assignments and group projects. Collaboration with peers is an effective teaching strategy that not only promotes higher-level thinking and creativity but also keeps students engaged. Incorporating these Google products into your instruction helps to make collaboration a seamless part of your Classroom.
Google Classroom: Digital classroom space that allows educators to post assignments, educational material, and grades. Provides an online platform that is organized, interactive, and paperless. Educators can easily progress monitor students, as well as provide instant feedback on all assignments.

Google Docs: Word processor with smart editing and styling apps. You can develop documents that integrate links, images, drawings, and tables. Students can share their Google Doc with their teacher and other classmates. This is great for group work because it provides an opportunity for learners to collaborate and share ideas with each other. Educators can use Google Docs to create worksheets and share important information as well.

Google Sheets: Spreadsheet application for analyzing, visualizing, and charting data. Also great for making checklists, schedules, charts, sign-up sheets, progress monitoring sheets, rubrics, communication logs, and much more.

Google Slides: Presentation app that makes it easy to tell stories and create presentations with colorful text and images. Students can create individual presentations that highlight important concepts. They also can take turns making slides to create high-quality group presentations across a variety of subjects and topics. Educators can utilize this app as well, creating slides to share educational content that includes images, pictures, graphics, and attention-grabbing colors to meet the needs of visual learners.
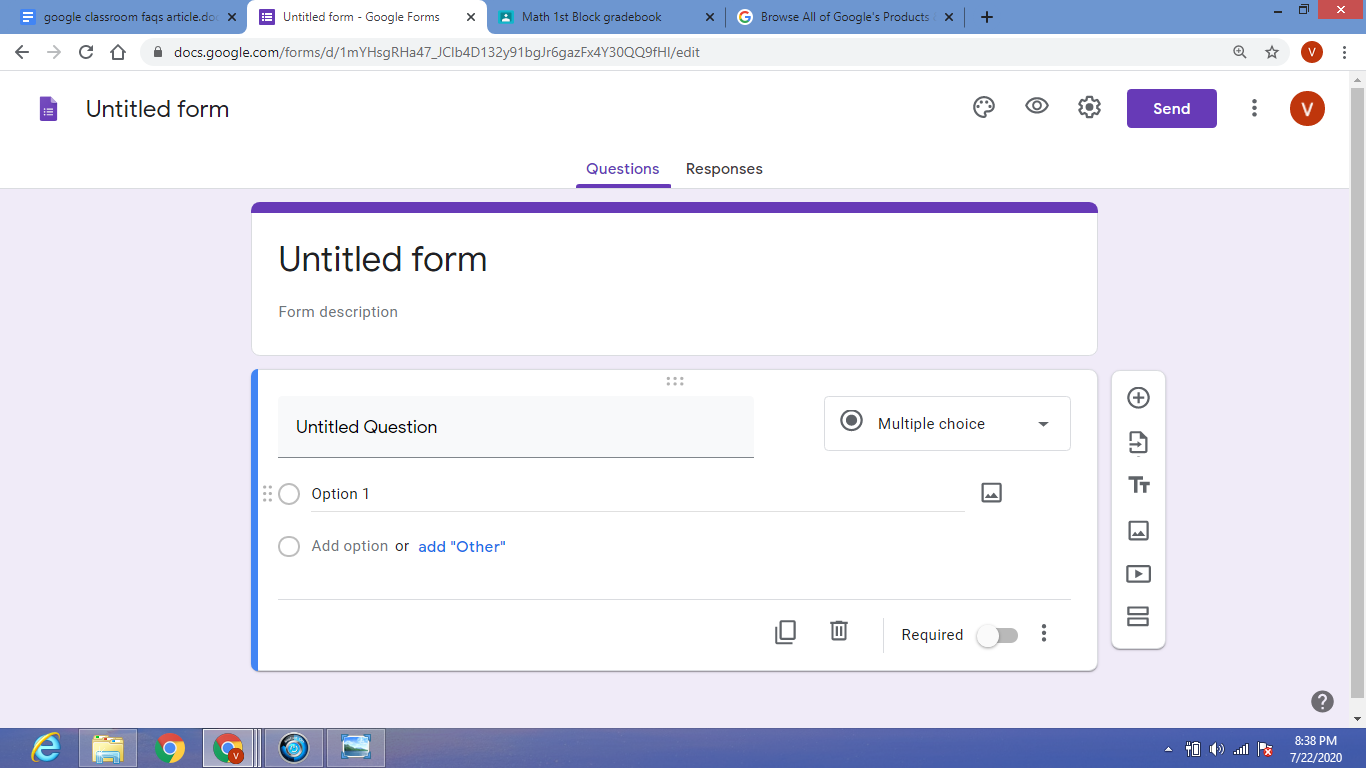
Google Forms: Quick & easy web-based survey and quiz creator. The information automatically appears in a spreadsheet. Formats include both multiple choice and short answer options. Educators can create short quizzes or longer, in-depth tests. The survey option helps educators gather student opinions quickly and efficiently.
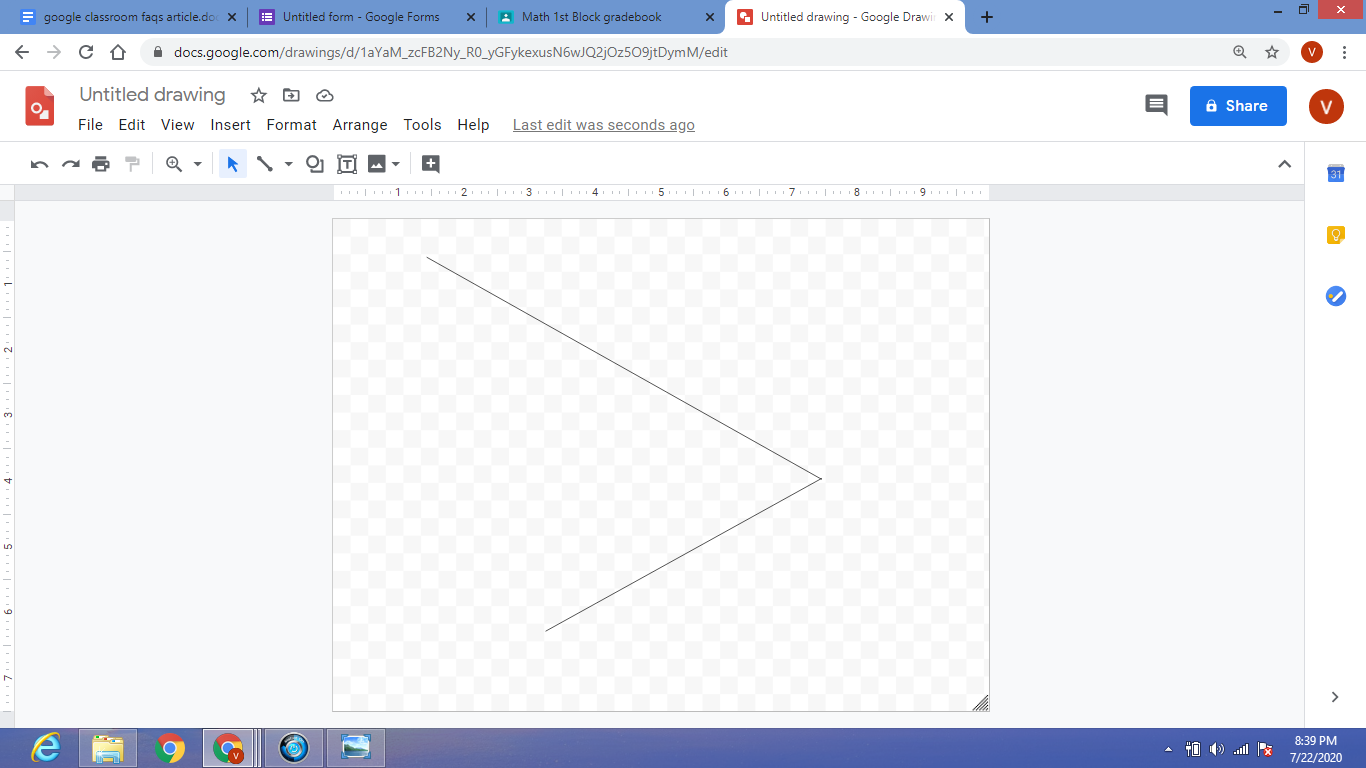
Google Drawings: Graphics editor. This versatile tool allows you to create graphic designs using shapes, text, and images. This product is great for creating an assortment of graphics, such as flowcharts, diagrams, concept maps, timelines, plotting graphs, number lines, mathematical equations and shapes, and graphic organizers. The scribble tool is also a great way for students to show their work when completing a math problem, or for note-taking during a lecture.
How Do I Sign In to Google Classroom?
Here are the steps to guide you through logging in to Google Classroom for the first time, whether you are an educator or learner.
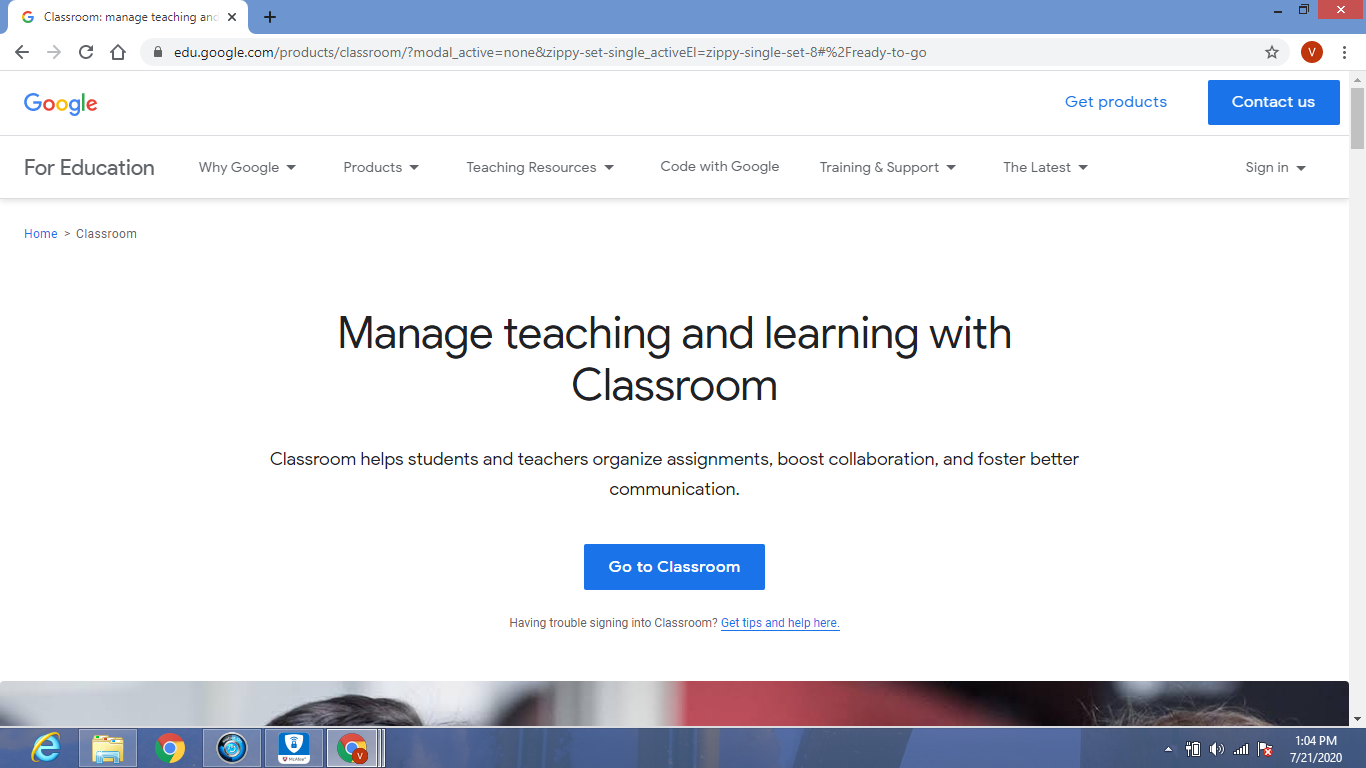
Step 1: Type in classroom.google.com on the web browser of your choice.
* If you have never signed in before, you may see a product info page. Click on Go to Classroom, located near the bottom of the screen.
Based on your learning environment, sign in to Classroom by entering your email address that is associated with one of the following user account types:
- School account: Known as a G Suite for Education account, this account is set up by an accredited school. It looks like [email protected]. If you do not know your G Suite for Education account details, ask your educator or the school’s IT admin.
- Personal Google Account: Set up by you or your parent or guardian. Typically you utilize a personal Google Account outside of a school, such as a homeschool. The email address should look like [email protected].
G Suite account: Set up by your company admin. It looks like [email protected].
Step 2: After entering your email address, click Next and you will then be prompted to enter your password. Click Next again after you have entered it.

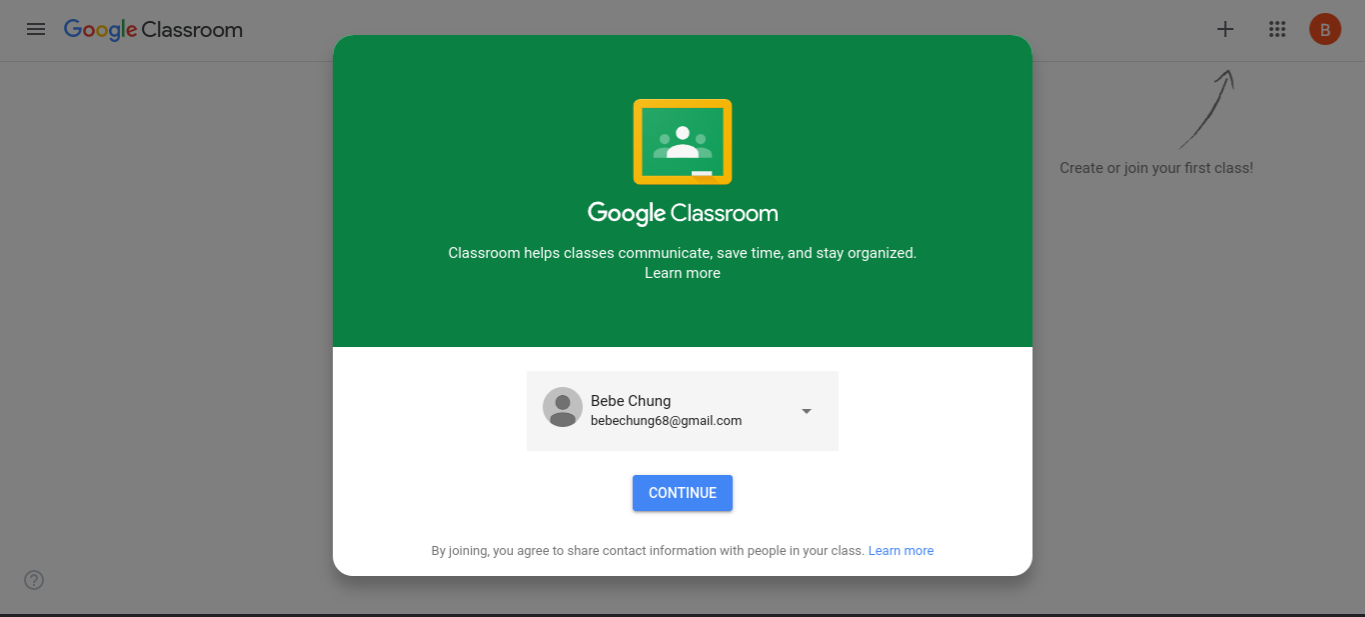
Step 3: A welcome message will appear that lists your name and email address. Click Continue.
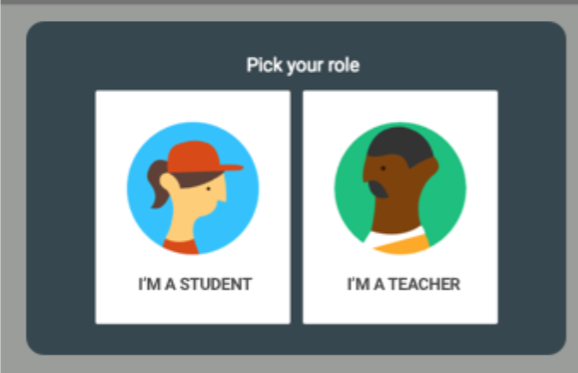
Step 4: If using a G Suite for Education account, you will be given the option to identify yourself as either a student or teacher. Personal Google accounts will not have this option and can skip to Step 5.
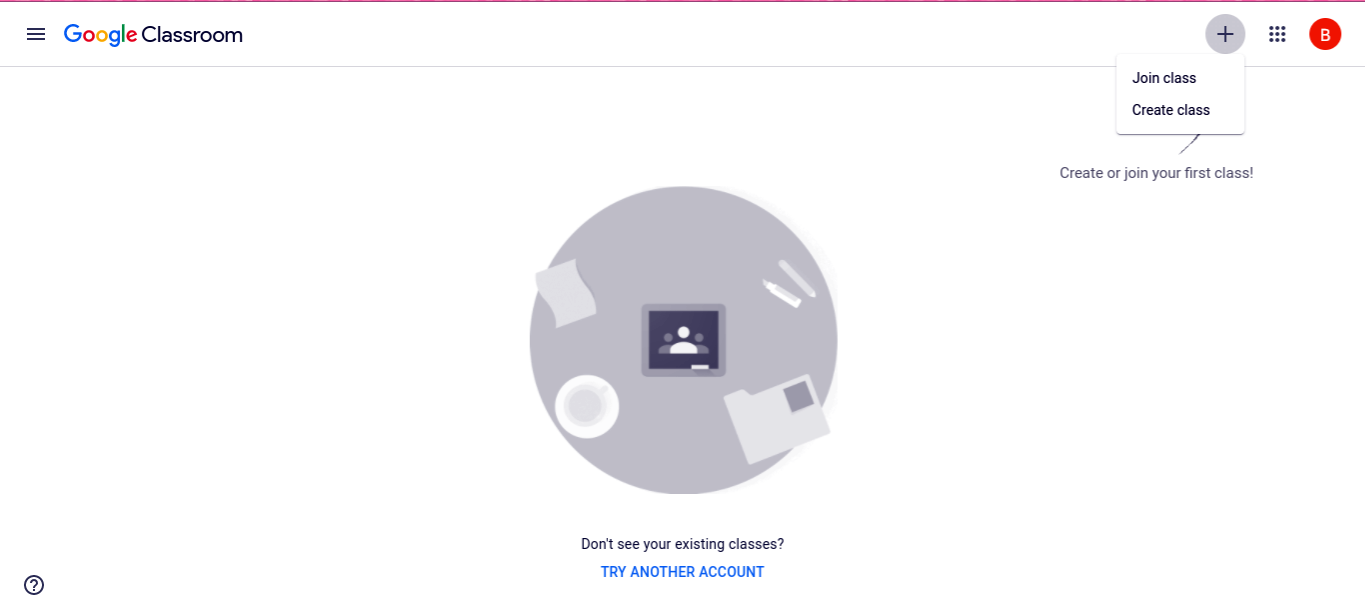
Step 5: Click on the + sign in the right-hand corner and select Join class if you are a student, or Create Class if you are an educator. You are now ready to start using Google Classroom!
How Can Educators Utilize Google Classroom?
Because it is a fairly flexible app, educators utilize their features in a lot of different ways. With Google Classroom, educators can:
Streamline how they manage classes. The app integrates with Google’s other apps like Docs, Drive, and Calendar so there are lots of built-in “shortcuts” for classroom-management tasks. For instance, if you post an assignment with a due date, it is automatically added to the class calendar for your learners to see. Also, everything you create on Google Classroom is saved onto a Drive folder. Your assignments, any digital materials you uploaded, and completed student work will all be in one easy to find location. You can also create a new Google Doc, Sheet, Form, Slide, or Drawing by clicking “Create”. You can upload it to your Classroom once you are done. Or you have the option to upload an existing file from your computer or Drive when creating assignments for your students.

You can digitally organize, distribute, and collect assignments, course materials, and learner work. Educators can also post an assignment to several classes at once or modify and reuse assignments from year to year. If your learners have access to technology devices, Google can help you create a paperless classroom, and finally, have a chance to enjoy your free time. No more wasted time making copies in the copy room, dealing with a line of people, or a malfunctioning copy machine. With one click you have everything you need, and the learning material will be much more engaging for students as opposed to a boring worksheet.
Communicate with learners about their classwork. You can utilize the app to post important announcements and reminders about assignments, and it is obvious to see who has or has not finished their assignment. You can also check in with individual learners privately, answer their questions, and offer support. Effective teaching requires frequent communication between educators and learners. Luckily, Google Classroom provides a platform with many opportunities for regular communication and feedback.

Give learners timely feedback on their assignments and assessments. Within Google Classroom, it is possible to utilize Google Forms to develop and share quizzes that are automatically graded as learners turn them in. You will not only spend less time grading, but your learners will get instant feedback on their work. You can use the private comment feature to explain errors or give praise.
How Does Google Manage Student Data and Privacy?
As an educator, protecting your learners’ privacy and data should be considered whenever choosing a digital app for your Classroom. Anytime an app might collect data from learners, it is important to ask questions about how the companies are securing, using, or storing learner data.
According to Google, data security and privacy is their number one priority for all G Suite Education products. The company tries to be as transparent as possible about the data that they collect. Google claims that when their services are used, they collect data from web searches, websites visited, watched videos, user location, and apps used to access Google products. Their reasoning behind their policies of data collection is that they use this data to make their services work better for the user. Therefore, it can be assumed that Google will be collecting data every time a student uses their product. However, they make assurances that collected data is only used for product development and is kept private.
Stakeholders have expressed doubts about Google’s ability to deliver on these promises about privacy and data protection. The visibility of Google branding and products in schools has raised questions about the trade-offs of allowing Google to build its brand.
Educators must remember that parents and families have a right to opt-out if they do not want their children to utilize Google products in school. Before launching Google Classroom, school administrators and educators might want to have an alternative plan for learners who may opt-out. Schools should obtain parents or guardians permission for their children before adding them to Google Classroom. Some families might prefer their children to stay off the internet completely, and strictly prefer traditional learning. This is certainly within the parents or guardians right and should be a discussion before implementing any use of Google products in your Classroom
Whether you utilize Google Classroom or not, it is important to get learners thinking about data privacy and security. Educators should discuss the importance of digital citizenship and internet safety with their students. This includes a warning about sharing private and sensitive information over the internet and being careful about what you post. Educators can also encourage families to have this talk with their children to make sure they understand the implications behind internet safety beforehand, especially in this technology-driven society we now live in.
How Can I Use Google Classroom to Differentiate Instruction?
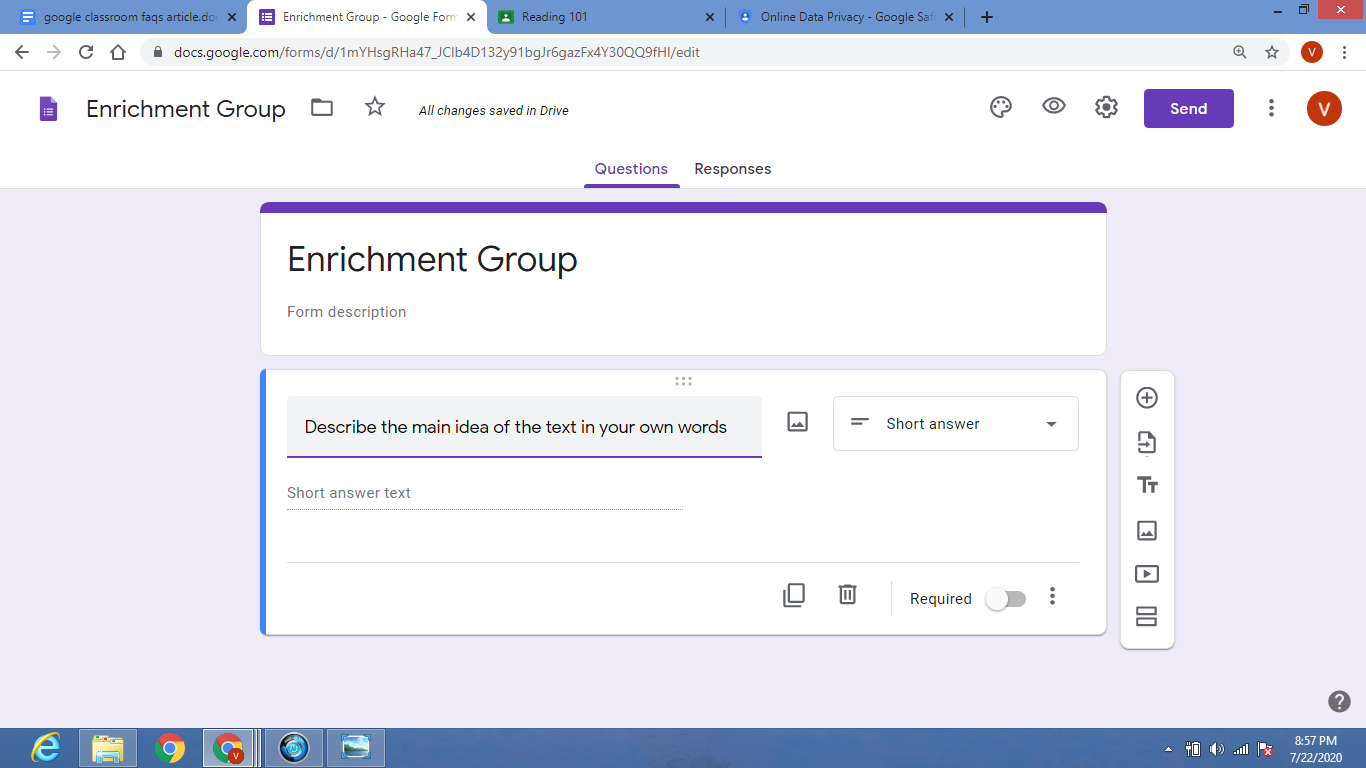
Google Classroom can simplify a formative assessment, which is essential in helping learners who might need more support or extra challenges. For instance, you can utilize the app to quickly develop, distribute, and pick up digital exit tickets or graded assessments. You can also create a test using Google Forms, and differentiate the way a student records their answers. Create a multiple-choice test for students who need that extra layer of support, and written responses for those who can handle more rigor. Google Classroom can make it a breeze to gather regular feedback on your learners’ progress. There are plenty of other formative assessment apps out there, several of which now offer Google Classroom integration.
Google Classroom makes it easier to modify assignments for individual learners or small groups. This means educators can give modified or differentiating assignments to certain learners or groups in a class. You can modify the rigor, content, length, presentation, or the due date of assignments to meet the needs of a variety of students. Educators can also differentiate by providing additional resources for students with disabilities or a language barrier. Resources can be material such as a graphic organizer, educational video, visual aids, teacher notes, or an audio recording of step by step instructions. You also can check on a learner privately to see if they have questions or need extra help.
The ability to do all of this online can make educators’ efforts at differentiation less conspicuous to the Class, which can be helpful for learners who might feel singled out. Plus, learners will know they can still count on their educator to check in on them and provide that extra support they may need to be successful with their assignments.
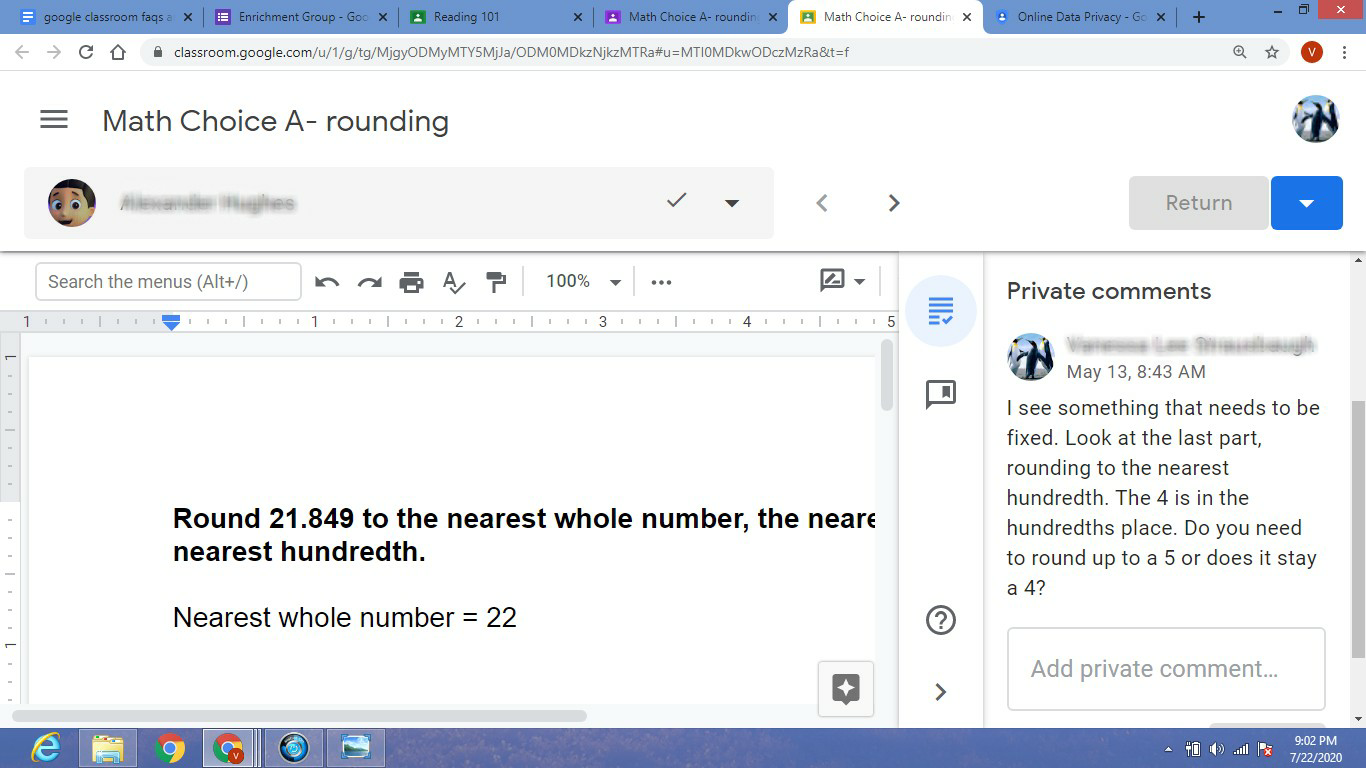
With or without an app like Google Classroom, differentiation is always going to be a matter of creative problem-solving, and there is no one or “right” way to do it. The possibilities are endless when it comes to providing differentiation for students. It depends on the creativity and willingness of the educator to find ways to modify assignments so that struggling students can succeed. Luckily, lots of educators share their tips, tricks, and creative solutions online for those who need support in this area.
How Can Google Classroom Make Learning Interactive?
To make digital content more dynamic and engaging for learners, consider mixing up the resources you share with them in Google Classroom. In addition to G Suite apps like Google Docs and Google Slides, educators and learners can share other types of media, such as website links, images, YouTube videos, and screencasts.
Some educators even give learners a variety of options for submitting their work within Google Classroom. For instance, you might offer learners the choice to respond to a reading assignment with a comment, video clip, Google Slides presentation, or drawing that shows they are thinking and interacting with the material in a way that aligns with their individual learning style.

If you are looking to develop an interactive hub for learners, you might consider doing this on Google Classroom’s Stream page. In Google Classroom, the Stream is a feed where the Class can find important announcements and upcoming assignments, and it is the first thing learners see when they log in. I recommend using the Stream feature to post your class schedule and suggest using Screencastify to post video messages for learners. With Screencastify you can present documents or web pages along with an audio clip of your voice explaining concepts in your own words. This can provide clarification and a more personal touch.
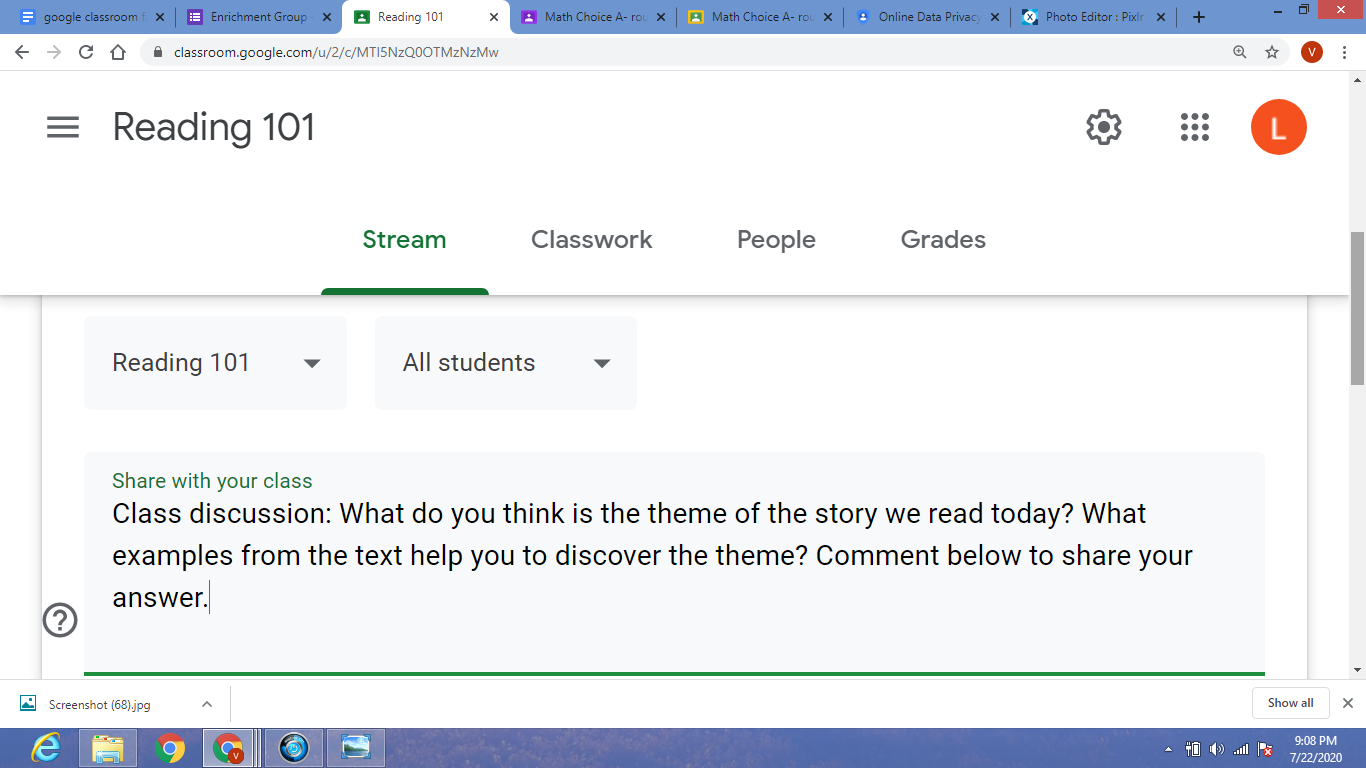
Some educators utilize the Stream to set up class discussion boards, where learners can interact online by asking questions or interacting on each other’s posts. Discussion boards can help raise class participation and offer learners more equity in having their voices heard (or read) by the Class. It also gets students excited and involved in the learning content. With discussions, you can utilize the Stream as a private social network of sorts.
Also, it can be the perfect way to help kids practice using all kinds of digital citizenship skills in a safe and secure setting. This also gives them the freedom to express themselves by posting their thoughts and opinions, while having an adult to monitor them.
Can I Add an Assignment Without it Becoming a Part of the Stream?
Many educators are annoyed with the Stream section of Google Classroom, where you can post important announcements and see notifications of items that have been added to the Classwork page. The Stream is your Google Classroom communication hub. This is where you post important messages and keep learners informed. The Stream will also display notifications of new items posted on the classwork page by default. This can feel like duplication and can muddy up the Stream. Perhaps you only want announcements and course materials to appear on the Stream, and do not want tons of posts about assignments taking up space and attention. Learners can just as easily view their assignments by clicking on the “Classwork” tab.
There is a way to remedy this by adjusting your settings. If you are using the “Classwork” page, you can choose a collapsed or expanded view for notifications on the Stream page. You can also hide them from the Stream page. Educators can customize what appears on this page for each Class. Here is how you change the settings:
- Navigate to classroom.google.com and you will see a menu of your classes.

2. Select the Class you want to make changes to.
3. Click on the Settings icon on the Stream Page ( top right corner, third icon from the left) and scroll down to General. Under “Classwork on the stream”, there is a drop-down option to select what is visible on your stream.
- If you select “Show attachments and details“, this means that every part of the assignments you create, including the instructions and all attachments will be included in your post. It will be a very long and detailed post.
- If you would like only a condensed version of the assignment on the stream, you can change your settings to “Show condensed notifications” on the drop-down screen. This will just show the title of the assignment on the stream.
- If you do not want any post about assignments on the stream, you can select “Hide notifications“, and all posts about assignments will be removed from the stream. It is up to the educator to choose how they want their Google Classroom to look and function.
4. After making your selection, be sure to press “Save” in the right-hand corner to save your changes.
How Do I Place My Worksheet in Google Classroom?
Usually, this question means, how do I put a PDF inside Google Classroom so my learners can write on top of it. Keep in mind that sometimes it is more difficult and not worth the time and energy to digitize a paper worksheet.
Before you attempt to do this, ask yourself:
- Will this worksheet help the learning stick?
- Is this worksheet better than hands-on learning?
- Is this worksheet better than the discussion?
- Is this worksheet better than engaging learners in new ways? — That is why you utilize technology! Not to save paper or digitize your old stuff. Technology is a tool that allows us to develop new learning experiences for learners that were not previously possible.
- Can I instead create a Google Doc with similar information geared towards the same learning goals? Attaching a Google Doc is a much simpler process.
If you still want to upload a worksheet, here are the steps:
- First, you will need to scan your document using a computer scanner. Once you have an image scanned, save it as a PDF onto your computer.
- To add it to your Drive, go to drive.google.com on your browser and click on the “New” button (+ sign in the top left corner).
3. Then choose “File Upload”.
4. Your computer files will pop up. Navigate to the PDF file that you want to add and upload it to your Drive by highlighting it and pressing “Open”. It will immediately start uploading.
5. Sign in to your Google Classroom. You can now add your new PDF document by creating a post on Stream or when creating a new assignment. Just click “Add”, then “Google Drive”, and select your document.
Can Parents Have Access to Google Classroom?
Parents can receive emails with information about their learner’s classwork. You can only add parents for learners using Classroom with a G Suite for Education account, not a personal account. However, most school settings are using the G Suite version, so this should not be a problem for teachers who want to use this feature. It is a great way to keep parents in the loop so that they know what assignments their child has, as well as whether they are keeping up with their work.
When parents join Classroom, they receive automatic email summaries for each of their learners. Parents choose the frequency of the emails (daily or weekly) and can unsubscribe at any time. The teacher must first invite the parent by adding their email address under their child’s name on Google Classroom. This can be done under the “People” tab. The parent will then receive an email and must accept the invitation to begin receiving the guardian email summaries.
Parent email summaries contain information about the following:
- Missing work— Assignments that were late when the email was sent.
- *Work that’s due today and tomorrow (for daily emails) or work that’s due in the upcoming week (for weekly emails)
- Class activity— Important announcements, assignments, and questions recently posted by educators
Guardian email summaries for your classes are turned off by default. Learn how to manage parent email summaries for your Class. It is important to note that parents cannot access any part of your Google Classroom or view your class stream. Therefore, they do not have access to view their child’s grades. Educators will need to find other ways to maintain a steady line of parent communication to keep them informed of their child’s progress and grades.
To turn on Guardian summaries, click on the Settings icon (right-hand corner of the stream page) and scroll down to General. Where it says “Guardian summaries”, slide the grey button to the right, and it will turn green to indicate this feature has been turned on.
Underneath “Guardian summaries”, it says “See example. Click on it for more information.
Can I Use Slides Without Using Google Classroom?
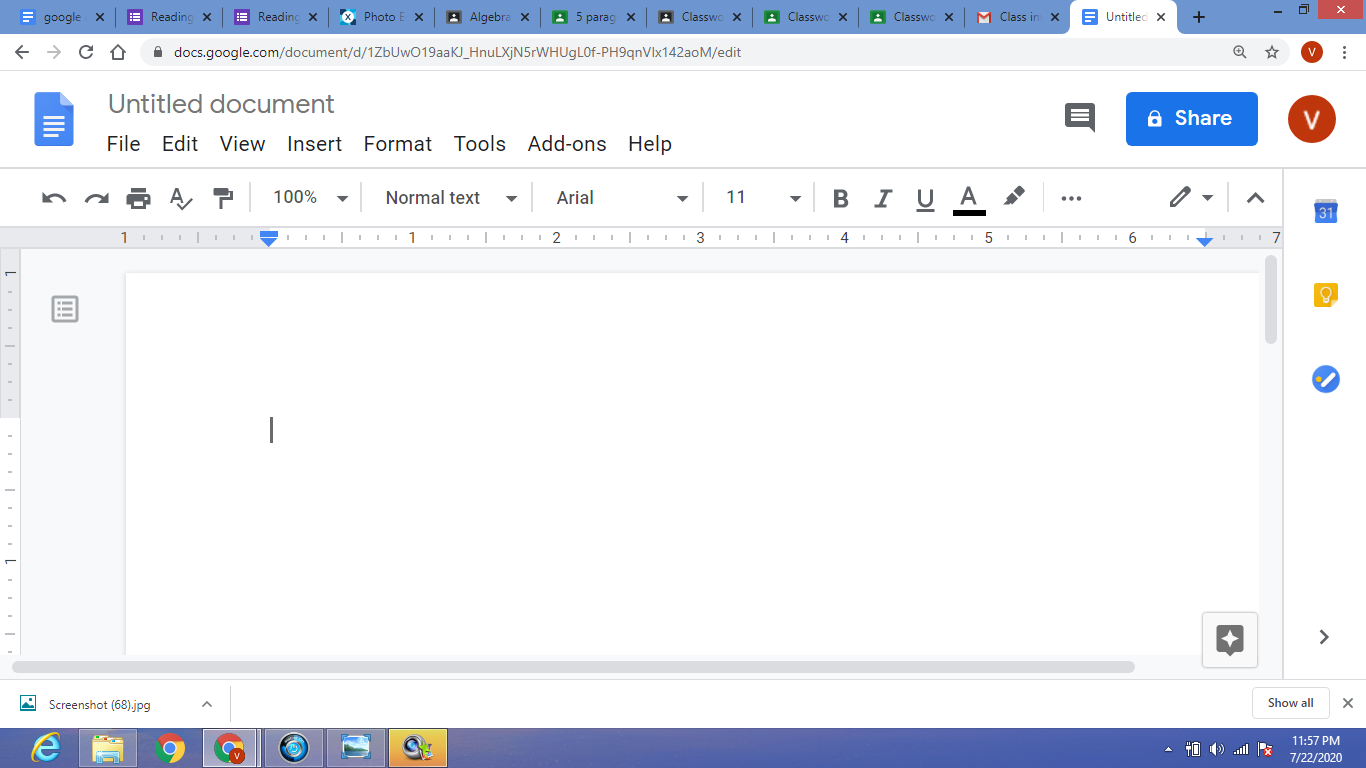
Yes, you can! As long as you have a G Suite account or Gmail account, Google Slides is a free app and can easily be accessed without Google Classroom. All you have to do is open up a Google Chrome browser and look for the App Launcher icon. It will be a grid of nine small grey dots located in the top right of the browser. This icon is nicknamed “The waffle” by some because it is shaped similarly to a waffle. Once you click on the App Launcher icon, a menu of Google apps will appear. You will see the yellow icon for Google Slides. Click on it, and a new slideshow document will open for you to use.
It will look like this:
If you are trying to give access to Slides to someone who does not have a Google account, you can open a new Slides document, then go to File and click Share. Or you can just click on the yellow “Share” icon in the top right corner.
A pop-up will appear and on the “Get link” section, click on “copy link”. A link to the slideshow will automatically be copied.
You then can paste the link into an email and when the recipient goes to click on the link, they will be directed to request permission from you to open it. You will receive their request through email and can accept it. Now they will have access to the Google Slides sent to them.
To turn in an assignment, learners will have to either email you the file or send you the link of their completed work. They also can click on the ‘Share’ button in the top right corner and enter your email address and it will be sent to you. It will appear on your Drive under “Shared with me”.
What Can I Do With Google Classroom?
So this is probably the essential question. Why would you use Google Classroom? What’s in it for you? First of all, it is completely free. After you have set up your Classroom, you can begin. You will find out how to set up your Google classroom account in just several moments. First, allow me to show you why Google Classroom is a big deal, by discussing how to use many of its bells and whistles.
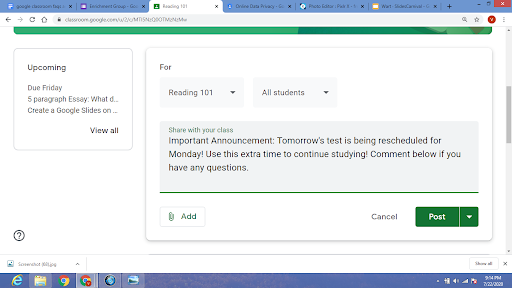
- Add announcements and lesson content: Give your learners announcements about your lesson or share an important message. You can also add lesson content and educational resources or materials in the announcements. These announcements will show up in your learners’ Google Classroom stream. That way, learners can find everything quickly, and as soon as they log in. You can add content from a Google drive, add files and pictures from your computer, add a video, or add any other link you want your learners to visit. It is that easy!
- Add assignments: It is very easy to add a learning activity (assignment) to your course. It works the same way the announcements do, but you can add a deadline and grade it. It will notify your learners when they must complete a learning activity (assignment), and it will also appear in their Calendar. To create an assignment, you need to go to the “Classwork” tab. Then you can customize your assignment to meet your students learning needs.
- Grade an assignment: You can check and grade the learning activities (assignments) your learners have turned in. There’s room for feedback via an educator’s comment. This could be corrective feedback or positive praise on a job well done. Then, send the learning activity (assignment) back to your learners. The “Grades” tab holds a grade book of all your learners’ learning activities (assignments) and grades for easy access and paper-free grading!
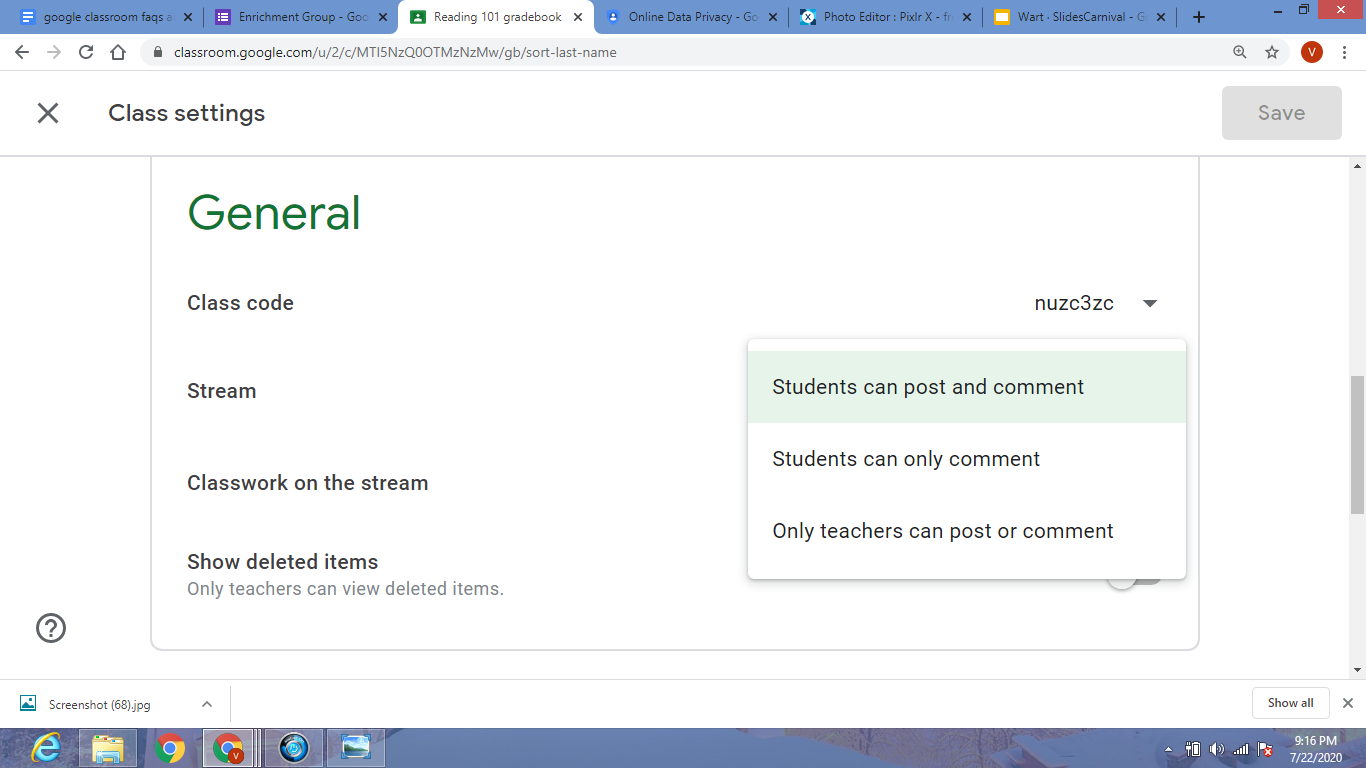
- Manage learners: Of course, your learners must be able to share comments. Or not? That’s totally up to you! You can manage permissions, giving learners the ability to post and comment, or give only the educator the ability to post and comment. Students enjoy interacting with each other and sharing their thoughts and opinions. It can allow their voices to be heard and get them engaged and excited about their learning. However, if they abuse this privilege and their posts are inappropriate, then you can turn off student commenting. This allows you to ensure your Classroom is a safe and wholesome digital learning environment.
What Can’t I Do With Google Classroom?
There are many things you must know before using Google Classroom for the wrong reasons. It is a great online learning platform for posting assignments, grades, announcements, and sharing online resources. However, there are some things that it does not provide. Here are a few things that it is not known to be:
- A chatbox: You can comment on learning activities (assignments) and announcements, but there’s no chat function that allows you to instantly communicate back and forth. If you want to be in direct contact with your learners, you can send them an email or allow other Google apps to take over that function. Think about Google Meet or Hangouts if you need instant, live communication.
- A test or quiz app: There are many possibilities for making quizzes in Google Classroom, but it is still not meant to be a quiz app. There are so many other amazing apps for that. You can add tests and learning activities (assignments) from other educational apps right inside Google Classroom. You also can add a question. Then select between a short response answer or a multiple-choice question. Not that impressive, I know. It is best to select the first option if you want to make your Classroom more interactive and engaging. Also, Google Classroom provides you with a blank form to create your test or app, and then leaves all the work to you. There are not many bells and whistles to help you create your assessments like other quiz apps.
- A discussion forum: You can create announcements, and learners can comment on them, but it is not a great fit for discussions. It does not have the organizational features of a discussion board. If an educator posts a discussion topic, and multiple students comment underneath it, it will be difficult to sort through. Also, the thread will be extremely long. Educators may have difficulties trying to find a particular student’s post as well. Learners can’t change the font color or size to make their post stand out, or underline important points. While you will have the means to create a discussion forum, it will not be as streamlined and easy to use as other learning platforms that are designed for it.
What is the Easiest Way to Set Up Google Classroom?
Google Classroom is an innovative online learning platform that is easy for educators to implement, and engaging for learners. You will find it is easy to set up and intuitive. Here is how you can set up your Google Classroom educator account:
1. Sign up
After you go to classroom.google.com, you can use Classroom by logging in using a G suite email address or using it without “claiming” to use it for education. Everything works just fine that way too. It is just harder to manage your learners if you have hundreds of them. You will add them one by one, which can be very time-consuming.
2. Create your first Class
Click on the “+” button, which is located in the right upper corner. Choose to “Create a class.” Here, you fill in information about your Class. Write down an amazing class name and section. Then click on “Create.”
3. Invite learners to your Class
Once you have developed your Class, you can invite your learners. Let learners sign in using the Google Classroom app by entering the unique code you give them. You will find the class code in your developed Classroom. Go to the tab “People” and under “Students” it will list your class code. Another option is to invite your learners one by one by entering their email address. One thing you must keep in mind: your learners need to have a G Suite for education email or a Google email address.
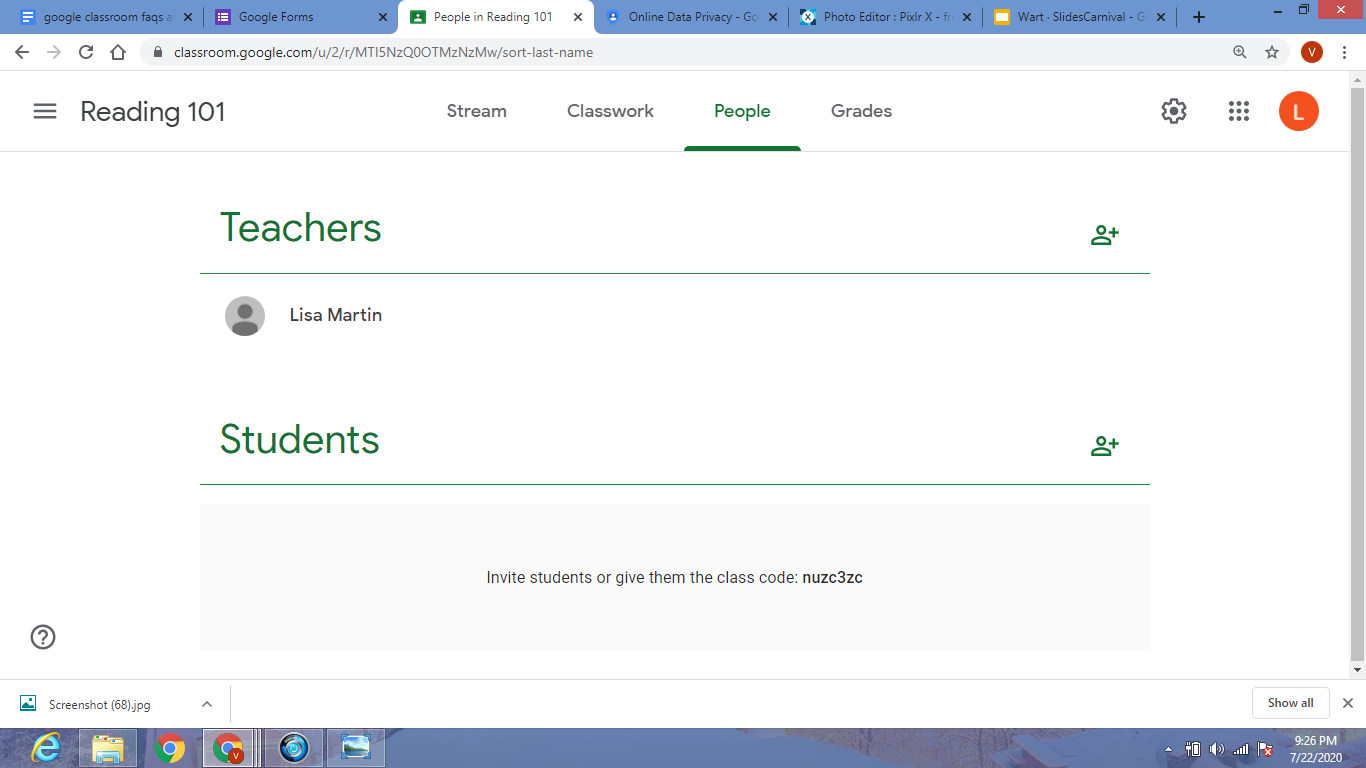
You can also let your learners go to classroom.google.com. Learners can click on “Join class,” enter the classroom code, and that’s it. This might be a bit quicker as you don’t have to manually type in every learner’s email address.
Now your online Class is ready! At least, it is there, and everyone can access it. There are several other things you must do before you can take off.
- Create your first assignment, or you make an announcement. You can share the initial announcement in the Stream, or go to Classwork to create an assignment. Click on the “+ Create” button and disseminate your first Google Classroom learning activity (assignment). Don’t forget to number your learning activities (assignments). It is easier for your learners to see which one comes first as you are unable to reorder learning activities (assignments) in the Stream. You can move learning activities (assignments) around to the top. Click on the title to determine if any learners have handed in the learning activity (assignment) and give grades and feedback. Afterward, you can return the learning activities (assignments) to your learners to start editing again.
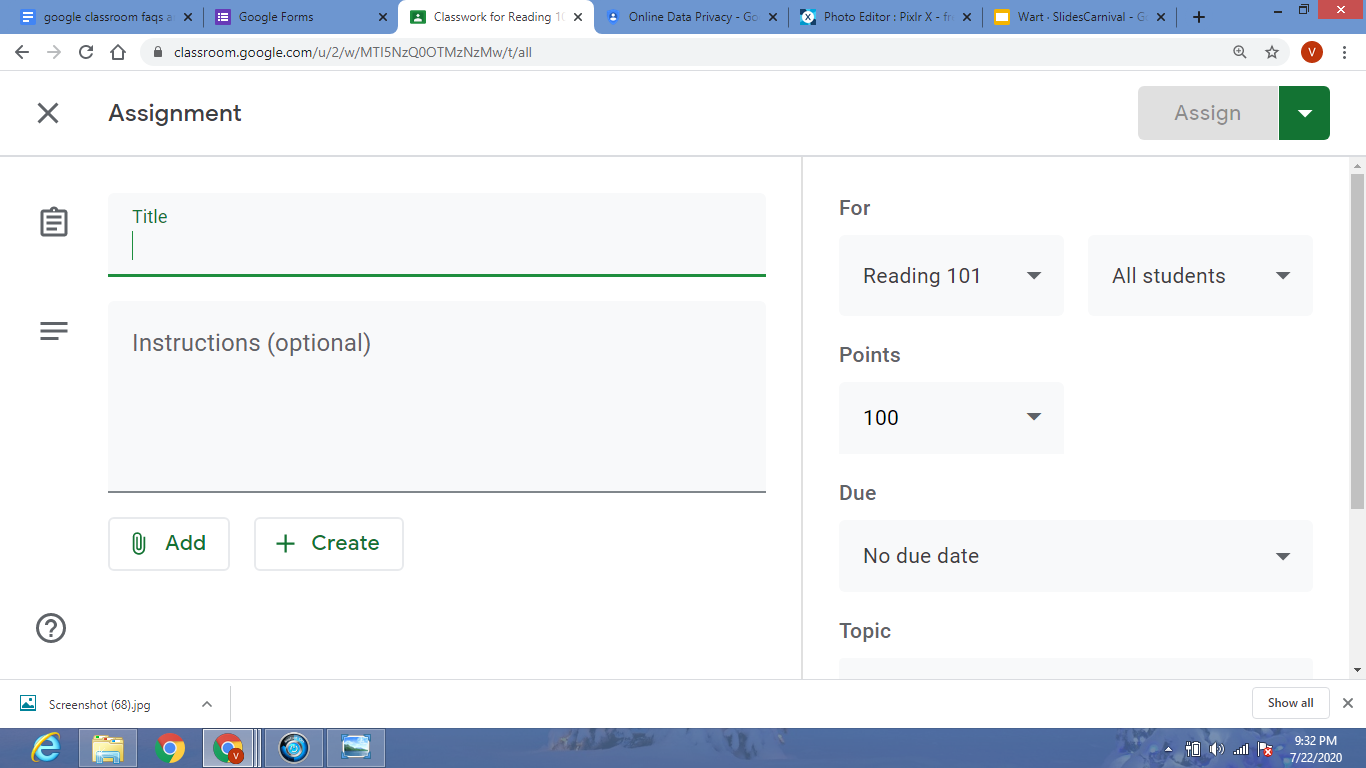
- Add lesson content to your learning activity (assignment)/ class. Add content from Google Drive or add a video, a file, a link, etc. These options can be found right beneath the due date. If you just want to share a class presentation that is not linked to a learning activity (assignment), you can post it on the Stream instead of under the Classwork tab. You can add lesson content such as slides, interesting articles, and examples.
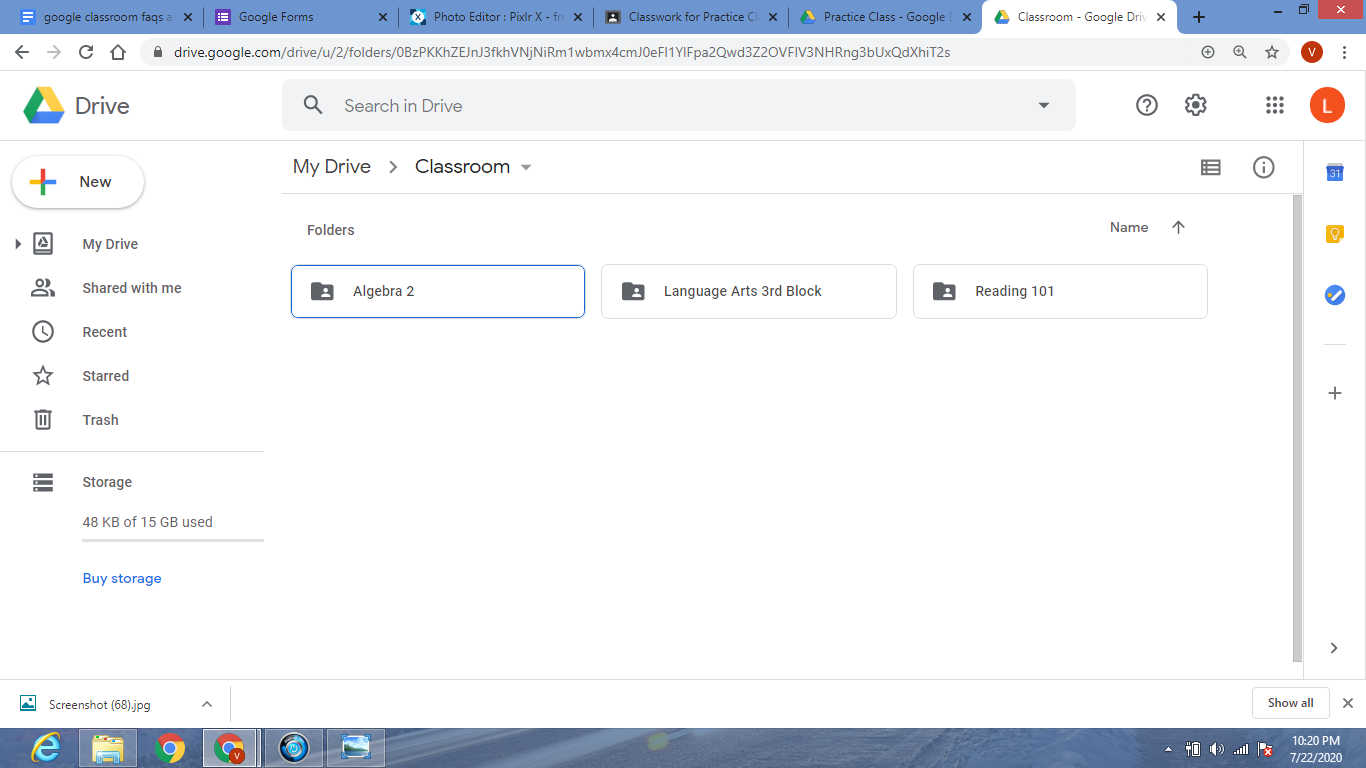
- Access the Drive folder. Every time you create a class, Google Classroom creates a Drive folder for that Class. You can access the folder by going to the tab “Classwork”. You will find a folder icon titled “Class Drive Folder” on the right-hand side. Click on it, and you’re in the folder. Here you can add class content too. All your learner’s learning activities (assignments) automatically end up in the Google Drive folder, so it will always be easy to locate.
Is My Child’s Data Collected by Google Classroom?
Many of the apps associated with G Suite for Education are indeed tracked. When your child is provided with an account to use Classroom, that data is managed by privacy rules that forbid Google from tracking and collecting learner data. If the school’s administrator turns on Additional Services, Google may collect data on those apps as it would for any of its other general apps.
If your child’s educator relies on learners to use their Gmail accounts to access Google Classroom, the data, including the sites they visit, the videos they watch, and their location will be tracked by Google. The company tries to be transparent with their data collection, stating that they maintain privacy and only use collected data to make their products better for the users.
Another risk is the third parties. Although Google doesn’t share or sell learner data to partners and vets the developers it utilizes for Classroom, third parties could collect information from your child, then profile and target them using that data.
Educators need to obtain permission from parents or guardians before implementing Google Classroom, and ensure they approve of their children using the internet and Google products. It also would be a good idea for students to be reminded by both their families and teachers that when using technology at school, they need to be responsible digital citizens. Make sure they are familiar with internet safety and the importance of refraining from sharing private or sensitive information over the internet.
What Safety Settings Should I Enable on My Child’s Google Account?
If your child uses a personal Gmail account for Classroom, you can change their privacy settings on their Google Account page. (If they have a school account, talk to the administrator for help on what settings you can control.) Keep in mind that to use Google Classroom, your child must share certain information, such as their first and last name. Take a look at these setting to see how to protect your child’s account:
- On the Personal Information page, you can view what information is public. You can set this information to private if you choose.
- On the Data Personalization page, you can take the Privacy Checkup to view what information you’re sharing and change it if you would like. You can go through your Activity controls and view the data that Google is tracking. If you select “pause” activity, Google can’t track it.
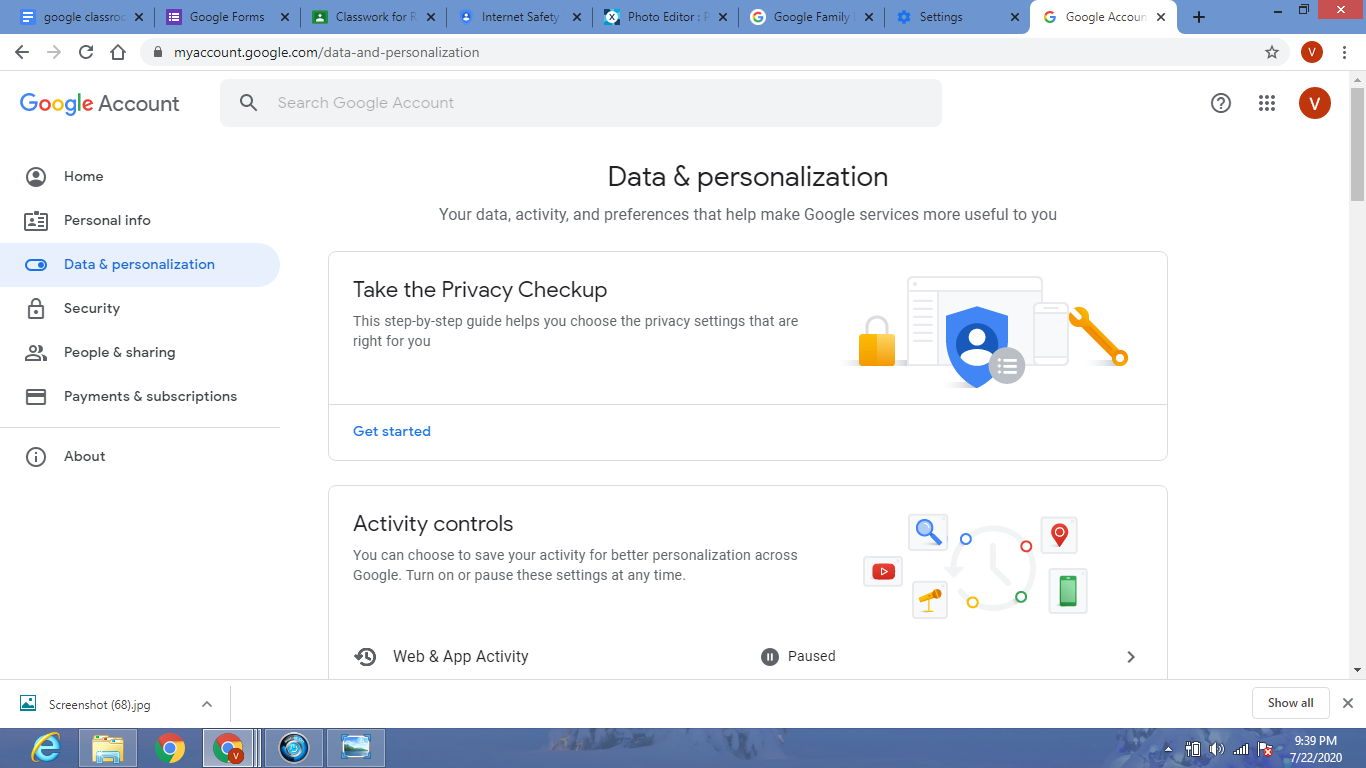
- You can see contact information from the People & Sharing page and what information you’re sharing on Google Services.
Consider downloading the Google Family Link for Parents app. This is a free app that is found under the Google Play Store. This app has many parental control features that can put families’ minds at ease and ensure their child’s internet activity is being monitored. Here are some of the great features it provides:
- Manage which apps your child can use
- Manage screen time
- Set daily time limits
- Receive activity reports
- Approve or block apps that your child wants to download
- See your child’s location
- Create a family group of up to 6 people
What Can I Do to Prevent Learners From Using Google Classroom to Cheat or Cyberbully?
There’s nothing to prevent learners from opening up other tabs, such as Wikipedia or Google Search while using Google Classroom. Kids can potentially see other learners’ work within the platform, too. Anything posted on the class stream can be viewed by all members of the Classroom. However, assignments are usually sent straight to the teacher, so this is not a common issue. If students are taking a quiz in Google Forms, educators can disable access to other resources using a feature called Quiz Lock. This will keep students from trying to look up answers on various websites while taking a test.
As for cyberbullying, unfortunately, yes, kids can interact with other learners and even educators by text and video using Google Hangouts or Google Meet. Chatting during instruction and learning activities can become a distraction. There have also been many reports of kids cyberbullying other learners in Google Docs shared for group projects — partly because it is a place no one would think to look for that type of behavior.
If the chatting is getting out of control, your child can shut off Hangouts and remove people from a shared document. To accomplish this, click the Share button and then click Advanced at the bottom of the window. Click the X next to the name of the person you want to remove. Educators can also disable the learners’ ability to comment and post on Google Classroom if they are using it to be a cyberbully to others.
The best way to prevent learners from engaging in inappropriate behavior such as cheating or cyber-bullying is to be open with them about the implications behind these negative behaviors. Both educators and parents can talk with students about internet safety, plagiarism, and being responsible digital citizens.
Remind them that it is a privilege to be able to access technology and use the internet. If they abuse this privilege it can easily be taken away. We want to encourage students to enjoy using technology in the Classroom because it can be fun and beneficial to their learning experience. However, they must be responsible and use it the right way.
What are the Best Features of Google Classroom?
Assignments: Educators can create learning activities (assignments) using learning content like Youtube videos, Google Form surveys, or PDFs from the Drive. They can assign learning activities (assignments) to all learners or individual learners. Educators can either immediately give out the learning activity (assignment) or schedule the learning activity (assignment) for a specific day.
Customizable Grading System: Educators can select a grading system and create grade categories. If educators want the overall grades to be accessible to learners, they can select from any of the following systems:
- Total Points Grading: Divide total points learners earn by the maximum points.
- Weighted by Category Grading: Grade categories are assigned a weight. Each grade category’s average scores are calculated and multiplied with the grade weight to give you the overall grade out of 100%.
- No Overall Grade: If the educators select not to grade the learners.
Virtual Discussions: Educators can invite learners to answer question-driven discussion. Comments on Google Docs allow a two-way discussion, as educators can give learners feedback. It is a good way to keep learners engaged, especially when you can’t see them. Educators can manage discussions by choosing to mute many individual learners from posting or commenting.
Announcements: Educators can give updates to learners through announcements. Announcements are posts with no learning activities (assignments); they’re just notices for learners about deadlines, tests, or any classwork. Educators can schedule announcements and can control replies and comments made on each announcement post.
Live Classes: One of the latest features allows educators to take a real-time class virtually through Google Meet. Educators can add up to 250 people to a Hangout call, and 1,00,000 viewers can live-stream. Meetings or lectures can be recorded so that learners who missed the live session can watch them later. Live classes are a great way for educators and learners to interact. They also allow the educator to do a quick check-in and review directions. Learners can ask questions or get some help with an assignment as well.
How Does Google Classroom Help Educators Personalize Education?
Google Classroom has many great features including the ability to cater to various types of learners in 3 ways:
Based on who the learners are:
Educators can create learning activities (assignments) based on learners’ proficiency in that specific subject. There are options for reteaching and remediation for those who are lagging, and there are enrichment activities to cater to students who are academically advanced for their age.
Differentiation can be implemented by providing extra support for struggling learners. Educators can provide additional resources with visual aids (slideshows, educational videos, graphic organizers, or information sheets), extended due dates, and modified or shortened assignments.
For those students who need a challenge or more rigor, educators can incorporate more critical thinking into the assignments or increase the length or requirements. They also can create additional ways for students to express their creativity by adding a research component to an assignment. Educators can create the perfect assignment to meet the needs of all the students, no matter what those needs may be.
Based on how learners learn:
Learners may also differ in the way they want to receive information. Many learners love to read, whereas other learners want to watch or listen. Google Classroom allows you to upload documents, videos, and audio files, making it possible to share learning content according to your learners’ needs.
There are also multiple learning styles that best fits the personality and abilities of a student. Educators that know what style of learning their students prefer, can differentiate the assignments based on how they learn best. For visual learners, educators can incorporate visual aids such as YouTube videos, colorful concept maps or diagrams, and Google Slides presentations. Kinesthetic learners who prefer a hands-on approach can be given interactive games, drag and drop activities, and virtual field trips. Auditory learners can be provided educational songs or podcasts that go along with the content, or a recording of the teacher’s voice explaining directions and concepts.
Based on how learners engage with the educator:
Learners have different ways of expressing themselves. Google Classroom allows learners to submit their learning activities (assignments) in the form they prefer; as documents, videos, or audio files. This way, the learners have the opportunity to showcase their interests and talent.
Learners who love to write and create poems and essays can use Google Docs. Creative and outgoing students can create videos of themselves acting out or explaining the content. Those who have a way with words can create audio recordings, songs, or podcasts to show what they know. Lots of students enjoy creating slideshow presentations using Google Slides and using written content matched with interactive images and photos to make their point. Lastly, learners who are great with numbers can create charts and data sheets using Google Sheets.
There is something for every student to show their skills with their preferred method, making learning fun and unique to them and their abilities.
Can Administrators Use Google Classroom Learning Analytics?
In Reports, Admins can view the ‘Highlights’ report, which will indicate App Usage Activity for Gmail, Google Drive, Google Calendar, Google+, Google Classroom. This provides a more in-depth look into what extent the educator and learners are using these apps. The following metrics are available:
- Weekly active users
- The number of 14-day active classes
- The number of courses created
- The number of posts developed by educators and learners
- For individual users, the number of classes created, posts created, and last active time in Classroom
What Are the Most Effective Ways to Use the ‘Ask a Question’ feature in Google Classroom?
Exit Tickets: Before learners leave a class, the educator can have them answer a question about the lesson. The learners can log into their accounts and the exit question can be ready to go on the Class Stream. Educators can provide a multiple-choice format to see if the learners can find the correct answer. Or a short response can be required to have learners show what they know in their own words.
Wait Time: Google Classroom shows the educator how many learners are done answering the question and how many have yet to answer. This helps the educator to pace themselves, know if more time is needed, and know when they can move on. Instead of wasting time asking the Class to raise their hand to show who is done, the educator can just quickly glance at their computer screen to gauge the room.
Share a Resource: The learners can share resources to validate their answers. By clicking on the “Add” button, students can add the website or image where they found their information to help cite their source. Great for when students need to prove their answers or provide examples to back up their claims.
Multiple choice and Polls: Google Classroom‘s multiple-choice question format allows you to poll the Class. This is helpful if, for example, you want to know what apps your learners are using for a specific project or the topic they’re interested in working on next. Instead of the timely old fashioned way of having students raise their hand and then creating a class tally, you can have them log in to Google Classroom and they can quickly choose their answer. If you want to provide anonymity, you can uncheck “Students can see class summary” (underneath “Topic”, right-hand corner) when designing the question.
Ask Learners to Ask a Question: Ask learners to come up with their own questions. This creates an environment of discussion and promotes peer learning. It also gives students a voice and encourages higher-order thinking.
How Does Google Classroom Improve Teaching and Learning?
Google Classroom is a big time-saver: Since all of the files are located in one place, educators have time to focus on lesson planning, rather than on administrative work. Going paperless makes assessing and grading quick and hassle-free. The added bonus of having a digital grade book saves you from wasting time searching through stacks of paper and eliminates the monotony. Digital grading also helps prevent achy wrists from grading multiple assignments by hand!
Increased levels of educator-learner engagement: AV apps, educational apps, and websites integrated with Google Classroom give the educators more scope to make lessons more interactive and engaging. Educators can create assignments that include an interactive online game, an entertaining YouTube video, or an eye-catching slideshow that is chock full of important information and images. Google Classroom makes learning fun and catches the attention of today’s technology-driven students.
Makes teaching more focused and organized: Educators can view classwork at any time, anywhere. Grade on the go. A laptop, tablet or phone can give you access to all of your students’ work and grades no matter where you are. Google Classroom also helps you stay organized by providing one spot for assignments, one for grades, and one for announcements. Everything is easy to find, just click on the corresponding tab to find what you’re looking for. It is much easier to locate completed assignments or a particular student’s work because it is all stored on your Classroom Drive folder, just one click away.
Learner-educator communication and collaboration is made easy: Educators can ask questions and make/schedule announcements easily. Just post your important messages or questions onto the class stream and learners will see it as soon as they log in. Video conferencing apps, such as Google Meet, helps educators, learners, and parents stay in touch from the comfort of their homes or offices. If you are unable to meet face-to-face, video conferencing can save the day with virtual parent conferences, live lessons, or a Q&A session.
How Do I Attach Files or Add Links to Assignments In Google Classroom?
Google Classroom lets educators attach or link PDFs, Google Drive files, or even YouTube videos while distributing learning activities (assignments).
Here’s how you do it:
- Select the Classroom you want to work from
- Click on the (+) button on the bottom-right corner of your screen
- Choose ‘Create assignment’
- The assignment creation pop-up will reveal itself and then enter the title, instructions, topic, and deadline
- Click on the type of attachment you would like to include
- Click ‘Assign’
Attaching files is great for adding resources from the internet or ones that are teacher created. It also is a simple process to attach teacher-made Google products for the learners to use to complete their assignments, such as Google Docs or Slides.
Educators can choose how their learners interact with these files. All of these options will be accessible once you upload a file or attach a Google Drive link. A pull-down menu will appear next to the file name with the following options:
(a) students can view the file – learners can read the file, but not make any changes to it.
(b) students can edit the file – learners can make changes to the file and edit it as needed.
(c) make a copy for each student – each learner will get an editable copy of the file. It will also automatically include their name in the title. The copies will be saved in your Google Drive underneath the folder ‘Classroom.’
You can also use it to share templates that learners need to follow or a list of questions they must answer.
How Do I Share Assignments With Multiple Classes in Google Docs?
Do you have multiple classes learning the same material? Google Classroom allows educators to post the same learning activity (assignment) to multiple classrooms at once. This feature is very handy for teachers who have multiple periods or sections, and want all of their students to be given the same assignment at the same time. This is a great time saver and is very simple to do.
In the assignment creation pop-up, in the top-left corner of your screen, there is a pull-down menu that lists all the classes that you have created. By default, it displays the Class you are currently accessing. Click the downward-pointing button next to it and select the classes you want the assignment to post to. You are given the option of checking one Class or multiple. As soon as you post the assignment, it will appear on all of the Classrooms that you selected, at the same time. No need to recreate the same assignment over and over for each Class. One check and it is all done for you.
How Do I Differentiate Assignments to Individual Learners?
Google Classroom also lets you assign different learning activities (assignments) to different learners. Ensure that the work you assign meets the needs of all types of students and corresponds with their unique ability level.
In the assignment creation pop-up, you will find a pull-down menu that lists all your students’ names from a specific class. By default, ‘All Students’ will be selected. To assign it only to a specific learner or a specific group of learners, click on the downward-pointing button and select the name(s) of the student(s) accordingly.
Let’s say you want to assign a more challenging assignment to your higher-level students. By following the steps above, you can easily mark a check next to those specific students and the assignment will only be assigned to them. If you have created a modified assignment for struggling learners, find their names to assign it specifically to them. You might have even created a makeup assignment for one individual learner. No problem, just put a check next to their name only. This feature makes differentiating assignments a breeze.
You can do the same for questions and announcements. Perhaps you have a question or announcement for a specific student or group of students. Select the names of your intended audience, and no need to worry about confusing the other students with irrelevant information.
How Can I Use the Google Calendar Integration with Google Classroom?
Each time you create or join a class, a calendar is by default added to your Google Calendar. You can make appointments and video conferences from this Calendar and schedule dates for field trips and exams. It also shows the deadlines for learning activities (assignments). If you would like to make any changes, it will, by default, get updated on your learners’ calendars. Google Calendar’s integration with Classroom helps both educators and learners stay organized and keep up with important tasks, with very little effort because it is added for you.
How Do I Open Google Calendar in Google Classroom?
Choose a Classroom > Click on the ‘About’ tab > Click on ‘Google Calendar’
You can share this Calendar with the parents and guardians of your learners. This allows them to make appointments and see what is going on in Class.
Here is how you do it:
- Open your Google Calendar and place or hover your cursor over the Calendar you want to share from under ‘My Calendars’ and click on the ellipsis (three-dots) button next to the calendar name.
2. Click ‘Settings and sharing’
3. Scroll down to the “Access Permissions” section, and check the box ‘Make available to the public’
4. Click on ‘Get Shareable link’
5. Copy the link and share it with the parents and guardians over email or through a social network site.
How Do I Archive a Room in Google Classroom?
When you have finished with a class, you may not want it to appear on your home screen anymore. You can delete it, but what if you don’t want to lose access to the assignments you created, or your students’ records? Google Classroom gives you another alternative; archive the Class. By doing this, you will be able to reuse those posts again and save time.
Here is how you do it:
a. To archive a class
- Access the Google Classroom home page
- Click the ellipsis (three-dots) button located on the tile of the Class you want to archive, and choose ‘Archive’ from the drop-down menu.

- When the confirmation pop-up appears, click ‘Archive’ again
What if you archived the wrong Class, or would like to make it active once again? There is a way to undo it:
b. To unarchive a class
- On the home page of Classroom, click the menu button in the top left corner of your screen
- Scroll down and select ‘Archived Classes’
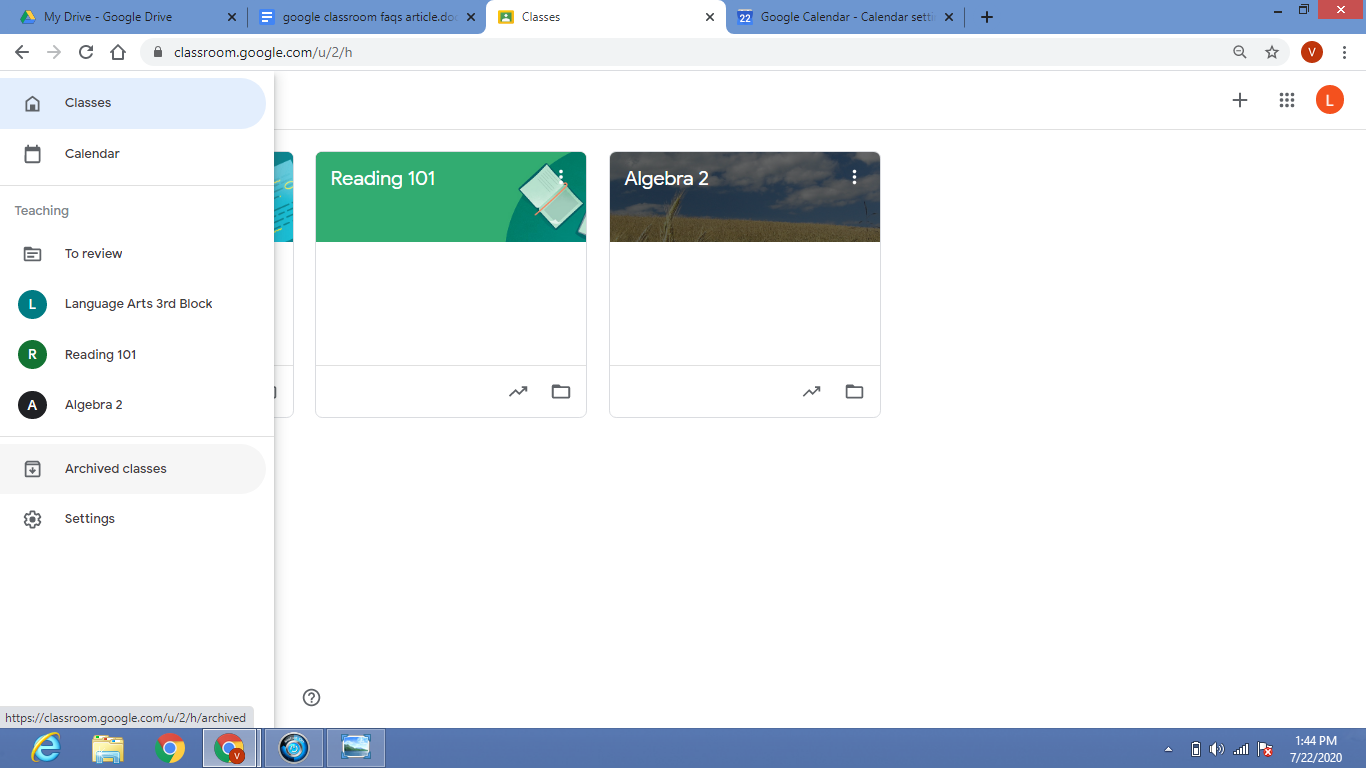
- Click on the ellipsis (three-dots) button located on the tile of the Class you want to restore, and select ‘Restore’ from the drop-down menu.
- When the confirmation pop-up appears, click ‘Restore’ again
How Do I Reuse Old Posts in Google Classroom?
Google Classroom allows educators to repost an earlier post. This feature comes in handy if you have repeat exercises and you want students to review and practice the content a second time. Or perhaps you want to share it with a new group of students.
This is not restricted to a specific class, meaning you can reuse posts from another class. Also, you can even reuse posts from archived classrooms.
Here is how you do it:
- Choose a Classroom and go to the “Classwork” tab.
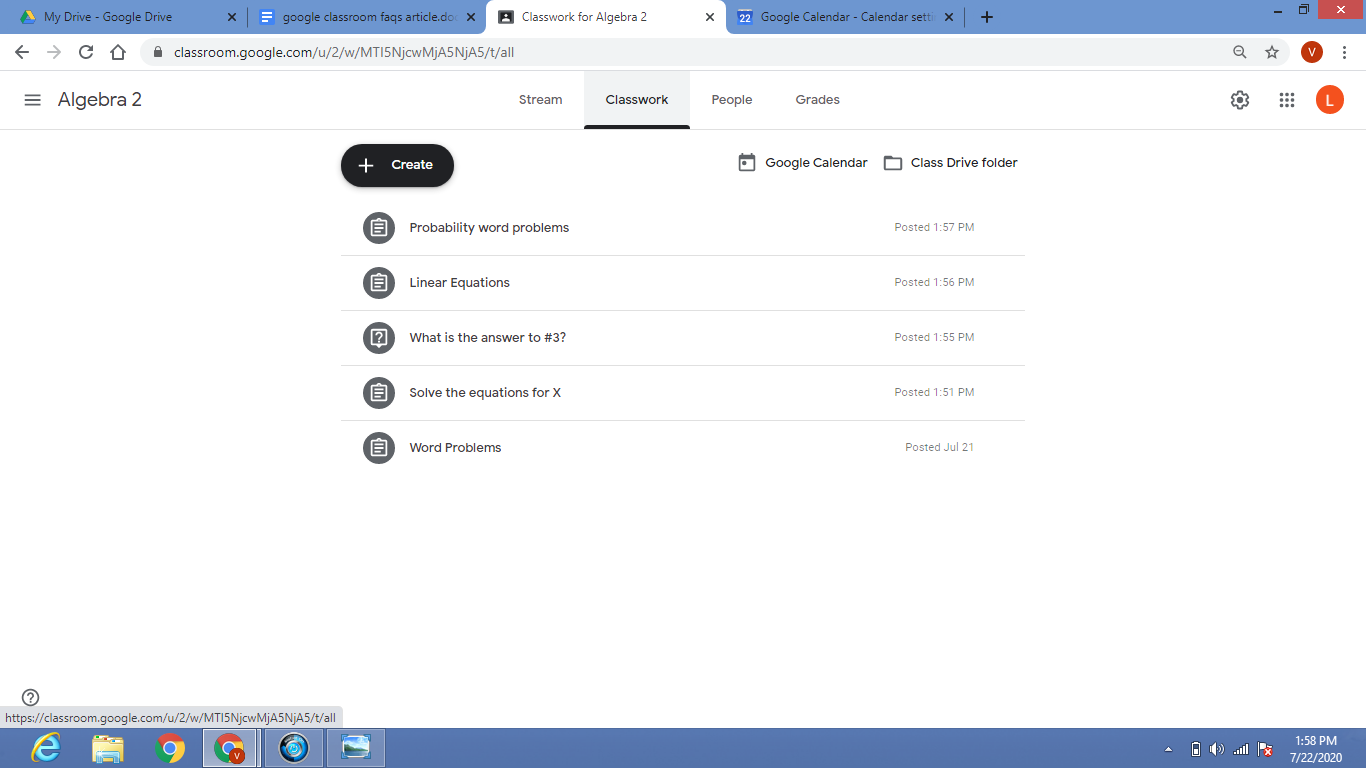
- Click the (+) Create button on the top-right of your screen and scroll down to select ‘Reuse post’
- The pop-up will show you a list of your classes including the archived ones. Choose the Class you want.
- The posts you assigned to the Class will be displayed, choose the one you want to repost.
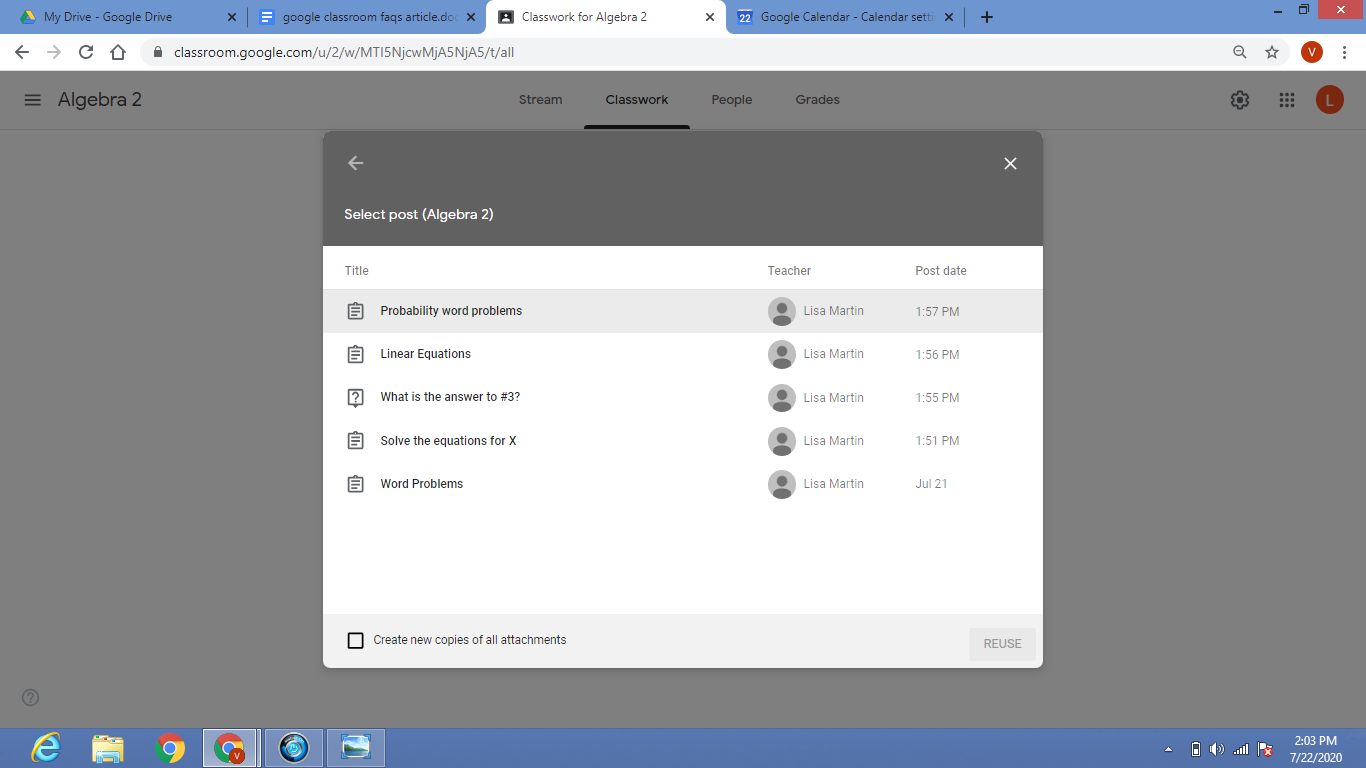
- In case the post has attachments, check the box below that says ‘Create new copies of all attachments’ and then click ‘Reuse’.
- The assignment creation pop-up appears, make changes if you would like, and then, press ‘Assign’.
How Do I Schedule Posts in Google Docs?
Google Classroom allows educators to schedule posts in advance. Perhaps you don’t want students to start an assignment just yet, but it is ready to go. Or maybe you were working ahead and have all of the assignments for the week ready to post, but don’t want to overwhelm students with an abundance of work all at once. Schedule them out so they can be posted on the day and time of your choosing. Set it and forget it, because Google Classroom has you covered! Once you schedule an assignment, it will automatically post it for you.
Here is how you do it:
- Create your assignment or question and then in the top right-hand corner where it says ‘Assign’, click the drop-down arrow and select, ‘Schedule’
- Select the date and time.
- Click ‘Schedule’ and the assignment will not post until the date you chose.
Keep in mind, there is no option to schedule a post for multiple classes. You must do it individually.
How Do You Create Self-grading Quizzes in Google Forms?
Developing self-grading quizzes with Google Forms is an excellent time-saver. This allows learners to see their test results right after they submit the quiz. Educators can even pre-record feedback for right and wrong answers. Students love getting immediate results, and you will love having your tests graded for you!
Here is how you do it:
- Visit the following page to create a new Google form
- Access the Settings menu (gear icon), choose ‘Quizzes’ tab, and toggle ‘Make this a quiz’
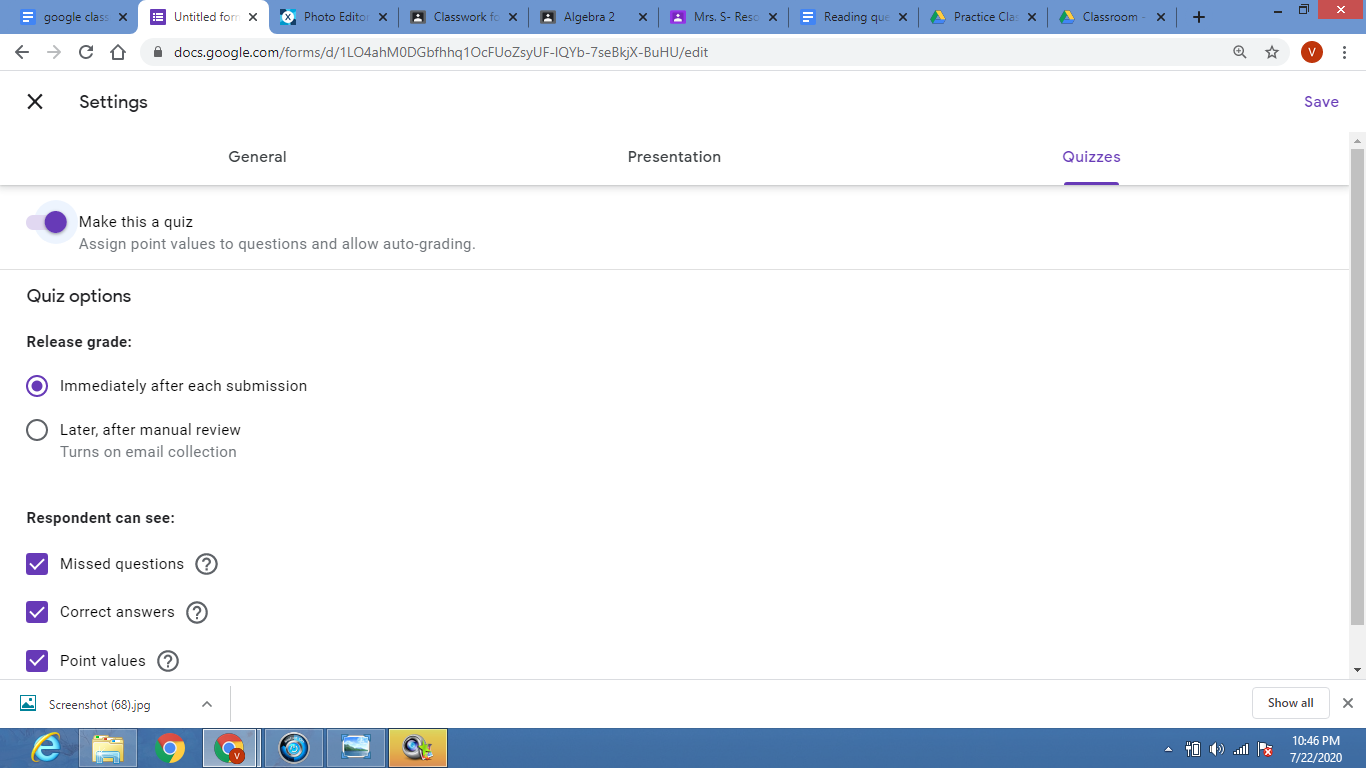
- Customize the options that appear underneath, make sure to check ‘Immediately after each submission’ under ‘Release grade’
- Go back to the Form, enter your questions and their instructions, attachments, and options
- Include the answer key for each question, the points for each right answer, and your feedback for right and wrong answers
- Double-check the Form by clicking on the ‘Preview’ (eye button) on the top right-hand corner of your screen – answer all the questions once and check if everything is working as you hoped.
- Access to the ‘Response’ tab, and turn on ‘Accepting responses’ and then click on the ‘+’ button to create a spreadsheet to collect the responses
- Go back to your Google Classroom, create a new post (question, assignment, or announcement) and add the specific Google Form as an attachment by clicking the Google Drive button
- Learners will be able to view the Form as an attachment to the post
How Do You Grade Assignments in Google Classroom?
Along with distributing learning activities (assignments), Google Classroom allows learners to turn them in and educators to assess them from inside the platform. This allows the entire process to be paperless.
Here is how you do it:
- Choose a Classroom, click the ‘Stream’ tab to see all the latest learning activities (assignments)
- Click on the assignment to view a list of learners who have turned in the learning activity (assignment)
- Click on the name of the learner to expand his or her learning activity (assignment)
- Open the attachment to view their learning activity (assignment)
- Review the learning activity (assignment), add comments if you must
- Go back to the ‘Learner Work’ page
- Set the total points for the learning activity (assignment), by default; it will be out of 100 points
- Enter the points earned by the learner
- Select the learner, and click ‘Return’
- A confirmation pop-up appears, and you can use it to add private comments, and when you are finished, click ‘Return Assignment’
Assignments need to be returned for the learners to see their grades. Learners will also receive an email notification when their learning activities (assignments) are returned.
How Do I Invite Co-teachers to Google Classroom?
Suppose you have a co-teacher also working with learners in the Classroom. In this case, it is essential to make sure the co-teachers are added to your Google Classroom account. Inviting your co-educator is easy to do, and you will have full control over what your co-teacher can and cannot do within your Google Classroom based on the default permissions set.
Here is how you do it:
- Navigate to your Google Classroom.
- Choose the Class you’d like to add your co-teacher(s) to.
- At the top of your screen, choose the “People” tab.
- Click “Invite Teachers.” You will have the option to add educators based on their name or email address.
- After you have added all of your co-teachers, simply select “Invite,” An email will be sent notifying the teacher that they’ve been invited to your Google Classroom.
It is essential to note that co-teachers do not have the same permissions as classroom owners. Co-teachers will not be allowed to delete a class, remove, or mute the primary educator. Once the co-teacher has been successfully added to the Classroom, the primary teacher or owner will be the owner of the files in the classroom drive, but the co-teacher will have complete access. However, co-teachers can post announcements, assignments, material, and comments. They also can see who turned in work and can view and assign grades.
How Do I Communicate With Parents in Google Classroom?
In Google Classroom, educators have the provision to keep parents in the loop with automated email summaries of their children’s progress. It consists of details such as missing work, future work, and class activity.
Initially, the guardian email summaries feature will be turned off.
Here’s how you can turn this on:
- Choose a class
- Click on the settings icon, and scroll down to General
- Toggle ‘Guardian summaries’ so it is turned on
- After turning it on, you will invite the parents. In the ‘People’ tab itself, besides the names of your learners, you will see an option to ‘Invite Parents’, enter the parents’ email addresses, and press invite.
If you are not able to invite parents, contact your school admin to get access.
How Do You Communicate With Learners Over Comments in Google Classroom?
There are two main ways you can communicate with learners inside your Google Classroom; class comments and private comments.
Class comments: Similar to Facebook post comments. Class comments appear in the ‘Stream’ tab and will be visible to the entire Class. By default, both learners and educators can add and reply to comments.
For example, if a learner has a question about a learning activity (assignment), they can comment on it and the educator can reply. Even other learners will find it useful as these comments will be visible to the entire Class.
Educators can also alter the permission level. There are three options to select from: Students can post and comment, Students can only comment, and Only teachers can post and comment. To tweak this, go to the settings icon on the stream page and scroll down to General. There will be a drop-down menu (below the ‘class code’) that contains all the three choices.
Remind students to make good choices about what they post, or they can lose their privileges. Encourage them to be responsible, digital citizens so that the Class can have open conversations with each other about assignments and class discussions.
Private comments: For one-to-one conversations between a learner and an educator. It won’t be visible to other learners; neither will it appear in the ‘Stream’ tab. This is great for providing both positive and constructive feedback. You can praise them for their hard work, or point out errors that need to be corrected.
Learners have the option to add private comments in their assignment turn-in pop-up. Educators can view and reply to these comments from the ‘Grading’ screen. Maintaining frequent communication between the educator and the learners is an essential part of every Classroom.
How Do I Send Learners Emails in Google Classroom?
Besides Private Comments, Google Classroom also allows educators to communicate with learners via email. If a short comment won’t cut it, and you need to write a more in-depth message, email is the way to go. With one click, you can easily send an email to any student in your Class.
Here is how you do it:
- Select a classroom
- Click on the ‘People’ tab
- Select the name of the learner(s) you would like to send an email to
- Click on the ellipsis (three dots) and select “Email student”
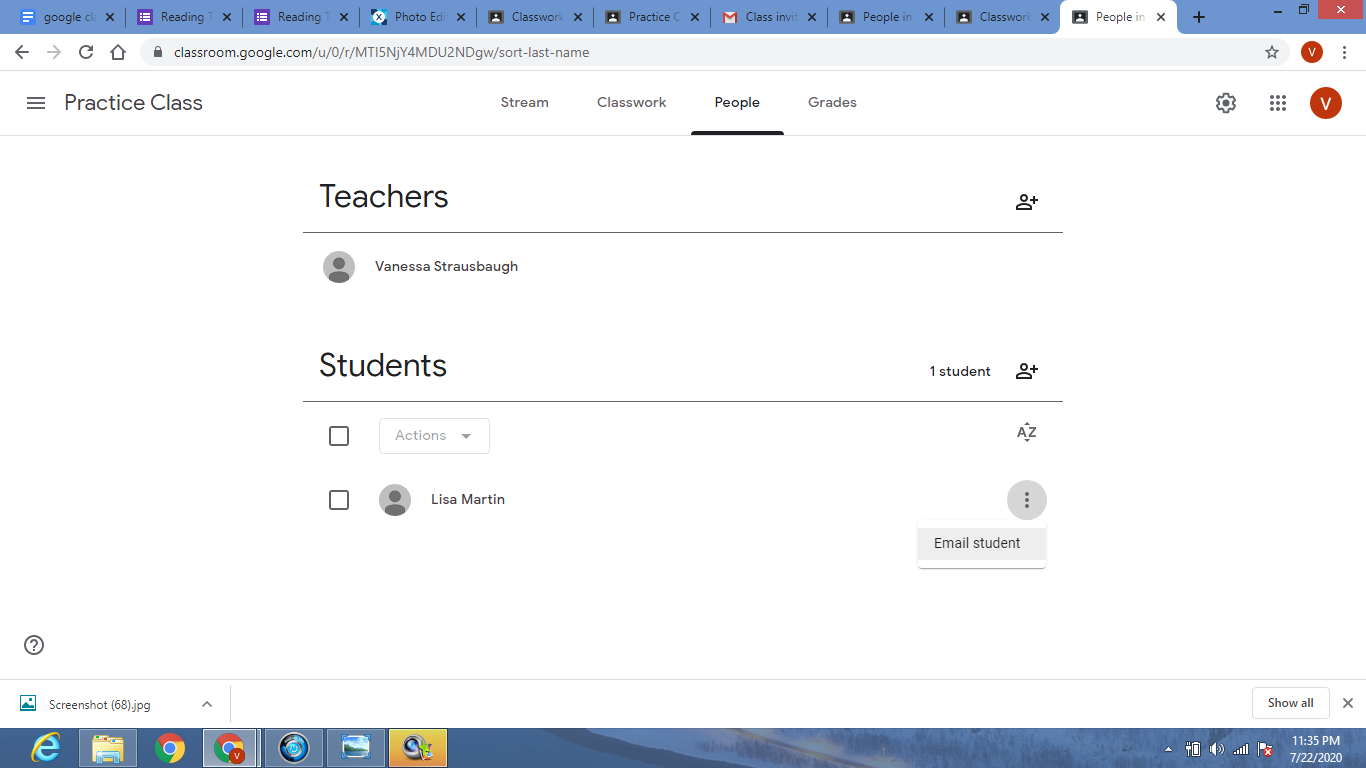
- When the Gmail pop-up appears, enter your message and click ‘Send.’
You must have Gmail turned on for this feature to work. Contact your school admin if you haven’t. You should also make sure students have access to email before attempting this. Some schools do not give students access to Gmail.
How Does My Child Access Google Classroom?
Setting up your child’s account for Google Classroom is simple. Their teacher does most of the work. Your child’s teacher will set up the Classroom and provide a class code for your child to enter. Educators can also invite learners by email. When access has been granted, your child can get into their Classroom any time by going to classroom.google.com.
For older learners who have different educators for different subjects, multiple classrooms will appear. From their dashboard, they can select the Class they want to view. Once they enter a classroom, learners find three tabs at the top of the screen.
- The Stream tab will be the first thing they’ll see when they log on. It is the announcement page where educators share important messages as well as online materials. It also provides a full overview of assignments, and any other posts the educator includes.
- The Classwork tab stores all your child’s academic assignments. They’ll see each learning activity (assignment) that’s been added by their educator. When your child clicks on a task, they’ll get the due date, details, resources needed, and status of the learning activity (assignment). Learners also can turn in their work here once it is completed. They can add files or create slideshows and images to be submitted.
- The People tab shows all the educators and learners in the Classroom. It is also a place where learners can communicate directly with one another or their educator through email.
How Do I Create a Class in Google Classroom?
Below you will find information about developing a classroom in Google Classroom. It is a very straightforward and simple process.
- Sign in to your Google Classroom account, and click on the + sign in the right-hand corner. Select ”Create class”.
- A pop up will show and you will fill in the information, including class name, section, room, and subject. Only the name of your Class is required, the other info is optional. Be sure to pick a relevant, concise name for your Class that makes sense. Click create.
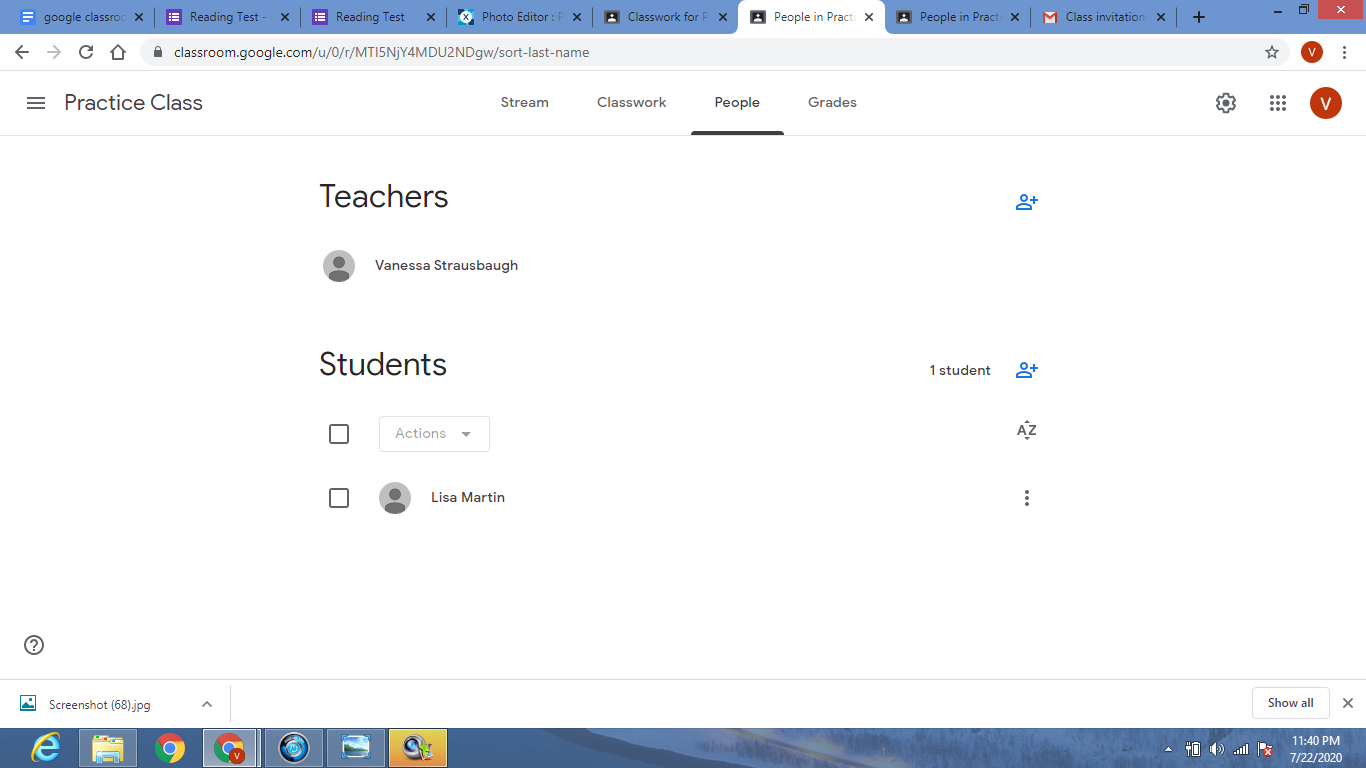
- Click on the “People” tab and add your learners by entering their email address. Remember to indicate what permissions you want these learners to have about posting and commenting. If you have a large class, this could take a while. You can also add learners by having them enter the class code themselves. You can find the class code listed at the bottom of the “People” tab, as well as in the settings under the “General” section.
- Access your Stream tab. Make an announcement to your Class. You will notice that you can attach a file, a document from Google Drive, a YouTube video, or a link to another resource.
- Go to the Classwork tab to create an initial learning activity (assignment) for this Class. Add in the title, description, and give it a deadline. Attach any resources and assign the learning activity (assignment) to learners enrolled in this Class.
- Your Class should now be ready to go. Time to get the learners involved and working on their first assignment!
How Do I Monitor Learner Assignments in Google Classroom?
Below you will find information on grading and returning assignments in Google Classroom. The app makes grading assignments a seamless task so that educators can grade with ease and learners can promptly get feedback on their progress.
- Log into your Google Classroom. Once you are on the homepage, you should see your assignments in the left-hand corner under the heading ‘Upcoming Assignments’ on your Stream tab. Click on one of your posted assignments.
- This will take you to a page where you can view learners’ status in terms of work completion. This is called the learner work page. It will show you the names of who turned in their work and who is still missing the assignment. For a learning activity (assignment) to have been marked complete, the learner will need to turn it into their Google Classroom account. This is helpful because you can immediately see which students are not turning in work, and may need you to check-in on them. Communication between the educator and the learners is essential and helps ensure students are not falling behind on their online assignments.
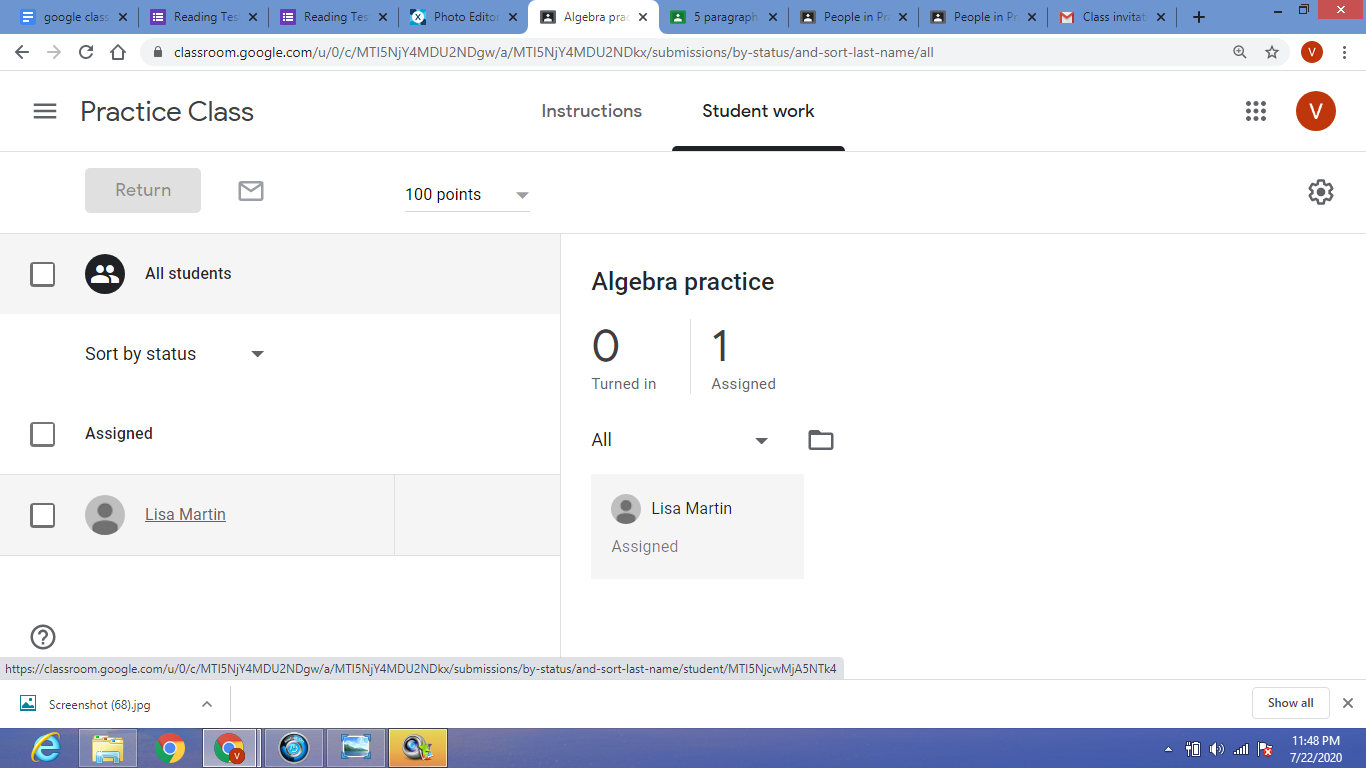
- If you check the box next to a learner’s name, you can email the learner or learners after clicking on the envelope icon at the top of the screen. Sending an email is a good option if you have more than a few questions or tips to share.
- Notice that you can assign grades and points. Review student work and assign corresponding grades right on the Google Classroom platform. No need for a paper grade book and the tiring act of scribbling multiple grades down by hand. If a learner has submitted work, you can grade it and return it to the learner. The learner will automatically be able to see their grade when they log in.
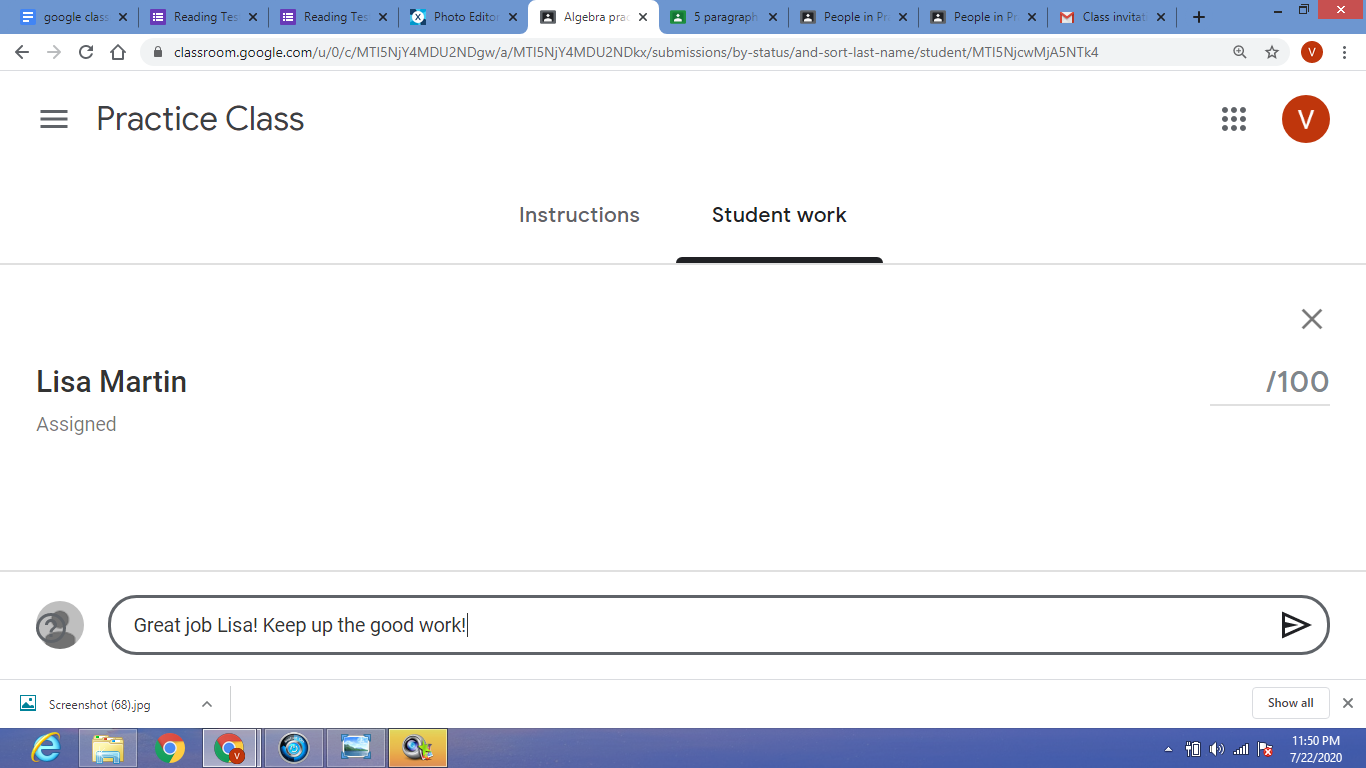
- You also have the option to click on a learner’s name, and you can send them a private comment. Reasons to send a private comment could include a request to fix an error and resubmit or to give them positive praise on a job well done.
- To see all learners work simultaneously, you need to click the folder at the top of the Learner Work page. The Folder link will be grayed out until learners have turned in work. Once you click on it, you will have access to all the turned in assignments, and it will include the students’ names in the title so that you can easily know who the work belongs to.
Why Should We Use Google Classroom?
There are a lot of reasons why integrating this app in your Classroom would be beneficial. First, it is highly engaging for your learners! Children love working with technology. Let’s face it; they are amazing at it! Incorporating this digital learning platform into the Classroom increases student interest. Being able to create a Google Slides show with bright colors and interesting images is much more fun than filling out a boring worksheet.
I can remember many times when my learners helped me figure out a roadblock with technology. Learners are pretty quick at learning how to navigate new activities through technology. They will probably surprise you with their creativity. Google Classroom is fairly easy to use once you get the hang of it. A few tutorials and your students will be ready and eager to log in and start working on their assignments.
Google Classroom is also great because of its organizational features. Teachers will no longer have a huge stack of papers to pass out or grade. Instead, all student work can be online and is automatically saved onto your Drive. This is also beneficial for students because they no longer have the issue of losing their homework or leaving their assignments in their locker. They just need to log in to their Google Classroom, and there it is.
I also found that this feature saves educators time. All you must do is upload a resource into your Google Classroom and share it with your learners. It only takes a few clicks and your students can have access to whatever educational material they need to successfully grasp standards and objectives.
You can save time by using the self-grading feature on Google Forms. This feature will even give you a spreadsheet of your learners’ scores. Grading papers is no teacher’s favorite pastime. With Google Classroom, you can create a quiz or test with relevant questions and answers choices, and input the correct answers. Once students submit their answers, their score is automatically calculated and shared with them and you. This will save so much time, and also has the benefit of providing instant feedback to the student. That is what you call a win-win situation!
Students can work at their own pace as well as have differentiated assignments that meet their needs. Assignments can be assigned to specific students and educators can then differentiate the assignment itself, as well as the resources provided, and the due date.
Why is Google Classroom So Popular?
If you’re still largely using paper for content and assignments, Google Classroom offers an easy-to-use, digital alternative. Like many of its products, Google provides an intuitive and user-friendly experience. If you already use paperless methods for your learners, then Classroom will streamline your workflow with its seamless integration of its apps.
It helps with learner organization by putting all assignments and works in one safe place. No more issues with work being left in lockers or at home, or completely lost. Learners can just log in and their work will always be there, especially with the handy auto-save feature that is a part of all Google products.
It also helps educators, because developing, copying, assigning, supervising, collecting, grading, recording, and returning work to learners requires a lot of time and steps. Google Classroom streamlines these tasks by combining, eliminating, or organizing them. Google Classroom will save time and trouble for educators grading learner work. Everything is also saved and organized onto a Drive folder, which is another great feature that allows educators to have one spot to house everything for easy access.
Classroom is not a production app, but rather a management app; so it merely requires you and your learners to learn how to post information and documents and locate the information you want. If your learners already have experience using other Google apps, like Docs or Spreadsheets, then they are already set for using Classroom.
Google Classroom is additionally designed for educators and learners to share ideas and resources. Educators and learners can participate in online Classroom discussions. The educator just posts a question on the stream and learners can comment and provide their thoughts and opinions. Everyone can post links to informative resources within discussions or other sharing mechanisms as well.
With its time-saving qualities, paperless platform, and ability to create engaging interactive assignments, no wonder it is quickly becoming a popular learning management system in many schools.
How Does Google Classroom Compare to Other Learning Management Systems?
With Classroom, Google is entering an already cutthroat market ripe with LMSs. A lot of the other learning management systems have been around a while and have unique characteristics that make them user friendly. However, Google Classroom has a few innovative features that make it stand out. Where it has the highest leverage is in its integration with its apps. This allows extremely easy access for learners and educators to view each other’s work and decreases many of the steps previously necessary for sharing information.
Educators can create assignments that incorporate other Google apps such as Google Docs, Sheets, Forms, or Slides. It is very simple for both educators and learners to create a new version of one of these apps, or upload a previously completed version. Educators can take advantage of this by using these products to share content. Learners can use these products to complete assignments with a variety of formats.
Another advantage is that products developed with Google apps are designed for collaboration. Collaboration may more easily take place in Google Classroom than other more “closed systems” management apps. The “Share” button located in the right-hand corner allows both learners to share what they are working on with their teacher, or their peers if they are doing group work. Educators can create a product for a particular student and enter their name to share it with them or share it with a co-worker to collaborate. One-click and you are on the way to collaborating with whomever you choose.
Google Classroom may not possess many of the perks educators have come to enjoy with another system that has continuously expanded its features for several years. Other systems allow for educators to create assessments right in the system itself, or more easily allow the utilization of non-Google apps for communication and resources.
What Types of Posts Can You Make in Google Classroom?
You can post almost anything in Google Classroom to start; Google Classroom allows you to make five different types of posts:
- Assignment: Posts in which learners can submit assignments. Assignments can be on any topic or subject. You can have students complete assignments in many different formats, such as a Google Slides presentation, or charting data on a Google Sheets form. You can create a variety of assignments that meet the needs of all learners in your Class, and the learning content you want to cover. The possibilities are endless.
- Quiz Assignment: Posts in which you can develop a Google Form quiz from Google Classroom. You have the option of making the quiz multiple choice or short answer. It will automatically grade the quiz for you as well. What a time saver! Students can see their grades once they submit their quiz, which helps to provide immediate feedback to them.
- Question: Posts in which you can ask learners a question and learners can respond with a short answer or answer multiple-choice questions. This is great for asking a quick question to all your students at the same time. Perhaps you want to ask an exit ticket type question to see if students understood the objective of your lesson. Or you might need to find out what day is best for a video chat lesson. Post your question and you can immediately get student feedback and responses.

- Material: Posts in which you are giving information to learners; learners do not submit their assignments. This is a great way to share educational resources to teach or review content. Material that can be shared could be a link to a website, educational videos, important documents, an interactive slideshow, an informational poster, or a study guide.
- Post to the Stream: An announcement, item, or link you post to the Stream that learners see when they access Google Classroom. This will be the first thing the students see when they log in. Great for sharing an important message to every member of your Class, or you can pick and choose who sees your post if you are trying to reach particular students.
You can link to an existing Google Doc, Slide, or Form that is in your Google Drive on any of your posts. Also, you can develop a new Google product from a post. You can link to a website, YouTube video, or PDF file as well. Many apps can integrate with your Google Classroom.
In Google Classroom, What Are the Essential Parts of an Assignment Post?
With an assignment post, teachers have several options to personalize assignments for their learners.
- Title: Here is where you write the title of your assignment. Don’t repeat titles- it will make it confusing for your learners to tell assignments apart. Make sure the title makes sense and correlates with what the assignment is about.
- Instructions: They are not mandatory. Add any information that your learners should know about their assignments. This could be a good place to add tips or reminders to help students do their best. A reminder could be a statement such as, “Don’t forget to look over your work and make corrections before turning it in.”
- Add: Add something from your Google Drive, a Link, a File, or a video. This function helps you to add content that will help learners complete their assignment, or better understand the learning goal. This could be a video that contains the steps to solving math problems on their assignment, or a graphic organizer to help them organize their thoughts. Enrich the learning process with this feature.
- Develop: This is where you can develop a new Doc, Slide, Sheet, Drawing, or Form. Create the perfect assignment and then it can be easily uploaded as a new assignment.
- For: An assignment will automatically post in the Google Classroom you are working in. You can assign one assignment to several Google Classrooms using this drop-down menu if you have multiple Classrooms. It will also post to all learners, but you can choose to assign a post to individual learners or small groups of learners using the drop-down menu.
- Points: You can give your assignments any number of points or have an assignment be ungraded. By default, the app assigns 100 points to assignments.
- Due: You can add a deadline and a time an assignment needs to be turned in by. This will help students stay on task and know what the deadline is. You can also select “no due date” if you want to allow students to take their time without the added pressure of the due date. This depends on the learner and the assignment.
- Topics: You can place an assignment under a topic. Topics are good ways to organize assignments. This is optional though, and you can choose “no topic” if you do not want to separate your assignments by topics.
- Rubric: You can develop a rubric for your assignment within Google Classroom or upload your own. Rubrics are a great way for students to self-assess their work, and Google Classroom makes it easy to add them to any assignment.
Once you’re ready to assign your post, click “Assign” in the upper right-hand corner of the page. This will post your assignment. Not ready to assign it yet? You can schedule the assignment to post at whatever time you like! Just click the down arrow to the right of “Assign” and click “schedule.” Google Classroom will ask you to select a date and time to schedule your assignment to post.
This is great for when you are working ahead and have several assignments ready to go, but do not want to overwhelm your students with too much work at once.
How Do I Delete a Classroom I Am No Longer Using or Made By Mistake?
It is recommended that you archive a Class in case you need to use an assignment or other materials from it in the future. However, if you are sure you want to delete it, here are the steps.
- To delete a class, you must first Archive it. Go to the Classes homepage, and hover over the Class you want to delete. Click on the ellipsis (three dots) and select “Archive” from the drop-down menu.
- A pop up will appear, asking if you are sure you want to archive this Class. Click “Archive”
- Next, go to the menu on the side of your homepage, and select “Archived Classes”
- The Class you just archived will appear. Click on the ellipsis (three dots) and select “Delete”.
- A pop up will appear asking if you are sure you want to delete this Class. Select “Delete” if you are sure, and it will be erased.
Where Do I Find the Class Drive Folder?
The class Drive folder is located on your Google Drive and will have all of the assignments you created, any materials you uploaded, and any work turned in by students. Everything put onto your Google Classroom is automatically saved onto this Drive folder for easy access. So where do you find this handy dandy Drive folder? There are two different ways to access this folder. One is directly from your Google Classroom. The other is after logging into your Google Drive.
To access it from Google Classroom, go to the “Classwork” tab and it will be located in the right corner next to an icon of a file folder, and will be titled “Class Drive Folder”.
To access it from your Google Drive, login to your Drive by going to drive.google.com. Once it opens up, click on “My Drive” on the left-hand side.
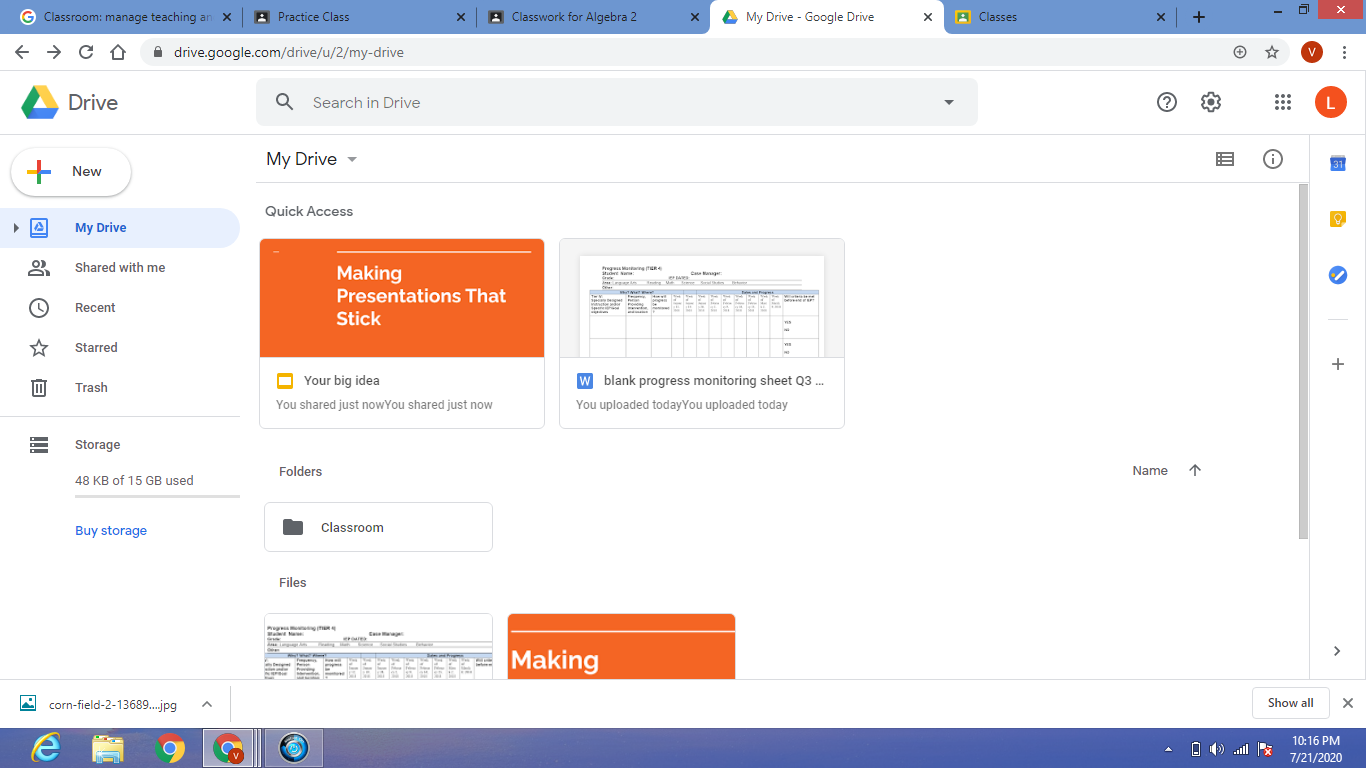
There will be a section titled “Folders”, and here you will see a folder title “Classroom”. Click here and this will take you to all the drive folders for each of your Google Classrooms ( if you have more than one Class). The title of the folder will match the title of your Class. Here is an example below:
How Do I Personalize My Google Classroom Homepage?
Personalize your homepage to make it stand out or reflect your personality and style. Google Classroom will put a random image as your background, but you can change it. You can pick a theme from a menu of choices provided by Google. The themes include the following categories: General, English & History, Math & Science, Arts, Sports, or Other. Each category has several colorful and artistic images to choose from.
To select a theme, go to the homepage of your Classroom, and you will see a colorful rectangular box that lists the class title and class code. In the bottom left corner, it says “Select theme”. Click on it to pull up your options.
Pick out the theme that represents your Class best, and then press “ Select class theme”, located at the bottom right corner. It will automatically update to show your new theme on the home page.
If you do not like any of the theme choices, you also have the option to drag and drop an image or upload it from your computer. You could use a personal photo, a class photo, or an image from the internet. To choose this option, go to the homepage and on the title and class code section, you will see “Upload photo”.
Click on it and this screen will appear:
You can drag a photo and release it, or click on “Select a photo from your computer”. A menu of your files will appear.
Highlight the file you want to use and press “Open”. It will begin loading the image you selected:
After it has loaded, you will be directed to crop it. Press “Select class theme” at the bottom left corner once you have decided how you want to crop the photo. It will automatically upload it to your homepage.
Can I Save an Assignment as a Draft and Finish it Later?
One of the best features of Google products is the auto-save feature. Gone are the days where you lose your work if your computer crashes or you log off and forget to press save. Google Classroom also has a nifty auto-save feature with assignments.
One option while working on an assignment, is to click on the drop-down arrow next to where it says ‘Assign’, and select ‘Save as draft’. However, if you are in the middle of creating an assignment and exit out of it for any reason, it will automatically be saved as a draft and you can come back to it later to finish it.
Here is an example of an assignment that has not been finished or posted yet:
Next to the word “Assignment” in the top left corner is an “X”. If you click it, you will be exited out of the assignment and will be brought back to the “Classwork” tab. Here, you will see it was saved as a “Draft”.
You can even log out and come back later, and it will still be there. Click on “Edit Assignment” and you can go back in and finish creating the assignment at your leisure.
You also can click next to where it says “Draft” and the ellipsis (three dots) will appear and give an option to delete. If you want to get rid of the draft, click on delete and it will erase it for you.
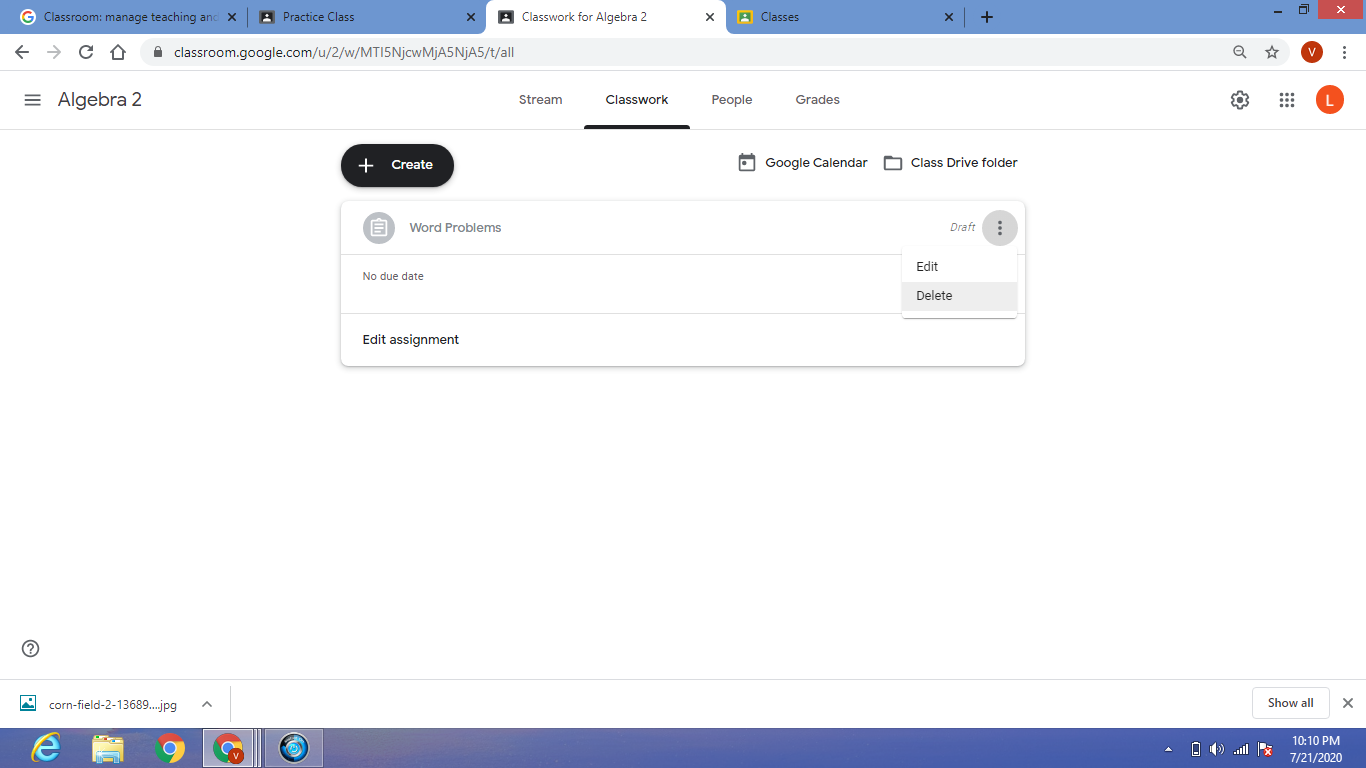
How Do I Create a Spreadsheet of the Assignments and Grades From My Google Classroom?
Google Classroom provides an easy to read digital grade book when you click on the “Grades” tab. It lists the assignment title along with the due date due and the grade you assigned to each student. There is even a class average feature, that automatically takes all the grades for the individual assignment listed and calculates the average score. While it is easy to read and maneuver the Grades tab while online, perhaps you would like to view it in a spreadsheet format. Google Classroom has a super simple way to transform the online grade book into a Google Sheets spreadsheet. Here are the steps:
- Click on the “Grades” tab to open your grade book.
- Click on any assignment title, and then go to the Settings icon in the right-hand corner and select “Copy all grades to Google Sheets”.
- A spreadsheet will automatically be generated for you, using the data from your Google Classroom grade book, and will open up on your screen for you to view.
Why would I want to create a spreadsheet?
- To have a printable version for your records
- Share a copy with your administrator to discuss student progress
- Make a copy with only a particular student’s info visible, and share it with their parent during a conference
- Add additional student info
- Automatically calculates student grade average
Concluding Thoughts
In this guide, we have provided answers to frequently asked questions about Google Classroom. How did we do? What did we miss? Hopefully, this information will help you to better understand the inner workings of this versatile app, and allow you to utilize its many great features.
For help on your next exam, check out PrepAway.

