How to use Logic Pro
“`html
Logic Pro is a powerful digital audio workstation (DAW) designed for musicians, producers, and audio engineers. Whether you’re a seasoned professional or a beginner just starting out, this comprehensive Logic Pro tutorial will guide you through its key features and functionalities. By the end of this article, you’ll have a solid understanding of how to make the most of Logic Pro in your music production journey.
1. Understanding the Basics of Logic Pro
Before diving into the intricacies of Logic Pro, it’s essential to grasp its foundational elements. Released by Apple, Logic Pro is known for its intuitive design and advanced capabilities, catering to everything from recording and editing to mixing and mastering audio tracks. The software is available exclusively for macOS, making it a go-to choice for many creative professionals.
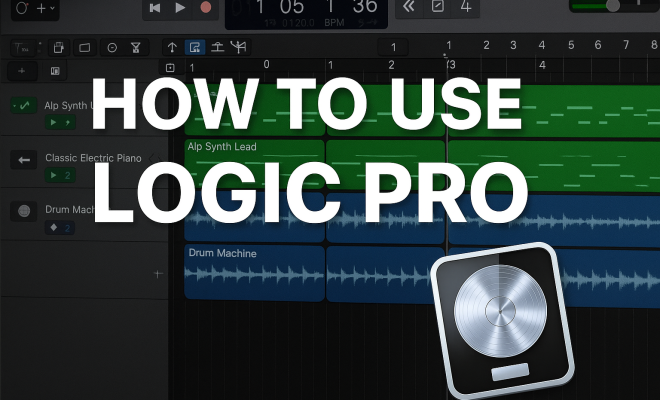
Logic Pro features a user-friendly interface that includes a main window, the mixer, and a variety of editors for MIDI and audio. The tracks area, where you spend most of your time, allows you to view and manipulate tracks visually. Familiarizing yourself with this layout is a crucial first step in your Logic Pro tutorial.
2. Setting Up Your Workspace
Setting up your workspace in Logic Pro is a vital step in maximizing your efficiency. Start by creating a new project. You can choose between a variety of templates tailored for different types of music production, such as electronic, hip hop, or orchestral. After selecting a template, you can customize your workspace by adding or removing tracks, adjusting the layout, and organizing your content.
One of Logic Pro’s standout features is the ability to use multiple screens. If you have access to a dual monitor setup, consider extending your workspace across both screens. This will allow you to keep the mixer and the main window visible simultaneously, enhancing your workflow when mixing or editing.
3. Recording Audio and MIDI
Recording is at the heart of music production, and Logic Pro makes it easy to capture both audio and MIDI. To record audio, you just need to connect a microphone or an instrument to your audio interface, set up an audio track, and hit the record button. Logic Pro supports a variety of audio formats and sample rates, ensuring high-quality recordings.
MIDI recording is equally accessible. You can use a MIDI controller or the built-in Musical Typing feature to input notes. Once recorded, MIDI data can be easily edited using the Piano Roll editor, giving you complete control over your performance. This flexibility is essential for crafting intricate compositions and is a highlight of any comprehensive Logic Pro tutorial.
4. Editing Your Tracks
After recording, editing becomes the next critical step in the production process. Logic Pro offers a plethora of editing tools that allow you to refine your audio and MIDI recordings. You can trim, split, and move regions within your tracks, ensuring smooth transitions and tight arrangements.
Moreover, Logic Pro’s Flex Time and Flex Pitch features take editing to another level. Flex Time allows you to manipulate the timing of your audio without affecting pitch, while Flex Pitch gives you the power to correct or enhance the pitch of your audio recordings. Mastering these tools is key to achieving a polished sound.
5. Exploring Virtual Instruments and Effects
Logic Pro comes packed with a wide range of virtual instruments and effects that can elevate your music. From synthesizers like the iconic Alchemy to a variety of sampled instruments, you have endless creative possibilities at your fingertips. Experimenting with these tools can make a significant difference in the quality and uniqueness of your productions. (See: Digital audio workstation overview.)
Additionally, Logic Pro includes a robust selection of audio effects, including EQ, compression, reverb, and delay. These effects can be applied to individual tracks or to the overall mix, allowing you to shape your sound precisely. As you progress through this Logic Pro tutorial, be sure to explore the effect routing options to create dynamic soundscapes.
6. Mixing and Mastering Your Track
Once your tracks are recorded and edited, it’s time to mix and master. Mixing involves adjusting the levels, pan positions, and effects to create a balanced sound. Logic Pro’s mixer interface provides a clear overview of all your tracks, enabling you to easily adjust volume levels and apply effects. Don’t overlook the importance of using auxiliary tracks to manage effects like reverb and delay effectively.
Mastering is the final step before distribution, and Logic Pro offers several tools to help you achieve a professional sound. The Adaptive Limiter and Multiband Compressor are essential for ensuring that your track maintains a consistent volume and dynamic range. Remember, mastering is about making your track sound polished and radio-ready, so take your time with this step.
7. Utilizing Logic Pro’s Advanced Features
Beyond the basics, Logic Pro is filled with advanced features that can enhance your workflow. One of these features is the Smart Tempo function, which automatically analyzes and adjusts the tempo of your project based on recorded audio. This is particularly useful when working with live performers or samples, ensuring that everything stays in sync.
Another great feature is the Live Loops function, which allows you to create music in a nonlinear fashion. By arranging and triggering clips in a grid format, you can spontaneously create new ideas and arrangements. Dive into these advanced tools as they empower you to push the boundaries of your creativity.
8. Getting Help and Continuing Your Learning
Even with a comprehensive Logic Pro tutorial, you might still have questions or need further guidance. Logic Pro has a built-in Help menu that provides access to a wealth of resources, including user guides and tutorials. Additionally, the Apple Support community and various online forums can be invaluable for troubleshooting specific issues or finding tips shared by other users.
Consider investing time in online courses or video tutorials from platforms like YouTube or dedicated music production sites. The Logic Pro community is vast, and tapping into these resources can accelerate your learning and skill development.
9. Staying Updated with Logic Pro
Logic Pro is regularly updated with new features and improvements, so staying informed is crucial. Apple often rolls out updates that enhance existing tools, introduce new virtual instruments, or improve the user interface. Make it a habit to check for updates and familiarize yourself with any new functionalities that could benefit your music production.
Following Logic Pro blogs, subscribing to newsletters, or joining social media groups focused on music production can keep you in the loop. Staying current not only improves your workflow but also helps you make the most out of your music projects.
10. Understanding Audio Formats and Sample Rates
One of the key factors in producing high-quality audio is understanding the different audio formats and sample rates Logic Pro supports. WAV, AIFF, and MP3 are some of the popular formats you can work with. Each format has its strengths and weaknesses, depending on your goals. For instance, WAV files are uncompressed and offer the highest audio quality, making them ideal for production. However, they take up significantly more storage space compared to compressed formats like MP3. When exporting your final track, consider the intended use—streaming, CD distribution, or professional mastering.
11. Collaborating with Other Musicians
Collaboration can bring new ideas and perspectives into your music. Logic Pro simplifies this process with features like Track Stacks, which group related tracks together. By organizing your project this way, you can share specific sections of your work without overwhelming collaborators with the entire project. Furthermore, Logic Pro enables you to use cloud-based services to share your projects seamlessly. This can be a game changer for remote collaborations, allowing everyone involved to contribute from wherever they are.
12. Common Mistakes to Avoid in Logic Pro
Every beginner makes mistakes, and recognizing them can help you avoid pitfalls in your music production journey. One common mistake is neglecting to save your work frequently. Logic Pro has an auto-save feature, but it’s always good practice to manually save and back up your projects regularly. Another common issue is overlooking the importance of sound design. Relying too heavily on presets can lead to a lack of originality in your tracks. Spend time experimenting with the parameters of your virtual instruments to create unique sounds that reflect your style. (See: Impact of technology on music production.)
13. FAQs about Logic Pro
What is the best way to learn Logic Pro?
The best way to learn Logic Pro is by hands-on practice. Start with simple projects and gradually challenge yourself with more complex techniques. Online courses, YouTube tutorials, and community forums can provide guidance and tips along the way.
Can I use Logic Pro on Windows?
No, Logic Pro is exclusively available for macOS. However, there are similar DAWs available for Windows, such as Ableton Live and FL Studio, which offer comparable features.
Is there a free trial of Logic Pro?
Apple offers a free trial of Logic Pro, allowing users to explore its features before committing to a purchase. This is a great opportunity for beginners to test the waters without upfront investment.
Can I use my existing plugins with Logic Pro?
Yes, Logic Pro supports a wide range of third-party plugins. However, ensure that the plugins you want to use are compatible with Logic Pro to avoid any issues.
How can I optimize my system for better performance with Logic Pro?
To optimize performance, ensure that your Mac meets the system requirements for Logic Pro. Close unnecessary applications running in the background, and consider increasing your RAM if you frequently work with large projects. Using external storage for sample libraries can also improve efficiency.
How do I troubleshoot audio issues in Logic Pro?
If you encounter audio issues, start by checking your audio interface connections and settings. Ensure that your input and output devices are correctly configured in Logic Pro’s Preferences. If problems persist, consider resetting Logic Pro’s preferences or checking for updates that may address specific bugs.
14. Understanding Key Shortcuts in Logic Pro
Learning the key shortcuts in Logic Pro can greatly enhance your efficiency and workflow. Shortcuts allow you to access functions quickly without navigating through menus. For instance:
- Command + Space: Starts and stops playback.
- R: Toggles recording on the selected track.
- Command + Z: Undoes the last action.
- Command + S: Saves your project.
- Command + T: Splits a selected audio region.
Familiarizing yourself with these shortcuts not only saves time but also helps keep your creative flow uninterrupted. Consider keeping a list of your most-used shortcuts handy until you memorize them.
15. Creative Tips for Music Production in Logic Pro
Creating unique and engaging music often involves thinking outside the box. Here are some creative tips to help you maximize your Logic Pro experience:
- Experiment with Layering Sounds: Try layering different instruments to create a fuller sound. For example, combine synth pads with live guitar recordings to add depth to your mix.
- Use Automation: Automate parameters like volume, panning, and effects to create dynamic changes throughout your track. This can keep listeners engaged and add professional polish to your music.
- Explore Sound Design: Dive deep into the settings of your virtual instruments to create your own unique sounds. Adjusting oscillators, filters, and envelopes can lead to discovering interesting textures that can set your music apart.
- Incorporate Field Recordings: Adding real-world sounds can enrich your music. Consider recording sounds outdoors or around your home and incorporating them into your tracks for an organic feel.
16. Networking with Other Logic Pro Users
Connecting with other Logic Pro users can provide opportunities for collaboration and learning. Consider joining online communities, such as forums, Facebook groups, or local meetups focused on music production. These networks can be fantastic sources of support, where you can share your work for feedback, get tips, and exchange ideas with fellow musicians. (See: Music production software trends.)
Attending music production workshops or conferences can also help you expand your network. Meeting industry professionals and fellow creatives can open doors to potential collaborations and new projects.
17. Advanced Techniques: Using Synthesis and Sampling
For those looking to push their boundaries even further, mastering synthesis and sampling can greatly enhance your music production skills. Logic Pro features several powerful synthesizers, including the ES2 and Sculpture. Understanding how to design sounds from scratch using synthesis can help you create truly original compositions.
Sampling, on the other hand, involves taking a piece of audio and reusing it in your music. Logic Pro’s Sampler and Quick Sampler make it easy to manipulate samples. You can stretch, pitch-shift, and slice samples to create unique sounds. This technique is widely used in genres like hip hop, electronic, and pop music.
Experimenting with both synthesis and sampling can lead to innovative sound design and give your productions a distinctive edge.
18. Future-Proofing Your Skills
In the ever-evolving world of music production, it’s essential to adapt and grow your skills continuously. As new technology emerges and trends shift, staying informed will help you remain relevant. Follow industry news through music blogs and podcasts, and keep an eye on emerging genres and production techniques.
Investing in courses or certifications in music production can also be beneficial. Many online platforms offer specialized training that can help you stay ahead of the curve. Additionally, never hesitate to seek out feedback on your work. Constructive criticism can provide you with insights that you may not have considered, leading to further growth and improvement in your music.
By following this comprehensive Logic Pro tutorial, you’ll be well on your way to harnessing the full potential of this powerful DAW. Whether you’re producing your first track or refining your skills, the tools and techniques outlined here will serve as a solid foundation for your music production journey. So grab your gear and start creating amazing music with Logic Pro!
“`
Trending Now
Frequently Asked Questions
What are the basic features of Logic Pro?
Logic Pro includes a user-friendly interface with a main window, mixer, and various editors for MIDI and audio. It supports recording, editing, mixing, and mastering audio tracks, making it suitable for musicians, producers, and audio engineers.
How do I set up my workspace in Logic Pro?
To set up your workspace in Logic Pro, create a new project by selecting a template that suits your music style. You can customize your layout by adding or removing tracks and using multiple screens for enhanced workflow.
Can I record audio and MIDI in Logic Pro?
Yes, Logic Pro allows you to record both audio and MIDI. This is a fundamental feature that enables you to capture your musical ideas and manipulate them within the software.
Is Logic Pro available for Windows?
No, Logic Pro is exclusively available for macOS. This makes it a preferred choice for many creative professionals who work on Apple computers.
What types of music production templates are available in Logic Pro?
Logic Pro offers a variety of templates tailored for different music genres such as electronic, hip hop, and orchestral, allowing users to start projects suited to their specific style.
What did we miss? Let us know in the comments and join the conversation.