Master GarageBand: Your Complete Guide to Music Creation
“`html
1. Introduction to GarageBand: A Music Creation Powerhouse
GarageBand is Apple’s flagship music creation software, first released in 2004 as part of the iLife suite. It’s designed for beginners and seasoned musicians alike, providing a user-friendly interface that makes music production accessible to everyone. With GarageBand, users can easily record, edit, and mix music, as well as create podcasts. Its intuitive layout allows users to delve into a world of sound creation without the steep learning curve typically associated with professional digital audio workstations (DAWs).
Over the years, GarageBand has evolved significantly, incorporating advanced features that cater to a wide range of musical needs. Whether you’re a budding musician looking to experiment with recording techniques or an experienced producer fine-tuning your latest album, understanding how to use GarageBand can unlock your creative potential. This guide will provide a thorough exploration of the software’s features, functionalities, and tips for maximizing your music production experience.
2. Getting Started: Installation and Setup
To kick off your journey in learning how to use GarageBand, the first step is to install it on your Apple device. GarageBand is available for macOS and iOS devices, making it accessible on both computers and iPads/iPhones. Users can download the software from the Mac App Store for macOS or the App Store for iOS. The installation process is straightforward, just click ‘Get’ or ‘Download’ and follow the on-screen instructions.
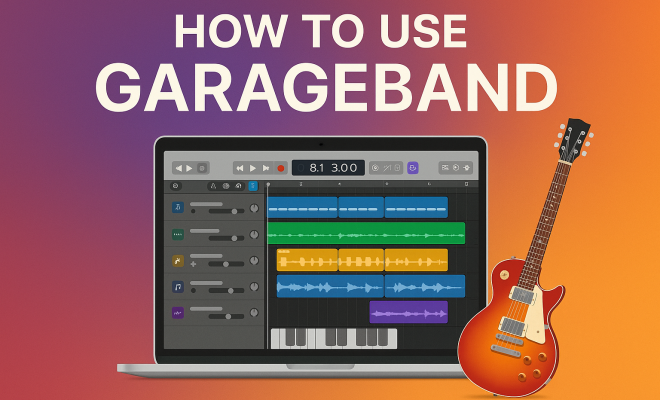
Once installed, launch GarageBand and you’ll be greeted with a welcome screen. It’s here that you can choose from various templates depending on the type of project you want to create, such as a music project, podcast, or song. Familiarize yourself with the layout: the main window includes the control bar at the top, the tracks area in the middle, and the library on the left. Configuring your audio input and output settings is crucial; navigate to GarageBand > Preferences to select your audio devices.
3. Understanding the Interface: The GarageBand Layout
GarageBand’s interface is designed to be intuitive, but it’s helpful to understand its various components. The control bar at the top includes essential tools like play, stop, record, and tempo settings, allowing for easy navigation during production. The tracks area is where you’ll spend most of your time, as it displays all the audio and MIDI tracks in your project. This area lets you edit and arrange your tracks visually, enhancing workflow efficiency.
On the left, the library contains a wealth of loops, instruments, and effects. You can access pre-recorded loops in various genres, which are perfect for those who may not have the time or experience to create everything from scratch. The Smart Controls at the bottom of the interface enable you to adjust effects and instrument settings quickly. Understanding these components will set you up for a productive session in GarageBand as you learn how to use GarageBand to its fullest potential.
4. Creating Your First Project: Step-by-Step Guide
Now that you’re familiar with the interface, let’s delve into creating your first project. Start by selecting ‘New Project’ from the welcome screen and choose the type of project you want—like a song or podcast. After naming your project and selecting your desired tempo and key, you’ll be taken to the main working area.
In the tracks area, you can add new tracks by clicking on the ‘+’ icon. GarageBand gives you the option to choose between audio tracks, software instrument tracks, and drummer tracks. If you opt for a software instrument, you can select from a variety of virtual instruments like pianos, guitars, and synths. To record, simply hit the record button and start playing. You can layer multiple tracks to build a rich soundscape—this is where the magic happens.
5. Recording Techniques: Tips for Quality Sound
Recording is a crucial aspect of learning how to use GarageBand effectively. To achieve the best sound quality, consider using a decent microphone and ensure you’re in a quiet environment. Proper mic placement can significantly impact your recordings, so experiment with distances and angles. If you’re recording vocals, try to speak directly into the mic while maintaining a consistent distance.
GarageBand also offers features that help enhance recording quality, such as input monitoring and metronome settings. Enable input monitoring to hear yourself while recording; this is especially helpful for vocalists. Additionally, utilize the metronome to keep your timing in check. After recording, you can adjust levels and apply effects like reverb or compression to polish your tracks. Experimentation is key, so don’t hesitate to try different techniques. (See: Wikipedia page on GarageBand.)
6. Editing Your Tracks: Tools and Techniques
Once you’ve recorded your tracks, the next step is editing. GarageBand provides a variety of editing tools to refine your music. Start by highlighting sections of your track in the tracks area. You can cut, copy, paste, and move sections as needed. The ‘Flex Time’ feature allows for tempo adjustments without altering pitch, making it easier to align various elements of your song.
Furthermore, the ‘Quantization’ feature can be a game-changer for timing issues. It automatically aligns your recorded notes to the closest beat, ensuring a tight rhythm. GarageBand also includes a range of effects and plugins to enrich your sound. You can apply EQ, reverb, and delay, enhancing your mix’s depth and character. Understanding these editing tools will elevate your music production skills significantly.
7. Mixing and Mastering: Finalizing Your Track
Mixing and mastering are essential processes that determine the final quality of your track. In GarageBand, start mixing by adjusting the volume levels of each track, ensuring that no single element overwhelms the others. Panning is another critical aspect; this allows you to position sounds in a stereo field, creating a more immersive listening experience.
Once you’re satisfied with the mix, mastering comes into play. This process involves preparing your audio for distribution. GarageBand offers a ‘Master Track’ feature, where you can apply final EQ adjustments, compression, and limiting. Make sure to listen to your track on various devices to ensure it sounds good across the board—from headphones to speakers. This attention to detail can make a substantial difference in how your music is perceived.
8. Utilizing Loops and Samples: Expanding Your Sound Palette
One of GarageBand’s standout features is its extensive library of loops and samples. These pre-recorded musical phrases can save time and serve as inspiration during your creative process. To access this library, click on the loop browser in the top right corner of the interface. You can filter loops by instrument, genre, or mood, making it easy to find the perfect sound for your project.
Incorporating loops into your tracks can enhance your music’s complexity without requiring advanced musical knowledge. You can layer multiple loops together, tweak their lengths, and apply effects to create a unique sound. Just remember, while loops are a fantastic tool, ensuring they complement your original material is essential for maintaining authenticity in your music.
9. Sharing and Exporting Your Music: From GarageBand to the World
After spending time crafting your music in GarageBand, it’s time to share your masterpiece. The software allows you to export your project in various formats, including MP3, WAV, and AAC. To export, go to ‘Share’ in the menu bar and select ‘Export Song to Disk.’ Choose your preferred format and quality settings, then save it to your desired location.
Beyond just exporting, GarageBand also integrates seamlessly with other Apple services, such as iTunes and SoundCloud, making it easy to distribute your music. You can share directly to these platforms, allowing your creations to reach a wider audience. Understanding how to use GarageBand for sharing and exporting effectively will ensure your hard work gets the recognition it deserves.
10. Advanced Features of GarageBand: Taking Your Music to the Next Level
As you become more comfortable with GarageBand, you may want to delve into some of its advanced features that elevate your music production game. These tools can help you refine your sound further and incorporate more creative elements into your projects.
One such feature is the ‘Drummer’ track. GarageBand includes a collection of virtual drummers that can play along with your music in a variety of styles. You can customize the drummer’s playing style, intensity, and even specific elements like cymbal crashes and fills. This not only saves time but also helps you achieve a more realistic drum sound without needing to hire a musician.
Additionally, GarageBand includes a ‘Smart Drummer’ option that automatically adjusts the drumming to fit your song’s dynamics and tempo, making it an excellent tool for enhancing rhythm without manual adjustments.
Another powerful feature is the ‘Live Loops’ function. This allows you to create music in a non-linear way, perfect for electronic music producers or DJs. You can set up a grid of loops and samples and trigger them in real-time, enabling a more spontaneous and creative approach to music making. Live Loops can transform your workflow and inspire new ideas for your compositions. (See: New York Times article on GarageBand.)
11. Exploring the GarageBand Community: Learning from Others
Part of learning how to use GarageBand effectively involves tapping into a broader community. There’s a wealth of resources available online where you can connect with fellow musicians and producers, share your projects, and gain feedback. Platforms like YouTube are filled with tutorials and tips from experienced users. You can find step-by-step guides that cover everything from basic functions to advanced techniques.
Moreover, GarageBand has a dedicated user community on forums and social media where you can ask questions, participate in discussions, and even collaborate with others. Websites like Reddit and Facebook have groups specifically for GarageBand users that offer invaluable advice and support. Engaging with this community can lead to valuable insights and help you stay updated with the latest trends and techniques.
12. FAQ: Common Questions About Using GarageBand
What are the system requirements for GarageBand?
GarageBand is designed for macOS and iOS devices, so ensure your device meets the minimum system requirements. For macOS, you typically need a Mac running macOS 10.15 or later, while for iOS, any iPhone or iPad running iOS 13 or later will suffice.
Can I use GarageBand for professional music production?
Absolutely! Many professional musicians and producers use GarageBand as part of their workflow. While it’s a great tool for beginners, its advanced features and capabilities make it suitable for high-quality music production as well.
Is GarageBand free to use?
Yes, GarageBand is free to download and use for all Apple users. It comes pre-installed on new Macs and iPads, and is available for free download from the App Store for iPhone and iPad users.
Can I use third-party plugins with GarageBand?
GarageBand does support third-party audio units (AU) plugins, which can enhance your sound and provide additional effects. You can install plugins and access them in GarageBand to expand your creative options.
How can I learn more about music production?
There are numerous resources available for learning music production. Online courses, tutorials on platforms like YouTube, forums, and even books can provide valuable information. Consider exploring websites like Coursera or Udemy for structured courses on music production.
What file formats can I export my music in?
GarageBand allows you to export your projects in several formats, including MP3, WAV, AAC, and AIFF. You can choose the file type that best suits your needs, whether you are sharing online or preparing for professional distribution.
Can I collaborate with other musicians in GarageBand?
While GarageBand does not have built-in collaboration features like some other DAWs, you can share your projects via AirDrop or email. Other musicians can then open the project on their own GarageBand software, allowing for collaboration and adjustments.
13. Tips for Improving Your Music Production Skills
As you continue to explore how to use GarageBand, consider implementing some strategies to enhance your music production skills. First and foremost, practice regularly. The more you work with the software, the more familiar you’ll become with its features and functionalities.
Listening critically to music across different genres can also provide insights into mixing techniques, song structure, and instrumentation. Analyzing how other producers craft their songs will help you understand what works and what doesn’t. You could even try recreating a song to grasp various production techniques.
Participate in online challenges or contests aimed at music producers. Engaging with the community in this way encourages you to push your creative limits and experiment with new ideas. Plus, getting feedback from peers can considerably speed up your learning process.
Finally, don’t hesitate to invest in some quality monitors or headphones. The right gear can make a substantial difference in how you perceive your mixes, allowing you to better understand frequencies, dynamics, and spatial placement in your tracks.
14. Common Mistakes to Avoid in GarageBand
As with any software, learning GarageBand comes with its pitfalls. One common mistake is neglecting to organize your project files. Keeping your tracks properly labeled and color-coded will save you time and frustration, especially on larger projects.
Another frequent issue is over-processing tracks. While it’s tempting to apply numerous effects, sometimes less is more. Focus on clarity; a well-mixed track doesn’t need excessive reverb or compression. It’s important to regularly reference your mix against professional tracks to gauge your progress.
Lastly, remember to save your work frequently. GarageBand can sometimes be resource-intensive, and losing your progress to a crash can be disheartening. Utilize the ‘Save As’ feature to create backups of different project versions. This way, you can always revert to an earlier state if needed.
15. Conclusion: Embracing Your Musical Journey with GarageBand
Learning how to use GarageBand opens up a world of musical possibilities. By following the steps outlined in this guide and exploring the additional features and community resources, you can harness the power of this software to create, edit, and share your music with the world. Whether you’re a hobbyist or aspiring professional, GarageBand equips you with the tools necessary to express your musical vision. So dive in, experiment, and let your creativity flow as you make music that resonates with you and your audience.
“`
Trending Now
Frequently Asked Questions
How do I get started with GarageBand?
To get started with GarageBand, first install the software on your macOS or iOS device via the Mac App Store or App Store. After installation, launch GarageBand, choose a project template, and familiarize yourself with the main window layout, including the control bar, tracks area, and library.
What can you do with GarageBand?
GarageBand allows users to record, edit, and mix music, as well as create podcasts. Its user-friendly interface caters to both beginners and experienced musicians, offering a range of features for sound creation and music production without the complexity of professional digital audio workstations.
Is GarageBand easy to use for beginners?
Yes, GarageBand is designed with beginners in mind. Its intuitive layout and straightforward installation process make it accessible for those new to music production, allowing users to explore sound creation without a steep learning curve.
What devices can I use GarageBand on?
GarageBand is available for both macOS and iOS devices, which means you can use it on your Mac computer as well as your iPhone or iPad. This versatility allows users to create music on various platforms.
How can I maximize my experience with GarageBand?
To maximize your experience with GarageBand, explore its various features and functionalities, such as recording techniques, editing tools, and mixing options. Experiment with different project templates and familiarize yourself with the software’s layout to enhance your music production skills.
What did we miss? Let us know in the comments and join the conversation.