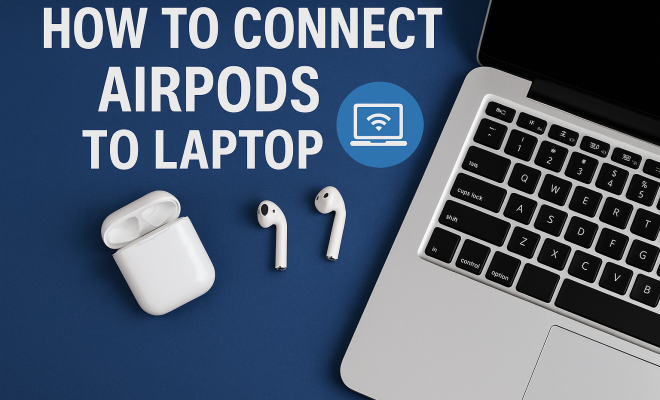
How to connect AirPods to laptop
“`html
Apple’s AirPods have become a staple for music lovers and tech enthusiasts alike. These wireless earbuds not only offer high-quality sound but also impressive convenience when used with various devices. However, many users wonder how to connect AirPods to a laptop effectively. Whether you’re using a Mac or a Windows machine, this comprehensive guide will provide you with the steps, tips, and insights you need to get your AirPods connected and ready for use.
1. Understanding AirPods Compatibility
Before diving into the connection process, it’s crucial to understand the compatibility of your AirPods with different laptop operating systems. First, if you own a MacBook, connecting your AirPods is typically seamless due to Apple’s ecosystem. For Windows laptops, compatibility is also possible, but it may require additional steps.
AirPods are designed to work with any device that supports Bluetooth, which includes most modern laptops. However, certain features, like automatic device switching and spatial audio, are exclusive to Apple devices. Understanding these nuances will help set the right expectations for your AirPods experience.
2. Preparing Your Laptop for Connection
To connect AirPods to your laptop, the first step is to ensure your laptop’s Bluetooth is activated. This involves checking your Bluetooth settings on both Mac and Windows systems. On a Mac, you can do this by accessing the Apple menu, selecting System Preferences, and then clicking on Bluetooth.
For Windows users, navigating to the Settings app, selecting Devices, and then choosing Bluetooth & other devices will help you confirm that Bluetooth is on. If your laptop doesn’t have Bluetooth capabilities, you may need to invest in a Bluetooth dongle to facilitate the connection. These are generally inexpensive and widely available.
3. How to Connect AirPods to a Mac
Connecting AirPods to your Mac is a straightforward process. First, ensure that your AirPods are charged and in their case. Open the lid of the case, then press and hold the button on the back until the LED light on the front starts flashing white. This indicates that your AirPods are in pairing mode.
Next, go back to your Mac and find your AirPods in the Bluetooth menu. Click “Connect,” and within moments, your AirPods should successfully pair with your laptop. An additional feature of Mac computers is the ability to switch seamlessly between devices if both are signed into the same Apple ID. This makes it incredibly convenient if you often switch between your iPhone and Mac.
4. How to Connect AirPods to a Windows Laptop
For Windows users looking to connect AirPods to their laptop, the process is slightly different but still manageable. Open your AirPods case, press and hold the button on the back until the light flashes white, indicating they are ready to pair. Then, on your Windows laptop, navigate to Settings, select Devices, and then Bluetooth & other devices. (See: CDC Lead Poisoning Prevention.)
Click “Add Bluetooth or other device,” and select Bluetooth from the menu. Wait for your AirPods to appear, and click on them to connect. Once paired, your Windows laptop should recognize the AirPods as an audio device, allowing you to use them for listening to music or attending video calls.
5. Troubleshooting Connection Issues
Even the most straightforward processes can encounter hiccups. If you find that your AirPods won’t connect to your laptop, there are several troubleshooting steps you can take. First, ensure that your AirPods are charged. If they aren’t, place them back in their charging case for a few minutes.
If your AirPods are charged but still not connecting, try deleting them from your laptop’s Bluetooth settings and re-pairing them. On a Mac, you can do this by right-clicking on the AirPods in the Bluetooth menu and selecting “Remove.” For Windows users, choose your AirPods and select “Remove device” before attempting to connect again.
6. Managing Audio Settings
After successfully connecting your AirPods to your laptop, it’s essential to configure your audio settings for optimal performance. On a Mac, go to System Preferences > Sound, and ensure that your AirPods are selected as the output device. This will ensure that any audio you play will come through your AirPods.
For Windows users, right-click on the speaker icon in the system tray and select “Playback devices.” Here, you can choose your AirPods as the default output device. Configuring these settings ensures you get the best sound quality and avoids any confusion with other audio devices connected to your laptop.
7. Using Siri with AirPods on a Laptop
One of the fantastic features of AirPods is Siri integration, which allows you to use voice commands hands-free. On a Mac, ensure that you have Siri enabled in your System Preferences. Once set up, you can use Siri to control music playback, manage calls, and even set reminders through your AirPods.
However, Siri functionality might be limited on Windows laptops since the function is more integrated within Apple’s ecosystem. You can still use your AirPods for listening to audio and making calls, but voice commands won’t operate in the same way as it does on a Mac or iOS device.
8. Maintaining Your AirPods for Longevity
Just like any gadget, taking care of your AirPods is crucial for longevity and performance. To maintain their battery life, avoid exposing them to extreme temperatures and ensure they are stored in their case when not in use. Regularly cleaning your AirPods helps to prevent any buildup of dirt or debris that could affect sound quality.
Additionally, software updates for your AirPods can enhance performance and introduce new features. If you own a Mac, connecting your AirPods to it will prompt any necessary updates automatically. Always ensure that both your AirPods and the laptop are running the latest software to enjoy the best experience.
9. Common Uses for AirPods with a Laptop
AirPods offer a range of functionalities that can enhance various tasks when connected to a laptop. Here are some common uses:
- Listening to Music: Whether you’re working, studying, or just relaxing, you can enjoy high-quality audio without the hassle of wires.
- Video Conferencing: AirPods can be a great tool for calls via Zoom, Microsoft Teams, or Skype, providing clear audio and eliminating background noise.
- Gaming: Many gamers enjoy using AirPods for their lightweight design and sound quality, although latency may be a concern with some games.
- Online Learning: For those attending virtual classes, AirPods can provide a seamless audio experience, making it easier to hear lectures and participate in discussions.
10. Exploring AirPods Features
AirPods come packed with features that enhance user experience beyond just audio playback. Here are some noteworthy features:
- Automatic Ear Detection: This feature pauses audio playback when you take out one or both AirPods and resumes when you put them back in.
- Noise Cancellation: With AirPods Pro, you can block out external noise, which is particularly useful in noisy environments.
- Transparency Mode: This allows you to hear the surrounding environment while still enjoying your audio, making it great for conversations without removing your AirPods.
- Spatial Audio: This feature provides an immersive audio experience by tracking head movement and ensuring sound comes from the correct direction, enhancing the movie experience when streaming.
11. Frequently Asked Questions (FAQ)
How do I check the battery life of my AirPods on a laptop?
On a Mac, you can check the battery life of your AirPods by clicking on the Bluetooth icon in the menu bar. Hover over the AirPods name, and it will display the battery percentage. On Windows, you may need to download a third-party app to see the battery life, as it isn’t natively supported.
Can I use only one AirPod at a time?
Yes, you can use a single AirPod while the other is inside the case. This can be great for extending battery life or when you want to remain aware of your surroundings.
Is there a delay when using AirPods for gaming on a laptop?
Some users report slight audio latency when using AirPods for gaming, especially if the game relies heavily on sound effects. This is less of an issue with AirPods Pro due to their low-latency mode.
Can I use AirPods with non-Apple devices?
Absolutely! AirPods can connect to any device that supports Bluetooth, including Android phones, tablets, and Windows laptops. However, some features like automatic switching will not be available.
What should I do if my AirPods are not connecting?
If your AirPods won’t connect, try resetting them. To do this, put them in the charging case, open the lid, and hold the setup button on the back of the case until the LED light flashes amber, then white. After that, try to connect again.
12. Additional Tips for Optimal Use
To make the most out of your AirPods while connected to a laptop, consider these additional tips:
- Keep Your AirPods Updated: Regularly check for firmware updates for your AirPods. Apple periodically releases updates that can enhance connectivity, fix bugs, and improve performance.
- Utilize the Find My Feature: If you misplace your AirPods, you can use the Find My app to locate them. This can be particularly useful if you often use your AirPods in various locations.
- Experiment with Audio Balance: Both Mac and Windows allow you to adjust the audio balance between the left and right AirPods. This can help if you find that one earbud is quieter than the other.
13. AirPods vs. Other Wireless Earbuds
While AirPods are incredibly popular, there are various other wireless earbuds on the market that offer different features, designs, and price points. Here’s a quick comparison of AirPods with some notable alternatives:
- Samsung Galaxy Buds: These earbuds provide excellent sound quality and are well-integrated with Samsung devices. They also feature active noise cancellation and customizable sound profiles.
- Jabra Elite 75t: Renowned for their comfort and excellent microphone quality, the Jabra Elite 75t is great for calls. They also offer customizable equalizer settings via the Jabra app.
- Google Pixel Buds: With real-time translation capabilities and a comfortable fit, these earbuds are perfect for those invested in the Google ecosystem. They also provide good sound quality and integration with Google Assistant.
14. Potential Issues with AirPods
While AirPods are generally reliable, some users encounter issues that can affect their experience. Here are common problems and their potential solutions:
- Audio Quality Problems: If you’re experiencing sound dropouts or lower audio quality, ensure that there are no obstructions between your AirPods and the device. Additionally, check if other Bluetooth devices are causing interference.
- Connection Drops: If your AirPods frequently disconnect, this could be due to a weak Bluetooth signal. Make sure there are no physical barriers, and try reducing the distance between your AirPods and the laptop.
- Battery Drain: If you notice that your AirPods are draining faster than usual, consider resetting them or checking for software updates. Also, pay attention to how long you leave them out of their case, as prolonged exposure can lead to battery drain.
15. Future of AirPods and Wireless Audio Technology
The future of AirPods and wireless audio technology is promising. With advancements in Bluetooth technology, we can expect even lower latency and higher audio quality in the future. Apple continues to invest in research and development, which may lead to enhanced features for AirPods, such as better noise cancellation and improved spatial audio capabilities.
Moreover, as more devices become compatible with Bluetooth 5.0 and beyond, the range and performance of wireless earbuds will significantly improve. This will enable users to enjoy seamless connectivity even in crowded environments, further enhancing the overall user experience.
16. Conclusion
Knowing how to connect AirPods to a laptop can vastly enhance your listening experience, whether it’s for work, leisure, or gaming. The simplicity of the connection process is one of the many reasons why AirPods are so popular. By following the steps outlined above, you can enjoy high-quality audio, the convenience of wireless technology, and the seamless integration of your devices.
As you explore the capabilities of your AirPods, consider how they can fit into your daily routine and enhance your productivity. Whether utilizing Siri on a Mac or enjoying music on a Windows laptop, the versatility of AirPods makes them more than just a pair of earbuds; they can be a vital part of your tech ecosystem.
“`
Trending Now
Frequently Asked Questions
How do I connect my AirPods to my laptop?
To connect your AirPods to your laptop, first ensure Bluetooth is enabled on your device. For a Mac, go to System Preferences > Bluetooth. For Windows, navigate to Settings > Devices > Bluetooth & other devices. Once Bluetooth is activated, open the AirPods case, press the button on the back, and select your AirPods from the list of available devices.
Can AirPods connect to a Windows laptop?
Yes, AirPods can connect to a Windows laptop. Ensure Bluetooth is enabled on your laptop, then open the AirPods case and press the button on the back. On your laptop, go to Settings > Devices > Bluetooth & other devices, and select your AirPods from the list to connect.
Why won't my AirPods connect to my laptop?
If your AirPods won't connect to your laptop, ensure Bluetooth is enabled on the device. Also, check if your AirPods are charged and in pairing mode. If issues persist, try restarting your laptop and resetting your AirPods by holding the setup button until the light flashes.
Do AirPods work with all laptops?
AirPods are compatible with most laptops that support Bluetooth, including both Mac and Windows machines. However, some features like automatic device switching and spatial audio may be limited to Apple devices, so the experience might vary based on your laptop's operating system.
How do I check if my laptop has Bluetooth?
To check if your laptop has Bluetooth, go to the Settings app on Windows and select Devices > Bluetooth & other devices. If you see Bluetooth options, your laptop has it. For Mac, click the Apple menu, go to System Preferences, and look for Bluetooth settings.
What did we miss? Let us know in the comments and join the conversation.