How to take panorama photos
“`html
Capturing the beauty of vast landscapes or sprawling cityscapes can be a daunting task, but with panorama photography, you can encapsulate these scenes in a single frame. If you’ve ever been in a stunning location and felt the need to share its grandeur, mastering panorama photography is a game-changer. Here are nine essential panorama photography tips that will help you take breathtaking shots that tell a story.
1. Understand the Basics of Panorama Photography:
Before diving into the technical aspects, it’s crucial to grasp the fundamental principles of panorama photography. This technique involves stitching together multiple images to create a wide-angle view. The result is a photograph that conveys the vastness of a scene, making it ideal for landscapes, cityscapes, and large group shots. Familiarizing yourself with the concept of focal length, overlapping images, and the importance of maintaining a consistent exposure will set you on the right path.
In the past, these images were often created using specialized equipment, but today, many cameras and smartphones come equipped with built-in panorama modes. However, understanding how to manually take and process these photos can yield superior results, so it’s worth investing time in learning the fundamentals.
2. Choose the Right Equipment:
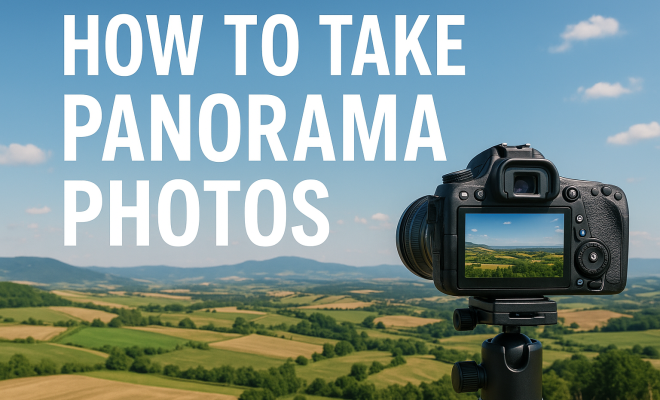
While you can take panorama photos with almost any camera, using the right equipment can significantly influence the quality of your photos. A DSLR or mirrorless camera with a decent lens is ideal, especially for capturing high-resolution images. A wide-angle lens is often preferred, as it allows you to capture more of the scene in a single frame.
Additionally, a tripod is invaluable when taking panoramic photos. It helps maintain a steady position, ensuring that your images line up perfectly during the stitching process. Many tripods also come with panoramic heads, which allow for smooth horizontal rotation. If you’re using a smartphone, consider investing in a smartphone gimbal or tripod for stability.
3. Plan Your Shot:
Planning is a crucial step in effective panorama photography. Scout your location ahead of time, checking the lighting and weather conditions. This foresight will help you choose the best time of day for your shot. The golden hour—shortly after sunrise or before sunset—often provides the best lighting conditions for photography.
Consider the composition of your panorama as well. Think about the leading lines and focal points that will draw the viewer’s eye. A well-structured composition can transform a panoramic image from ordinary to extraordinary. If you’re aiming for a natural landscape, look for interesting foreground elements, such as trees or rocks, to add depth to your image.
4. Set Your Camera Settings:
Getting your camera settings right is vital for capturing stunning panorama shots. Use manual mode to have complete control over your settings. Set a low ISO (100 or 200) to minimize noise, and choose a small aperture (f/8 to f/16) for a greater depth of field. This ensures that both the foreground and background remain sharp.
Consistent exposure is fundamental in panorama photography. If you’re using manual settings, it’s essential to lock in your exposure. This way, all images will have the same lighting conditions, making the stitching process easier and yielding a more cohesive final image. If your camera has a histogram feature, use it to check for proper exposure.
5. Overlap Your Images:
One of the most critical aspects of panorama photography is ensuring that each image has sufficient overlap with the next. Aim for about 30% overlap between frames. This overlap allows photo-editing software to align the images more effectively, producing a seamless final result.
When taking your shots, it’s often helpful to use a consistent reference point in each frame. For example, if you’re photographing a landscape, look for a prominent tree or rock that appears in each overlapping image. This technique not only aids in stitching but also creates a more fluid transition between images.
6. Maintain a Level Horizon:
A common mistake in panorama photography is not keeping the camera level throughout the series of shots. A tilted horizon can create significant challenges when stitching images together, leading to distorted results. If your camera doesn’t have a built-in level, consider using a tripod with a level bubble or an app that helps you maintain a straight horizon. (See: Understanding panorama photography basics.)
Using a panoramic head can also assist in keeping your camera level. This tool allows for precise adjustments and ensures your camera rotates around the lens’s nodal point, minimizing parallax errors and providing a smoother end result. A level horizon not only enhances the stitching process but also contributes to the overall aesthetic of your photograph.
7. Edit and Stitch Your Images:
After capturing your images, it’s time to bring them together. Numerous software options exist for stitching panorama photos. Programs like Adobe Lightroom, Photoshop, and dedicated panorama software like Hugin allow you to align and blend your images seamlessly. These tools can automatically correct exposure mismatches and align images based on overlapping content.
As you stitch your photos, pay close attention to the edges. In some cases, you may need to fine-tune the alignment or crop parts of the image to create a balanced composition. After stitching, don’t forget to enhance the final image with adjustments to brightness, contrast, and saturation for a polished look.
8. Experiment with Formats:
Panorama photography isn’t restricted to a conventional horizontal format. Consider experimenting with vertical panoramas for towering skyscrapers or stunning natural features like waterfalls. This can create a unique viewpoint that draws the viewer’s eye upward and emphasizes height.
You can also play with different aspect ratios. Wider images can provide a cinematic feel, while more square formats can be intriguing for social media. Don’t hesitate to adjust your composition creatively; the possibilities are endless. Challenge yourself to think outside the box and explore various styles within panorama photography.
9. Share and Get Feedback:
Once you’ve mastered your panorama photography techniques, it’s time to share your work. Platforms like Instagram, portfolios, and photography forums allow you to showcase your skills and receive constructive feedback from fellow photographers. This interaction can be incredibly beneficial for growth and improvement.
Engage with your audience by asking questions about your photos. What do they like? What draws their attention? This engagement not only fosters a sense of community but also provides you with new perspectives that can help refine your photography skills further.
10. Explore Different Locations for Variety:
Every location offers unique challenges and opportunities for panorama photography. National parks, city skylines, and coastal views provide different textures, colors, and perspectives. Consider visiting various types of locations to diversify your portfolio. For example, capturing a panorama of a bustling market contrasts greatly with a serene mountain landscape.
Research popular locations known for their panoramic views, such as the Grand Canyon or the Cliffs of Moher. However, don’t shy away from local spots that may offer unexpected beauty. Sometimes, the best panoramas come from familiar places that you’ve never viewed from a wide perspective before.
11. Utilize Natural Elements:
Incorporating natural elements into your panorama can enhance the image’s depth and interest. Use foreground objects like flowers, rocks, or water to frame your shot. This technique helps to create layers in the image, giving it more dimension. For instance, a field of wildflowers in the foreground can lead the viewer’s eye into a vast mountain range in the background.
Additionally, consider the weather and natural light conditions. Fog can add a mystical element to a landscape, while dramatic clouds can enhance the overall mood of your panorama. Pay attention to how these elements interact with your scene and incorporate them creatively into your compositions.
12. Stay Aware of Lighting Conditions:
Good lighting can make or break a panorama photo. Early morning or late afternoon light, known as the golden hour, not only provides gorgeous warm tones but also adds depth through shadows. If you’re shooting during midday when the sun is harsh, look for shaded areas or wait for clouds to diffuse the light.
If you’re aiming for a sunset or sunrise panorama, plan to arrive at your location early enough to set up your camera and background. Capture multiple shots to ensure you don’t miss the changing light, which can dramatically alter the image’s appearance. (See: Research on photography techniques.)
13. Use Filters Wisely:
Filters can enhance your panorama photography significantly. A polarizing filter can help reduce glare from water and enhance the saturation of the sky. Additionally, a neutral density (ND) filter can allow you to use slower shutter speeds even in bright conditions, helping to create a smooth water surface or capture motion in clouds.
When using filters, consider their effect on your exposure settings and adjust accordingly. It’s crucial to maintain consistent exposure across your panorama, so if you use a filter, be sure to apply it throughout your entire shooting process.
14. Learn from the Masters:
Studying the works of renowned panorama photographers can provide inspiration and teach you new techniques. Look for photographers who specialize in this genre and analyze their compositions, lighting, and editing styles. Some notable photographers in this field include David Hockney, who famously created photo collages, and Galen Rowell, known for his stunning landscape panoramas.
By understanding their methods and approaches, you can incorporate valuable lessons into your own photography. Consider joining workshops or photography clubs where you can share insights and collaborate with others who share your passion for panorama photography.
15. Common Mistakes to Avoid:
Even seasoned photographers can make mistakes in panorama photography. One common error is shooting too quickly without considering composition or overlap. Always give yourself time to frame each shot carefully. Another mistake is failing to account for moving subjects, which can lead to ghosting in the final image. If you’re photographing a busy area, consider waiting for a moment of stillness.
Additionally, don’t forget to check your camera settings before starting a series. Changing lighting conditions can affect exposure, so it’s essential to stay vigilant. Regularly review your images as you shoot to ensure you’re on track, and don’t hesitate to take multiple series if needed.
16. Frequently Asked Questions (FAQ):
What is the best time of day for panorama photography?
The golden hour, shortly after sunrise and before sunset, offers the best lighting conditions for panorama photography. The soft, warm light creates stunning effects and enhances colors.
Can I shoot panoramas with my smartphone?
Absolutely! Many smartphones come with built-in panorama modes that simplify the process. While a DSLR or mirrorless camera may offer better quality, smartphones can still produce impressive panoramas, especially with proper techniques.
How do I avoid distortion in my panorama images?
To avoid distortion, maintain a level horizon and ensure consistent exposure across frames. Using a tripod with a panoramic head can help keep your camera steady and level, reducing parallax errors.
What software is best for stitching panorama photos?
Popular options include Adobe Lightroom, Photoshop, and more specialized software like Hugin and PTGui. Each has unique features, so it’s worth trying a few to see which fits your needs best.
Are there any specific lenses I should use for panorama photography?
A wide-angle lens is often ideal for capturing expansive scenes, but avoid ultra-wide lenses that can introduce distortion. A standard zoom lens can also work well if it provides sharp images without excessive barrel distortion.
What should I do if my images don’t align correctly during stitching?
Check for adequate overlap between images and adjust the stitching settings in your software. If necessary, you may have to manually align the images or crop the edges for a better fit. (See: Photography and public health.)
17. Understanding the Types of Panoramas:
There are different types of panoramas you can create, each offering unique perspectives and experiences to the viewer. The most common types include:
- Horizontal Panoramas: These are the most traditional and widely used, ideal for capturing landscapes, cityscapes, and wide group shots.
- Vertical Panoramas: Perfect for capturing tall structures like skyscrapers or natural features like waterfalls and mountains. These images can emphasize height and depth.
- 360-Degree Panoramas: These immersive images capture the entire environment around the photographer. They are particularly popular in virtual reality applications and can be created using specialized equipment or techniques.
- Little Planet Panoramas: This creative style transforms a panoramic image into a spherical projection, giving it a whimsical, planet-like appearance. This technique is more artistic and can be a fun way to reinterpret your panoramic shots.
18. Incorporating Motion into Panoramas:
Adding a sense of motion in your panorama can create dynamic and engaging images. For instance, you could capture a bustling street with moving cars or people. To do this effectively, you might use a slower shutter speed to blur the movement while keeping stationary elements sharp. This contrast can create a captivating narrative within your photographs.
Just be cautious with overlap and stitching in these scenarios. Moving elements can lead to issues in alignment, so planning and a steady technique become even more essential. Using a tripod and capturing several shots can help maintain consistent exposure and alignment.
19. Invest in Post-Processing Skills:
Post-processing is not just about stitching images; it’s an art in its own right. Understanding tools such as Lightroom or Photoshop can significantly enhance your final output. You can adjust colors, contrast, and sharpness while also correcting any minor alignment issues that may arise during stitching.
Consider exploring tutorials or online courses focused on post-processing techniques specifically for panorama photography. This investment in your skills will pay off when you see the difference in your final images. A well-edited panorama can elevate a good shot into something truly spectacular.
20. Advanced Techniques to Enhance Your Panoramas:
If you’re looking to take your panorama photography to the next level, consider these advanced techniques:
- High Dynamic Range (HDR) Panoramas: Combine multiple exposures of the same scene to create a stunning HDR panorama. This technique captures details in both highlights and shadows that a single exposure might miss.
- Focus Stacking: For landscapes with a wide depth of field, shoot multiple images at different focal points and blend them during post-processing. This ensures sharpness throughout the entire scene.
- Time-Lapse Panoramas: Create a panorama that evolves over time. This could be a sunset or bustling market scene, where you capture numerous images over time and stitch them together for a dynamic effect.
As you experiment with these advanced techniques, remember that practice and patience are key. Each new approach can unveil different aspects of panorama photography that you’ve yet to explore.
In summary, panorama photography is an exciting and rewarding way to capture the expansive beauty of our world. By following these essential panorama photography tips and exploring advanced techniques, you’ll be well on your way to taking stunning images that encapsulate vast landscapes and dynamic scenes. So grab your camera, head outdoors, and start creating breathtaking panoramas today!
“`
Trending Now
Frequently Asked Questions
What is panorama photography?
Panorama photography is a technique that involves capturing multiple images and stitching them together to create a wide-angle view. This method is ideal for showcasing vast landscapes or cityscapes, allowing photographers to convey the grandeur of a scene in a single frame.
What equipment do I need for panorama photography?
While you can take panorama photos with any camera, using a DSLR or mirrorless camera with a decent lens is recommended for high-resolution images. A wide-angle lens and a tripod are also essential for stability and alignment during the stitching process.
How do I take a good panorama photo?
To capture a good panorama photo, start by understanding the fundamentals of the technique, such as overlapping images and maintaining consistent exposure. Use a tripod to stabilize your camera, and ensure smooth horizontal rotation during the shot to achieve better alignment in the final image.
Can I take panorama photos with my smartphone?
Yes, many smartphones come equipped with built-in panorama modes that make it easy to capture wide-angle images. However, for better quality, consider learning how to manually take and process panoramic photos, which can yield superior results compared to automatic modes.
What are some tips for stitching panorama photos?
When stitching panorama photos, ensure that your images overlap by about 30%, maintain consistent exposure settings, and use specialized software for better alignment. Additionally, taking photos in a horizontal sweep and avoiding moving subjects will help create a seamless final image.
Have you experienced this yourself? We’d love to hear your story in the comments.