How to take RAW photos on phone
“`html
In the world of mobile photography, the term “RAW” is becoming increasingly popular among enthusiasts and professionals alike. But what does it mean, and how can you take RAW photos on your phone? If you’re looking to elevate your photography game, understanding RAW images is essential. This article will explore everything you need to know about how to take RAW photos on your phone, including the advantages, practical tips, and the best apps and settings to use.
1. Understanding RAW Images
RAW files are uncompressed and unprocessed images that contain all the data captured by your camera’s sensor. Unlike JPEGs, which compress and alter image data, RAW files offer much greater flexibility when it comes to editing. This is crucial for photographers who want to make significant adjustments without degrading image quality.
When you capture a photo in RAW format, you’re essentially preserving all the information in the image, which allows for more advanced post-processing capabilities. You can adjust exposure, white balance, contrast, and other elements without losing detail. This level of control is especially beneficial for landscapes, portraits, or any shots requiring intricate editing.
2. The Advantages of Shooting in RAW
One of the primary reasons to learn how to take RAW photos on your phone is the enhanced image quality. When shooting in RAW, you can retain more details in both highlights and shadows, making your photos look more professional. This is particularly useful in challenging lighting conditions, such as shooting during golden hour or in low light.
Another significant advantage is the dynamic range. RAW images typically have a broader dynamic range than JPEGs, which means you have more room to recover details in bright or dark areas of your photo. This can be a game changer when editing, as it allows you to create stunning images that maintain their integrity regardless of the adjustments made.
Additionally, shooting in RAW can help you achieve more accurate color representation. Unlike JPEGs, which apply in-camera processing that can alter colors, RAW files retain the original color data. This is particularly beneficial when you’re shooting under artificial lighting, where color casts can occur. You can accurately correct these issues during editing, ensuring your final image looks true to life.
3. Compatible Devices and Apps
Most modern smartphones, including iPhones and high-end Android devices, can shoot in RAW format. However, you’ll need to ensure your device has this capability. For iPhone users, this feature is available on models with iOS 10 and later. Android users will find various options depending on the manufacturer, with many flagship devices supporting RAW image capture.
To take RAW photos on your phone, you will also need the right app. Many smartphone cameras come with a built-in option for RAW capture, but dedicated apps can offer more advanced features. Popular choices include Adobe Lightroom, ProCamera, and Camera FV-5 for Android. Each of these apps provides the capability to shoot in RAW and has various settings to enhance your photography experience.
It’s also worth noting that some newer smartphones have started implementing features like dual-lens systems or multi-frame processing that can further enhance RAW image quality. This allows for even more post-processing options and improves low-light performance, which is a significant advantage for those passionate about night photography.
4. How to Enable RAW Photography on Your Device
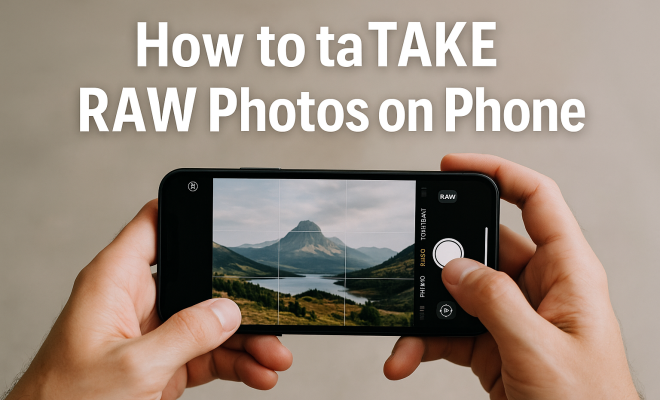
Enabling RAW photography on your phone varies depending on the operating system. For iPhones, you can enable this feature by going to the Camera app settings and toggling on “Enable RAW Photos” under Formats. For Android devices, you may find this option in the camera settings, often labeled as “RAW” or “RAW+JPEG.”
After enabling RAW capture, you’ll generally see a change in the file format when you take a photo. Instead of JPEG, your images will be saved as .dng or another RAW format. Remember that RAW files are larger than JPEGs, so ensure you have enough storage space to accommodate these high-quality images. (See: Understanding RAW image formats.)
Keep in mind that not all camera apps support RAW capture. If you find that your default camera app doesn’t have this option, consider downloading a third-party app that does. Many of these apps not only allow for RAW shooting but also offer additional features that can help you get the most out of your mobile photography experience.
5. Essential Camera Settings for RAW Photography
When you’re ready to take RAW photos on your phone, setting up your camera correctly is crucial. Start with proper exposure settings; use manual mode if available. Adjust the shutter speed, aperture, and ISO based on the lighting conditions and the effect you want to achieve.
Moreover, consider your white balance settings. Unlike JPEGs, which adjust white balance automatically, RAW files preserve the original data, giving you the flexibility to adjust it during post-processing. When shooting indoors or in unusual lighting, pay close attention to white balance to ensure accurate colors in your final image.
In addition to white balance and exposure, focus is another critical setting to consider. Depending on your subject, you might want to use manual focus to ensure that your image is sharp where it needs to be. This can be particularly beneficial when shooting close-ups or in situations where autofocus might struggle.
6. Tips for Capturing Great RAW Photos
Shooting in RAW demands a bit more from you as a photographer, but the results are worth it. One of the most important tips is to stabilize your phone. Even slight movements can lead to blurriness, especially in low-light conditions. Use a tripod or a stable surface to keep your phone steady while shooting.
Also, experiment with different compositions and angles. RAW photography allows for extensive editing, so you can play around with your framing and focus without worrying too much about minor mistakes. Be creative and take multiple shots of the same scene to give yourself options during editing.
Don’t shy away from using natural elements to your advantage. If you’re photographing landscapes, try to include foreground elements to add depth to your images. This can create a more compelling composition and enhance the overall impact of your photo. Similarly, consider the time of day you’re shooting; early mornings or late afternoons often provide the best light for capturing stunning RAW images.
7. Editing RAW Photos on Your Phone
After capturing your RAW images, effective editing is key to bringing out their full potential. Many apps, such as Adobe Lightroom or Snapseed, are tailored for editing RAW files. You can adjust everything from exposure and contrast to saturation and sharpness. The ability to make comprehensive adjustments without losing detail is one of the most significant benefits of shooting in RAW.
Spend time learning the editing features of your chosen app. Utilize tools like the histogram to evaluate exposure levels and make precise adjustments. Remember, the goal is to enhance your image while maintaining its natural quality, so be mindful of over-editing.
For those who might be overwhelmed by the editing process, start with basic adjustments. Tackle exposure first, followed by contrast and color balance. As you become more comfortable, you can explore advanced features like gradient filters or selective adjustments, which can help you target specific areas of an image without affecting the entire photo.
8. Common Challenges and Solutions
While shooting RAW can significantly enhance your photography, there are some challenges to be aware of. First, RAW files are larger than JPEGs, so they take up more storage space. If you’re shooting in RAW often, consider transferring files to a computer or cloud storage to free up space on your device.
Another challenge is the complexity of post-processing. RAW photos are typically flatter and less vibrant than JPEGs straight out of the camera. This means you’ll need to invest time in learning how to edit effectively. Consider watching tutorials or reading guides specific to your editing app to improve your skills. (See: Benefits of RAW photography.)
Additionally, if you’re shooting RAW but find that your images are not turning out as expected, double-check your camera settings and lighting conditions. Sometimes, the issue may be as simple as an incorrect exposure setting or poor lighting. Take the time to review your settings before shooting, especially in challenging environments.
9. The Future of RAW Photography on Mobile Devices
As smartphone technology progresses, mobile RAW photography continues to grow. Newer devices are integrating even better camera systems, making it easier than ever to produce high-quality RAW images. Features like computational photography and advanced sensors are redefining the boundaries of what’s possible in mobile photography.
Additionally, as more photographers gravitate towards mobile photography, app developers are continuously innovating. Expect to see more robust editing tools, enhanced shooting capabilities, and seamless sharing options in the future, making it even easier to take RAW photos on your phone.
With the rise of social media and platforms focused on photography, there’s also an increasing demand for high-quality images. This trend is encouraging manufacturers to prioritize camera innovations, which means future smartphones will likely come equipped with even more advanced RAW capabilities. Think about how cameras in smartphones just a few years ago were limited compared to those available today!
10. Frequently Asked Questions (FAQ)
What is the difference between RAW and JPEG?
RAW files store all the data captured by the camera’s sensor, allowing for more extensive editing without losing quality. JPEG files, on the other hand, are compressed and processed in-camera, which can result in a loss of detail and editing flexibility.
Can I shoot RAW photos with any smartphone?
Not all smartphones support RAW capture. You’ll typically need a modern device, especially higher-end models. Check your device specifications or camera app features to confirm if RAW shooting is supported.
How much storage do RAW files consume?
RAW files are significantly larger than JPEG files, often ranging from 10MB to 50MB or more, depending on the camera and settings. It’s important to monitor your device’s storage when shooting in RAW frequently.
Do I need special software to edit RAW photos?
Yes, to fully utilize RAW files, you need software capable of reading and editing them. Popular options include Adobe Lightroom, Photoshop, and various mobile apps designed for RAW editing.
Is it worth it to shoot in RAW?
If you’re serious about your photography and value the ability to edit images extensively, shooting in RAW is definitely worth it. It offers higher quality and more flexibility in post-processing, which can be crucial for creating stunning images.
What are some tips for beginners when shooting in RAW?
Start by practicing basic techniques, such as understanding exposure and composition. Don’t hesitate to experiment with different settings and compositions. Also, familiarize yourself with your editing software, as it will greatly enhance your ability to make the most of your RAW images. (See: Health benefits of photography.)
11. Embrace the RAW Revolution
If you’re serious about your mobile photography, learning how to take RAW photos on your phone opens up a world of creative possibilities. With enhanced flexibility in editing and superior image quality, RAW files provide an unmatched advantage for anyone looking to capture stunning photographs. So, gear up, experiment, and embrace the RAW revolution!
12. Advanced Editing Techniques for RAW Photos
Once you’ve gotten the hang of basic editing, it’s time to explore some advanced techniques that can take your RAW images to the next level. One such technique is using masks and layers in editing apps. This allows you to make localized adjustments without affecting the entire image. For instance, if the sky is too bright, you can selectively darken it while keeping the foreground unaffected, resulting in a more balanced and visually appealing photo.
Another advanced technique is using split toning, which adds different colors to the highlights and shadows of your image. This can create a unique mood or aesthetic that stands out. You might want to give a warm tone to the highlights and a cool tone to the shadows for a vintage look, or vice versa for a modern feel. Experimenting with these techniques can greatly enhance your workflow and the final results.
13. Comparing Popular RAW Editing Apps
Choosing the right app for editing your RAW photos can be overwhelming given the multitude of options available. Here’s a comparison of a few popular apps that can help you in the editing process:
- Adobe Lightroom: This app is a favorite among professional photographers and serious hobbyists alike. Its powerful editing suite includes tools for light, color, effects, and detail, plus the ability to create presets for quick edits. It syncs with the desktop version if you want to edit on a larger screen.
- Snapseed: Owned by Google, Snapseed is a user-friendly app that offers a wide range of editing tools. It includes features like selective adjust, brush tools, and a healing tool to remove unwanted elements. It’s great for beginners and those who want a comprehensive yet straightforward editing experience.
- VSCO: Known for its film presets, VSCO is a solid choice if you’re looking to give your photos a unique aesthetic. While it offers basic editing tools, its strength lies in its filters and community sharing features. It’s a great platform for photographers looking to showcase their work and connect with other enthusiasts.
Each of these apps has its strengths, so consider what features are most important to you based on your editing style and needs.
14. Best Practices for RAW Photography
As you continue to explore RAW photography on your phone, keep these best practices in mind to ensure you’re capturing the best images possible:
- Plan Your Shots: Think about the composition and lighting before you shoot. If you’re going to be editing the images later, having a clear vision will help you capture images that require minimal adjustments.
- Use Natural Light: Whenever possible, utilize natural light to enhance your photos. Early morning and late afternoon light can add a beautiful quality to your images, making post-processing easier and more effective.
- Regularly Backup Your Photos: Since RAW files take up significant space and are essential to your photographic journey, make it a habit to regularly back up your images to a computer or cloud storage solution. This ensures that you’ll never lose your important work.
15. Mobile Photography Communities
Engaging with fellow photographers can tremendously improve your skills and knowledge. Consider joining online communities or forums dedicated to mobile photography. Platforms like Instagram and Facebook have numerous groups where photographers share tips, critiques, and inspiration. Participating in challenges or collaborations can also push your creative boundaries and help you learn from others.
Additionally, platforms like Reddit and photography-specific forums are great places to ask questions, share your work, and get feedback from a supportive community. The wealth of knowledge shared in these spaces can be invaluable for both novice and experienced photographers.
“`
Trending Now
Frequently Asked Questions
What is a RAW photo on a phone?
A RAW photo on a phone is an uncompressed image file that retains all the data captured by the camera's sensor. Unlike JPEGs, RAW files offer greater flexibility for editing, allowing you to make significant adjustments to exposure, white balance, and other settings without losing image quality.
How do I take RAW photos on my smartphone?
To take RAW photos on your smartphone, you need to enable the RAW format in your camera settings or use a dedicated photography app that supports RAW capture. This option is often found in the settings menu under image quality or format.
What are the benefits of shooting in RAW?
Shooting in RAW offers several benefits, including enhanced image quality, greater dynamic range, and the ability to recover details in highlights and shadows. This is especially useful in challenging lighting conditions, allowing for more advanced post-processing without degrading image quality.
Can all smartphones take RAW photos?
Not all smartphones can take RAW photos. Generally, higher-end smartphones and those with advanced camera features support RAW capture. Check your device specifications or camera settings to see if RAW format is available.
What apps can I use to shoot RAW photos on my phone?
Several apps allow you to shoot RAW photos on your phone, including Adobe Lightroom, Camera FV-5, and ProCam. These apps provide advanced controls and settings for capturing high-quality RAW images.
What did we miss? Let us know in the comments and join the conversation.