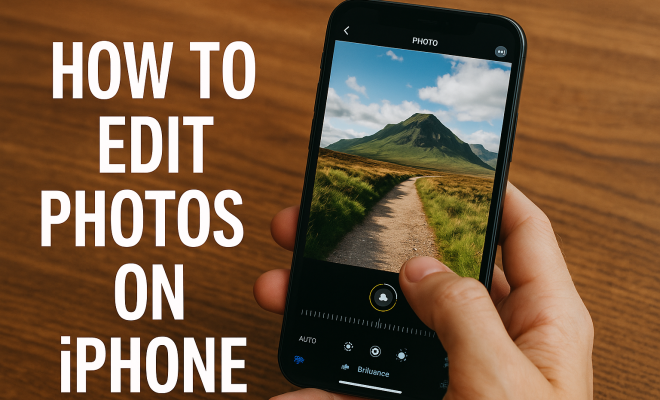
How to edit photos on iPhone
“`html
In a world where visual storytelling reigns supreme, knowing how to edit photos on iPhone can significantly enhance your photography skills. Whether you’re a budding photographer, a social media enthusiast, or simply someone who loves capturing moments, iPhone’s editing tools can elevate your images from mundane to stunning. This comprehensive guide will walk you through essential techniques and tips to master iPhone photo editing.
1. Understanding the Built-in Editing Features
The iPhone comes equipped with powerful editing capabilities right out of the box. You don’t need fancy software or extensive knowledge; the native Photos app includes a range of editing tools that allow you to enhance your images quickly and efficiently. When you open a photo in the Photos app, tap ‘Edit’ at the top right corner. From there, you can access various editing options, including cropping, filters, adjustments, and more.
The editing interface is user-friendly. You’ll find adjustment sliders for exposure, brightness, contrast, saturation, and sharpness. Each tool is designed to be intuitive, giving you real-time feedback as you make changes. Understanding these features is critical if you want to effectively edit photos on iPhone.
2. Crop and Straighten: The Basics of Composition
One of the first steps when you edit photos on iPhone is cropping. Cropping not only removes unwanted elements from your photo but also allows you to focus on the subject. To crop, simply select the crop tool and adjust the corners to frame your image better. You can also rotate or straighten your image by using the dial option that appears when cropping.
Composition is crucial in photography. The rule of thirds is a popular guideline where you divide your image into thirds, both horizontally and vertically. You can enable a grid in the settings to help align your subject correctly. A well-composed image stands out and is more engaging, making cropping and straightening vital skills to develop.
3. Utilizing Filters for Instant Effects
If you’re looking to add flair to your photos quickly, filters can be a game changer. The iPhone offers a variety of built-in filters that can be applied with just a tap. Once you select a filter, you can further fine-tune its intensity using the adjustment slider. This way, you can create a unique look without losing the authenticity of the photo.
However, it’s important to use filters judiciously. While they can enhance your images, overdoing it can lead to an unnatural appearance. Try experimenting with different filters to find the one that suits your style, but always keep the original image in mind to maintain its integrity.
4. Fine-Tuning with Basic Adjustments
After applying a filter, you can take your editing a step further by making basic adjustments. The Photos app allows you to tweak brightness, contrast, exposure, and shadows, among other parameters. To access these, tap on the adjustment icon (the dial) after hitting ‘Edit’.
For instance, increasing the brightness can give your photo a lighter feel, whereas adjusting the contrast can enhance the details and colors. Each adjustment plays a role in how your image is perceived, so take your time to experiment. The best part? You can always revert to the original photo if you don’t like the changes!
5. Color Corrections Made Easy
Color correction is another key aspect of photo editing. Understanding how to manipulate color balance can dramatically change the mood of your photo. In the adjustment menu, you’ll find options for saturation, warmth, and tint. For example, increasing saturation can make colors pop, while adjusting warmth can give a photo a cooler or warmer tone.
Keep in mind that color corrections should align with the photo’s context. If you’re editing a landscape, warmer tones can create a sunset effect, while cooler tones may be better for a winter scene. Experimenting with color corrections is essential to develop your unique style when you edit photos on iPhone. (See: Photo editing overview on Wikipedia.)
6. Advanced Editing: Using Third-Party Apps
For those looking to go beyond the built-in tools, numerous third-party apps offer advanced editing capabilities. Apps like Snapseed, VSCO, and Adobe Lightroom provide features like selective adjustment, curves, and advanced filters that can transform your images even further.
Snapseed is particularly user-friendly, offering a variety of tools and filters that allow for precise control over your edits. On the other hand, Adobe Lightroom is more comprehensive, catering to users who are serious about photography. These apps can complement your iPhone’s native tools, giving you endless possibilities for creativity.
7. Sharpening and Noise Reduction: Enhancing Details
Sharpening can help make your images crisper, while noise reduction can smooth out grainy images, especially those taken in low light. Within the adjustment tools in the Photos app, you can find options for both sharpening and noise reduction. Applying these techniques can significantly enhance the overall quality of your photos.
However, be cautious with sharpening; too much can introduce artifacts, making the photo look unnatural. Similarly, excessive noise reduction can lead to loss of detail. Striking the right balance is crucial, and sometimes it’s worth comparing before and after versions to see what works best.
8. Creating Memorable Collages and Slideshows
Editing photos on iPhone isn’t limited to single images; you can also create collages and slideshows. The Photos app offers a feature that allows you to select multiple images and compile them into a collage. This can be a fun way to showcase a series of related photos, such as a day out or a special event.
Additionally, you can create slideshows with music to tell a story visually. These features are great for sharing memories with friends and family. They also provide a creative outlet for your photo editing skills, allowing you to pair your best images with engaging narratives and soundtracks.
9. Saving and Sharing: The Final Touches
Once you’re satisfied with your edits, saving and sharing is the last step. iPhones allow you to save edits directly to your camera roll, but you can also export images in various formats. Sharing on social media is seamless; you can directly upload your edited photos to platforms like Instagram, Facebook, and Twitter.
Before sharing, consider the platform’s requirements. For example, Instagram favors square images, while Facebook might display landscape photos better. Knowing how to adjust your images for different platforms can make a substantial difference in how they are received. So, take the extra moments to optimize your photos for the best presentation.
10. Common Mistakes to Avoid While Editing
Even with the best intentions, it’s easy to make mistakes when editing photos on iPhone. Here are some common pitfalls to watch out for:
- Over-Editing: It can be tempting to apply every possible adjustment and filter. Resist the urge to go overboard; remember that subtlety often leads to more pleasing results.
- Ignoring Composition: While adjustments can enhance your images, neglecting the basics of composition can undermine your efforts. Always start with a well-composed shot.
- Failing to Compare Edits: Always compare edited images to the originals. This helps you understand the impact of your changes and ensures you’re happy with the direction your edit has taken.
- Neglecting Backup: Before making edits, ensure you have a backup of the original photo. This way, you can always return to the unedited version if needed.
11. Tips for Specific Types of Photography
Different types of photography might require specific editing techniques. Here are some tailored tips:
Landscape Photography
When editing landscape photos, try enhancing the greens and blues to make the scenery more vibrant. Increasing contrast can help define clouds and create depth in the horizon. A slight vignette effect can also lead the viewer’s eye toward the focal point of the image.
Portrait Photography
For portraits, focus on skin tone adjustments. Smoothening skin can be effective, but ensure you keep it natural. You might want to brighten the eyes and slightly enhance the colors in the background to help the subject stand out. (See: New York Times tips on iPhone photo editing.)
Night Photography
Images taken at night can often appear grainy. Start with noise reduction to smooth out unwanted noise. Adjust brightness carefully to maintain the atmosphere of the scene, and consider increasing contrast to add depth to the image.
12. Expert Tips for Professional Quality Edits
If you’re serious about improving your editing skills, consider these expert tips:
- Use RAW Format: If your iPhone supports it, consider shooting in RAW format. This gives you more flexibility in post-processing, allowing for more comprehensive adjustments without losing quality.
- Seek Inspiration: Follow photographers whose work you admire. Analyze their editing styles and try to incorporate some of their techniques into your own work.
- Join Photography Communities: Engage with others who share your passion. Online forums or local photography clubs can provide valuable feedback and inspire you to try new things.
- Experiment Regularly: Make a habit of editing different styles of photos. The more you experiment with various techniques, the better you’ll become at finding your unique editing voice.
13. Frequently Asked Questions (FAQ)
How do I restore a photo to its original state after editing?
You can easily revert to the original photo in the Photos app. Open the edited photo, tap ‘Edit’, and then select ‘Revert’. This will return the image to its unedited state.
Can I edit videos on my iPhone too?
Yes! The Photos app also includes basic video editing features, allowing you to trim, adjust, and apply filters to your videos just like you can with photos.
Are there any editing apps that work better for specific photography styles?
Absolutely! For example, Lightroom is fantastic for landscape photographers due to its advanced color correction tools, while Snapseed is excellent for general use and quick edits.
What’s the best way to learn photo editing?
Practice is key! Start with your photos and gradually challenge yourself with more complex edits. Online tutorials and courses can also be helpful in learning specific techniques.
How can I ensure my edits look good on social media?
Always preview your images on the platform you intend to use them on. Adjust sizes and formats according to platform specifications to retain quality and impact.
14. Understanding Image Formats and Compression
When you edit photos on iPhone, it’s essential to understand image formats and how compression affects your images. The most common formats are JPEG and HEIC. JPEG is widely recognized but can lose some quality due to compression. HEIC offers better quality at smaller file sizes, which can be beneficial for storage but may not be compatible with all platforms.
When saving your edited photos, consider the intended use. If you’re planning to print, you may want to save in a lossless format to maintain quality. For sharing on social media, JPEG is typically more than adequate.
Additionally, be aware of how excessive editing can lead to compression artifacts. Aim for a balance between quality and file size. If you’re using third-party apps, check if they allow you to choose the output format and quality settings, which can help maintain the integrity of your images. (See: Scientific insights on photo editing.)
15. Exploring Creative Techniques
Once you’re comfortable with standard editing techniques, consider experimenting with creative editing methods. You can create double exposure effects by layering images or use selective color adjustments to highlight specific areas of your photo. Apps like Adobe Photoshop Mix are great for these types of projects.
Another fun technique is to use overlays or textures. You can find various textures online, such as film grain or light leaks, and layer them onto your images to give them a unique feel. This approach can make your photos stand out and showcase your personality as a photographer.
16. Understanding Lighting in Editing
Lighting plays a crucial role in photography and should be considered during the editing process. Properly understanding how to adjust exposure and contrast can significantly affect the mood of your photos. For instance, softening harsh shadows can create a more flattering appearance in portraits, while enhancing highlights can add drama to landscape images.
Using the built-in histogram feature can help you understand your image’s exposure. Ensure that you’re not clipping highlights or shadows, as this can lead to loss of detail. By paying attention to the light in your edits, you can create more dynamic and engaging images.
17. Creating a Consistent Editing Style
As you develop your skills and style, think about creating a consistent editing aesthetic. This can help your images look cohesive, especially if you’re sharing on social media. You might find inspiration from your favorite photographers and adapt their techniques into your editing workflow.
Consider creating presets in apps like Lightroom, which allows you to apply a specific look across multiple images quickly. This can save time and ensure that your photos maintain a unified style, making your portfolio more visually appealing.
In summary, learning how to edit photos on iPhone can transform your photography and help you create stunning visual content. By mastering the built-in tools, exploring third-party apps, and understanding the nuances of editing techniques, you can showcase your perspective in ways that resonate with others. With the tips and techniques provided in this guide, you’re well-equipped to enhance your photos, whether for personal enjoyment or sharing with the world. So grab your iPhone, start editing, and watch your photos come to life!
“`
Trending Now
Frequently Asked Questions
How do I edit photos on my iPhone?
To edit photos on your iPhone, open the Photos app, select a photo, and tap 'Edit' in the top right corner. You'll find options for cropping, adjusting exposure, brightness, contrast, and applying filters. Use the intuitive sliders to make real-time adjustments to enhance your image.
What editing tools are available on iPhone?
iPhone offers a variety of built-in editing tools in the Photos app, including cropping, straightening, filters, and adjustment sliders for exposure, brightness, contrast, saturation, and sharpness. These tools are user-friendly and provide instant feedback as you edit your photos.
Can I crop and straighten photos on iPhone?
Yes, you can easily crop and straighten photos on your iPhone. When in the editing mode, select the crop tool to adjust the corners of your image and use the rotation dial to straighten it. This helps improve composition and focus on your subject.
What is the rule of thirds in photography?
The rule of thirds is a composition guideline that involves dividing your image into thirds both horizontally and vertically. This technique helps create a more balanced and engaging photo by positioning key elements along the grid lines or at their intersections.
Is there a way to enhance photos without third-party apps?
Yes, the iPhone's native Photos app includes powerful editing features that allow you to enhance your photos without needing third-party apps. You can adjust brightness, contrast, apply filters, and crop images directly within the app, making it easy to improve your photos.
What’s your take on this? Share your thoughts in the comments below — we read every one.