How to use Monday.com timeline
“`html
If you’ve ever wrestled with project schedules, trying to visualize dependencies, track progress, and communicate deadlines effectively, you know the struggle is real. Spreadsheets become unwieldy, whiteboards get erased, and suddenly, what should be a clear roadmap turns into a confusing maze. This is precisely where a tool like the monday.com timeline view steps in, offering a visual, intuitive, and incredibly powerful way to manage projects.
For anyone serious about streamlining their workflows, boosting team collaboration, and ensuring projects hit their marks, understanding how to harness the monday.com timeline is an absolute game-changer. It’s not just about seeing tasks; it’s about seeing the entire project lifecycle, understanding bottlenecks before they happen, and making data-driven decisions on the fly. This comprehensive monday.com timeline tutorial will walk you through everything you need to know, from setting up your first timeline to leveraging its advanced features for maximum impact.
1. Understanding the Core Purpose of the Timeline View: Why It Matters
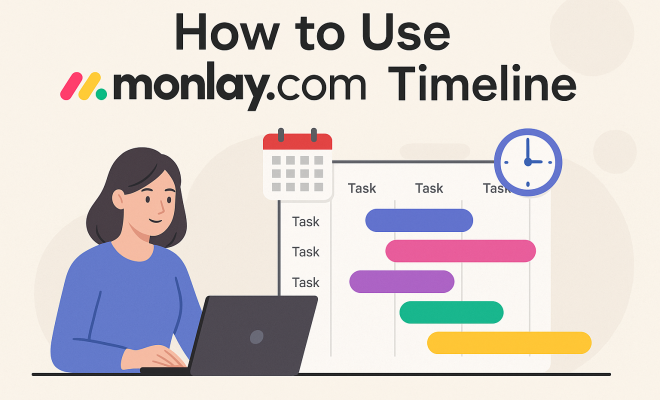
At its heart, the monday.com timeline view is a visual representation of your project schedule. Think of it as a dynamic Gantt chart, but with a modern, user-friendly interface that makes traditional Gantt charts look like relics from a bygone era. Instead of rows and columns filled with dates, you see color-coded bars stretching across a calendar, each representing a task or a phase of your project. This immediate visual feedback is crucial because our brains are wired to process visual information far more efficiently than raw data.
The primary benefit here is clarity. You can instantly grasp the duration of each task, identify overlaps, and see the sequence of activities. This isn’t just helpful for you as a project manager; it’s invaluable for your entire team. When everyone can see the big picture, understand their role within the broader timeline, and anticipate what’s coming next, collaboration naturally improves. It removes ambiguity and fosters a shared understanding of the project’s rhythm.
2. Setting Up Your First Timeline in monday.com: Getting Started
Creating a timeline in monday.com is surprisingly straightforward, even if you’re new to the platform. It starts with your board. Once you have a board set up with your tasks (items) and relevant columns, you can add a timeline view. Head to the ‘Add View’ button at the top of your board, and select ‘Timeline’. Instantly, monday.com will try to render a timeline based on existing date columns you might have. But to make it truly effective, you’ll need a dedicated ‘Timeline’ column type.
To add this essential column, click the ‘+’ sign to add a new column, and choose ‘Timeline’ from the column center. This column is where you’ll define the start and end dates for each task. Once you’ve added the Timeline column and populated it with dates for your items, your timeline view will magically come to life. Each item on your board will now appear as a horizontal bar, stretching across the calendar from its start date to its end date. It’s a simple step, but it’s the foundation for all the powerful visualization and management that follows in this monday.com timeline tutorial.
3. Customizing Your Timeline Display: Making It Yours
A generic timeline is good, but a customized one is great. monday.com offers a wealth of options to tailor your timeline view to your specific needs, making it easier to digest information and highlight critical aspects. You can start by adjusting the time scale. Do you need to see things by day, week, month, or even year? The controls at the top of the timeline view allow you to zoom in or out, providing the right level of detail for your current focus. For short sprints, a daily view is perfect; for long-term strategic planning, you might prefer a monthly or quarterly view.
Beyond the time scale, you can also customize what information is displayed on each timeline bar. By default, you’ll see the item name, but you can overlay other crucial details. Perhaps you want to see the assigned person, the status, or even a numerical value like estimated effort. monday.com lets you select which columns from your board appear as labels on the timeline bars, offering immediate context without needing to click into each task. This level of customization ensures that your timeline isn’t just a pretty picture, but a highly functional information hub.
4. Leveraging Groups and Subitems for Granular Control: Deeper Organization
Projects rarely consist of a flat list of tasks. They have phases, milestones, and smaller sub-tasks that make up larger deliverables. The monday.com timeline view handles this complexity beautifully through the use of groups and subitems, allowing for a much more organized and hierarchical project structure. Groups, represented by different colored sections on your board, can delineate different project phases, departments, or categories of work. When you view these on the timeline, all tasks within a group are visually clustered together, making it easy to see the progress of an entire phase. (See: Project management overview.)
Subitems take this granularity a step further. If a main task is ‘Website Redesign’, its subitems might be ‘Design Mockups’, ‘Develop Front-End’, ‘Develop Back-End’, and ‘Content Migration’. Each of these subitems can have its own timeline entry within the main task’s bar on the timeline view. This means you can expand a parent task to see its underlying components and their individual schedules, or collapse it for a higher-level overview. This hierarchical structure is incredibly powerful for managing complex projects, ensuring no detail is overlooked while maintaining a clear view of the overall progress, which is a key part of any effective monday.com timeline tutorial. project management software tips offers useful background here.
5. Dependencies and Baselines: Advanced Project Planning
Real-world projects are full of dependencies – tasks that cannot start until another task is completed. Ignoring these leads to chaos. monday.com’s timeline view provides robust functionality for managing dependencies, which is a cornerstone of effective project planning. You can link tasks so that if one task’s end date shifts, all dependent tasks automatically adjust. This ‘smart’ scheduling prevents manual errors and ensures your timeline always reflects the most current reality.
Another crucial, often overlooked, feature is the ability to set baselines. A baseline is essentially a snapshot of your original project plan. As a project progresses, things inevitably change – tasks get delayed, new requirements emerge. By setting a baseline, you can compare your current progress against your initial plan. This helps you identify scope creep, understand schedule variances, and communicate changes effectively. It’s a powerful tool for accountability and for learning from past projects to improve future estimations.
6. Filtering and Searching Your Timeline: Finding What You Need
As your projects grow, your timeline can become quite dense. This is where monday.com’s filtering and searching capabilities become indispensable. You don’t always need to see every single task; sometimes you just want to focus on specific elements. The filter options allow you to narrow down your view based on virtually any column on your board. Want to see only tasks assigned to Sarah? Filter by ‘Person’. Need to view only ‘High Priority’ tasks? Filter by ‘Status’.
You can apply multiple filters simultaneously, creating highly specific views that cut through the noise. For instance, you could filter to see ‘Overdue tasks assigned to the Marketing Team’. This ability to dynamically adjust your focus is critical for daily stand-ups, stakeholder reviews, or simply for an individual team member to see only their relevant workload. The search bar also offers quick access to specific tasks or groups, making navigation a breeze even on the most sprawling project timelines. This flexibility is a vital part of mastering the monday.com timeline tutorial.
7. Collaborating and Sharing Your Timeline: Teamwork Made Easy
A project timeline is only as good as its ability to facilitate collaboration. monday.com excels here, making it incredibly easy to share your timeline and work together with your team and stakeholders. Since monday.com is a cloud-based platform, your timeline is always live and up-to-date for everyone with access to the board. There’s no need to email static screenshots or worry about version control issues.
Team members can comment directly on tasks, update their progress, and mark items as complete, all of which instantly reflect on the timeline. For external stakeholders who might not need full board access, monday.com allows you to share read-only versions of your timeline. You can even embed the timeline view into external websites or wikis, providing a dynamic and always-current view of project progress without requiring them to log into monday.com. This transparency fosters trust and keeps everyone on the same page. We covered better IT project strategies in more detail.
8. Integrating Your Timeline with Other monday.com Features: A Holistic Approach
The timeline view doesn’t exist in a vacuum; it’s part of the broader monday.com ecosystem, and its power is amplified when integrated with other features. For example, you can set up automations that trigger based on timeline events. Imagine an automation that sends a notification to the project manager three days before a major milestone is due, or automatically changes a task’s status to ‘Overdue’ if its end date passes without completion. These automations save time and ensure proactive project management.
Dashboards are another powerful integration. You can create custom dashboards that pull data from multiple boards, including timeline data. This allows you to build high-level overviews of portfolio progress, track key performance indicators (KPIs) related to schedule adherence, and get a bird’s-eye view of all your projects’ timelines in one place. By connecting your timeline to these other features, you transform it from a simple scheduling tool into a comprehensive project control center, greatly enhancing the value you get from this monday.com timeline tutorial.
9. Best Practices for Maximizing Your monday.com Timeline: Pro Tips
To truly get the most out of your monday.com timeline, consider these best practices. First, be consistent with your date entries. A timeline is only accurate if the underlying data is accurate. Encourage your team to update task dates promptly as plans evolve. Second, utilize color coding wisely. monday.com allows you to color-code items based on various columns (status, person, priority, etc.). This visual cue can help you quickly identify critical paths, overdue tasks, or tasks assigned to specific individuals at a glance. (See: Ergonomics in workplace productivity.)
Third, don’t shy away from using subitems for complex tasks. Breaking down large deliverables into smaller, manageable chunks makes the timeline more accurate and less daunting. Fourth, regularly review your timeline with your team. Use it as a central point of discussion during stand-ups and project meetings. This ensures everyone is aligned and helps identify potential issues early. Finally, leverage the workload view in conjunction with the timeline. While the timeline shows *when* tasks are happening, the workload view shows *who* is doing *how much* work. Combining these gives you an unparalleled understanding of both schedule and resource allocation, making your project planning truly robust.
10. Comparing monday.com Timeline to Traditional Gantt Charts: Evolution of Project Visualization
While we touched on the modern feel of monday.com’s timeline, it’s worth a deeper dive into how it stacks up against traditional Gantt charts. The core concept is similar: both visually represent tasks over time, showing durations and sequences. However, monday.com’s approach makes it far more accessible and collaborative. Traditional Gantt charts, often created in specialized software like Microsoft Project, can be rigid and complex, requiring specific training to master. They’re often static documents, difficult to update in real-time, and less conducive to team input.
The monday.com timeline, on the other hand, is built for dynamic team environments. It’s interactive, easily customizable, and inherently linked to your live project data. This means changes made in the board view (like updating a status or reassigning a task) are immediately reflected in the timeline. The visual design is cleaner, less cluttered, and uses color and drag-and-drop functionality to make scheduling intuitive, not a chore. It democratizes project scheduling, moving it from a specialized tool for project managers to a shared, understandable resource for the entire team. This shift from static, expert-driven charts to dynamic, team-centric timelines is a significant advantage in today’s fast-paced work environment.
11. Using Milestones Effectively in Your Timeline: Marking Key Progress Points
Milestones are critical markers in any project, representing significant achievements or decision points. In monday.com’s timeline, you can visually distinguish these important events to make your project’s roadmap even clearer. While there isn’t a dedicated “milestone” column type in the same way there’s a “timeline” column, you can effectively create and highlight milestones using existing features.
A common approach is to create a separate group on your board specifically for ‘Milestones’. Each item in this group would represent a key project milestone (e.g., “Phase 1 Completion,” “Client Sign-off,” “Product Launch”). For these milestone items, you typically set a single date in the timeline column, making their bar appear as a short, distinct marker on the timeline. You can then use color coding for this group or status to make them stand out visually. Alternatively, you can create a status column and dedicate a specific status label, like “Milestone,” to visually identify these tasks directly on the timeline bar. By clearly marking milestones, you provide clear checkpoints for your team and stakeholders, allowing everyone to track progress against major deliverables and celebrate successes along the way.
12. Leveraging monday.com Automations with Your Timeline: Smart Scheduling
Automations are where monday.com truly shines in terms of efficiency, and they integrate seamlessly with the timeline view to create a more ‘intelligent’ project schedule. Think about the repetitive tasks or the constant need to remind people about deadlines. Automations can handle all of that, freeing up your time for more strategic work.
Here are a few examples of how you can use automations with your timeline:
- Deadline Reminders: Set an automation to notify a team member (or the project manager) X days before a task’s end date in the timeline column. This helps prevent tasks from becoming overdue.
- Status Updates: Automatically change a task’s status to ‘Overdue’ if its end date passes and its current status isn’t ‘Done’. This provides an immediate visual cue on your timeline.
- Dependency Management (Beyond Native): While monday.com has native dependency linking, you can create custom automations. For instance, “When Task A’s status changes to ‘Done’, set Task B’s start date to today.” This can be useful for more complex, multi-board dependency scenarios.
- Resource Allocation Alerts: If you’re tracking estimated hours in a Numbers column and a task’s duration changes on the timeline, an automation could alert you if the total estimated hours exceed a certain threshold for a given week, signaling potential over-allocation.
By thoughtfully setting up these automations, your monday.com timeline becomes a proactive assistant, not just a static display. It helps ensure deadlines are met, statuses are current, and potential issues are flagged before they become major problems. (See: Latest technology news.)
Frequently Asked Questions About monday.com Timelines
Q1: Can I link tasks across different boards in my monday.com timeline?
A1: Directly linking timeline dependencies between tasks on entirely separate boards isn’t a native timeline feature in the same way you link tasks within a single board. However, you can achieve a similar effect using monday.com’s ‘Connect Boards’ column and automations. For example, you can connect an item on Board A to an item on Board B and then set up an automation like, “When status of connected item on Board A changes to ‘Done’, change status of item on Board B to ‘Ready to Start’.” While this won’t show a visual dependency line on the timeline itself, it will trigger the start of the dependent task on the other board, effectively managing the flow.
Q2: How do I handle recurring tasks on the monday.com timeline?
A2: monday.com doesn’t have a built-in ‘recurring task’ feature that automatically regenerates tasks on a schedule within the timeline. The best approach is to use templates or automations. You can create a board template with your recurring tasks and duplicate it regularly. Alternatively, use automations: “When a task’s status changes to ‘Done’, duplicate this item and set its new timeline dates X days/weeks/months in the future.” This allows you to manage recurring work and visualize its schedule on your timeline. Related reading: favorite project management apps.
Q3: Is there a way to export my monday.com timeline as a PDF or image?
A3: Yes, you can. While monday.com doesn’t offer a direct ‘Export as PDF/Image’ button specifically for the timeline view, you have a couple of good options. The simplest is to use your browser’s print function (Ctrl+P or Cmd+P) and choose ‘Save as PDF’ from the printer options. For images, you can use a screenshot tool (like the built-in snipping tool on Windows or Cmd+Shift+4 on Mac) to capture the relevant section of your timeline. For more professional reports, consider using monday.com’s reporting features on dashboards, which can then be exported, or integrate with a reporting tool via monday.com’s API.
Q4: Can I view resource allocation directly on the timeline?
A4: Not directly *on* the timeline bar itself in terms of workload numbers. The timeline primarily shows *when* tasks are scheduled. However, monday.com’s ‘Workload’ view is specifically designed for resource allocation. It uses the same timeline data (start and end dates from your Timeline column) to visualize who is assigned to what and for how long. The Workload view will show you if someone is over-allocated based on their capacity. Combining these two views – the timeline for schedule and the workload view for resource balancing – gives you a complete picture.
Q5: What’s the difference between the ‘Date’ column and the ‘Timeline’ column?
A5: This is a common point of confusion! A ‘Date’ column in monday.com is for a single point in time – a due date, a delivery date, a meeting date. It represents one specific day. The ‘Timeline’ column, however, represents a duration. It has both a start date and an end date, making it perfect for tasks that span multiple days, weeks, or months. The timeline view specifically renders items based on the data in a ‘Timeline’ column, showing a bar stretching from start to end. While you can technically add a date column to the timeline view, it will only show a single point, not a duration, so the dedicated ‘Timeline’ column is essential for effective Gantt-like visualization.
The monday.com timeline view isn’t just a fancy calendar; it’s a dynamic, collaborative, and incredibly insightful tool that can transform how you manage projects. By following this monday.com timeline tutorial, you’re not just learning features; you’re adopting a mindset of visual, proactive project management that will undoubtedly lead to smoother workflows, fewer surprises, and ultimately, more successful project deliveries. Go ahead, give it a try – you’ll wonder how you ever managed without it.
“`
Trending Now
Frequently Asked Questions
What is the timeline view in monday.com?
The timeline view in monday.com is a visual representation of your project schedule, similar to a modern Gantt chart. It allows users to see tasks as color-coded bars across a calendar, providing clarity on task duration, overlaps, and the sequence of activities, which enhances project management and team communication.
How do I set up a timeline in monday.com?
To set up a timeline in monday.com, start by creating a new board or selecting an existing one. Add tasks with start and end dates, then switch to the timeline view. This will automatically generate a visual timeline where you can adjust tasks and dependencies easily, streamlining your project management process.
What are the benefits of using the timeline view?
The timeline view offers several benefits, including improved clarity on project schedules, the ability to identify overlaps and dependencies, and enhanced visual feedback for team collaboration. It helps project managers and teams anticipate bottlenecks and make data-driven decisions quickly, ultimately streamlining workflows.
Can I customize the timeline view in monday.com?
Yes, the timeline view in monday.com can be customized to fit your project needs. You can adjust task colors, durations, and dependencies, as well as filter and sort tasks based on various criteria. This flexibility allows you to tailor the view to better suit your team's workflow and project requirements.
How does the timeline view improve team collaboration?
The timeline view enhances team collaboration by providing a clear visual representation of project timelines. When everyone can see the big picture, understand their roles, and anticipate upcoming tasks, it fosters better communication and coordination among team members, leading to more efficient project execution.
What did we miss? Let us know in the comments and join the conversation.