How to whiten teeth in Lightroom
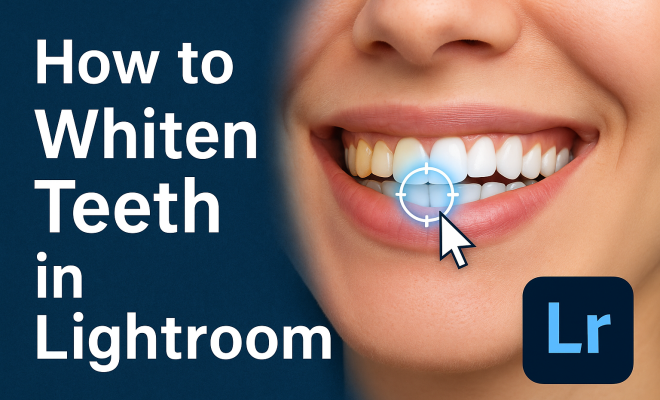
“`html
If you’re a photographer or simply someone who enjoys editing their photos, you know how crucial it is to present the best version of your subjects, especially when it comes to portraits. One common request in portrait editing is how to whiten teeth in Lightroom. Whether it’s for professional shots or personal memories, having bright, white teeth can make a significant difference in the overall appeal of a photo. In this comprehensive guide, we’ll explore nine essential techniques to help you perfect the art of teeth whitening in Lightroom.
1. Understanding the Basics of Teeth Whitening in Lightroom
Before diving into the specifics, it’s important to grasp the fundamentals of teeth whitening in Lightroom. The process involves enhancing the brightness and reducing the yellowness of the teeth without compromising the overall quality of the image. Lightroom provides a range of tools, including sliders and brushes, that allow for precise adjustments.
Essentially, when you’re trying to whiten teeth in Lightroom, your goals are twofold: to increase brightness and to adjust the color balance to minimize any yellow or dull tones. Understanding how these adjustments work in tandem is key to achieving a natural look.
2. Gather Your Tools: Lightroom Features for Teeth Whitening
Lightroom offers a wealth of features that can be utilized effectively for teeth whitening. The main tools you’ll want to focus on include:
- Adjustment Brush: This localized editing tool allows you to paint over specific areas of your image.
- Hue, Saturation, and Luminance (HSL) Panel: Here, you can adjust the color balance and brightness of specific hues.
- Radial Filter: Ideal for creating a soft focus around the subject’s face.
Familiarizing yourself with these tools will enhance your workflow and make your teeth whitening efforts more efficient and effective.
3. Preparing Your Image for Editing
Before you start the teeth whitening process, ensure that your image is in the best condition possible. This means checking for exposure, contrast, and sharpness. If the image is too dark or too bright, it will be more challenging to achieve a natural look.
Consider making preliminary adjustments to the overall brightness and contrast of the image to set a strong foundation for your teeth whitening work. Once you’re satisfied with the overall image quality, it’s time to focus on the teeth.
4. Using the Adjustment Brush for Targeted Whitening
The Adjustment Brush is one of the most effective tools for whitening teeth in Lightroom. Start by selecting the brush tool and adjusting the size to fit over the teeth. Then, increase the exposure and reduce the saturation slightly. By carefully painting over the teeth, you can achieve a brighter and whiter appearance.
Be sure to adjust the brush feathering to create a soft transition between the edited area and the surrounding skin. This helps avoid a harsh contrast that can make the teeth look unnaturally white.
5. Fine-Tuning with the HSL Panel
The HSL (Hue, Saturation, and Luminance) panel is another essential aspect of effectively whitening teeth. In this panel, you can select the yellow hue and decrease its saturation and luminance. This adjustment helps to counteract any yellow tones in the teeth.
By doing this, you ensure that the teeth not only appear brighter but also more natural. It’s a subtle but powerful way to enhance the whiteness without making the teeth look overly artificial. (See: Teeth whitening techniques and trends.)
6. Using the Radial Filter for Softness
The Radial Filter can be especially useful when you want to create a more polished look. After applying the adjustment brush for whitening, use the radial filter around the face to add a soft light effect. This draws attention to the subject and enhances the focus on the smile.
To do this, create an elliptical shape around the subject’s face and adjust the exposure and clarity settings. This technique can harmonize the overall aesthetic of the photograph, making the teeth appear even more radiant.
7. Mastering Color Balance and Tonality
Color balance plays a crucial role in maintaining a natural look when whitening teeth in Lightroom. If the teeth start to look too blue or too bright, they can lose their natural appearance. To combat this, adjust the temperature and tint sliders in the Basic panel to ensure that the teeth have a balanced, natural look.
Keep an eye on the overall tonality of the image as well. You want the teeth to pop, but they should still blend seamlessly with the overall color palette of the photo. This attention to detail will help your images feel cohesive and professionally edited.
8. Reviewing and Comparing Your Edits
After completing your teeth whitening edits, it’s essential to review your adjustments. Use the before-and-after view in Lightroom to compare your edited photo with the original. Ensure that the teeth look bright but not unnaturally white or overly processed.
Don’t hesitate to make further minor tweaks if necessary. Sometimes, small adjustments can lead to a significant improvement in the final image quality. This step is critical in achieving a polished and professional look.
9. Saving and Exporting Your Final Image
Once you’re satisfied with your edits, it’s time to save and export the image. Lightroom allows you to export photos in various formats and sizes, so choose the one that fits your needs. Ensure that the quality settings are high to maintain the best results.
Remember to save your edited image in a way that retains the original version so you can return to it later if needed. With proper organization, you can always revisit and refine your skills in whitening teeth in Lightroom.
10. Common Mistakes to Avoid When Whiten Teeth in Lightroom
While it’s relatively straightforward to whiten teeth in Lightroom, there are some common pitfalls to watch out for. Here’s a quick rundown of mistakes to avoid:
- Over-Whitening: It’s easy to get carried away and make teeth too white. Always aim for a natural look.
- Ignoring Skin Tones: If the teeth are too bright compared to the skin tones, it can draw attention to the teeth in an undesirable way.
- Neglecting Context: Consider the lighting and environment of the photo. Teeth that are too white can look out of place in darker or moodier settings.
- Rushing Edits: Take your time to ensure the adjustments blend well, especially when using the adjustment brush.
11. Expert Tips for Professional-Looking Teeth Whitening
Several professional photographers share insights on how to achieve optimal teeth whitening results. Here are a few expert tips:
- Use a Reference Image: Have a reference image on hand that showcases the ideal teeth color you’re aiming for. It can help keep your edits consistent.
- Work in Layers: If you’re familiar with using layers in Photoshop, consider editing the teeth in Photoshop for finer control, then bring the image back to Lightroom for color correction.
- Regularly Step Back: Zoom out of your image frequently to see how it looks at a normal viewing distance. This can help you catch issues that may not be as apparent when zoomed in.
- Seek Feedback: Don’t hesitate to ask for feedback from fellow photographers or friends. Sometimes a fresh pair of eyes can spot things you may have overlooked.
12. Statistics on the Impact of Teeth Whitening in Portrait Photography
According to a study by the American Academy of Cosmetic Dentistry, 99.7% of adults believe that a smile is an essential social asset. Additionally, 74% of people feel that an unattractive smile can hinder career success. Teeth whitening can dramatically enhance the visual appeal of a smile, making it a critical aspect of portrait photography.
A survey by the same organization revealed that 68% of participants believed that a person with a white smile appeared more attractive. Therefore, the process of whitening teeth in images is not just an aesthetic choice—it can influence perceptions and interactions in various social and professional settings.
13. Frequently Asked Questions About Whitening Teeth in Lightroom
What is the best way to ensure teeth look natural after editing?
To achieve a more natural look, make subtle adjustments to brightness and color rather than applying extreme changes. Regularly zoom out and check how the teeth blend with the skin tones and overall image. (See: CDC guidelines on teeth whitening.)
Can I whiten teeth without affecting the rest of the image?
Yes, using the Adjustment Brush allows you to selectively edit only the teeth. By painting carefully over the teeth and adjusting settings like exposure and saturation, you can leave the rest of the image untouched.
Is it possible to whiten teeth in Lightroom mobile?
Absolutely! The mobile version of Lightroom offers similar tools, such as the Adjustment Brush. While the interface may differ slightly, you can achieve effective teeth whitening on your mobile device.
How do I prevent teeth from looking too blue after whitening?
To avoid the blue tint, make sure to adjust the temperature and tint sliders appropriately after whitening. A slight increase in warmth can help maintain a natural color.
Are there alternative methods to whiten teeth in Lightroom?
Besides the Adjustment Brush and HSL panel, you can use the Gradient Filter to subtly enhance teeth without disturbing the overall image. Experimenting with various adjustments will reveal what works best for your specific photo.
14. Additional Techniques for Teeth Whitening in Lightroom
While the previously mentioned techniques are effective, there are additional methods you can employ to further enhance the whiteness of teeth in your images. Let’s explore a few more options that can complement your workflow:
Selective Color Adjustments
Lightroom’s selective color adjustments can be a powerful tool when trying to achieve the perfect teeth whitening effect. Under the HSL panel, you can adjust specific colors more finely. This means you can target yellows and adjust their luminance to create a brighter appearance without affecting other colors in the image.
For instance, if the teeth have a slight beige hue, lowering the yellow saturation will help neutralize that tone, enhancing the overall whiteness. This technique can be particularly useful in images with varied lighting conditions where reflections can create unwanted color casts.
Using the Clarity Slider
The Clarity slider can also play a role in teeth whitening. A slight increase in clarity can help define the edges of the teeth, giving them a crisper and cleaner look. However, this should be done cautiously, as too much clarity can cause the teeth to look too sharp or unrealistic.
To implement this, after whitening the teeth, dial up the clarity just a notch while keeping an eye on the overall image. This will ensure the teeth appear well-defined while still blending seamlessly with the rest of the portrait.
15. Teeth Whitening in Various Lighting Conditions
Your approach to whitening teeth may need to vary depending on the lighting conditions of your original photo. Natural light, harsh artificial light, and low-light settings all produce different effects on skin tones and teeth color.
For images taken in natural light, teeth may appear more yellow due to shadows. In these cases, you might need to increase the exposure or reduce the yellow hues more aggressively. Conversely, in harsh lighting, teeth can reflect too much light, requiring a softer touch in adjustment to prevent a glow or overly bright appearance. (See: World Health Organization on oral health.)
Observing how the light interacts with the subject can guide your edits. Taking notes or creating presets for various lighting situations can make future edits quicker and more consistent.
16. Creating a Custom Teeth Whitening Preset
Once you’ve honed your teeth whitening technique, consider creating a custom preset in Lightroom for future use. This can save you time and help maintain a consistent look across different images. To create a preset, adjust the sliders for the tools and adjustments you’ve used for teeth whitening, then save these settings as a preset.
This way, you can quickly apply your whitening adjustments to other portraits with similar lighting conditions. Just remember to tweak the settings as needed for each photo since no two images are identical.
17. Real-Life Applications of Teeth Whitening in Lightroom
There are numerous scenarios where mastering the skill of whitening teeth in Lightroom can be beneficial. For professional photographers, this skill can enhance client satisfaction, particularly in portrait, wedding, and engagement photography where smiles play a pivotal role.
For social media influencers and content creators, having bright, white teeth can significantly improve the visual appeal of their images, attracting more engagement and followers. Even for personal photography, enhancing teeth can preserve precious memories with family and friends, ensuring that smiles shine bright during special occasions.
18. Conclusion and Embracing Continuous Improvement
With these techniques and insights, you’re well-equipped to transform your portrait editing skills and effectively whiten teeth in Lightroom. Remember that practice is key in mastering any editing technique. Over time, you’ll develop your unique style and workflow, which will not only enhance your portraits but also ensure you enjoy the editing process.
Take the time to experiment with the tools available in Lightroom, and don’t shy away from seeking feedback. Continuous improvement will lead to stunning results that reflect your growth as a photographer and editor.
With these nine essential techniques, you’re well on your way to mastering the art of teeth whitening in Lightroom. Each step is integral to enhancing your portraits and ensuring that your subjects look their best. As you practice and refine your skills, you’ll find that your editing process becomes more intuitive and your results more impressive.
“`
Trending Now
Frequently Asked Questions
How do you whiten teeth in Lightroom?
To whiten teeth in Lightroom, use the Adjustment Brush to paint over the teeth, then adjust the brightness and reduce yellowness using the HSL panel. This method allows for precise edits, ensuring a natural look without affecting the overall image quality.
What tools in Lightroom are best for teeth whitening?
The best tools for teeth whitening in Lightroom include the Adjustment Brush for localized edits, the HSL panel for color adjustments, and the Radial Filter to create a soft focus around the subject's face, enhancing the whitening effect.
Can you whiten teeth without affecting the rest of the photo in Lightroom?
Yes, you can whiten teeth without affecting the rest of the photo by using the Adjustment Brush to selectively edit only the teeth. This localized editing ensures that other areas of the image remain unchanged.
What settings should I use to whiten teeth in Lightroom?
To whiten teeth in Lightroom, increase the exposure and adjust the yellow tones down using the HSL panel. Typically, slight increases in brightness and moderate decreases in saturation work well for achieving a natural white.
Is it easy to whiten teeth in Lightroom?
Yes, whitening teeth in Lightroom is relatively easy once you understand the basic tools and techniques. Utilizing features like the Adjustment Brush and HSL panel allows for effective and precise adjustments for a polished final look.
Have you experienced this yourself? We'd love to hear your story in the comments.