How to create timeline in PowerPoint
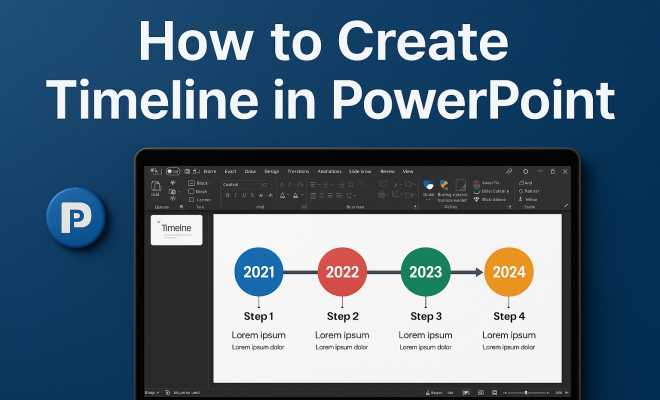
“`html
Creating a timeline in PowerPoint can transform a simple presentation into a visually engaging narrative that captivates your audience. Timelines are an effective way to convey chronological events, project milestones, or historical data, making complex information easier to digest and understand. In this comprehensive guide, we’ll explore how to create a timeline in PowerPoint, delving into essential techniques, design tips, and practical insights.
1. Understanding the Importance of Timelines
Timelines serve as a powerful visual tool that can enhance the storytelling aspect of your presentations. They help to contextualize information, allowing viewers to see connections between events and understand the progression of ideas over time. Whether you’re presenting project updates, historical overviews, or educational content, incorporating a timeline can make your presentation more engaging and informative.
Additionally, timelines can improve retention of information. Research shows that visuals improve memory recall significantly, and when people can see information laid out in a linear fashion, they are more likely to remember it. By creating a timeline in PowerPoint, you not only convey your message clearly but also leave a lasting impression on your audience.
2. Getting Started: Planning Your Timeline
Before diving into PowerPoint, it’s crucial to spend some time planning your timeline. Start by determining the key events or milestones you want to include, and arrange them in chronological order. This step will help you visualize the structure of your timeline and ensure you cover all necessary points.
Consider the type of timeline you want to create. Will it be a simple linear timeline, a more complex one with overlapping events, or perhaps a multi-faceted timeline that shows multiple threads of information? Understanding the story you want to tell will guide your design choices later on.
3. Choosing the Right Template
PowerPoint offers a variety of built-in templates for timelines, which can save you time and effort. To access these templates, open PowerPoint and go to the Insert tab. From there, click on SmartArt and select Process to find timeline options. You can also find more specialized timeline templates online, either for free or for purchase, that may better suit your needs. We covered comprehensive implementation guide in more detail.
When choosing a template, look for one that aligns with your content and presentation style. A clean, straightforward layout is often more effective than a cluttered one, as it allows your audience to focus on the information rather than being distracted by design elements.
4. Customizing Your Timeline
One of the strengths of PowerPoint is its flexibility in customization. After selecting a timeline template, you can modify it to fit your specific needs. Start by adjusting the colors, fonts, and shapes to align with your brand or presentation theme. Consistent design elements reinforce your message and create a polished look.
Don’t hesitate to add images, icons, or logos to enhance your timeline. Visual elements can break up text-heavy slides and keep your audience engaged. However, make sure that any added visuals support your message rather than distract from it. Each element should have a purpose and contribute to the overall narrative. (See: Understanding timelines and their uses.)
5. Adding Details: Text and Data
Once your timeline is visually appealing, it’s time to fill it with content. Add concise text to describe each event or milestone clearly. Keep your descriptions brief; aim for clarity over complexity. If you find yourself writing lengthy paragraphs, consider summarizing the information into bullet points or short descriptors. For more on this, see must-have timeline apps.
Incorporating data into your timeline can also enhance its effectiveness. If you’re presenting project timelines, including deadlines, completion percentages, or key statistics makes your information more credible and informative. Just ensure that your text remains legible and doesn’t overcrowd the slide.
6. Using Animation to Enhance Engagement
One of PowerPoint’s most engaging features is its animation options. Effective use of animation can add a dynamic element to your timeline, making it more compelling. For example, you might choose to animate the timeline so that events appear sequentially as you discuss them, guiding the audience’s attention.
To add animations, select the element you want to animate, click on the Animations tab, and choose from a variety of effects. Be cautious, though. Overusing animation can be distracting. Aim for a balance that enhances your presentation without overwhelming your audience.
7. Finalizing Your Timeline: Review and Edit
After creating your timeline, take time to review and edit it carefully. Look for any spelling or grammatical errors, and ensure that the information is accurate and up-to-date. If your timeline relies on data, double-check your numbers to prevent the dissemination of incorrect information.
Consider seeking feedback from colleagues or peers. A fresh set of eyes can catch errors you’ve missed and provide insights on clarity and effectiveness. Make adjustments based on feedback to ensure your timeline is as polished as possible.
8. Presenting Your Timeline Effectively
Creating a timeline in PowerPoint is only half the battle; presenting it effectively is just as crucial. When you’re ready to deliver your presentation, practice your timing and familiarize yourself with the flow of events on your timeline. This practice helps you maintain rhythm and ensures that you discuss each point clearly without rushing.
Engage with your audience while presenting. Ask questions to encourage participation and invite them to share their thoughts on the timeline. This interaction can make the presentation feel more collaborative and less like a one-sided lecture.
9. Exploring Advanced Features for Customization
If you’re comfortable with PowerPoint basics, consider exploring some advanced features to further customize your timeline. For instance, you can use hyperlinks to connect different sections of your presentation or even link to external resources for additional context. This feature is particularly useful if you have a lot of information to present and want to make it easily accessible.
Another advanced technique is to incorporate multimedia elements. Adding videos or sound clips can provide context or depth to the events on your timeline, making for a more immersive experience. Just be sure to test everything beforehand to ensure compatibility and functionality during your presentation. (See: Data visualization and information retention.) benefits of visual storytelling offers useful background here.
10. Types of Timelines You Can Create in PowerPoint
Understanding different types of timelines can help you select the most effective format for your presentation. Here are a few popular types:
- Linear Timelines: These are the simplest form, displaying events in a straight line from start to finish. They are great for straightforward narratives.
- Vertical Timelines: A vertical design can save space and provide a unique visual, making it easier to compare events that happen simultaneously.
- Collapsible Timelines: This interactive timeline format allows you to click on each event to expand for more details, perfect for presentations with limited time.
- Horizontal Timelines: This format allows for multiple timelines on the same slide, which can be beneficial for comparing different projects or events.
11. Common Mistakes to Avoid When Creating a Timeline
While creating a timeline can be straightforward, there are pitfalls to watch out for:
- Overloading Information: Too much information can make your timeline cluttered and confusing. Stick to essential events and data to keep your audience engaged.
- Neglecting Visual Hierarchy: Not all elements are created equal. Use size, color, and positioning to emphasize key events or milestones.
- Ignoring Audience Needs: Tailor your timeline to your audience’s level of knowledge. Avoid jargon and complex terminology that may alienate your viewers.
12. Examples of Effective Timelines in Different Fields
To inspire your timeline creation, here are some examples from various fields:
- Project Management: A project timeline can outline phases like planning, execution, and closure with specific milestones, such as crucial deadlines or deliverables.
- History Presentations: Historical timelines can depict key events in a nation’s history, such as significant battles, treaty signings, or notable political changes.
- Marketing Campaigns: A timeline for a marketing project may show launch dates for ads, campaign phases, and evaluation points.
13. Using Data Visualization in Timelines
While text and images are important, integrating data visualization can take your timeline to the next level. For instance, consider using graphs or charts to represent growth over time or to show a project’s progress visually. This approach can help your audience grasp complex data more quickly.
Tools like Excel can be integrated with PowerPoint timelines to create dynamic charts that update automatically. This is particularly useful for project timelines that change frequently.
14. Frequently Asked Questions (FAQ)
How do I create a timeline in PowerPoint from scratch?
To create a timeline from scratch, start with a blank slide and choose a line shape to represent your timeline. Then, add text boxes for each event, customizing them with relevant dates and descriptions. You can enhance your timeline by incorporating shapes and images for a more engaging look.
What are the best practices for designing a timeline?
Some best practices include maintaining a clean and organized layout, using consistent colors and fonts, and limiting the amount of text on each slide. It’s also beneficial to highlight major milestones to draw attention to key points.
Can I edit a timeline template once it’s created?
Absolutely! PowerPoint allows you to edit any timeline template. You can change colors, fonts, shapes, and add or remove events according to your needs.
Is there a way to animate my timeline effectively?
Yes! You can use custom animations in PowerPoint to reveal events one by one, making your timeline dynamic. Just select the elements you want to animate and choose the desired effect from the Animations tab. (See: Tips for effective PowerPoint presentations.) Related reading: bridging entertainment and education.
What if my timeline is too long for one slide?
If your timeline is extensive, consider breaking it up into multiple slides. You can focus on specific segments or phases of the timeline, ensuring clarity and maintaining audience engagement.
15. Best Software Alternatives for Creating Timelines
While PowerPoint is a strong tool for creating timelines, there are several software alternatives that can also be effective. If you’re looking for something different, consider these options:
- Microsoft Excel: Excel is great for creating data-driven timelines, especially for project management. You can use graphs and charts to visualize progress and milestones.
- Google Slides: Similar to PowerPoint, Google Slides offers easy collaboration features and templates for timelines. It’s perfect for team projects where multiple users can edit simultaneously.
- Lucidchart: This online diagramming application offers a user-friendly interface for creating detailed timelines. It’s particularly useful for complex timelines that require collaboration and extensive detail.
- Visme: Visme allows you to create visually appealing timelines with a variety of design options. It focuses on infographics and presentations, making it suitable for marketing and educational purposes.
16. Tips for Team Collaboration on Timeline Projects
When working in a team to create a timeline, communication is key. Here are some tips to facilitate effective collaboration:
- Define Roles: Assign specific roles to team members, such as content creators, designers, and presenters. This helps streamline the process and ensures accountability.
- Use Shared Tools: Leverage tools like Google Slides or collaborative platforms to allow team members to contribute in real time. This can speed up the timeline creation and enhance creativity through diverse input.
- Regular Check-ins: Schedule regular meetings or check-ins to discuss progress, address challenges, and refine the timeline together. This keeps everyone aligned and motivated.
17. Incorporating Feedback: Continuous Improvement
Once your timeline is presented, gathering feedback is essential for future improvements. Consider these strategies:
- Surveys: After the presentation, send out a brief survey to the audience to gather their thoughts on the timeline’s clarity, engagement, and overall effectiveness.
- Review Sessions: Hold a review session with your team to discuss what worked well and what can be improved for next time. This collaborative reflection can lead to stronger timelines in the future.
- Iterate: Based on feedback, take the time to refine the timeline for future presentations. Continuous improvement will enhance both your skills and the quality of your timelines.
18. Future Trends in Timeline Presentations
As technology evolves, so do the ways we present timelines. Here are some emerging trends to watch for:
- Interactive Timelines: With advancements in technology, interactive timelines that allow the audience to engage with content in real time are becoming increasingly popular. These can include clickable elements that reveal additional information.
- Augmented Reality (AR) Timelines: As AR technology develops, integrating timelines into AR environments could provide immersive experiences where users can visualize events in a three-dimensional space.
- Real-Time Data Integration: Future timelines may incorporate live data feeds, allowing for dynamic updates during a presentation. This could be particularly useful for project management timelines that require real-time tracking.
Creating a timeline in PowerPoint doesn’t have to be a daunting task. With careful planning, thoughtful customization, and strategic presentation techniques, you can develop a timeline that not only informs but also engages your audience. So, roll up your sleeves and start crafting your next timeline – your audience will appreciate the clarity and creativity it brings to your presentation!
“`
Trending Now
Frequently Asked Questions
How do I create a timeline in PowerPoint?
To create a timeline in PowerPoint, start by planning your key events in chronological order. Then, choose a suitable template from PowerPoint's design options or create your own using shapes and lines to represent the timeline visually. Finally, add text and images to enhance the content and make it engaging.
What are the benefits of using a timeline in presentations?
Timelines enhance presentations by providing a clear visual representation of chronological events, making complex information easier to understand. They improve audience engagement and retention, as visuals aid memory recall. Using timelines can help contextualize information and show relationships between different events effectively.
Can I customize timeline templates in PowerPoint?
Yes, PowerPoint allows you to customize timeline templates. You can change colors, fonts, shapes, and layouts to match your presentation's theme. Adding images, icons, and additional text is also possible, enabling you to tailor the timeline to your specific content and audience.
What types of timelines can I create in PowerPoint?
In PowerPoint, you can create various types of timelines, including linear timelines for straightforward sequences, complex timelines for overlapping events, and multi-faceted timelines that display multiple threads of information. The type you choose should align with the story you want to tell.
Is there a specific way to plan a timeline before creating it in PowerPoint?
Yes, planning is essential before creating a timeline in PowerPoint. Start by identifying key events or milestones and arranging them chronologically. Consider the narrative you want to convey, as this will guide your design choices and ensure all necessary points are covered.
What's your take on this? Share your thoughts in the comments below — we read every one.