How to use Google Photos editor
“`html
In today’s digital age, capturing memories through photography has never been easier. However, once you’ve taken those pictures, the real fun often begins: editing them to perfection. Enter the Google Photos editor, a powerful tool that not only lets you store your photos but also provides an extensive range of editing options. This guide will delve into how to make the most of this intuitive editor, ensuring your images stand out in every album.
1. Getting Started with Google Photos
Before diving into the editing features, it’s essential to know how to access Google Photos. You can use it via the app on your mobile device or through the web interface on your computer. If you’re new to the platform, simply download the app from the Google Play Store or the Apple App Store, or visit the Google Photos website. Once you’ve set up your account, uploading images is a breeze — just click on the ‘+’ icon and select ‘Upload’.
Google Photos offers 15GB of free storage. Keep this in mind as you upload; you might want to manage your space efficiently. If you require more storage, Google offers paid plans through Google One, which allow for expanded options. With your images uploaded, you’re ready to explore the editing capabilities of the Google Photos editor.
2. Accessing the Editing Tools
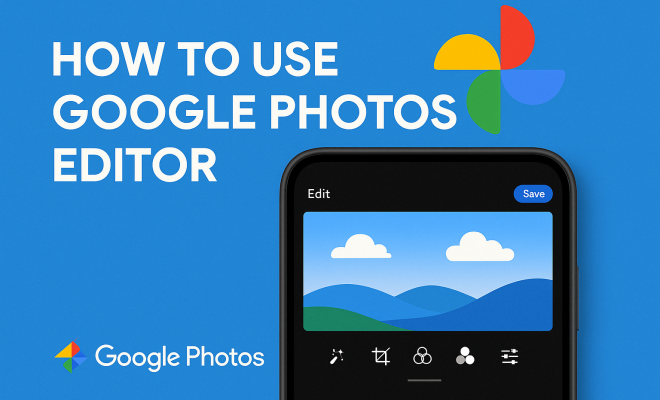
To access the editing tools, simply select an image from your library. You’ll find the ‘Edit’ button (represented by a pencil icon) in the interface. Clicking this will open up the Google Photos editor, which showcases a clean and user-friendly layout. This includes various tabs such as ‘Adjust’, ‘Filters’, and ‘Crop’ which are all designed for different aspects of photo editing.
The layout is intuitive, which means you won’t waste time searching for tools. In fact, the Google Photos editor is designed for users of all skill levels, whether you are a beginner or an experienced editor. Familiarizing yourself with these tools is key to editing your photos effectively.
3. Making Basic Adjustments
Once you’re in the editor, you’ll see options for basic adjustments like brightness, contrast, saturation, and warmth. Each of these sliders is straightforward; moving them left or right will visibly alter your image in real-time. Brightness helps illuminate dark areas, while contrast enhances the differences between light and dark parts.
Saturation is crucial for adding vibrancy to your photos, perfect for those landscape shots where you want colors to pop. If you prefer a more subdued look, reducing saturation can create a subtle, artistic effect. Warmth balances the temperature of your photo, allowing you to give it a cooler or warmer tone, depending on your desired aesthetic.
4. Utilizing Filters
Filters can transform a good photo into a great one with just a click. Within the Google Photos editor, you’ll find a variety of filters ranging from vintage looks to modern, high-contrast styles. Applying a filter can significantly change the mood of your photo, making it feel more polished.
It’s worth experimenting with different filters; don’t hesitate to adjust the strength of the filter to suit your style. The ability to fine-tune these options means you can maintain control over the final appearance of your images. Applying a subtle filter can enhance your photo without making it look overly processed. Always remember to preview your edits before finalizing them.
5. Advanced Features: Cropping and Rotating
The Google Photos editor also excels in cropping and rotating images. Cropping allows you to focus on the most critical elements of your photo by removing unwanted background details. You can freely drag the corners of the crop box to get your desired framing, or select preset aspect ratios, such as 1:1 for social media posts.
Rotating your images is equally straightforward. If you find that your shot is slightly tilted, use the rotation tool to straighten it out. Additionally, the editor provides a ‘flip’ option, letting you mirror your photo if needed. Proper cropping and alignment can drastically improve the composition of your image, bringing attention to what matters most. (See: Learn more about Google Photos.)
6. Adding Text and Drawings
One of the standout features of the Google Photos editor is the ability to add text and drawings to your images. This can be particularly useful for creating personalized cards, quotes, or social media posts. To add text, select the ‘Text’ feature, choose your desired font and color, and type in your message. You can also move and resize the text box to fit your needs.
For those who prefer a more hands-on approach, the drawing tool allows you to create freehand designs directly on your photo. This feature could be great for doodling on vacation pictures or adding fun elements to your family photos. Both tools provide a personal touch that can make your images truly unique.
7. Utilizing the Magic Editor
A relatively newer addition to the Google Photos editor is the Magic Editor feature, which employs artificial intelligence to enhance photos automatically. This tool analyzes your image and suggests adjustments regarding lighting, color balance, and clarity. You can accept these suggestions or modify them further to fit your style.
Many users find this feature incredibly helpful for quick edits, especially when time is of the essence. It’s especially beneficial for those who may not feel confident in their editing skills but still want their photos to look polished. However, use this tool wisely; a little enhancement goes a long way, so make sure not to overdo it.
8. Saving and Sharing Your Edits
After you’ve made all your desired edits, saving your work is a breeze. The Google Photos editor allows you to save your edited photo without overwriting the original. This means you can always go back to the untouched version if needed. Simply click on ‘Save’ or ‘Save Copy’, and your edited image will be stored in your library, ready for sharing.
Sharing your edited photos is just as simple. You can share directly through Google Photos or download them to your device to post on social media. The platform’s integration with various social networks makes it easy to showcase your edits to friends and family, ensuring your beautiful memories reach the audience they deserve.
9. Understanding Photo Formats and Quality
When editing photos using the Google Photos editor, it’s essential to understand different photo formats and how they can impact the quality of your edits. Google Photos supports various formats, including JPEG, PNG, and HEIF, each with its own advantages and disadvantages. JPEG is the most common format for photos due to its balance between quality and file size, making it ideal for sharing online.
On the other hand, PNG is often preferred for images requiring transparency, but it usually results in larger file sizes. HEIF, while offering better compression and quality, may not be universally supported across all platforms. When you edit photos in Google Photos, the editor maintains the original quality of your image, allowing you to experiment without worrying about degrading the photo quality.
10. The Importance of Backing Up Your Photos
Editing photos in the Google Photos editor is fantastic, but it’s equally important to ensure your photos are backed up. Google Photos automatically backs up your images to the cloud, which is a lifesaver in case you lose your device or accidentally delete important pictures. You can also set your preferences for backing up photos over Wi-Fi or mobile data based on your needs.
Regularly checking your backup settings will ensure you don’t lose any precious memories. Additionally, you can create albums in Google Photos to organize your images better. This not only makes it easier to find specific photos later on but also helps keep your library tidy.
11. Photo Editing Techniques for Beginners
If you’re just starting with photo editing, there are several techniques that can enhance your skills and improve your images significantly. One of the most critical aspects is understanding composition. The rule of thirds is a fundamental guideline in photography; try to place important elements along the lines or intersections of a 3×3 grid.
Additionally, consider using leading lines — elements in the scene that draw the viewer’s eye toward the main subject. When editing, make a habit of checking the alignment and spacing of your subject in the frame. You can also experiment with depth of field; blurring the background using the focus tool can help emphasize the subject in your photo.
12. Exploring Additional Features
Beyond the basic editing tools, the Google Photos editor includes several additional features that can elevate your editing game. For instance, the “Color Pop” feature allows you to isolate a specific color within your image while converting the rest to black and white, creating a striking visual effect. (See: Understanding digital storage management.)
You can also utilize the “Suggested Edits” feature, where Google Photos automatically suggests enhancements based on AI analysis of your images. This feature is particularly useful for those who might be unsure of where to start or what edits would best suit their photo.
Another interesting tool is the “Enhance” option, which optimizes the image automatically by adjusting brightness, contrast, and saturation in a balanced manner. It’s a great way to quickly elevate your photos if you’re short on time.
13. Expert Tips for Using the Google Photos Editor
To get the most out of the Google Photos editor, here are some expert tips to keep in mind:
- Stay Consistent: If you’re regularly sharing photos on social media, develop a consistent editing style that aligns with your brand or personal aesthetic. This creates a cohesive look across your images.
- Don’t Over-Edit: One common mistake is over-editing photos, leading to unnatural results. Always aim for a balance that highlights your photo’s strengths without making it look artificial.
- Keep Learning: Photo editing is a skill that improves with practice. Take time to explore tutorials or forums dedicated to Google Photos editing techniques to enhance your knowledge.
- Feedback is Key: Share your edited photos with friends or on social media and seek constructive feedback. This can provide insights into what resonates with viewers and help you refine your style.
14. Frequently Asked Questions (FAQ)
1. Can I use the Google Photos editor offline?
Unfortunately, the Google Photos editor requires an internet connection to access all its features. However, you can view and manage your photos offline, but editing will be limited.
2. Will editing a photo in Google Photos delete the original?
No, editing a photo in Google Photos does not delete the original image. When you save your edits, Google Photos keeps both the original and the edited version, allowing you to revert back if you change your mind.
3. Is there a limit to how many photos I can edit in Google Photos?
There is no specific limit on the number of photos you can edit in Google Photos. Your ability to edit will depend on your storage capacity and whether you’ve reached the limits of your account plan.
4. How does Google Photos compare to other photo editing apps?
Google Photos is generally more focused on organization and storage, providing a good balance of editing tools, especially for casual users. In contrast, dedicated editing apps like Adobe Lightroom or Photoshop offer more advanced features for professional editing but may have a steeper learning curve.
5. Can I recover deleted edits in Google Photos?
If you accidentally delete an edited version of your photo, you can often recover it from the Trash folder in Google Photos within 30 days of deletion. After that period, the photo will be permanently removed.
15. Using Google Photos Editor for Social Media
In the era of social media, having eye-catching images is vital. The Google Photos editor is especially useful for creating polished images that can help you stand out on platforms like Instagram, Facebook, and Twitter. When you upload pictures, consider the demographic of your audience and tailor your edits accordingly. For instance, vibrant colors might work well for a youthful audience, while a more muted palette might appeal to a professional one.
To create a cohesive Instagram feed, you could establish a color palette or style that you consistently apply. This can be achieved by using the same filters and adjustments across your posts. Moreover, the editor’s cropping tools can help you perfectly size your images for different platforms while ensuring that the focus remains on your subject. (See: Latest updates on Google Photos.)
Another tip is to use the text feature to create engaging captions or quotes that add context to your images. This not only engages your followers but can also enhance the overall aesthetic of your posts, making them more shareable.
16. Statistics and Trends in Photo Editing
According to recent studies, over 80% of smartphone users regularly edit their photos before sharing them on social media. This trend highlights the importance of user-friendly editing tools, like those found in the Google Photos editor. Additionally, research indicates that images with bright colors and high contrast tend to receive 20% more engagement on social media platforms, emphasizing the effectiveness of the editing features available in Google Photos.
Moreover, as photography continues to evolve, the demand for advanced editing capabilities is on the rise. A survey conducted in 2023 showed that 70% of users prefer apps that combine photo storage and editing capabilities, supporting the comprehensive offerings of Google Photos. As more people turn to mobile photography, the editor’s tools play a crucial role in helping users create visually appealing content.
17. Common Mistakes to Avoid When Editing
Even the best editors can fall prey to common editing mistakes. Here are a few to watch out for when using the Google Photos editor:
- Overusing Filters: While filters can add flair, using them excessively can make photos look artificial. Aim for subtle enhancements that maintain the photo’s authenticity.
- Ignoring Composition: No matter how powerful your edits are, if the composition is poor, the image won’t shine. Always consider the arrangement of elements in your photo before applying edits.
- Neglecting the Original: With the ease of saving edited photos, it can be tempting to rely solely on edits. Regularly reviewing the original can provide insights into how your editing decisions impact the final product.
- Forgetting About Mobile Users: If you’re sharing images on social media, remember that many users will view your content on mobile devices. Ensure your edits look great on smaller screens.
18. The Future of Photo Editing with Google Photos
As technology continues to evolve, the Google Photos editor is likely to integrate more advanced features driven by AI and machine learning. Future updates may include enhanced automation that learns your editing preferences, streamlining your workflow. You might even see features that predict the best edits based on the content of your images.
Additionally, as the demand for video content increases, Google Photos may expand its editing capabilities to include video editing tools. This would allow users to create compelling video stories alongside their photo collections, making the platform even more versatile.
Staying updated with these advancements will help you take full advantage of the platform, ensuring your editing skills remain sharp and relevant in the ever-changing digital landscape.
In summary, the Google Photos editor offers a comprehensive suite of tools that cater to all levels of photo editing. Whether you’re performing basic adjustments or exploring advanced features like text and drawing, you can create stunning images that reflect your personal style. With a little practice and the right techniques, you can take your photo editing skills to the next level and make every memory shine.
“`
Trending Now
Frequently Asked Questions
How do I start editing photos in Google Photos?
To start editing photos in Google Photos, select an image from your library and click the 'Edit' button, represented by a pencil icon. This will open the Google Photos editor, where you can access various editing tools like 'Adjust', 'Filters', and 'Crop' to enhance your images.
What editing features does Google Photos offer?
Google Photos offers a range of editing features including adjustments for brightness, contrast, and saturation, various filters to enhance your images, and cropping tools for framing your photos. The intuitive layout allows users of all skill levels to easily navigate these options.
Is Google Photos free to use for editing?
Yes, Google Photos is free to use, offering 15GB of storage for photo uploads. While editing features are included at no cost, keep in mind that you may need to manage your storage efficiently. Additional storage can be purchased through Google One if needed.
Can I access Google Photos on my computer?
Absolutely! You can access Google Photos on your computer by visiting the Google Photos website. This allows you to upload and edit photos just like you would on the mobile app, making it convenient to use across different devices.
Is Google Photos easy to use for beginners?
Yes, Google Photos is designed to be user-friendly and accessible for beginners. The editing tools are clearly laid out, allowing new users to quickly familiarize themselves with features, making it easy to edit and enhance photos without any prior experience.
What did we miss? Let us know in the comments and join the conversation.