How to use Trello for beginners
Ever felt like your to-do list is less a helpful guide and more a chaotic scribble on a napkin? You’re not alone. In a world brimming with distractions and competing priorities, keeping track of tasks, projects, and even simple ideas can feel like a Herculean effort. That’s where a tool like Trello comes in. For beginners, Trello can seem like just another app to learn, but it’s really a surprisingly intuitive and powerful visual way to organize just about anything. It’s built on the Kanban system, a method developed by Toyota for visualizing workflow, and it’s fantastic for both personal task management and complex team projects. Think of it as a digital whiteboard filled with sticky notes, but infinitely more versatile and accessible from anywhere. It’s truly a game-changer for anyone looking to get a handle on their work and life.
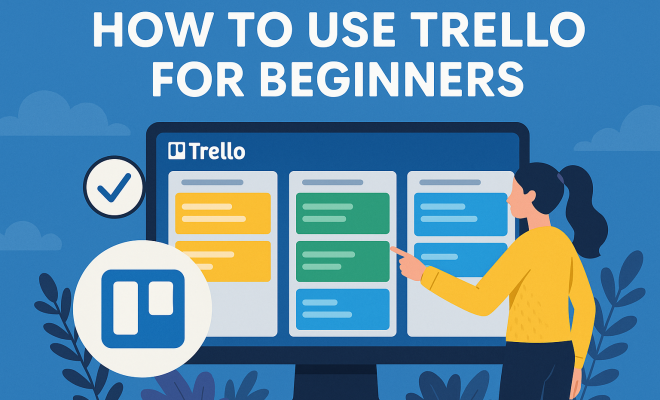
Before we dive into the nitty-gritty of how to use Trello for beginners, let’s talk about why it’s so popular. The beauty of Trello lies in its simplicity. You’ve got boards, which are essentially your projects; lists, which represent stages of a workflow; and cards, which are individual tasks or ideas. This visual structure makes it incredibly easy to see what needs to be done, what’s in progress, and what’s completed, all at a glance. Whether you’re planning a wedding, managing a software development sprint, or just trying to remember to pick up groceries, Trello offers a flexible framework. The learning curve is gentle, which is a huge plus for anyone just starting out. You don’t need to be a project management guru to get value out of it, and that’s precisely why it’s such a powerful tool for beginners.
1. Understanding the Core Components: Boards, Lists, and Cards
To truly grasp Trello for beginners, you first need to get comfortable with its fundamental building blocks: boards, lists, and cards. Imagine a physical whiteboard. That whiteboard is your Trello ‘board.’ You might have a board for ‘Marketing Campaign Q3,’ another for ‘Personal To-Do,’ and perhaps one for ‘Home Renovation Project.’ Each board is a dedicated space for a specific project or area of your life. They keep everything neatly segmented, preventing that overwhelming feeling of a single, endless to-do list.
Now, on that physical whiteboard, you’d probably draw vertical lines to create columns, right? In Trello, these columns are called ‘lists.’ Lists represent stages in a workflow or categories of tasks. Common lists you’ll see are ‘To Do,’ ‘Doing,’ and ‘Done,’ which perfectly illustrate the flow of work from start to finish. But you’re not limited to these. You could have ‘Ideas,’ ‘Backlog,’ ‘In Progress,’ ‘Review,’ ‘Blocked,’ or even ‘Recipes to Try.’ The flexibility here is immense, allowing you to tailor your lists to precisely match your process, whether it’s for a creative project, customer support tickets, or planning your next vacation.
Finally, the ‘sticky notes’ you’d put on your whiteboard? Those are Trello ‘cards.’ Each card represents an individual task, an idea, a piece of information, or an item that needs attention. A card might be ‘Write blog post on Trello tips,’ ‘Research competitor pricing,’ or ‘Buy milk and eggs.’ The beauty of cards is that they are highly detailed containers. Click on a card, and it expands to reveal a wealth of information and functionality. This hierarchical structure—boards containing lists, and lists containing cards—is the backbone of Trello and makes organizing complex information incredibly manageable for beginners.
2. Creating Your First Board and Adding Lists: Your Digital Workspace
Ready to jump in? Let’s create your very first Trello board. Once you’ve signed up and logged in, you’ll usually see an option like ‘Create new board.’ Give your board a clear, descriptive title, something like ‘My First Project’ or ‘Personal Task Tracker.’ You can also choose a background, which is a small but nice touch to personalize your workspace and differentiate between boards at a glance. Don’t overthink this step; you can always change the title and background later. The goal here is just to get a dedicated space set up for whatever you want to manage. See also improve your IT project management.
With your board created, it’ll look a little empty, like a blank canvas. Now it’s time to add your first lists. Remember, lists define the stages or categories of your work. For a simple personal task board, start with ‘To Do,’ ‘Doing,’ and ‘Done.’ To add a list, you’ll see an ‘Add another list’ button. Just type in the name and hit enter. Repeat this for each list you want. If you’re managing content creation, you might have ‘Ideas,’ ‘Drafting,’ ‘Editing,’ ‘Scheduled,’ and ‘Published.’ For a product development team, it could be ‘Backlog,’ ‘Sprint Current,’ ‘Testing,’ and ‘Deployed.’ (See: Learn about the Kanban system.)
The power here is in visualizing your workflow. By having these distinct stages, you can easily see where every task stands. Tasks move from left to right as they progress, providing a clear visual representation of work flowing through your system. This simple act of defining your lists is a crucial step in setting up Trello for beginners because it forces you to think about the natural progression of your tasks and projects, making organization much more effective.
3. Populating Your Board with Cards: The Heart of Your Tasks
Once you have your lists, it’s time to fill them with individual tasks – your cards. This is where the real work of organizing begins. Think about everything you need to accomplish related to this board’s purpose. For our ‘Personal Task Tracker’ example, under ‘To Do,’ you might add cards like ‘Schedule dentist appointment,’ ‘Research new laptop,’ ‘Plan weekend trip,’ and ‘Finish reading Trello guide.’ To add a card, just click ‘Add a card’ at the bottom of any list, type in your task, and press Enter. It’s that simple.
The real magic of cards, however, comes when you click on them. Each card opens up to reveal a detailed ‘back’ where you can add all sorts of information. This is where you transform a simple task title into a comprehensive work item. You can add a detailed description of the task, attach files (documents, images, links), create a checklist of sub-tasks (perfect for multi-step items like ‘Plan weekend trip’ which might have sub-tasks for ‘Book flights,’ ‘Find accommodation,’ ‘Create itinerary’), set due dates, and even assign members if you’re working with a team.
Getting into the habit of adding comprehensive details to your cards is a crucial step for Trello for beginners. It ensures that all the necessary information for a task is in one place, reducing the need to hunt through emails or other documents. When a task is ready to move to the next stage, simply drag and drop the card from one list to another. This incredibly intuitive drag-and-drop functionality is what makes Trello so visually appealing and easy to use, providing instant feedback on your progress.
4. Leveraging Card Details: Descriptions, Checklists, and Due Dates
Don’t just rely on the card’s title; the power of Trello for beginners truly shines when you dig into the card’s details. Think of the card description as a mini-brief for the task. This is where you’d put any background information, specific instructions, links to relevant documents, or context that someone (even future you!) might need to complete the task. Be as clear and concise as possible. A good description can prevent confusion and save a lot of back-and-forth communication.
Checklists are another incredibly valuable feature within cards. For tasks that involve multiple steps, a checklist breaks down the larger task into manageable sub-tasks. For example, a card titled ‘Launch New Feature’ might have a checklist with items like ‘Develop backend logic,’ ‘Design UI elements,’ ‘Write user documentation,’ ‘Perform QA testing,’ and ‘Announce to users.’ As you complete each sub-task, you check it off, and Trello shows your progress with a percentage bar, which is incredibly satisfying and motivating. You can even add multiple checklists to a single card if needed, say one for ‘Development Steps’ and another for ‘Marketing Steps.’
Finally, due dates are essential for time management. Trello lets you set a specific date and time for when a card should be completed. As the due date approaches, Trello will give you visual cues: yellow for upcoming, red for overdue. You can also set reminders, so you’ll get a notification before the deadline hits. This is fantastic for personal accountability and for keeping team projects on track. For beginners using Trello, getting into the habit of adding detailed descriptions, comprehensive checklists, and realistic due dates will significantly boost your organizational prowess and ensure nothing slips through the cracks.
5. Collaborating with Team Members: Sharing the Load
While Trello is excellent for personal use, its collaborative features truly make it shine for teams. If you’re working with others, inviting them to your board is the first step. You can invite team members by their email address or Trello username. Once they accept, they become ‘members’ of the board and can view, edit, and interact with cards, lists, and the board itself, depending on their permissions. This shared workspace eliminates the need for endless email chains or fragmented communication about task statuses. (See: Technology and health management.)
Assigning cards to specific team members is a core collaborative function. On the back of any card, you’ll see an ‘Members’ option. Click it, and you can select who is responsible for that particular task. Their profile picture (or initial) will appear on the front of the card, making it immediately clear who owns what. This promotes accountability and helps everyone understand their responsibilities at a glance. Imagine a content marketing board: one person might be assigned to ‘Write Blog Post,’ another to ‘Edit Blog Post,’ and a third to ‘Promote on Social Media.’
Beyond assigning, team members can also comment on cards. This is a powerful feature for discussions, asking questions, providing updates, or giving feedback directly related to a specific task. All comments are time-stamped, creating a transparent and easily searchable history of communication. For beginners using Trello in a team setting, mastering these collaboration tools – inviting members, assigning cards, and using comments – will transform how your team communicates and executes projects, making it a truly centralized hub for all project-related interactions.
6. Labels and Filters: Categorizing and Finding What You Need
As your Trello boards grow, you’ll find yourself with dozens, maybe hundreds, of cards. This is where labels and filters become indispensable tools for organization and navigation, especially for Trello for beginners who might feel overwhelmed by a busy board. Labels are essentially color-coded tags that you can apply to cards. They’re incredibly flexible and can represent anything you want: priority levels (e.g., Red for ‘Urgent,’ Yellow for ‘High,’ Green for ‘Low’), types of tasks (e.g., ‘Marketing,’ ‘Development,’ ‘Design,’ ‘Admin’), or even different clients or projects within a single board. Related reading: top whiteboards for educators.
To use labels, open a card, click ‘Labels,’ and then you can either select from existing labels or create new ones. Give each label a meaningful name. For instance, on a personal board, you might have labels for ‘Work,’ ‘Personal,’ ‘Errands,’ and ‘Learning.’ Once applied, the colored stripe of the label appears on the front of the card, providing a quick visual cue about its category. This visual categorization is incredibly powerful; you can scan a board and instantly grasp the nature of the tasks without even opening the cards.
Filters take labels (and other card attributes) to the next level. The ‘Filter’ option at the top of your board allows you to temporarily hide all cards that don’t match specific criteria. Want to see only ‘Urgent’ tasks? Apply the ‘Urgent’ label filter. Need to see only tasks assigned to ‘Sarah’? Filter by member. Or perhaps you want to see only cards with a due date in the next 7 days. You can combine filters too, for example, showing only ‘Urgent’ tasks assigned to ‘Sarah.’ This ability to quickly narrow down your view to exactly what you need is a massive time-saver and a critical skill for beginners to master in Trello to manage information overload.
7. Power-Ups and Integrations: Expanding Trello’s Capabilities
While Trello’s core functionality is robust, ‘Power-Ups’ are where it truly becomes a customizable powerhouse. Think of Power-Ups as add-ons or plugins that extend Trello’s features and integrate with other services you already use. For beginners, it’s wise not to overdo it at first, but understanding their existence and potential is key. Some popular Power-Ups include Calendar, which displays all your cards with due dates on a calendar view; Google Drive, allowing you to attach files directly from Drive; and Slack, which lets you create Trello cards from Slack messages or get updates in Slack when Trello cards change. (favorite project management apps)
The free tier of Trello typically allows one Power-Up per board, which is a great way for beginners to experiment. As you get more comfortable and your needs grow, paid plans offer unlimited Power-Ups. The range is vast, covering everything from reporting and automation to CRM and communication tools. Want to track the time spent on tasks? There are Power-Ups for that. Need to visualize project timelines? Gantt chart Power-Ups are available. The marketplace is extensive, and new ones are constantly being developed. (See: How to use Trello effectively.)
Integrating Trello with your existing tech stack through Power-Ups means you don’t have to jump between multiple apps as much. It centralizes more of your workflow. For instance, if your team uses Salesforce, you can find a Power-Up that links Trello cards to Salesforce records. This connectivity makes Trello a more central hub for project management, bringing relevant information and actions directly to your boards. Exploring Power-Ups is an exciting next step for Trello beginners who are ready to customize their workflow beyond the basics.
8. Keyboard Shortcuts and Automation: Efficiency Boosters
Once you’re comfortable with the basics, mastering a few keyboard shortcuts can dramatically speed up your Trello workflow. For Trello beginners, this might seem like an advanced topic, but even learning a handful can make a big difference. For example, pressing ‘Q’ will filter cards assigned to you, ‘C’ will archive a card, and ‘D’ will open the due date picker. Pressing ‘?’ (Shift + /) on any board will bring up a full list of available shortcuts, so you don’t need to memorize them all at once. Just picking up one or two shortcuts that you use frequently can save you precious seconds throughout the day.
Beyond shortcuts, Trello offers some basic automation features, particularly through the built-in Butler Power-Up (which is often included for free, even on basic plans, for a certain number of commands). Butler allows you to create rules that automate repetitive actions. For instance, you could set up a rule that automatically moves a card to the ‘Done’ list when all its checklist items are completed. Or, when a card is moved to the ‘In Progress’ list, Butler could automatically assign it to a specific team member and set a due date five days from now.
These automation rules can save an incredible amount of manual effort and ensure consistency across your boards. For Trello beginners, starting with simple automations, like moving cards between lists based on status or adding a checklist template to new cards, can be an excellent way to dip your toes into the world of workflow optimization. As you become more proficient, you can create more complex rules and even schedule commands to run at specific times, transforming Trello from a static organizer into a dynamic workflow engine that works harder for you.
Trello is much more than just a digital to-do list; it’s a versatile visual workspace that can adapt to almost any organizational need. From managing personal projects and household chores to coordinating complex team initiatives, its intuitive interface and powerful features make it an invaluable tool. For beginners, the key is to start simple, get comfortable with boards, lists, and cards, and then gradually explore the deeper functionalities like labels, due dates, collaboration, and Power-Ups. Don’t be afraid to experiment and customize your boards to fit your unique workflow. The more you use it, the more you’ll discover how Trello can truly help you visualize, organize, and accomplish your goals with greater clarity and efficiency.
Trending Now
Frequently Asked Questions
What is Trello and how does it work?
Trello is a visual project management tool that uses boards, lists, and cards to help you organize tasks and projects. Boards represent projects, lists indicate stages of a workflow, and cards are individual tasks or ideas. This intuitive system allows users to easily track progress and manage workloads, making it suitable for both personal and team projects.
How do I get started with Trello?
To get started with Trello, sign up for a free account and create your first board. From there, you can add lists to represent different stages of your project and create cards for individual tasks. Familiarize yourself with the drag-and-drop functionality to move cards between lists as tasks progress, making it simple to visualize your workflow.
What are the main features of Trello?
Trello's main features include boards for organizing projects, lists for tracking stages of tasks, and cards for individual tasks or ideas. Additional features like due dates, checklists, labels, and attachments enhance task management. Trello also allows collaboration with team members, making it a versatile tool for both personal and team projects.
Can Trello be used for personal tasks?
Yes, Trello is ideal for personal task management. You can create boards for various aspects of your life, such as grocery lists, travel planning, or event organization. Its visual layout helps you prioritize and track tasks easily, making it a great tool for anyone looking to stay organized in their personal life.
Is Trello easy to learn for beginners?
Absolutely! Trello is designed with beginners in mind, featuring a gentle learning curve. Its simple structure of boards, lists, and cards makes it easy to understand and use. You don't need prior project management experience to benefit from Trello, making it accessible for anyone looking to improve their organization skills.
Have you experienced this yourself? We'd love to hear your story in the comments.