Set Up Your NVR System: A Step-by-Step Guide
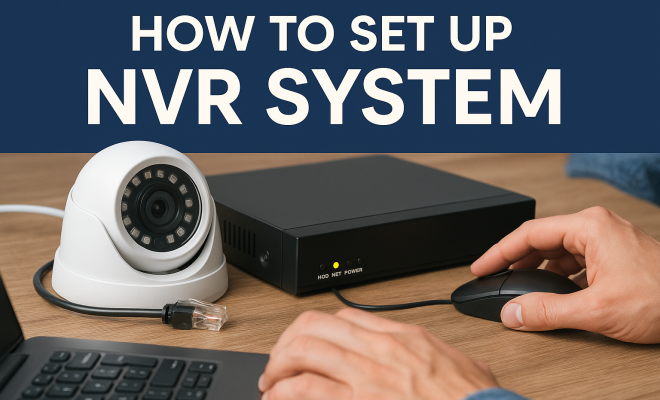
“`html
Setting up an NVR (Network Video Recorder) system can seem like a daunting task, especially if you’re new to surveillance tech. However, with the right guidance and a step-by-step approach, you can efficiently install an NVR system that meets your security needs. In this article, we’ll break down the NVR system setup process into nine essential steps that will help you understand how to optimize your home or business security.
1. Understanding What an NVR System Is
Before diving into the setup process, it’s crucial to understand what an NVR system entails. An NVR is a specialized computer system that stores and manages video footage from IP cameras. Unlike traditional DVR systems that connect to analog cameras, NVRs work exclusively with digital cameras, offering higher resolution video and more flexibility in camera placement.
The primary function of an NVR is to record, store, and allow for easy retrieval of video footage. This is invaluable in security applications, where having reliable and accessible video evidence can be critical. NVR systems can also support features like remote viewing, motion detection alerts, and flexible storage options, making them a popular choice for both residential and commercial properties.
2. Choosing the Right NVR for Your Needs
Not all NVR systems are created equal, so selecting the right one for your specific requirements is essential. Consider the number of cameras you plan to use; some NVRs can support up to 64 cameras, while others may only handle 4. Additionally, think about the storage capacity you’ll need based on how long you want to retain footage.
Look for NVRs that offer features like high definition recording (1080p and above), PoE (Power over Ethernet) support for easy installation, and user-friendly software for accessing and managing your footage. Some popular brands like Hikvision, Dahua, and Synology provide a range of options depending on your budget and feature needs.
3. Gathering Necessary Equipment
Once you’ve chosen your NVR, it’s time to gather additional equipment needed for the setup. Essential components typically include the NVR itself, IP cameras, Ethernet cables, a network switch (if required), a monitor for viewing footage, and a mouse for navigation. Don’t forget about storage drives; many NVRs allow you to add internal hard drives to accommodate more footage.
In addition to the hardware, ensure you have the right tools for installation, like screwdrivers and cable ties, as well as a computer for configuring the system. Having everything on hand before you start will streamline the setup process and prevent unnecessary delays.
4. Planning Your Camera Placement
Effective camera placement is critical to the success of your NVR system setup. Take time to identify all potential blind spots and areas where security is paramount. Consider factors such as lighting conditions, camera angles, and coverage area to ensure that each camera will capture clear, actionable footage.
It’s often a good practice to start by marking out your intended camera locations. Use temporary markers or tape to indicate where you’ll install the cameras. Remember to adhere to any local laws regarding surveillance and privacy to avoid potential legal issues down the line.
5. Connecting Your NVR and Cameras
With your cameras mapped out, it’s now time to connect them to your NVR. Start by wiring the cameras to the NVR using Ethernet cables. If your NVR supports PoE, you can use a single cable for both power and data transmission, simplifying the installation process. (See: Understanding Network Video Recorders.)
Once connected, power on your NVR and cameras. You should see indicators lighting up on both the NVR and the cameras, signifying they are powered and operational. Make sure to check that each camera is recognized in the NVR’s interface during the initial setup to confirm successful connections.
6. Configuring the Network Settings
After physically connecting the cameras and NVR, the next step involves configuring the network settings. Connect your NVR to your router using a network cable. This will allow you to access your cameras remotely and receive alerts.
Access the NVR’s settings menu, typically through a web interface or dedicated software. Configure the IP addresses, ensuring each camera has a unique address to avoid conflicts. Make sure to set up the appropriate network protocols, such as DHCP or static IP, depending on your network needs.
7. Setting Up Recording Options
With the network configurations in place, you can now set up your recording options. Decide on the type of recording you want: continuous, scheduled, or motion-based. Continuous recording captures footage around the clock, while motion-based recording only activates when movement is detected, saving storage space.
Set the resolution and frame rate for each camera, as higher settings will consume more storage. It’s worth noting that most NVRs allow you to customize settings per camera, so tailor each configuration based on the specific environment and requirements of each location.
8. Testing Your System
Once you have configured all the settings, it’s time to test your NVR system. Walk in front of each camera to ensure they all detect motion, and check that the footage is being recorded correctly. Access the NVR interface to view live feeds and review recorded footage to ensure everything is functioning as intended.
Additionally, test remote access features to confirm you can view your cameras from a smartphone or computer. This step is crucial for ensuring you can monitor your property from anywhere, adding an essential layer of convenience and security.
9. Regular Maintenance and Updates
After a successful setup, don’t forget that ongoing maintenance is key to keeping your NVR system running smoothly. Regularly check for software updates, as manufacturers often release patches that improve performance and security. Ensure your storage drives are functioning properly and have enough space for your recording requirements.
Consider periodic testing of camera angles and settings to make sure your coverage remains effective. By maintaining your NVR system, you’ll guarantee that your security setup remains reliable and effective for years to come.
10. Advanced Features of NVR Systems
Once you have your basic NVR system set up, you might want to explore some advanced features that can enhance your surveillance setup. Many modern NVR systems offer capabilities like facial recognition, license plate recognition, and smart analytics. These features can provide a higher level of security and can help you to respond more effectively to incidents.
For example, facial recognition technology can help identify individuals on your property, which is especially useful for businesses that may need to manage employee or visitor access. Likewise, license plate recognition can be vital for monitoring vehicles entering and leaving premises, giving you insight into traffic flow and helping to secure your property further.
11. Understanding Storage Options
Storage is a vital aspect of your NVR system setup. When it comes to storage, you have a few options to consider. Most NVR systems come with built-in storage, but you can also add external hard drives or cloud storage, depending on your needs. (See: National Institute of Standards and Technology.)
Hard drives generally allow for extensive storage but can be costly if you require a significant amount of space. Cloud storage, on the other hand, offers flexibility and can be scaled according to your requirements. However, it may be subject to subscription fees. Evaluating the pros and cons of each storage solution is essential to ensure you have a reliable system that meets your needs.
12. Integration with Other Security Systems
Many businesses and homeowners benefit from integrating their NVR systems with other security solutions like alarm systems, access control, or home automation. This integration can provide a comprehensive security infrastructure that enhances your overall protection strategy.
For example, linking your NVR with a smart alarm system can trigger recording when an alarm is activated, allowing for immediate evidence collection. Also, integrating with home automation systems will enable you to control cameras and receive alerts based on specific conditions, enhancing both convenience and security.
13. Troubleshooting Common Issues
Even with a well-planned setup, you may encounter some common issues with your NVR system. Here are a few troubleshooting tips:
- Camera Not Detected: Ensure the camera is powered on and properly connected. Check the network settings to confirm the camera’s IP address.
- Recording Issues: If footage isn’t recording, check the storage capacity and ensure your recording settings are active.
- Network Connectivity Problems: Test the Ethernet connection and router settings. A simple restart of the NVR and router often resolves connectivity issues.
Documenting common issues and solutions can help you maintain a reliable system and minimize downtime.
14. Security Best Practices for NVR Systems
Securing your NVR system is just as important as setting it up properly. Here are some best practices to protect your system:
- Change Default Passwords: Always change default login credentials to something more secure to prevent unauthorized access.
- Regularly Update Software: Keep your NVR firmware and software updated to protect against vulnerabilities.
- Implement Network Security: Use a firewall and consider placing your NVR on a separate VLAN for added security.
By following these practices, you can significantly enhance the security of your NVR setup.
15. Frequently Asked Questions (FAQ)
What is the difference between an NVR and a DVR?
DVRs (Digital Video Recorders) are designed primarily for analog camera systems, while NVRs (Network Video Recorders) work with IP cameras, providing better quality and more flexible installation options.
How many cameras can I connect to my NVR?
The number of cameras an NVR can support varies by model. Some entry-level models support 4 cameras, while more advanced systems can accommodate up to 64 cameras or more.
Can I access my NVR remotely?
Yes, most NVR systems allow for remote access via a web interface or a mobile app, enabling you to monitor your cameras from anywhere with an internet connection. (See: CDC on workplace violence prevention.)
How much storage do I need for my NVR system?
The amount of storage you need depends on factors like the number of cameras, the resolution of the footage, and how long you want to retain recordings. A general rule is to estimate around 1TB of storage for every 4 cameras recording continuously at 1080p for one month.
What should I do if I experience connectivity issues with my NVR?
Start by checking your network cables and connections. Restart both your NVR and router. If problems persist, check the configuration settings and ensure your network is functioning properly.
16. Understanding Network Requirements
Before you set up your NVR system, it’s important to understand the network requirements to ensure smooth operation. NVRs and IP cameras rely heavily on network bandwidth, especially when streaming high-definition video. Here’s what you need to keep in mind:
- Bandwidth Considerations: Each IP camera typically requires between 1-5 Mbps of bandwidth, depending on the resolution and frame rate. Calculate your total bandwidth needs by adding up the requirements of all your cameras. It’s advisable to have at least 20% more bandwidth available than what your calculations suggest to account for fluctuations.
- Wired vs Wireless: While wireless cameras offer flexibility, they can suffer from interference and connectivity issues. For a more reliable connection, especially for high-resolution feeds, wired connections using Ethernet cables are recommended.
- Router Compatibility: Ensure your router can handle the load. Look for routers that support Quality of Service (QoS) settings to prioritize video traffic, helping to reduce latency and improve overall performance.
17. Choosing IP Cameras: Key Features to Look For
When selecting IP cameras for your NVR system, consider features that can enhance security and user experience:
- Resolution: Choose cameras with at least 1080p resolution for clear video quality. 4K cameras are also available for environments requiring high detail.
- Night Vision: Look for cameras with infrared capabilities for nighttime surveillance. This feature ensures visibility even in complete darkness.
- Field of View: A wider field of view allows a single camera to cover more area. Cameras with adjustable lenses can be fine-tuned for specific needs.
- Weather Resistance: For outdoor installations, ensure your cameras are rated for outdoor use (IP65 or higher) to withstand environmental factors.
18. Future-Proofing Your NVR System
As technology evolves, you may want to upgrade your NVR system down the line. Here are some tips for future-proofing your setup:
- Scalability: Choose an NVR that supports additional cameras and higher storage capacities. This will allow you to expand your system as your security needs grow without having to replace the entire system.
- Compatibility with New Technologies: Select an NVR and cameras that are compatible with new technologies, such as AI analytics or smart home integrations.
- Regularly Evaluate Your Needs: As your property or business evolves, so will your security requirements. Periodically assess your system to ensure it continues to meet your needs.
19. Real-Life Case Studies
Understanding how NVR systems have been successfully implemented can provide valuable insights. Here are a couple of examples:
- Retail Store Security: A local retail store installed a 16-camera NVR system to monitor high-traffic areas and deter theft. By utilizing motion-triggered recording, they were able to save storage space while ensuring they captured all relevant activities. The store reported a 30% decrease in theft incidents following installation.
- Home Security: A homeowner installed an NVR system with four IP cameras, focusing on entry points and outdoor areas. After experiencing a break-in, they used the recorded footage to provide law enforcement with crucial evidence, which led to the recovery of stolen property and the arrest of the suspect.
20. Conclusion
In summary, mastering the NVR system setup involves understanding the technology, choosing the right equipment, and following a structured installation process. By completing each of these steps, you will establish a comprehensive security system that not only protects your property but also provides peace of mind. It’s not just about installation; it’s also about ongoing management, maintenance, and future-proofing your system to adapt to ever-evolving security needs.
“`
Trending Now
Frequently Asked Questions
What is an NVR system?
An NVR, or Network Video Recorder, is a specialized computer system designed to store and manage video footage from IP cameras. Unlike DVRs that work with analog cameras, NVRs handle digital cameras, providing higher resolution video and more flexible camera placement options.
How do I choose the right NVR for my needs?
To choose the right NVR, consider the number of cameras you plan to use and the storage capacity you need. Look for features like high-definition recording, PoE support, and user-friendly software. Brands like Hikvision and Dahua offer a variety of options to fit different budgets and requirements.
What are the benefits of using an NVR system?
NVR systems provide several benefits, including higher resolution video quality, flexible camera placement, remote viewing capabilities, and motion detection alerts. They also offer flexible storage options, making them a popular choice for both residential and commercial security needs.
Can I access my NVR system remotely?
Yes, most NVR systems offer remote access features, allowing you to view live feeds and recorded footage from anywhere via a smartphone or computer. This capability enhances security by enabling real-time monitoring of your property.
What features should I look for in an NVR?
When selecting an NVR, look for features such as high-definition recording capabilities, support for multiple cameras, user-friendly software, PoE compatibility, and options for motion detection alerts. These features can significantly enhance your surveillance experience.
What did we miss? Let us know in the comments and join the conversation.