Power Your Arduino Projects: A Comprehensive Guide
“`html
When embarking on your journey with Arduino projects, one of the first and most critical decisions you’ll face is how to power your setup. Whether you’re building a simple LED circuit or a complex robotic system, understanding the various methods of powering your Arduino can make or break your project. This comprehensive guide will explore key aspects of powering Arduino projects, offering insights into options that suit diverse needs, from hobbyists to professionals.
1. Understanding Arduino Power Requirements
Before diving into the various ways to power your Arduino projects, it’s essential to grasp the power requirements of your specific Arduino board. Most Arduino boards operate at a voltage of around 5 volts, but this can vary based on the model. For instance, the Arduino Uno and Nano typically require 5 volts, while the Arduino Mega can be powered by a 7-12 volts input through its barrel jack.
Understanding current consumption is equally important. Some projects may have minimal energy needs, while others, like those involving motors or sensors, might demand more power. As a general rule, aim to provide a power supply that meets or slightly exceeds the voltage and current specifications of your board to ensure stable operation.
2. Common Power Supply Options
For your Arduino projects, various power supply options are available, each with its pros and cons. Here are some of the most common:
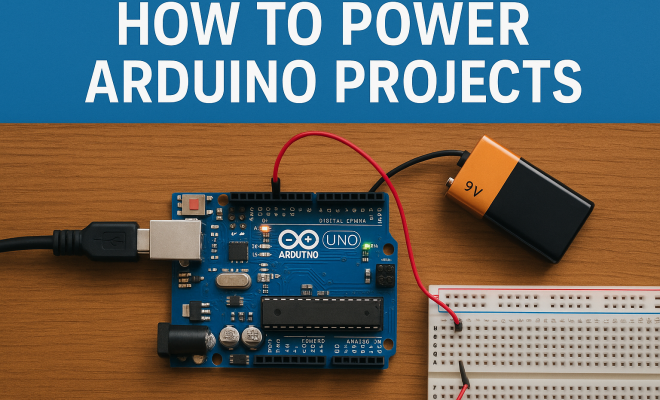
- USB Power: The easiest way to power your Arduino is through a USB connection to your computer or a USB wall adapter. This option provides a stable 5V supply and is perfect for prototyping.
- DC Barrel Jack: Most Arduino boards come with a barrel jack for external power supply. This method allows you to use batteries or a wall adapter, with input voltage typically ranging from 7 to 12 volts.
- Batteries: If portability is key for your project, consider battery power. Options include AA batteries, 9V batteries, or even lithium-polymer (LiPo) batteries. Just be sure to use a voltage regulator if necessary.
- Power Banks: A newer trend involves using USB power banks, offering a reliable and portable solution for powering Arduino projects on the go.
3. Battery-Powered Arduino Projects
Battery power is a popular choice for many Arduino projects, especially those requiring mobility. When selecting batteries, you’ll need to consider both voltage and capacity.
For example, if you opt for AA batteries, you can configure them in series to achieve the required voltage. A battery pack made up of six AA batteries provides 9 volts, which is suitable for most Arduino boards. However, keep in mind the trade-off between weight and power capacity, especially for larger projects.
Lithium-polymer (LiPo) batteries offer another excellent option, commonly found in drones and portable devices. They are lightweight, rechargeable, and available in various capacities, making them ideal for compact projects. However, they require a specific charger and care in handling due to their sensitivity.
4. Using External Power Supplies
External power supplies, such as wall adapters, can be a perfect solution for projects that need continuous power without the hassle of changing batteries. When using a DC power supply, make sure the output voltage is within the safe operating range for your Arduino board.
When selecting an adapter, consider its current rating. Ideally, you want an adapter that can provide more current than your project requires. For example, if your project needs 500mA, choosing an adapter rated for 1A would ensure reliable operation.
Additionally, take care to use a regulated power supply to safeguard your Arduino from voltage spikes or drops, as these can damage your board over time.
5. Powering Arduino with Solar Energy
Solar power is an exciting and sustainable option for powering Arduino projects, especially those deployed outdoors. By integrating a solar panel into your design, you can harness the sun’s energy to keep your project running without reliance on traditional power sources. (See: Research on power supply efficiency.)
When considering solar power, you’ll need a suitable solar panel and a charge controller to regulate the voltage and charging of a connected battery. A small solar panel (around 5V) can work well for powering basic projects, but for more demanding setups, you may require a larger panel and a more robust battery system.
Using solar energy not only makes your Arduino project more eco-friendly but also adds an element of technology that many enthusiasts find appealing. It’s a perfect opportunity to experiment with renewable energy in your DIY electronics.
6. Voltage Regulation and Protection
When powering your Arduino projects, voltage regulation is crucial to ensure stable operation. An unregulated power source may provide fluctuating voltage levels, which can lead to erratic behavior or even permanent damage to your board.
Consider using voltage regulators, which can help maintain a consistent voltage level. There are many types of voltage regulators, including linear and switching regulators, each serving different purposes depending on your project’s needs.
Additionally, incorporating protection circuits can safeguard against overvoltage and reverse polarity, which could result in costly damage. Diodes can be used to prevent reverse current flow, while fuses can protect against short circuits, ensuring your project remains safe and functional.
7. Considerations for Power Consumption
Understanding power consumption is vital when planning how to power your Arduino projects. High current draw can lead to quicker battery depletion and overheating components, so it’s essential to calculate the total current your project will use.
Many Arduino enthusiasts advocate for optimizing power consumption, especially for battery-operated projects. Techniques such as using sleep modes, reducing the brightness of LEDs, or turning off unused components can significantly extend battery life.
Tools like the Arduino IDE’s built-in power consumption calculator can help you estimate power needs and refine your design. Additionally, consider using components that are designed for low power consumption, which can make a significant difference in overall efficiency.
8. Real-World Applications and Examples
Power Arduino projects span countless applications, from simple automation systems to complex IoT devices. For instance, hobbyists often use Arduino boards to create smart garden systems that automatically water plants based on soil moisture levels, powered by battery or solar sources.
In robotics, Arduino can power sensors and motors, allowing for a range of functionalities. Using a rechargeable battery pack can make these robots mobile while also being sustainable. Similarly, remote weather stations using solar panels can continuously monitor conditions without needing direct power supply.
In the realm of home automation, Arduino can control lighting, heating, and security systems, often integrating with smart home technology. These projects typically employ wall adapters or power banks for reliable energy supply.
9. Future Trends in Arduino Power Solutions
As technology advances, the landscape of powering Arduino projects continues to evolve. Innovations in battery technology, such as solid-state batteries, promise greater efficiency and safety, potentially transforming how we approach power supply for embedded systems.
Moreover, the rise of energy harvesting technologies — from solar to kinetic energy — presents new opportunities to power Arduino projects sustainably. This trend aligns with the growing focus on green technology and sustainability, encouraging developers to think creatively about energy sources. (See: Power supply options for electronics.)
With the ongoing development of low-power components and efficient power management strategies, the future of powering Arduino projects looks promising. By staying informed about new technologies, you can enhance your projects’ capabilities and sustainability.
10. Best Practices for Powering Arduino Projects
Implementing best practices when powering your Arduino projects can drastically improve performance and reliability. Here are some guidelines to consider:
- Choose the Right Power Source: Depending on your project requirements, select the most suitable power source. For stationary projects, a wall adapter might be best, while portable projects could benefit from battery power.
- Monitor Power Levels: Incorporate monitoring tools to keep track of battery levels or voltage outputs. This can inform you if your power source is depleting or needs replacement.
- Utilize Sleep Modes: If your project allows it, use sleep modes to minimize power consumption during periods of inactivity, extending battery life significantly.
- Test Under Load: Always test your power supply setup under the expected load during development to ensure everything operates smoothly under actual conditions.
11. Comparison of Power Supply Types
To help you choose the right power source for your Arduino projects, here’s a quick comparison of common power supply types:
| Power Source | Voltage Output | Portability | Cost | Best For |
|---|---|---|---|---|
| USB Power | 5V | No | Low | Prototyping |
| DC Barrel Jack | 7-12V | No | Low to Moderate | Stationary projects |
| Batteries | Varies | Yes | Moderate | Mobile projects |
| Power Banks | 5V | Yes | Moderate | Portable projects |
| Solar Power | Varies | Yes | Varies | Outdoor projects |
12. Common FAQs about Powering Arduino Projects
Q: Can I power an Arduino with a 9V battery?
A: Yes, you can power an Arduino with a 9V battery, but it’s worth noting that they can have a limited lifespan depending on the current draw of your project. Continuous use with higher power components will deplete the battery quickly.
Q: What happens if I use the wrong voltage?
A: Using an incorrect voltage can damage your Arduino board. Always ensure that the power supply voltage is within the specifications for your specific board model.
Q: How do I connect multiple components to power my Arduino?
A: You can connect multiple components to your Arduino power supply by using a breadboard or by directly wiring them in parallel. Ensure that the total current draw does not exceed the power supply’s rating.
Q: Can I use rechargeable batteries for my Arduino projects?
A: Yes, rechargeable batteries are a great option for Arduino projects, but ensure they provide sufficient voltage and current. Lithium-ion or LiPo batteries are popular choices for portability and rechargeability.
Q: What are the signs that my Arduino is not receiving enough power?
A: If your Arduino is not receiving enough power, you might experience erratic behavior, components not functioning correctly, or the board resetting unexpectedly. A multimeter can be a useful tool to measure voltage output.
Q: Is it safe to leave my Arduino powered continuously?
A: Generally, it is safe to leave your Arduino powered continuously, especially if you’re using a regulated power supply. However, ensure that your components are rated for continuous use to prevent overheating.
Q: How can I extend battery life in my Arduino projects?
A: To extend battery life, consider using power-saving modes, optimizing code to reduce processing time, and choosing low-power components. Reducing the operational voltage can also help save power.
13. Advanced Power Management Techniques
For more complex Arduino projects, especially those that require longer operational times or have higher power demands, advanced power management techniques can be beneficial. Here are some strategies to consider:
- Dynamic Voltage Scaling: This technique involves adjusting the voltage supplied to components based on their current operation. By lowering the voltage during idle times, you can significantly reduce power consumption.
- Power Gating: This method allows you to cut off power to specific components when they’re not in use. By selectively powering down certain parts of your circuit, you conserve energy and extend battery life.
- Using Supercapacitors: Supercapacitors can store energy and provide bursts of power when needed. They can complement batteries by supplying extra power during peak demand or when transitioning between power sources.
- Energy Harvesting: Exploring ways to harvest energy from the environment, such as using piezoelectric sensors or thermoelectric generators, can provide supplementary power to your projects without relying solely on traditional batteries.
14. Powering Arduino Projects with IoT Integration
As IoT (Internet of Things) devices become more prevalent, understanding how to power these interconnected systems adds another layer of complexity to your Arduino projects. Many IoT devices need a reliable power source to maintain connectivity and functionality.
For instance, a weather station that sends data to the cloud may require consistent power to operate sensors and a wireless module. Consider using a combination of solar panels and rechargeable batteries to create a self-sustaining system. This setup not only powers your device but also ensures it can operate in remote or off-grid locations.
If your IoT projects require constant connectivity, using a low-power network protocol, such as LoRaWAN or Zigbee, can help manage energy consumption. These protocols allow devices to communicate over long distances while consuming less power than traditional Wi-Fi connections.
15. Community Resources and Support
The Arduino community is vast and active, offering a wealth of resources, tutorials, and forums for enthusiasts at all levels. If you’re ever in doubt about how to power your project or if you’re looking for new ideas, tapping into these community resources can be invaluable.
Websites like Arduino’s official forum, Instructables, and Hackster.io provide examples of projects that can inspire your own creations. These platforms often feature discussion threads that address common power-related issues, such as selecting the right battery or optimizing power consumption.
Joining local maker spaces or community workshops can also facilitate hands-on learning and problem-solving with like-minded individuals. Many communities host Arduino meetups, where you can collaborate with others, share your experiences, and learn new techniques to power your Arduino projects more effectively.
16. Conclusion
Powering your Arduino projects effectively requires understanding the various power sources available and how each option aligns with your project’s needs. By utilizing best practices, considering future trends, and staying informed about new technologies, you can ensure your projects are not only functional but also efficient and sustainable. Whether you choose solar power for outdoor applications or rely on batteries for portability, the right power solution can elevate your Arduino project to new heights.
“`
Trending Now
Frequently Asked Questions
What are the power requirements for Arduino boards?
Most Arduino boards, like the Uno and Nano, operate at 5 volts, while others, such as the Mega, can accept 7-12 volts through their barrel jack. It's essential to understand both voltage and current needs for stable operation in your projects.
How can I power my Arduino project?
You can power your Arduino project using several methods, including USB power from a computer, a DC barrel jack with a wall adapter or batteries, depending on your project's needs for portability and power.
What is the best way to power an Arduino?
The best way to power your Arduino depends on your project. For prototyping, USB power is convenient, while for mobile projects, battery options like AA or lithium-polymer batteries offer flexibility and portability.
Can I use a battery to power my Arduino?
Yes, batteries are a great option for powering Arduino projects, especially when portability is essential. You can use AA batteries, 9V batteries, or lithium-polymer batteries, ensuring they meet the required voltage for your specific board.
What are the advantages of using a DC barrel jack for Arduino?
Using a DC barrel jack to power your Arduino offers flexibility in using different power sources, such as batteries or wall adapters, with a voltage input typically ranging from 7 to 12 volts, making it suitable for various projects.
Agree or disagree? Drop a comment and tell us what you think.