How to connect sensors to Arduino
“`html
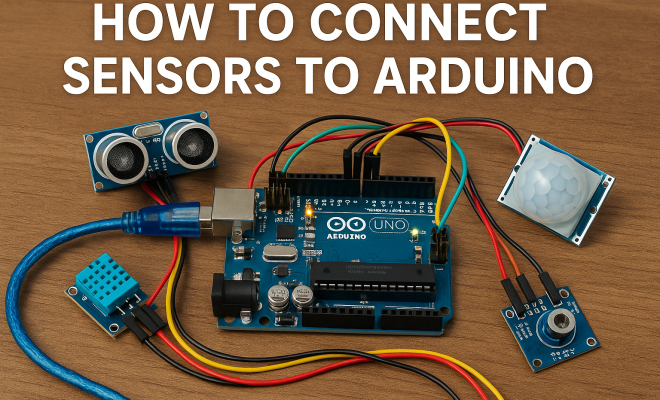
Connecting sensors to Arduino opens up a vast array of possibilities for hobbyists and professionals alike, transforming ideas into functional prototypes and projects. Whether you want to measure temperature, detect motion, or monitor environmental conditions, understanding the basics of how to connect sensors to Arduino is crucial. This comprehensive guide provides clear steps and tips to help you get started.
1. Understanding Arduino and Its Capabilities
Arduino is an open-source electronics platform based on easy-to-use hardware and software. It’s ideal for creating interactive projects and prototypes. With various boards available, such as the Arduino Uno, Nano, and Mega, each serves different projects and sensor requirements. Arduino boards are equipped with digital and analog input/output pins, allowing them to connect with different sensors and actuators.
One of the standout features of Arduino is its compatibility with various sensors. From basic light sensors to sophisticated GPS modules, the platform allows users to gather data from the environment and respond accordingly. This adaptability makes Arduino an excellent choice for developing Internet of Things (IoT) projects, robotics, and automation systems. Understanding its architecture and capabilities will lay a solid foundation for your sensor integration journey.
2. Choosing the Right Sensors for Your Project
Before you can connect sensors to Arduino, you need to decide which sensors are suitable for your project. Sensors come in various types, including analog and digital, and each type serves different purposes. For instance, an analog temperature sensor like the LM35 provides a continuous voltage output relative to the temperature, while a digital sensor like the DHT11 offers data in a more structured format.
Common types of sensors you might consider include:
- Temperature Sensors: Such as the LM35 or DHT22, useful for climate control systems.
- Motion Sensors: Like the PIR sensor for detecting human movement.
- Light Sensors: Such as the LDR, which can be used in automatic lighting systems.
- Ultrasonic Sensors: For distance measurement, ideal for robotics projects.
Choosing the right sensor depends on your project’s goals, environmental conditions, and required precision. Conducting thorough research on the specifications and compatibility of each sensor with your Arduino board ensures a smoother setup process.
3. Gathering Necessary Components
Once you’ve selected your sensors, gather all the necessary components to connect sensors to Arduino effectively. The basic items include:
- Arduino Board: Choose a model that fits your project needs.
- Sensors: As selected in the previous section.
- Jumper Wires: For making connections between the sensors and the Arduino board.
- Breadboard: An optional but helpful tool for prototyping without soldering.
- Power Supply: Depending on your project, you may need a battery or USB power source.
Make sure all components are compatible with each other. For instance, check that the operating voltage of the sensor matches what the Arduino board can provide. Having everything organized beforehand will streamline the assembly process and reduce complications later on.
4. Wiring Your Sensors to Arduino
The next step in connecting sensors to Arduino is wiring them properly. Each sensor has specific pins for power (VCC), ground (GND), and signal output. Understanding how to connect these pins to the correct Arduino pins is crucial.
Here’s a general guideline for wiring:
- Power Pins: Connect the VCC pin of the sensor to the 5V or 3.3V output on the Arduino as required.
- Ground Pins: Connect the GND pin of the sensor to one of the GND pins on the Arduino.
- Signal Pins: Connect the signal output pin to one of the analog or digital input pins on the Arduino, depending on the sensor type.
Refer to the datasheet of each sensor for specific wiring instructions and pin configurations. A clear wiring diagram can significantly reduce errors and enhance your understanding of how the sensor communicates with the Arduino. (See: Learn about Arduino technology.)
5. Programming Your Arduino
With your sensors connected, the next challenge is programming the Arduino to read sensor data. The Arduino IDE (Integrated Development Environment) allows you to write and upload code to your board. Each sensor usually comes with sample code provided in its documentation, which can serve as a solid starting point.
Here’s a simple structure for your Arduino sketch:
- Setup Function: Initialize serial communication and set pin modes.
- Loop Function: Read sensor data, process it, and output results.
For example, if you’re using a temperature sensor, your code might look like this:
void setup() {
  Serial.begin(9600);
}

void loop() {
  int temp = analogRead(A0);
  Serial.println(temp);
  delay(1000);
}
This code initializes serial communication and reads data from the sensor every second. As you gain experience, you can expand your code with error checking, data logging, or integrating multiple sensors.
6. Testing and Troubleshooting
After programming, it’s time to test your setup. Monitor the serial output in the Arduino IDE to ensure that the data from your sensors is being read correctly. If you encounter issues, troubleshooting becomes essential.
Common problems include:
- No Output: Check connections and ensure the sensor is powered.
- Incorrect Readings: Verify that the correct pins are referenced in your code.
- Inconsistent Data: Check for potential noise in the signal and consider adding filtering code or hardware solutions.
Taking the time to troubleshoot effectively not only helps you solve immediate problems but also deepens your understanding of how sensors interact with Arduino.
7. Integrating Multiple Sensors
As you become more comfortable connecting sensors to Arduino, you might want to explore integrating multiple sensors into a single project. This can create more complex and responsive systems, such as weather stations or smart home applications.
When integrating multiple sensors, keep in mind:
- Power Requirements: Ensure your power supply can handle the combined load of all sensors.
- Pin Limitations: Each Arduino board has a finite number of pins; make use of I2C or SPI protocols for additional connections.
- Code Organization: Structure your code to handle multiple inputs efficiently, possibly using functions or classes.
For instance, if you connect both a temperature and humidity sensor, your code will need to handle readings from both sensors and output them accordingly, potentially creating a more comprehensive environmental monitoring solution.
8. Exploring Advanced Projects
Once you’ve mastered the basics of how to connect sensors to Arduino, it’s time to take on advanced projects that can showcase your skills. Examples include smart irrigation systems that use soil moisture sensors, automated weather stations with multiple sensors for temperature, humidity, and pressure, or even robotics projects where sensors help navigate environments.
As you venture into these projects, you’ll likely engage with additional components such as motor drivers, displays, and wireless communication modules (like Bluetooth or Wi-Fi). This not only expands your skill set but also enables you to create more sophisticated and interconnected systems. (See: New York Times on Arduino projects.)
Online resources, forums, and communities can provide invaluable support and inspiration as you tackle these advanced projects. Websites like Instructables and Arduino’s official forums are excellent places to find tutorials, share your projects, and ask questions.
9. Popular Sensors and Their Applications
Getting familiar with popular sensors can give you ideas for your projects. Here are a few commonly used sensors, along with their applications:
- MQ Series Gas Sensors: These sensors can detect various gases like methane, propane, and alcohol. They’re often used in gas leak detection systems.
- GPS Module: Useful for projects that require location tracking such as drones or navigation systems.
- Accelerometer Sensors: These sensors measure acceleration forces and can be used in wearable technology or motion detection systems.
- Soil Moisture Sensor: Ideal for monitoring soil conditions in agricultural applications or home gardens.
Each of these sensors comes with its own specifications and data sheets, providing you with the information needed to effectively integrate them into your projects.
10. Using Libraries for Sensor Integration
When working with sensors, using libraries can greatly simplify your coding process. Libraries provide pre-written code that makes it easier to interact with various sensors. For example, the Adafruit_Sensor library is commonly used for a range of sensors and provides a unified interface to retrieve data.
Installing a library is straightforward in the Arduino IDE:
- Open the Arduino IDE and navigate to Sketch > Include Library > Manage Libraries.
- Search for the desired library and click Install.
- Once installed, you can include the library in your sketch using
#include <LibraryName.h>.
Using libraries not only saves time but also enables you to access advanced functionalities that would be challenging to code from scratch.
11. Best Practices for Sensor Projects
As you dive deeper into connecting sensors to Arduino, following best practices can help ensure your projects are successful:
- Document Your Work: Keep a project log with wiring diagrams, code snippets, and notes on how each part of your project works.
- Use Modular Components: By breaking down your project into smaller modules, you can troubleshoot more easily and make iterative improvements.
- Test Regularly: Don’t wait until the end of your project to test your setup. Regular testing helps catch errors early.
- Stay Updated: The Arduino community is always evolving. Keep learning about new sensors, libraries, and techniques to enhance your projects.
12. Frequently Asked Questions (FAQ)
What is the best Arduino board for beginners?
The Arduino Uno is often recommended for beginners due to its simplicity, large community support, and a wealth of tutorials available. It’s versatile and can handle most sensor projects you might encounter.
Can I use multiple sensors on the same pin?
Generally, you can’t connect multiple sensors directly to the same pin unless they use a protocol like I2C or SPI, which allows multiple devices to share the same communication lines. For analog sensors, direct connections can lead to incorrect readings.
How do I power my Arduino project when using multiple sensors?
For most projects, powering the Arduino via USB is sufficient. However, if you’re running multiple sensors that draw significant current, consider using an external power supply that matches the voltage requirements of your Arduino board.
What should I do if my sensor readings are inconsistent?
Inconsistent readings can arise from various issues, including noisy signals, loose connections, or incorrect wiring. Ensure that connections are secure, check your power supply, and consider averaging multiple readings in your code to minimize noise effects.
How do I connect sensors that require different voltages?
If your sensors operate at different voltages, you may need to use a voltage divider for analog sensors or level shifters for digital signals to ensure they are compatible with your Arduino.
13. Common Arduino Projects to Try
Once you’ve mastered connecting sensors to Arduino, it’s time to put your skills into practice. Here are a few project ideas that can inspire your next creation:
- Weather Station: Combine a temperature sensor (DHT22), humidity sensor, and barometric pressure sensor (BMP180) to monitor and display environmental conditions.
- Smart Home Automation: Use motion sensors and light sensors to automate lighting. Set up the system to turn on lights when someone enters a room and adjust brightness based on ambient light levels.
- Plant Watering System: Integrate a soil moisture sensor with a small water pump to create a system that waters your plants automatically when the soil gets dry.
- Obstacle Avoidance Robot: Combine ultrasonic sensors with motor drivers to create a robot that can navigate around obstacles autonomously.
- Smart Alarm System: Use PIR motion sensors and a buzzer to develop an alarm system that activates when unexpected movement is detected.
These projects can be adapted based on your interests and the sensors you have available. Feel free to mix and match components and add your unique twist to each project.
14. Safety Precautions When Working with Arduino and Sensors
While working with electronics can be exciting, it’s important to prioritize safety. Here are some precautions to consider:
- Check Voltage Ratings: Ensure that all components are rated for the voltage you plan to use. Connecting a sensor to a higher voltage than it can handle can damage it.
- Use Proper Equipment: When soldering or using a breadboard, ensure you use appropriate tools and equipment to minimize the risk of injury.
- Be Mindful of Short Circuits: Double-check connections before powering your circuit. Short circuits can lead to overheating and potential fires.
- Work in a Safe Environment: Always work in a well-lit area and on a non-conductive surface to prevent accidental shocks or damage.
15. The Future of Sensor Technology and Arduino
The field of sensor technology is evolving rapidly, with advancements like miniaturization, improved accuracy, and cost reduction. Future Arduinos may come equipped with built-in support for emerging sensor types, including biosensors for health monitoring or environmental sensors capable of detecting pollutants at lower levels.
As IoT continues to grow, expect to see greater integration of sensors into everyday objects, enabling them to communicate and function together seamlessly. This opens up even more possibilities for Arduino projects, allowing creators to build smarter, more responsive systems that can adapt to their environments and user needs.
16. Conclusion: The Future of Sensor Integration with Arduino
In summary, learning how to connect sensors to Arduino is a rewarding journey that opens up numerous possibilities. By understanding the fundamentals, gathering the right components, and engaging with the community, you can develop impressive projects that harness the power of sensors and Arduino. Whether you’re a beginner or looking to enhance your skills, there’s always something new to explore in the world of Arduino and sensor integration.
“`
Trending Now
Frequently Asked Questions
What sensors can I connect to an Arduino?
You can connect a variety of sensors to an Arduino, including temperature sensors like the LM35 and DHT22, motion sensors, light sensors, and even GPS modules. The choice of sensor depends on your project's requirements and the type of data you wish to collect.
How do I choose the right sensor for my Arduino project?
To choose the right sensor for your Arduino project, consider the type of data you need to measure, such as temperature or motion. Identify whether you need an analog sensor, like the LM35 for continuous readings, or a digital sensor, like the DHT11 for structured data outputs.
Can I use multiple sensors with Arduino?
Yes, you can use multiple sensors with Arduino. The platform supports various configurations, allowing you to connect multiple sensors simultaneously. Just ensure you have enough input/output pins and manage the data collection effectively in your code.
What is the difference between analog and digital sensors?
Analog sensors provide a continuous voltage output based on the measurement, while digital sensors output data in a discrete format, typically as binary signals. For example, the LM35 is an analog temperature sensor, whereas the DHT11 is a digital sensor that sends structured data.
What Arduino boards are best for sensor projects?
The best Arduino boards for sensor projects include the Arduino Uno for beginners, the Nano for compact designs, and the Mega for larger projects requiring more input/output pins. Each board has specific features that cater to different sensor integration needs.
Agree or disagree? Drop a comment and tell us what you think.