How to install Nest thermostat
“`html
With the rise of smart home technology, the Nest thermostat has become a popular choice for those looking to enhance energy efficiency while maintaining comfort at home. This innovative device offers numerous features, from learning your heating and cooling preferences to being remotely controllable via an app. If you’ve decided to install Nest thermostat, you may have questions about how to properly set it up. In this article, we’ll guide you through the installation process step by step, ensuring your transition to smart temperature control is smooth and successful.
1. Understanding the Nest Thermostat
Before diving into installation, it’s important to understand what a Nest thermostat is and how it operates. Nest, now a part of Google, offers various models, including the Nest Learning Thermostat and the Nest Thermostat E. These devices learn your schedule and preferences, adjusting the temperature accordingly to save energy. They also allow remote adjustments via a smartphone app, making them incredibly user-friendly.
The current models feature a sleek design, a user-friendly interface, and compatibility with most HVAC systems. However, before you install Nest thermostat, you should check compatibility with your existing system. Nest provides an online compatibility checker that you can use to ensure your setup will work with their devices. Make sure to gather all necessary tools and components, which typically include a screwdriver, a drill (if needed), and your smartphone for app setup.
2. Gathering Your Tools
To install Nest thermostat successfully, having the right tools and materials on hand is crucial. You’ll typically need:
- Screwdriver: A Phillips screwdriver is commonly needed for removing old thermostats and installing the new one.
- Drill: If you’re mounting the Nest in a new location, a drill with the appropriate drill bits may be required.
- Level: Ensuring your thermostat is level will make it easier to read and interact with.
- Smartphone or tablet: You’ll need this to download the Nest app and complete the setup process.
- Wire labels: These can help you identify wires during installation.
Make sure all tools are functional and within reach before starting the installation. This preparation can save you time and frustration.
3. Removing the Old Thermostat
Once you have your tools ready, it’s time to remove your old thermostat. Start by turning off the power to your HVAC system at the breaker box to prevent any electrical hazards during installation. It’s crucial to ensure the power is off before proceeding.
Next, carefully detach the cover of your old thermostat. Note the wiring setup and take a picture for reference. Label each wire using wire labels (or masking tape) so you can reconnect them properly later. Unscrew the mounting plate from the wall, and then gently pull the wires through the plate. Dispose of the old thermostat responsibly.
4. Wiring the Nest Thermostat
After removing your old thermostat, it’s time to wire the Nest. First, take the Nest base and connect the labeled wires to their corresponding terminals. The terminal letters correspond to specific functions:
- R: Power (Red)
- Y: Cooling (Yellow)
- W: Heating (White)
- G: Fan (Green)
- C: Common (Blue or Black)
It’s essential to connect each wire according to the labels you created earlier. In some cases, your HVAC system may have additional wires that may need to be connected. Consult the Nest Compatibility Checker or your HVAC technician if you’re unsure about any connections.
5. Mounting the Nest Thermostat
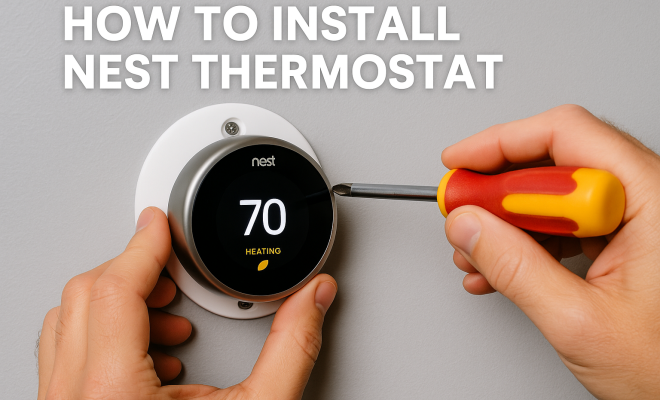
With the wiring completed, the next step is to mount the Nest thermostat. Position the Nest base on the wall where you want it installed. Use a level to ensure it’s straight, and mark the screw holes with a pencil. Drill the holes if necessary, then attach the base using the screws provided in the kit.
After securing the base, you can attach the Nest display by simply pushing it onto the base until you hear a click. The display should be flush against the wall and secure in place. (See: Nest Thermostat overview on Wikipedia.)
6. Setting Up the Nest Thermostat
Now comes the exciting part: setting up your new thermostat! Turn the power back on at the breaker and wait for the Nest to power on. Using the display, follow the on-screen instructions to connect the device to your Wi-Fi network. You’ll need to download the Nest app on your smartphone if you haven’t already. The app is available for both iOS and Android devices.
Once your thermostat is connected to Wi-Fi, you’ll be prompted to create a Nest account or log in if you already have one. The app will guide you through the remaining setup steps, including naming your thermostat and setting your preferred temperature schedule. This is also where you can explore other features, like Eco Mode, which helps save energy when no one is home.
7. Final Touches and Troubleshooting
After completing the setup, take a moment to check that everything is functioning correctly. Test the temperature adjustments from the app to see how responsive the system is. You might also want to explore the energy history feature, which shows you how much energy you’ve used and when, allowing you to make informed decisions about your usage.
Should you encounter any issues during installation, Nest’s support page offers a wealth of resources, including troubleshooting guides and FAQs. If your thermostat isn’t heating or cooling properly, ensure that all wires are securely connected and that the power is on. If problems persist, contacting a professional HVAC technician may be necessary.
8. Why Choose a Nest Thermostat?
Investing in a Nest thermostat can offer significant benefits beyond just convenience. One of the standout features of these devices is their energy-saving capability. According to Nest, users can save an average of 10-12% on heating and 15% on cooling bills. This potential for saving money on energy bills can quickly offset the initial investment.
The Nest thermostat also integrates seamlessly with other smart home devices, allowing for enhanced control and automation. For example, you can set up routines that adjust your thermostat based on factors like time of day or whether you’re home or away. This level of customization is appealing to tech-savvy homeowners looking to streamline their living environment.
9. Common Questions About Installing a Nest Thermostat
What tools do I need to install a Nest thermostat?
You will need a Phillips screwdriver, a drill (if necessary), a level, your smartphone or tablet for app setup, and wire labels to mark your existing wires. Ensuring you have these tools ready can help the installation process go smoothly.
How long does it take to install a Nest thermostat?
On average, the installation process takes about 30 minutes to an hour. The actual time may vary depending on the complexity of your existing setup and your familiarity with electrical wiring.
Will my Nest thermostat work with my HVAC system?
Most HVAC systems are compatible with the Nest thermostat. However, it’s best to use the online compatibility checker provided by Nest to confirm that your specific system will work with the thermostat.
What if I have a multi-stage heating or cooling system?
The Nest thermostat can handle multi-stage systems. If you have a more complicated setup, make sure to consult the installation guide or the Nest support page for detailed instructions on wiring.
Can I install the Nest thermostat myself?
Yes, many homeowners are able to install the Nest thermostat themselves, especially if they have basic DIY skills. However, if you’re uncomfortable with electrical wiring, it’s advisable to hire a professional.
What are the benefits of using a smart thermostat like Nest?
Using a smart thermostat can enhance your home’s energy efficiency, provide convenience with remote access, and offer insights into your energy usage. Many users find that they save money on their energy bills due to better temperature management.
10. Advanced Features of the Nest Thermostat
The Nest thermostat isn’t just a temperature control device; it’s packed with advanced features that enhance user experience. One notable capability is its learning function. Over time, the thermostat learns your scheduling patterns – when you typically wake up, leave for work, come home, and go to bed. It uses this information to create a personalized schedule that optimizes energy use. (See: CDC on energy efficiency and health.)
Home/Away Assist
This feature uses sensors to determine whether anyone is home. If the Nest detects that no one is there, it automatically adjusts the temperature to save energy. This is especially useful for those long days at work or when you’re on vacation.
Energy History and Reports
With the Nest app, you can access your energy history and see how much energy you’re using over time. This data can help you make informed decisions to improve energy efficiency. The app also sends you monthly reports with tips on how to save even more energy.
Integration with Other Smart Devices
The Nest thermostat can be integrated with other smart home devices, such as smart lights, security systems, and more. For example, you can set your lights to turn off when you leave home and adjust the temperature accordingly. This level of automation simplifies managing your home environment.
Voice Control
Compatible with Google Assistant and Alexa, the Nest thermostat can be controlled using voice commands. This feature adds another layer of convenience, allowing you to adjust the temperature without lifting a finger.
11. Comparing Nest Thermostat Models
When considering to install Nest thermostat, it’s helpful to understand the differences between the available models. The Nest Learning Thermostat and the Nest Thermostat E serve different needs and budgets.
Nest Learning Thermostat
The Nest Learning Thermostat is the more advanced of the two. It features a high-resolution display, a stainless steel ring, and the ability to learn your habits over time. This model can also handle more complex HVAC systems, including those with multi-stage heating and cooling. Additionally, the Nest Learning Thermostat includes premium features like the ability to control humidity levels.
Nest Thermostat E
The Nest Thermostat E, on the other hand, is designed for simplicity and affordability. It has a plastic design and a slightly less advanced display but still retains the core functionalities of a smart thermostat. It’s ideal for those who want the benefits of a smart thermostat without the premium features. It is compatible with most HVAC systems but may lack the multi-stage capability of its counterpart.
Which one should I choose?
Your choice between models should depend on your needs and budget. If you have a more complex HVAC system or want a device that learns your habits for maximum efficiency, the Learning Thermostat is worth the investment. If you’re looking for something straightforward and more budget-friendly, the Thermostat E is an excellent option.
12. Frequently Asked Questions (FAQ)
What is the difference between the Nest Learning Thermostat and the Nest Thermostat E?
The main differences lie in design, functionality, and price. The Learning Thermostat has a more premium feel with a metal design and a more advanced display. It also offers features like advanced scheduling and humidity control that the Thermostat E lacks. The Thermostat E is more affordable and designed for users who want basic smart thermostat features without the added bells and whistles.
Can the Nest thermostat save me money?
Yes, the Nest thermostat is designed to be energy-efficient. By learning your habits and adjusting the temperature accordingly, many users notice significant savings on their energy bills. Nest estimates that users can save about 10-12% on heating and 15% on cooling costs.
Is it easy to reset the Nest thermostat?
Resetting the Nest thermostat is quite simple. You can reset it through the settings menu on the device itself or via the Nest app. This is useful if you’re moving or if you want to start fresh with your scheduling and settings. (See: New York Times review of Nest Thermostat.)
Can I control my Nest thermostat remotely?
Absolutely! Once your thermostat is connected to Wi-Fi, you can control it from anywhere using the Nest app on your smartphone or tablet. This feature allows you to adjust the temperature even when you’re not home, making it easier to manage your energy usage.
What should I do if my Nest thermostat is not working?
If your Nest thermostat is not working, first check that the power is on and that all wires are securely connected. You can also try resetting the device or checking the Nest app for any notifications regarding connectivity issues. If problems persist, contacting Nest support or a professional HVAC technician is recommended.
13. Embracing Energy Efficiency
Installing a Nest thermostat is not only about convenience; it’s also a step towards greater energy efficiency in your home. As global efforts to combat climate change intensify, homeowners are encouraged to take measures to reduce their carbon footprint. Smart thermostats like Nest are at the forefront of this movement. By optimizing heating and cooling based on your usage patterns, they contribute to significant energy savings.
According to research, smart thermostats can reduce energy usage in homes by up to 15%, which translates to substantial savings over time. This makes them a smart investment not just for individual homeowners but also for the environment as a whole.
14. Future of Smart Thermostats
The future of smart thermostats like the Nest is exciting. With ongoing advancements in technology, we can expect even more features that enhance user experience and energy efficiency. Innovations like AI-driven temperature control, better integration with renewable energy sources, and advanced predictive algorithms could soon become commonplace.
As more homes adopt smart technology, the potential for energy conservation will grow. The Nest thermostat is just one example of how technology can help us manage our homes more effectively and sustainably. Whether you’re tech-savvy or just looking for ways to save on utility bills, incorporating a smart thermostat is a beneficial step.
15. Conclusion: Embracing Smart Home Technology
As you can see, installing a Nest thermostat is an achievable DIY project that can significantly improve your home’s energy efficiency. By following these steps, you’ll be taking a solid step towards a more comfortable and eco-friendly living environment. Technology is advancing rapidly, and embracing smart home solutions like the Nest thermostat can enhance your quality of life while also benefiting the planet.
So, are you ready to make the switch? With the information provided above, you’ll find that installing a Nest thermostat is not just a task; it’s an upgrade to your home that pays off in convenience and savings.
“`
Trending Now
Frequently Asked Questions
How do I install a Nest thermostat?
To install a Nest thermostat, first ensure compatibility with your HVAC system using Nest's online checker. Gather necessary tools like a screwdriver, drill, and a level. Remove your old thermostat, connect the wires to the Nest base, mount it, and finally, set it up using the Nest app on your smartphone.
What tools do I need to install a Nest thermostat?
You typically need a Phillips screwdriver to remove the old thermostat and install the Nest. A drill may be necessary if you're mounting it in a new location, along with a level to ensure proper alignment. Having a smartphone for app setup is also crucial.
Is the Nest thermostat easy to install?
Yes, the Nest thermostat is designed for easy installation. With basic tools and a clear understanding of your HVAC system, most users can set it up themselves by following the step-by-step instructions provided in the Nest app.
What should I check before installing a Nest thermostat?
Before installation, check the compatibility of your HVAC system with the Nest thermostat using their online compatibility checker. Ensure you have all necessary tools and confirm that you understand the wiring and setup process.
Can I install a Nest thermostat myself?
Yes, many homeowners can install a Nest thermostat themselves. The installation process is user-friendly and supported by detailed guides. However, if you're unsure about the wiring or your HVAC system, consider consulting a professional.
What did we miss? Let us know in the comments and join the conversation.