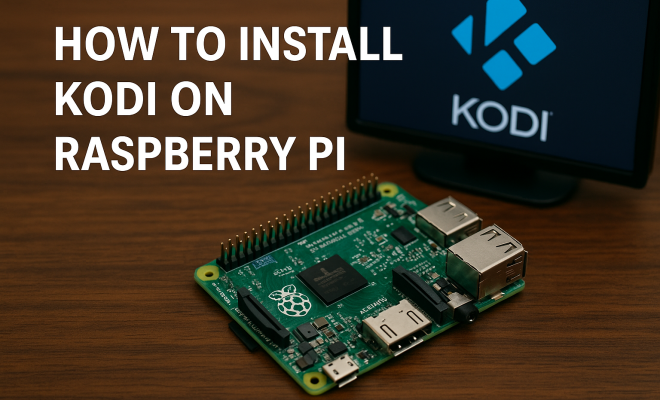
How to install Kodi on Raspberry Pi
“`html
As home entertainment systems grow increasingly complex, finding a simple, cost-effective solution can feel daunting. Enter the Raspberry Pi, a versatile mini-computer that can be transformed into a powerful media player with the installation of Kodi. This guide will cover everything you need to know about how to install Kodi on Raspberry Pi, providing you with a comprehensive walkthrough and essential insights.
1. Understanding Kodi and Raspberry Pi
Before diving into the installation process, it’s crucial to understand both Kodi and the Raspberry Pi. Kodi is an open-source media center application that allows users to play and view most videos, music, podcasts, and other digital media files from local and network storage media. Its extensive range of add-ons and customizable interface makes Kodi a popular choice for media enthusiasts.
The Raspberry Pi, on the other hand, is a small, affordable computer that’s designed to promote learning and coding. With its low power consumption and ability to connect to various peripherals, it’s an ideal platform for home projects, including setting up a dedicated media center. Together, these two technologies create an incredible home entertainment solution.
2. Choosing Your Raspberry Pi Model
While many models of Raspberry Pi can run Kodi, the Raspberry Pi 3 and Raspberry Pi 4 are the most popular choices due to their superior processing power and RAM, which are vital for smooth media playback. The Raspberry Pi 4, for instance, comes with options for 2GB, 4GB, or even 8GB of RAM, making it highly capable of handling high-definition streams and multiple add-ons without lag.
It’s also important to consider the necessary accessories. You’ll need a power supply, a microSD card (16GB or larger recommended), an HDMI cable, and a case to protect your Raspberry Pi. Additionally, a USB keyboard and mouse can be handy during the initial setup process.
3. Preparing Your MicroSD Card
The first step in installing Kodi on Raspberry Pi is preparing your microSD card. This involves downloading an operating system (OS) that can support Kodi. The most popular choice is LibreELEC, a minimalistic Linux distribution specifically tailored for running Kodi. To start, download the LibreELEC USB-SD Creator tool, which makes the installation process straightforward.
Once you have the tool, insert your microSD card into your computer and select it in the USB-SD Creator. From there, download the appropriate LibreELEC version for your Raspberry Pi model. After the download is complete, the tool will write the necessary files to the microSD card. This process will format the card, so ensure you back up any important data beforehand. Once finished, safely eject the microSD card, and you’re ready to move on.
4. Booting Up Your Raspberry Pi
With your microSD card prepared, it’s time to boot up your Raspberry Pi. Insert the microSD card into the Raspberry Pi and connect the power supply. The device should power on, and you’ll see the LibreELEC logo appear on your screen. The initial boot process may take a few minutes as the system configures itself for first use.
During the boot process, you may need to complete some initial configuration steps, such as setting your language and time zone. It’s essential to connect your Raspberry Pi to the internet, either via Wi-Fi or Ethernet cable, as this will allow you to download any add-ons or updates later on. Once configured, you’ll be greeted with the Kodi home screen, ready for your next steps.
5. Configuring Kodi Settings
Now that you have Kodi up and running, it’s essential to configure its settings to optimize your media experience. First, navigate to the settings menu, where you can adjust various options such as video output, audio settings, and more. Setting your video resolution to match your display is crucial for the best viewing experience.
You can also customize your library settings. Kodi allows you to add sources for media content, including movies, TV shows, and music. This means you can point Kodi to network shares or local drives where your media files are stored. Organizing your content not only makes it easier to find but also enhances your overall experience with the media center. (See: Research on Kodi in computer science.)
6. Adding Add-ons for Enhanced Functionality
One of Kodi’s most enticing features is its support for add-ons, which can dramatically enhance your media experience. These add-ons can provide access to streaming services, live TV, and more. To add an add-on, navigate to the Kodi Add-on browser and browse the available options. Popular choices include Netflix, Hulu, and various sports channels.
When installing third-party add-ons, exercise caution. Ensure you’re obtaining them from reputable sources, as some may lead to security risks or copyright issues. It’s also important to keep your add-ons updated to benefit from the latest features and security patches.
7. Troubleshooting Common Issues
Even with the best setups, users may encounter issues while using Kodi on Raspberry Pi. A common problem is playback lag, which can often be resolved by adjusting video output settings and ensuring that the Raspberry Pi is connected via Ethernet for more stable internet access.
If you’re facing issues with certain add-ons, consider checking for updates or reinstalling them. Additionally, the Kodi community is active and helpful; forums and user groups are excellent resources for finding solutions to specific problems. Regularly checking for updates to both Kodi and your add-ons can also minimize potential issues.
8. Exploring Advanced Features
Once you’re comfortable with the basics of Kodi, you may want to explore its advanced features. For instance, you can set up a PVR (Personal Video Recorder) with compatible hardware to record live TV. Kodi has built-in support for various backends, such as NextPVR and TVHeadend.
Another advanced feature is the ability to integrate with other smart home devices. If you have smart speakers or home automation systems, you can configure Kodi to respond to voice commands or integrate media controls seamlessly with your home network. This not only enhances your media consumption but also makes it more interactive.
9. Maintaining Your Kodi Setup
To ensure your Kodi experience remains smooth and enjoyable, routine maintenance is essential. Regularly back up your settings and libraries to avoid data loss. You can easily export your Kodi library and settings to restore them if needed.
Furthermore, being aware of the hardware limitations of your Raspberry Pi can help you plan for future upgrades. If you find that your media needs are growing, consider investing in a more powerful model or additional accessories, such as an external hard drive for more storage. Keeping your system updated and maintaining a clean library will ensure an optimal viewing experience for years to come.
10. Customizing Your Kodi Experience
Kodi isn’t just about watching videos; it’s about creating a tailored experience for your entertainment needs. You can change the skin of Kodi, which alters the interface’s appearance. There are numerous skins available that can completely change how Kodi looks and feels, depending on your preferences. Some popular skins include Estuary, Aeon Nox, and Mimic, each offering different aesthetics and functionalities.
Customization goes beyond appearance. You can set up various profiles within Kodi, allowing different users to have their own personalized libraries and settings. This is especially useful in families where different members may have different tastes in media. Each profile can have its own favorites, watched status, and even add-ons.
11. Accessing Live TV and Sports
For sports enthusiasts and fans of live television, Kodi offers powerful features that can turn your Raspberry Pi into a live TV hub. You can utilize PVR add-ons that connect to various live TV services. For instance, with add-ons like TVHeadend or NextPVR, you can access free-to-air channels if you have a compatible TV tuner.
Alternatively, many people use services like Pluto TV or Stirr, which provide free streaming of live channels via Kodi. Make sure to check the legal implications of any add-ons you install, especially when it comes to live broadcasts.
12. Frequently Asked Questions
Can I use Kodi on any Raspberry Pi model?
While older Raspberry Pi models can run Kodi, the performance may not be optimal. For the best experience, it’s recommended to use at least a Raspberry Pi 3 or Raspberry Pi 4.
Is Kodi legal to use?
Yes, Kodi itself is a legal media center application. However, some add-ons may provide access to pirated content, which is illegal. Always ensure that you use reputable add-ons that comply with copyright laws.
Do I need a VPN when using Kodi?
While a VPN is not necessary for Kodi itself, it’s recommended if you’re using third-party add-ons. A VPN can help protect your privacy and anonymity while streaming content online.
How do I update Kodi on Raspberry Pi?
Updating Kodi on Raspberry Pi can usually be done through the settings menu in Kodi. Alternatively, you can reinstall the latest version of LibreELEC or your chosen OS to ensure you’re running the current version of Kodi.
What are the best add-ons for Kodi?
The best add-ons will depend on your interests. Some of the popular ones include Exodus Redux for movies and TV shows, SportsDevil for sports content, and YouTube for streaming videos. Always check the add-on’s source and community reviews before installation.
13. Securing Your Kodi Installation
Security is a significant concern when setting up any media center. Ensure that your Raspberry Pi is running the latest version of software, including all updates for both the OS and Kodi. Consider using a strong password for your network and avoid using public Wi-Fi for streaming.
You can also enhance your security by using a firewall or network-level protection. These can help block unwanted connections to your Raspberry Pi. Additionally, keep an eye on the add-ons you install; regularly review them to ensure they haven’t changed and are still safe to use.
14. Comparing Kodi with Other Media Center Solutions
While Kodi is a fantastic option, it’s worth looking at how it stacks up against other media center software. Plex, a popular alternative, offers an organized library and remote access capabilities. Plex’s strength lies in its media management and user-friendly interface, but it requires a more powerful server to stream content effectively, especially if you’re encoding on-the-fly.
On the other hand, Emby works similarly to Plex but offers more customization options. While Emby has a subscription model for some features, it also allows users to self-host their libraries effectively. Kodi remains free and open-source, making it a more appealing choice for those looking to avoid subscriptions and maintain full control over their media.
15. Advanced Add-ons for Kodi
Once you become comfortable with Kodi, you might explore some advanced add-ons that can further enhance your experience. For instance, Trakt.tv is an excellent tool for tracking your viewing habits, syncing your watch history across platforms, and discovering new shows and movies tailored to your preferences. It can integrate directly into Kodi, making it seamless to keep your media library organized.
Another popular add-on is Seren, known for its high-quality streaming options. It offers a different approach to pulling content than traditional add-ons and is particularly favored for its integration with Real-Debrid for premium streaming sources, which can significantly improve the quality and reliability of streams. If you’re serious about streaming, this add-on is worth considering.
16. Tips for Optimizing Performance on Raspberry Pi
To make the most out of your Raspberry Pi running Kodi, there are several tips you can follow to optimize its performance. First, consider overclocking your Raspberry Pi, which can provide a significant performance boost if done correctly. Tools like Raspberry Pi Configuration allow you to adjust CPU speed safely without voiding any warranties.
Using a heat sink or a fan is also recommended for cooling, especially if you overclock your device. Overheating can cause throttling, which negatively affects performance. If you notice frame drops or lag during playback, it might be a sign that your Raspberry Pi is running hot.
17. Setting Up a Library for Your Media
Organizing your media library in Kodi can make a significant difference in usability and enjoyment. When setting up your library, consider using a structured folder hierarchy. For instance, create separate folders for Movies, TV Shows, and Music. Inside these folders, further categorize your media by genre or year, as this will make it easier for Kodi to scrape metadata and present content.
Using high-quality metadata is crucial for a visually appealing library. Kodi automatically pulls metadata from online databases, but you can enhance this by manually adding posters, fan art, and detailed descriptions for your content. This not only beautifies your library but also improves the overall user experience when browsing.
18. Future of Kodi with Raspberry Pi
The future of Kodi alongside Raspberry Pi seems very promising. As technology evolves, so does Kodi, with regular updates that enhance its capabilities and security features. The Raspberry Pi Foundation continues to innovate its hardware, which means future models may offer even more powerful processing capabilities.
Moreover, the Kodi community is vibrant and active, constantly developing new add-ons and features that can be leveraged on Raspberry Pi setups. As 4K and 8K content become more prevalent, Kodi’s adaptability will ensure it remains a viable solution for home media entertainment. With continuous support and development, using Kodi on Raspberry Pi will likely evolve into an even more robust media center experience.
19. Conclusion
Setting up Kodi on Raspberry Pi is a rewarding project that can significantly enhance your home entertainment experience. Whether you want to watch movies, listen to music, or even explore live TV, Kodi offers a robust platform that is both flexible and powerful. With the right knowledge and tools, you can create a customized media center that fits your specific needs and preferences. Enjoy your journey into the world of Kodi!
“`
Trending Now
Frequently Asked Questions
What is Kodi and why should I use it?
Kodi is an open-source media center application that allows users to play and view a variety of digital media files. It is highly customizable with numerous add-ons, making it a popular choice for those looking to create a personalized home entertainment system.
Which Raspberry Pi model is best for Kodi?
The Raspberry Pi 3 and Raspberry Pi 4 are the most recommended models for running Kodi, with the Raspberry Pi 4 offering better processing power and RAM options, making it ideal for high-definition streaming and handling multiple add-ons.
What accessories do I need to install Kodi on Raspberry Pi?
To install Kodi on a Raspberry Pi, you will need a power supply, a microSD card (16GB or larger), an HDMI cable, a protective case, and optionally a USB keyboard and mouse for easy navigation during setup.
How do I prepare my microSD card for Kodi installation?
Preparing your microSD card involves formatting it and then flashing the Kodi operating system onto it. This can typically be done using software tools like Etcher or the Raspberry Pi Imager, which makes the installation process straightforward.
Can I use Kodi on older Raspberry Pi models?
While older Raspberry Pi models can run Kodi, performance may be limited compared to the Raspberry Pi 3 and 4. For optimal media playback and to utilize the full capabilities of Kodi, it is recommended to use the more powerful models.
What did we miss? Let us know in the comments and join the conversation.