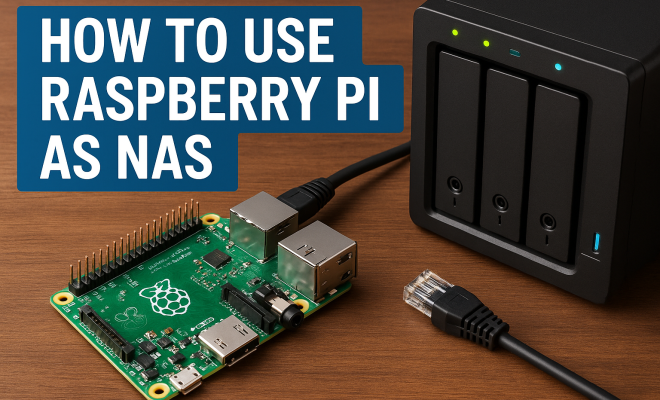
How to use Raspberry Pi as NAS
“`html
1. Understanding What NAS Is
Network Attached Storage (NAS) refers to dedicated file storage devices that connect to a network, allowing multiple users to access and share files. Unlike traditional external hard drives, NAS systems are more than just a storage solution; they serve as file servers that can manage and share data across a network. With the rise of digital content, from photos to videos, having a NAS is increasingly relevant for homes and businesses alike. By providing a centralized storage location, users can access their files from various devices, whether it’s a computer, smartphone, or tablet.
One of the significant advantages of NAS is scalability. You can start small and expand your storage solution as your needs grow. This flexibility is further enhanced when using devices like the Raspberry Pi, which provides an affordable entry point into NAS setups.
NAS systems can also support a range of applications, from simple file sharing to media streaming and even hosting virtual machines. This versatility makes them suitable for diverse uses in both personal and professional environments.
In a rapidly evolving digital landscape, understanding the importance of NAS solutions can help users make informed decisions about their storage needs. For instance, cloud storage services are often perceived as convenient, but they come with recurring costs and potential privacy concerns. On the other hand, a NAS system gives you complete control over your data, with the ability to customize security settings and access controls to fit your comfort level.
2. The Raspberry Pi: A Versatile Mini Computer
The Raspberry Pi is a low-cost, credit-card-sized computer that has gained immense popularity since its release in 2012. It’s highly regarded in educational contexts and among hobbyists, thanks to its versatility and ease of use. With models like the Raspberry Pi 4 boasting up to 8GB of RAM and USB 3.0 ports, it’s capable enough to function as a basic NAS.
Aside from being budget-friendly, the Raspberry Pi can run various operating systems, including Raspbian, Ubuntu, and even specialized NAS software. This flexibility makes it a great choice for users looking to create their own NAS system without breaking the bank. Setting up a Raspberry Pi NAS allows you to customize your storage solution to fit your specific needs, whether for media streaming, file sharing, or backups.
Additionally, the Raspberry Pi community is vast and supportive. You can find countless tutorials, forums, and resources online, making it easier for both beginners and experienced users to troubleshoot issues and share insights.
One of the exciting aspects of the Raspberry Pi ecosystem is the continuous development and updates from its community. New projects, add-ons, and software optimizations regularly emerge, allowing users to enhance their NAS functionality. For example, several users have successfully integrated Docker into their Raspberry Pi NAS setups, enabling them to run multiple applications in isolated containers without compromising performance.
3. Essential Components for Your Raspberry Pi NAS
Before diving into the setup process, you’ll need to gather some essential components for your Raspberry Pi NAS. Here’s what you’ll require:
- Raspberry Pi: The Raspberry Pi 4 is recommended for its superior performance, but earlier models can also work.
- Power Supply: A reliable power source is essential to keep your Raspberry Pi running.
- Storage Device: Use external USB drives or SSDs. Consider drives with adequate storage capacity based on your needs.
- MicroSD Card: This will hold the operating system and NAS software.
- Network Connection: Preferably, connect via Ethernet for better speed and stability, though Wi-Fi is also an option.
- Keyboard, Mouse, and Monitor: These are needed for initial setup, although you can later manage the Pi headlessly.
Once you have these components, you’re ready to move on to setting up your Raspberry Pi NAS.
It’s also advisable to invest in a decent case for your Raspberry Pi. A good case can improve heat dissipation and protect your device from dust and physical damage. Some cases even come with built-in fans or heat sinks to enhance performance.
Additionally, consider acquiring a UPS (Uninterruptible Power Supply) to safeguard your Raspberry Pi NAS against sudden power outages. This will help prevent data corruption and loss, ensuring your storage solution remains reliable at all times. With a UPS, you can also set up scripts to gracefully shut down your NAS in the event of a power failure, preserving the integrity of your data. (See: Understanding Network Attached Storage.)
4. Installing the Operating System
The first step in creating your Raspberry Pi NAS is installing the operating system. While you can use Raspbian, many users prefer dedicated NAS operating systems like OpenMediaVault (OMV) for their streamlined features tailored for file-sharing purposes.
To install OpenMediaVault, download the image from the official website, and use software like Balena Etcher to write the image onto your MicroSD card. Once done, insert the card into your Raspberry Pi, connect the peripherals, and power it up. The Pi will boot into OpenMediaVault, guiding you through the initial configuration, including setting up a username and password.
Alternatively, other options worth exploring include Nextcloud and Samba for your NAS setup, both of which offer unique features that may suit your specific needs. Nextcloud focuses on private cloud storage and collaboration, while Samba provides robust file sharing capabilities across different operating systems.
It’s essential to stay updated with your chosen operating system. Regular updates will help you benefit from security patches, new features, and improvements. OpenMediaVault, for example, has a dedicated community that frequently releases updates, allowing users to enhance their NAS capabilities continually.
5. Configuring Your NAS Storage
After the operating system is installed, the next step involves configuring your storage. In the OpenMediaVault interface, navigate to the ‘Storage’ section, where you can add your external USB drives or SSDs. It’s advisable to format these drives to a suitable filesystem like EXT4 for optimal performance.
Once the drives are connected and configured, you can create shared folders. This can be done in the ‘Shared Folders’ section of the interface. You’ll need to specify the name, device, and permissions for each folder you create. This setup allows you to designate who can access what, ensuring that your data is secure and organized.
Consider setting up RAID (Redundant Array of Independent Disks) configurations for data redundancy and integrity. While the Raspberry Pi might not have the processing power for complex RAID setups like those found in dedicated NAS systems, you can still implement software RAID solutions to enhance your data protection.
There are various RAID levels to consider, such as RAID 1 for mirroring data and RAID 0 for striping, which can improve performance. It’s important to weigh the benefits against your needs for speed versus data safety when deciding which RAID configuration to choose.
6. Setting Up User Access and Permissions
User management is a crucial aspect of your Raspberry Pi NAS. You can create different users and groups to control access to shared folders. This feature is particularly useful in a multi-user environment where you want certain files accessible only to specific individuals.
In OpenMediaVault, navigate to the ‘Access Rights Management’ section. Here, you can create users, assign passwords, and manage permissions. Ensuring that your NAS has robust security settings will help protect sensitive data from unauthorized access.
Consider implementing two-factor authentication for an extra layer of security, especially if you plan on accessing your NAS remotely. This way, even if a password is compromised, unauthorized users will still have difficulty gaining access.
Furthermore, you can utilize tools like Fail2Ban to protect your NAS from brute-force attacks. By monitoring log files and banning IP addresses that show malicious signs, you can significantly enhance the security measures of your Raspberry Pi NAS.
7. Remote Access and Additional Features
One of the most significant benefits of a Raspberry Pi NAS is the ability to access your files remotely. You can configure services like FTP, WebDAV, or even install a VPN to secure your remote connections. This way, you’ll be able to access your data from anywhere in the world, as long as you have internet access.
Moreover, you can enhance your NAS with additional features. For example, consider setting up media server software like Plex or Emby, which allows you to stream your media library to various devices. You can also use backup solutions to ensure your data is safe from accidental deletions or hardware failures. (See: Importance of data storage solutions.)
In addition to media streaming, you might want to set up a personal cloud service. Using software like Nextcloud, you can create a fully functional cloud storage solution that rivals commercial options like Google Drive or Dropbox while maintaining complete control over your data.
Some users have also integrated home automation systems with their Raspberry Pi NAS, leveraging its capabilities to create a centralized hub for managing smart devices. This integration can streamline your home tech and offer a seamless experience when controlling various aspects of your living environment.
8. Troubleshooting Common Issues
Even the most robust setups can run into issues. Common problems with Raspberry Pi NAS include connectivity issues, permission errors, or performance bottlenecks. If you experience slow transfer speeds, consider connecting via Ethernet instead of Wi-Fi to minimize interference. Also, ensure you have sufficient power supplied to your Raspberry Pi, as insufficient power can lead to unstable performance.
For permission issues, double-check user settings in OpenMediaVault to ensure users have the correct access rights. If something goes wrong during configuration, the community forums and documentation are valuable resources for troubleshooting.
If your NAS is frequently crashing or behaving unpredictably, it could be related to overheating. Ensure that your Raspberry Pi is in a well-ventilated area and consider using a fan or heat sink to help manage temperature.
In some cases, you might face issues with your drives not being recognized. If this happens, ensure that the drives are formatted correctly and compatible with the Raspberry Pi. Checking for hardware errors by connecting the drives to another system can also help diagnose the issue.
9. Real-World Applications of Raspberry Pi NAS
The practical applications of a Raspberry Pi NAS are vast. Many users employ it for media streaming, backup solutions, or even hosting private cloud services. For example, someone might set up a Raspberry Pi NAS to store and stream their extensive movie collection to multiple devices, allowing for a seamless viewing experience.
Businesses can also benefit from a Raspberry Pi NAS for file sharing and collaboration. It’s a cost-effective way to centralize data storage, making it easier for teams to access shared resources without relying on more expensive, proprietary solutions.
Another example is educational institutions using Raspberry Pi NAS setups for collaborative projects. Students can store and share documents and media files in a central location, making it easier to work together on group assignments.
Moreover, hobbyists use Raspberry Pi NAS setups for various projects, such as hosting game servers or developing IoT applications. The low initial investment and customizable nature of the Raspberry Pi make it an appealing platform for experimentation and innovation.
10. Conclusion: The Future of DIY NAS Solutions
Using a Raspberry Pi as a NAS is not only a cost-effective solution but also a rewarding project that enhances your technical skills. The flexibility, scalability, and customization options available with a Raspberry Pi NAS make it an attractive choice for both individuals and businesses. As digital storage needs continue to grow, DIY NAS solutions like this will become increasingly relevant, providing a practical and hands-on approach to managing and sharing data.
11. Frequently Asked Questions (FAQ)
What is the maximum storage capacity I can use with a Raspberry Pi NAS?
The maximum storage capacity depends on the size of the external drives you connect. Generally, you can use multiple drives, so your storage potential is primarily based on the number and size of the drives you use. Some users have successfully set up Raspberry Pi NAS systems with several terabytes of storage. (See: Benefits of using NAS systems.)
Can I set up a Raspberry Pi NAS with an old Raspberry Pi model?
Yes, older Raspberry Pi models can function as NAS systems, though performance may be limited. The Raspberry Pi 4 offers significantly better performance, especially for tasks like media streaming, but models like the Raspberry Pi 3 can still handle basic NAS functionalities.
Is it safe to use a Raspberry Pi NAS for sensitive data?
Yes, you can safely use a Raspberry Pi NAS for sensitive data as long as you implement proper security measures. Make sure to configure user access, use strong passwords, and consider enabling encryption for added security.
How do I back up my Raspberry Pi NAS?
Backing up a Raspberry Pi NAS can be done by regularly copying data to another external drive or using cloud backup solutions. You can also create RAID configurations for redundancy, but keep in mind that RAID is not a backup solution; it’s meant for data redundancy.
Can I use a Raspberry Pi NAS as a media server?
Absolutely! Setting up software like Plex, Emby, or even Kodi on your Raspberry Pi NAS allows you to stream your media library to various devices. You’ll be able to access your movies, music, and photos from anywhere, making it a great solution for home entertainment.
What are some alternatives to Raspberry Pi for NAS solutions?
While Raspberry Pi is a popular choice, there are other alternatives, such as using an old laptop or desktop computer, dedicated NAS units from companies like Synology or QNAP, or even other single-board computers like the Odroid or Banana Pi. Each option has its pros and cons, depending on your budget and requirements.
How can I enhance the performance of my Raspberry Pi NAS?
To enhance the performance of your Raspberry Pi NAS, consider upgrading to a faster storage medium, such as an SSD, which can significantly improve read and write speeds. Additionally, using a wired Ethernet connection instead of Wi-Fi will provide better stability and speed. Optimizing your NAS software settings and ensuring your Raspberry Pi has adequate cooling can also help maintain performance.
What types of files can I store on a Raspberry Pi NAS?
You can store a wide variety of file types on your Raspberry Pi NAS, including documents, images, videos, and music. Depending on the software you use, you can also host databases or even run virtual machines. The only limitations will be the storage capacity of your drives and the configurations you have set up on your NAS.
What are the power requirements for running a Raspberry Pi NAS?
The Raspberry Pi typically requires a power supply that provides 5V with a minimum current rating of 3A for optimal performance. If you’re using external drives, especially those that are not powered independently, make sure your power supply can handle the additional load to avoid system instability.
Can I access my Raspberry Pi NAS from outside my home network?
Yes, you can access your Raspberry Pi NAS from outside your home network by configuring remote access through FTP, WebDAV, or a VPN. Make sure to implement proper security measures, such as strong passwords and encryption, to protect your data while accessing it remotely.
“`
Trending Now
Frequently Asked Questions
What is a Raspberry Pi used for in a NAS setup?
A Raspberry Pi can be used as a cost-effective Network Attached Storage (NAS) solution, allowing users to store and share files across a network. It serves as a file server, enabling access from various devices and supporting applications like media streaming and file sharing.
How do I set up a Raspberry Pi as a NAS?
To set up a Raspberry Pi as a NAS, you'll need to install a suitable operating system, configure the storage drives, and set up file sharing protocols like Samba. This process allows multiple users to access and share files conveniently over the network.
What are the advantages of using a NAS over cloud storage?
Using a NAS provides complete control over your data without recurring costs associated with cloud storage. It allows for customizable security settings and access controls, ensuring privacy and scalability as your storage needs grow.
Can I use Raspberry Pi for media streaming?
Yes, a Raspberry Pi can be configured as a NAS to stream media. By installing software like Plex or Kodi, users can access and stream their media files to various devices on the network, making it a versatile solution for home entertainment.
Is a Raspberry Pi powerful enough for a NAS?
Yes, particularly models like the Raspberry Pi 4, which offers up to 8GB of RAM and USB 3.0 ports. This hardware capability enables it to manage file sharing and media streaming effectively, making it suitable for personal and small business NAS setups.
Have you experienced this yourself? We’d love to hear your story in the comments.