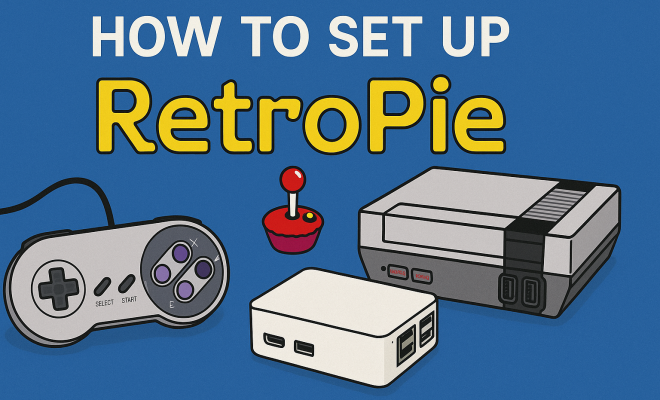
How to set up RetroPie
“`html
In the age of powerful consoles and cutting-edge graphics, many gamers find themselves yearning for the charm of retro gaming. Enter RetroPie, a powerful software that effectively turns your Raspberry Pi into a retro gaming console, allowing you to play classic games from systems like NES, SNES, Sega Genesis, and even arcade machines. In this article, we’ll explore how to set up RetroPie, covering everything from initial installation to configuration and troubleshooting. Whether you’re a seasoned gamer or a curious newcomer, this guide will provide all the necessary steps to get you reliving those cherished moments from gaming’s golden age.
1. What is RetroPie?
RetroPie is an open-source software package designed to emulate retro gaming systems on single-board computers, particularly the Raspberry Pi. Its origins can be traced back to a desire to provide an accessible platform for users to enjoy vintage games without needing original hardware. With RetroPie, you can play a vast library of titles from popular consoles like the Atari, Nintendo, and Sega. The flexibility of RetroPie also allows users to customize their gaming experience, whether that means modifying game controls or changing the graphical settings.
The software itself integrates various emulators, helping you to run games from different platforms. RetroPie is built on top of Raspbian, the Raspberry Pi’s official operating system, and utilizes EmulationStation to provide a user-friendly interface for navigating your game library. It’s particularly significant in the gaming community for combining nostalgia with modern technology, making it a popular choice for both casual and hardcore gamers alike.
2. Essential Requirements to Set Up RetroPie
To set up RetroPie successfully, you’ll need to gather some essential hardware and software. Here’s a rundown of what you’ll need:
- Raspberry Pi: While RetroPie supports various models, the Raspberry Pi 3 and 4 are preferred due to their superior performance and compatibility.
- MicroSD Card: A quality microSD card (at least 16GB, but 32GB or more is recommended) is necessary for storing RetroPie and your game library.
- Power Supply: Ensure you have a reliable power supply for your Raspberry Pi, as insufficient power can lead to performance issues.
- Controllers: Any USB controllers will work, but retro-style controllers enhance the nostalgic experience. You can also connect Bluetooth controllers if desired.
- Computer: You’ll need a computer to download and transfer files to your Raspberry Pi.
- Monitor/TV: HDMI-compatible display to connect your Raspberry Pi.
- Internet Connection: Required for software updates and downloading additional emulator files.
Having these essentials ready will streamline the process and help you get started on the right foot.
3. Installing RetroPie: Step-by-Step Guide
Now that you have all the necessary components, let’s explore how to install RetroPie on your Raspberry Pi. Follow these steps:
- Download the RetroPie Image: Visit the official RetroPie website and download the appropriate image for your Raspberry Pi model.
- Etcher Software: Use Etcher or a similar software to flash the RetroPie image onto your microSD card. Simply connect your microSD card to your computer, open Etcher, select the downloaded RetroPie image, choose your microSD card, and click ‘Flash’.
- Initial Setup: Once flashing is complete, insert the microSD card into your Raspberry Pi and connect it to your display, power supply, and controllers. Upon first boot, RetroPie will expand the filesystem and configure settings.
- EmulationStation Interface: You’ll be greeted with the EmulationStation interface upon successful booting. From here, you can set up your controller and navigate to configure your settings.
These steps lay the foundation for your RetroPie setup, enabling you to access your retro games in no time.
4. Configuring Your Controllers
Setting up your controllers correctly is crucial for a seamless gaming experience. RetroPie supports a wide range of controllers, whether they’re wired or wireless. When you boot RetroPie for the first time, you’ll be prompted to configure your controller. Here’s how to do it:
Follow the on-screen instructions to map each button on your controller. This usually involves pressing the buttons corresponding to the prompts. If you’re using a controller with more buttons than RetroPie recognizes, simply hold any unused button to skip the mapping for that button. After configuration, you can always re-map your controller by accessing the configuration menu in EmulationStation.
Take some time to ensure your controls feel comfortable. A misconfigured control scheme can lead to frustration during gameplay, especially in fast-paced titles. Having a responsive setup will enhance your gaming experience significantly. (See: Wikipedia page on RetroPie.)
5. Adding Games to RetroPie
One of the most exciting aspects of setting up RetroPie is adding games. However, it’s essential to approach this step with care. RetroPie does not come with games pre-installed due to legal reasons, so you’ll need to source your ROMs (game files). Here’s how you can do it:
- Transferring ROMs: You can transfer ROMs to your Raspberry Pi via several methods—USB stick, FTP, or through your local network. The USB method is user-friendly. Just create a folder named ‘retropie’ on your USB stick, insert it into your Raspberry Pi, and wait for the OS to create the necessary directories. Then, you can insert the USB stick back into your computer and transfer your ROM files into the ‘roms’ folder.
- Supported Formats: Ensure your ROMs are in compatible formats. Most emulators support .nes for NES games, .smc for SNES games, and .gb for Game Boy titles.
- Legal Considerations: Always remember that downloading ROMs for games you do not own is illegal in many jurisdictions. It’s best to dump your own copies from original cartridges when possible.
After transferring your games, restart EmulationStation. Your new games should appear in the corresponding console section, ready to play!
6. Customizing RetroPie: Themes and Settings
RetroPie is highly customizable, allowing you to tailor your gaming experience to your liking. You can change themes, alter settings, and even add new emulators. Here’s how to customize your setup:
- Changing Themes: Access the RetroPie Configuration menu from the EmulationStation main menu. Navigate to the ‘UI Settings’ and select the ‘Theme Set’ option. You can choose from built-in themes or download additional ones.
- Overclocking: If you’re comfortable, consider overclocking your Raspberry Pi for better performance. This can improve the performance of more demanding games. However, ensure your cooling solution is adequate to prevent overheating.
- Adding New Emulators: You can install additional emulators through the RetroPie Setup Script. Access the setup script from the RetroPie Configuration menu and choose the ‘Manage packages’ option to explore available emulators.
Customizing RetroPie not only enhances your gaming experience but also makes the platform feel unique to your preferences and style.
7. Troubleshooting Common Issues
While setting up RetroPie is generally straightforward, you may encounter some common issues. Here’s how to troubleshoot:
- Controller Not Recognized: If your controller isn’t being recognized, check the connections and ensure you’ve completed the configuration process. Try another USB port or a different controller if necessary.
- Games Not Appearing: If your games aren’t showing up, ensure they’re in the correct folder, formatted properly, and that the Raspberry Pi has been restarted after transferring.
- Overheating Issues: If your Raspberry Pi is overheating, consider investing in a cooling fan or heat sinks. This is especially important if you’re overclocking the device.
By proactively addressing these issues, you can maintain a smooth gaming experience and avoid frustration.
8. Exploring the Community and Resources
The RetroPie community is vibrant and supportive, offering a plethora of resources for newcomers and veterans alike. Here’s how to engage:
- Official Documentation: The RetroPie website offers extensive documentation, including setup guides, emulator information, and troubleshooting tips.
- Forums and Social Media: Engaging with forums, Reddit communities, and social media groups dedicated to RetroPie can provide you with insights and help solve any specific issues you may encounter.
- Video Tutorials: YouTube is a treasure trove of RetroPie content, featuring tutorials ranging from installation to game optimization. These visual aids can be incredibly helpful for understanding complex steps.
Incorporating these resources into your RetroPie journey will enhance your knowledge and improve your overall experience.
9. Final Thoughts on Setting Up RetroPie
Setting up RetroPie can be both a rewarding and nostalgic experience, bridging the gap between classic gaming and modern technology. With a little bit of preparation and an adventurous spirit, you can create your own retro gaming haven. Remember to take your time throughout the setup process, ensuring that each step is done correctly for optimal performance.
Whether you’re revisiting old favorites or discovering new classics, RetroPie offers a unique platform to enjoy gaming history. Take advantage of community support, and don’t hesitate to experiment with customization options. The world of retro gaming is vast, and with RetroPie, it’s all at your fingertips.
10. Advanced Configuration Options
If you’re looking to take your RetroPie experience to the next level, there are several advanced configuration options you can explore. These settings can optimize performance, enhance the visual quality of games, and even expand the gaming library with additional features. (See: Scientific articles on emulation technology.)
10.1. Overclocking Your Raspberry Pi
Overclocking your Raspberry Pi can provide a significant performance boost, especially with more demanding games. It involves increasing the clock speed of the CPU and GPU, allowing them to run faster than their default settings. However, it’s essential to approach overclocking with caution. Make sure you have proper cooling solutions in place, like heat sinks or fans, to avoid overheating. You can adjust the overclock settings in the RetroPie configuration menu under the ‘Raspberry Pi Configuration’ section.
10.2. Installing Additional Emulators
While RetroPie comes pre-installed with several popular emulators, you might want to install additional ones for more gaming options. Access the RetroPie Setup Script, navigate to ‘Manage Packages’, and you’ll see lists of optional emulators you can install. This can include niche systems or lesser-known platforms, allowing you to explore a more extensive range of titles.
10.3. Using Custom Scripts
For the tech-savvy, RetroPie allows the use of custom scripts to automate tasks such as game backups, updates, and even game launches. You can create scripts that run on startup to streamline your gaming experience. This level of customization is particularly beneficial if you’re managing a large library of ROMs or want to ensure your configurations are always up to date.
11. Frequently Asked Questions (FAQs)
Many users have common questions when it comes to setting up and using RetroPie. Below are some frequently asked questions that can help clarify your setup process.
11.1. Can I use any USB controller with RetroPie?
Yes, most USB controllers are compatible with RetroPie. However, for the best experience, you may want to consider using controllers that are designed for retro gaming, such as those modeled after the original NES or SNES controllers.
11.2. Is it legal to download ROMs for RetroPie?
Downloading ROMs for games you do not own is illegal in many countries. The safest and most legal way to get ROMs is to dump them from cartridges you own to ensure compliance with copyright laws.
11.3. How can I add more games once RetroPie is set up?
You can add more games by transferring them using a USB stick, FTP, or through your local network, just like you did during the initial setup. Simply ensure that the new ROMs are placed in the correct folders and restart EmulationStation.
11.4. What should I do if my Raspberry Pi does not boot?
If your Raspberry Pi does not boot, check the following: ensure the microSD card is properly inserted, verify that the power supply is functioning, and try another HDMI cable or monitor. If these solutions don’t work, you may need to re-flash the RetroPie image onto the microSD card.
11.5. Can I play multiplayer games on RetroPie?
Yes! RetroPie supports both local and network multiplayer games, provided the games themselves support multiplayer functionality. You can connect multiple controllers and set them up accordingly during configuration.
12. Popular Games to Consider for RetroPie
Once you have RetroPie set up, the fun begins with choosing which games to play. Here are some popular titles you might want to consider adding to your collection:
- Super Mario Bros. (NES): An iconic platformer that set the standard for many games that followed.
- The Legend of Zelda: A Link to the Past (SNES): A classic action-adventure game that remains highly regarded in gaming history.
- Street Fighter II (Sega Genesis): A revolutionary fighting game that defined the genre and introduced many iconic characters.
- Pac-Man (Arcade): A timeless arcade classic that’s still enjoyable today.
- Tetris (Game Boy): One of the most famous puzzle games of all time, perfect for quick sessions.
- Castlevania: Symphony of the Night (PlayStation): A beloved action-adventure platformer known for its atmospheric design and gameplay depth.
These titles not only showcase the best of retro gaming but also highlight the diversity and creativity of the gaming industry during its formative years.
13. Setting Up RetroPie with Other Hardware
For those looking to expand their RetroPie setup beyond a simple Raspberry Pi, there are various hardware options worth considering. These can enhance performance or provide different gaming experiences.
13.1. Using a RetroPie with a Raspberry Pi Zero
The Raspberry Pi Zero is a compact and cost-effective option that can also run RetroPie. While it may not offer the same performance as the Pi 3 or 4, it’s perfect for handheld devices or smaller setups. You can modify your case to accommodate a small display and controls, creating a portable retro console. Many enthusiasts utilize the Pi Zero to bring classic games on the go, creating custom devices that fit into their pockets.
13.2. Connecting to Different Displays
RetroPie can be connected to various types of displays, from high-definition TVs to older CRT monitors. If you’re using a CRT, you might need additional converters to adapt the HDMI output to composite video. This can give you the authentic retro experience, displaying games just as they looked in their original form. For modern displays, ensure you consider settings that allow for optimal scaling to maintain the best visual quality.
13.3. Adding Additional Peripherals
Consider integrating additional peripherals for a more enhanced gaming experience. USB keyboards can be useful for navigating menus and entering text. You can also employ external speakers or sound systems for improved audio, especially when diving into immersive titles. If you have arcade buttons or joysticks, RetroPie can be configured to support these, creating an arcade cabinet that replicates the classic gaming arcade environment.
14. Conclusion
Setting up RetroPie can be both a rewarding and nostalgic experience, bridging the gap between classic gaming and modern technology. With a little bit of preparation and an adventurous spirit, you can create your own retro gaming haven. Remember to take your time throughout the setup process, ensuring that each step is done correctly for optimal performance.
Whether you’re revisiting old favorites or discovering new classics, RetroPie offers a unique platform to enjoy gaming history. Take advantage of community support, and don’t hesitate to experiment with customization options. The world of retro gaming is vast, and with RetroPie, it’s all at your fingertips.
“`
Trending Now
Frequently Asked Questions
What is RetroPie and how does it work?
RetroPie is an open-source software package that turns your Raspberry Pi into a retro gaming console. It emulates classic gaming systems, allowing you to play games from consoles like NES, SNES, and Sega Genesis. RetroPie integrates various emulators and provides a user-friendly interface through EmulationStation for easy navigation of your game library.
What hardware do I need to set up RetroPie?
To set up RetroPie, you'll need a Raspberry Pi (preferably models 3 or 4), a microSD card for storage, a power supply, and controllers for gaming. Additionally, you may want a keyboard for initial configuration and a monitor or TV to display your games.
Is RetroPie easy to install?
Yes, RetroPie is relatively easy to install. The setup process involves downloading the RetroPie image, flashing it onto a microSD card, and then configuring your system. Detailed guides and community support are available to help users through the installation process.
Can I play arcade games on RetroPie?
Absolutely! RetroPie supports a variety of emulators that allow you to play arcade games, alongside titles from other classic consoles. By installing the appropriate emulators, you can relive the arcade experience right from your Raspberry Pi.
How do I troubleshoot RetroPie if it’s not working?
If RetroPie isn't working properly, start by checking your hardware connections and ensuring your Raspberry Pi is powered correctly. You can also check the configuration settings within RetroPie, consult the official documentation, or seek help from community forums for specific error messages or issues.
Have you experienced this yourself? We’d love to hear your story in the comments.