How to apply thermal paste
“`html
Applying thermal paste is a crucial step in ensuring optimal performance in computers, gaming consoles, and other electronic devices. Whether you’re a seasoned enthusiast or a newcomer to the DIY tech scene, understanding how to apply thermal paste can significantly impact your device’s cooling efficiency and longevity. In this comprehensive guide, we’ll cover everything from the basics of thermal paste to the best techniques and tips for application.
1. What is Thermal Paste?
Thermal paste, also known as thermal compound or thermal grease, is a substance applied between the CPU or GPU and the heat sink to enhance thermal conductivity. Its primary purpose is to fill in microscopic imperfections on the surfaces of these components, allowing for better heat transfer. Without thermal paste, heat generated during processing could cause overheating, leading to decreased performance and potential hardware failure.
Made from materials such as silicone, metal oxides, or ceramic, thermal paste comes in various formulations, each designed for specific applications. Some pastes are better suited for high-performance setups, while others cater to everyday use. Understanding the type of thermal paste you need is the first step in mastering how to apply thermal paste.
2. Why Is Thermal Paste Important?
The importance of thermal paste cannot be overstated. A CPU or GPU generates heat during operation, and without effective cooling, components can throttle, affecting performance. Poor heat transfer can lead to overheating, which can shorten the lifespan of your hardware significantly. By properly applying thermal paste, you ensure that your system runs efficiently and remains stable under load.
Additionally, thermal paste acts as a barrier against dust and debris, which can accumulate over time and hinder cooling. This protective layer is vital, especially in dusty environments. Regularly reapplying thermal paste can help maintain your system’s performance and prevent overheating issues.
3. When Should You Apply Thermal Paste?
Knowing when to apply thermal paste is essential for maintaining your system’s health. You should consider reapplying thermal paste in the following situations:
- When building a new computer or installing a new CPU/GPU.
- If you notice high temperatures or thermal throttling during intensive tasks.
- During routine maintenance, particularly for older systems.
- Whenever you remove the heat sink for cleaning or upgrades.
In general, it’s a good practice to check thermal paste every year or two, especially if you’re using your device for gaming or heavy workloads. Regular maintenance can prevent overheating and prolong the lifespan of your components.
4. Gathering the Right Tools and Materials
Before you start applying thermal paste, ensure you have the necessary tools and materials ready. Here’s a checklist:
- Thermal Paste: Choose an appropriate thermal paste for your needs. High-performance options often contain metal or ceramic particles for enhanced conductivity.
- Isopropyl Alcohol (70% or higher): This is essential for cleaning surfaces before applying a new layer of thermal paste.
- Lint-Free Cloth or Coffee Filters: Use these to wipe away old thermal paste without leaving behind fibers.
- Cotton Swabs: These are useful for precise cleaning in hard-to-reach areas.
- Plastic Spatula (Optional): Some people prefer to use a spatula for spreading thermal paste, although it’s not necessary.
Having these tools at your disposal will streamline the process and help you achieve the best results when learning how to apply thermal paste.
5. Steps to Apply Thermal Paste
Now that you’re equipped with knowledge and tools, let’s go through the step-by-step process of applying thermal paste: (See: Wikipedia on thermal paste.)
- Prepare the Work Area: Ensure you’re working in a static-free environment. Use an anti-static wrist strap if possible, and work on a clean, flat surface.
- Remove the Heat Sink: Carefully detach the heat sink from the CPU or GPU. Follow manufacturer instructions to avoid damage.
- Clean the Surface: Use isopropyl alcohol and a lint-free cloth to clean the surfaces of the CPU/GPU and the heat sink. It’s essential to remove all old thermal paste.
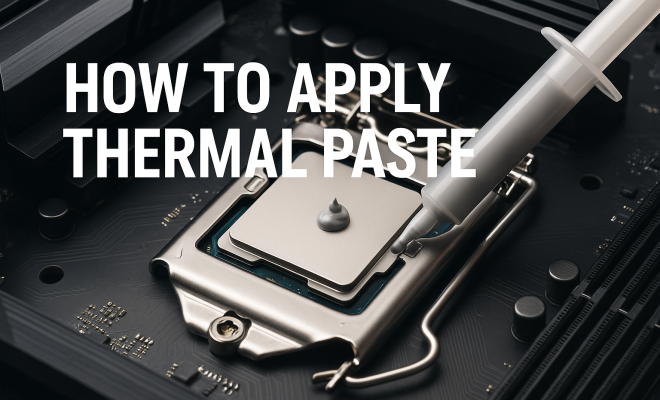
- Apply Thermal Paste: Using a small amount of thermal paste (about a pea-sized dot or a line), apply it directly to the center of the CPU or GPU. Avoid spreading it with your finger or a spatula, as the pressure from the heat sink will evenly distribute it.
- Reattach the Heat Sink: Carefully place the heat sink back onto the CPU or GPU. Ensure it is aligned correctly, and apply the necessary pressure to spread the paste without over-tightening screws.
- Check Temperatures: After reassembling your system, monitor the temperatures using software tools to ensure efficient heat transfer.
Following these steps will help you effectively learn how to apply thermal paste and ensure your components are adequately cooled.
6. Common Mistakes to Avoid
While applying thermal paste may seem straightforward, there are several common mistakes that can lead to poor performance. Here are some pitfalls to avoid:
- Using Too Much Paste: Applying an excessive amount can cause the paste to spill over the edges of the CPU, leading to conductivity issues and potential short circuits.
- Not Cleaning Properly: Failing to thoroughly clean the surfaces can leave residue and prevent effective heat transfer.
- Applying Paste in the Wrong Locations: Make sure to apply the paste directly onto the CPU or GPU, not on the heat sink itself.
- Ignoring Manufacturer Guidelines: Always check the guidelines provided by the manufacturer of your CPU/GPU and thermal paste for specific recommendations.
Avoiding these common mistakes will help ensure that your application of thermal paste is effective and safe, leading to better thermal management.
7. Different Types of Thermal Paste
Choosing the right type of thermal paste can affect your system’s performance. Here are some common types:
- Metal-Based Compounds: These are often the most effective thermally, providing excellent heat conductivity. However, they can be electrically conductive, so caution is needed during application.
- Ceramic-Based Compounds: While not as thermally conductive as metal-based options, these are safer to apply and generally less costly. They work well for everyday use.
- Silicone-Based Compounds: These are easy to apply and clean but tend to have lower thermal conductivity. They’re suitable for standard computing tasks.
- Phase Change Materials: These thermal pastes change from solid to liquid when heated, providing excellent performance without the risk of overspreading.
Understanding the different types of thermal paste will empower you to make informed decisions on what to use based on your specific needs, enhancing your knowledge of how to apply thermal paste.
8. Signs You Need to Replace Thermal Paste
Knowing when to replace thermal paste is just as important as learning how to apply thermal paste. Here are signs that indicate it may be time for a change:
- High Temperatures: If your CPU or GPU is operating at higher temperatures than normal, it may be time for a reapplication.
- Frequent Crashes or Throttling: If your system is slowing down during intensive tasks, it may be due to overheating caused by degraded thermal paste.
- Visible Degradation: If you’ve opened your system and notice that the thermal paste has dried out or cracked, it’s a clear indication for replacement.
Regularly monitoring your system’s performance can help you catch these issues early and ensure that your thermal paste is always doing its job effectively.
9. Tips for Maintaining Your System’s Cooling Efficiency
Beyond applying thermal paste, maintaining your system’s cooling efficiency involves several best practices:
- Regular Cleaning: Dust buildup can obstruct airflow, leading to overheating. Clean your system regularly, including fans and heat sinks.
- Monitor Temperatures: Use monitoring software to keep track of your system temperatures, especially during heavy workloads.
- Optimize Airflow: Ensure your case fans are correctly positioned to promote optimal airflow, helping to dissipate heat effectively.
- Use Quality Components: Invest in high-quality heat sinks and fans that match your performance needs for better cooling.
Implementing these maintenance tips alongside knowing how to apply thermal paste will help keep your system running smoothly for years to come.
10. Common Myths About Thermal Paste
There are several myths surrounding thermal paste that can lead to confusion. Here are a few that need debunking:
- Myth 1: More Paste is Better: Many believe that applying a larger amount of thermal paste will improve performance. In reality, more paste can be detrimental, leading to excess spillage and reduced effectiveness.
- Myth 2: Thermal Paste Doesn’t Expire: Some users think that thermal paste is permanent once applied. However, it can dry out and lose effectiveness over time, requiring reapplication.
- Myth 3: All Thermal Pastes are the Same: Not all thermal pastes have the same properties. Different formulas have varying thermal conductivity, viscosity, and performance, making it essential to choose one suited for your application.
Recognizing these myths and understanding the facts can enhance your approach to thermal management in your devices.
11. Advanced Techniques for Application
If you’re looking to take your thermal paste application skills to the next level, consider these advanced techniques: (See: New York Times on PC building.)
- Dot Method: While the “pea-sized dot” method is common, some enthusiasts prefer the dot method, where several small dots are placed in a specific pattern across the CPU surface. This technique can promote even distribution across larger heat spreaders.
- Line Method: For CPUs with elongated surfaces, applying a thin line of thermal paste down the center can yield great results. This ensures coverage without over-applying.
- Spread Method: Although not generally recommended, some users like to use a plastic spatula to spread thermal paste across the surface before reattaching the heat sink. If done carefully, this can ensure a thin, even layer.
Experimenting with these methods can help you find the best approach for your specific hardware setup, improving your understanding of how to apply thermal paste.
12. Frequently Asked Questions (FAQ)
1. How often should I apply thermal paste?
Generally, it’s good to apply thermal paste every one to two years. However, if you notice high temperatures or after removing the heat sink for maintenance, it’s advisable to reapply.
2. Can I use any type of thermal paste?
While you can technically use any thermal paste, choosing one that matches your specific needs—like high-performance or standard use—is crucial for optimal cooling.
3. What happens if I don’t use thermal paste?
Without thermal paste, your CPU or GPU can overheat, leading to throttling, reduced performance, and ultimately hardware failure. It’s essential for maintaining thermal efficiency.
4. Is it safe to use thermal paste on all components?
Yes, thermal paste is designed for use on CPUs, GPUs, and even some chipsets. However, always check the manufacturer’s guidelines for compatibility and recommendations.
5. Can I mix different types of thermal paste?
Mixing different thermal pastes is not recommended, as it can lead to unpredictable thermal conductivity and potential performance issues. It’s best to use a single type for the best results.
6. How can I tell if my thermal paste is ineffective?
Signs include unusually high temperatures, frequent crashes, or visible signs of degradation such as dryness or cracking of the paste. If you notice these, it’s time to reapply.
7. Is there a difference between budget and premium thermal pastes?
Yes, there is typically a noticeable difference. Budget thermal pastes may use lower-quality materials, resulting in less effective thermal conductivity. Premium pastes often have better performance characteristics, such as higher thermal conductivity and longer-lasting performance under high temperatures.
8. Are there specific brands of thermal paste that are recommended?
Some well-regarded brands include Arctic Silver, Noctua, Thermal Grizzly, and Cooler Master. Each brand offers a variety of thermal paste options, catering to different needs, from budget-friendly choices to high-performance pastes for overclocking.
9. Can thermal paste be reused?
It’s not advisable to reuse thermal paste. Once removed, the paste loses its effectiveness and could dry out or become contaminated. Always clean the surfaces and apply a new layer for the best performance. (See: ScienceDirect on thermal paste.)
10. What should I do if thermal paste spills onto the motherboard?
If thermal paste spills onto the motherboard, use a lint-free cloth or cotton swab dipped in isopropyl alcohol to gently clean it up. Be careful not to touch any components. Ensure everything is dry before powering up your system again.
Understanding the intricacies of how to apply thermal paste and maintaining your system is key to ensuring your hardware operates effectively. With the right knowledge, tools, and techniques, you’re well on your way to achieving optimal thermal performance for your devices.
13. Temperature Monitoring Tools
Monitoring your CPU and GPU temperatures is essential after applying thermal paste to ensure everything functions within safe limits. Here are some popular temperature monitoring tools:
- HWMonitor: A free tool that provides real-time monitoring of your system’s temperatures and voltages. It offers a comprehensive view of your hardware’s status, including CPU and GPU temperatures.
- Core Temp: This lightweight application is designed specifically for CPU temperature monitoring and provides detailed temperature readings, including per-core temperatures for multi-core CPUs.
- MSI Afterburner: Primarily a GPU overclocking tool, it also features temperature monitoring functionalities. Ideal for gamers looking to keep track of their GPU performance while playing.
- Open Hardware Monitor: An open-source tool that allows you to monitor CPU temperatures, fan speeds, and voltages. It’s customizable and supports a wide range of hardware.
Choosing the right temperature monitoring tool will help you keep an eye on your system’s performance and ensure that your thermal paste application is effective.
14. Understanding Thermal Paste Application in Different Systems
Different systems may require unique considerations when applying thermal paste. Here’s a look at thermal paste application in various setups:
- Desktop PCs: Typically, you’ll be working with standard CPUs and GPUs. The methods outlined in this guide apply here, but ensure to check for specific thermal paste requirements based on your CPU architecture.
- Laptops: Laptop CPUs and GPUs often have a smaller footprint. Be careful when applying thermal paste here, as excess can spill over. Also, consider that laptops may have more intricate cooling solutions that could require more detailed disassembly.
- Gaming Consoles: Applying thermal paste to consoles like the PS5 or Xbox Series X involves similar principles, but the design may necessitate additional steps. Always consult specific guides for your console model before proceeding.
Understanding these differences will help you adapt your thermal paste application skills to various hardware scenarios, enhancing your overall competency in how to apply thermal paste.
15. Environmental Considerations
When working with thermal paste, consider the environment in which you operate. Here are some factors to keep in mind:
- Temperature and Humidity: High temperatures and humidity levels can affect thermal paste application. Aim to work in a cool, dry area to avoid unintended consequences.
- Static Electricity: You’re working with sensitive electronic equipment, so static discharge is a concern. Use an anti-static wrist strap and keep your work area free of unnecessary clutter.
- Long-term Storage: If you have leftover thermal paste, store it in a cool, dry place. Check expiration dates, as using expired paste can lead to poor thermal performance.
Paying attention to these environmental factors will help you maintain a safe workspace and ensure the longevity and effectiveness of your thermal paste applications.
“`
Trending Now
Frequently Asked Questions
What is the purpose of thermal paste?
Thermal paste, also known as thermal compound or thermal grease, is used to enhance thermal conductivity between the CPU or GPU and the heat sink. It fills microscopic imperfections on these surfaces, improving heat transfer and preventing overheating, which can lead to performance issues and hardware failure.
How often should thermal paste be reapplied?
Thermal paste should typically be reapplied every few years or whenever you remove the CPU or GPU cooler. Regularly checking and reapplying can help maintain optimal cooling efficiency and prolong the lifespan of your hardware, especially in dusty environments.
Can I use any thermal paste for my CPU?
Not all thermal pastes are suitable for every application. While many are designed for CPUs, some are better suited for high-performance setups. It's essential to choose a thermal paste that matches your specific needs, considering factors like thermal conductivity and application type.
What happens if you don’t use thermal paste?
Without thermal paste, heat generated by the CPU or GPU cannot be efficiently transferred to the heat sink. This can lead to overheating, which may cause throttling, decreased performance, and even hardware failure over time. Proper application of thermal paste is crucial for maintaining system stability.
What are the best techniques for applying thermal paste?
The best techniques for applying thermal paste include using a small, pea-sized amount in the center of the CPU or GPU and allowing the pressure from the cooler to spread it evenly. Alternatively, you can use a thin line or cross pattern, but avoid over-applying, as it can lead to inefficient cooling.
Have you experienced this yourself? We’d love to hear your story in the comments.