Upgrade or Replace Your CPU Cooler: A Step-by-Step Guide
“`html
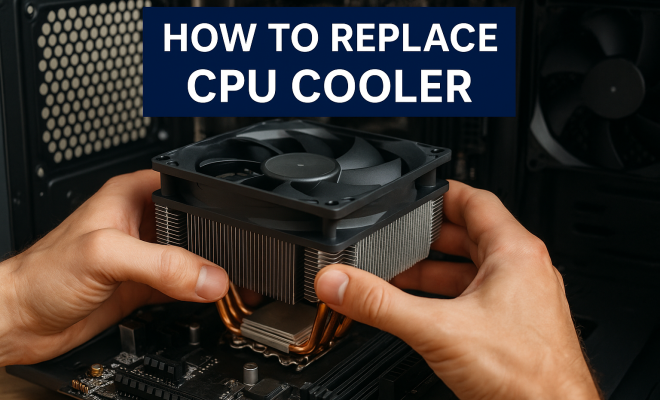
Replacing your CPU cooler can seem like a daunting task, but with a little guidance, it’s completely manageable—even for those who are new to PC building or maintenance. Whether you’re looking to upgrade your cooling system for improved performance or simply need to replace a failing cooler, this comprehensive guide on how to replace a CPU cooler will walk you through the process step by step.
1. Understanding the Importance of a Good CPU Cooler
Your CPU is often referred to as the “brain” of your computer, and just like any brain, it needs proper cooling to function optimally. A CPU cooler dissipates heat produced during processing tasks, ensuring that your computer runs efficiently and doesn’t overheat. If your cooler is inadequate or failing, it can lead to thermal throttling, where the CPU reduces its speed to prevent overheating, ultimately affecting performance.
Good cooling solutions also prolong the lifespan of your CPU. Overheating can cause permanent damage, reducing the longevity of your hardware. Additionally, high temperatures can affect the stability of your system, leading to crashes or unexpected behaviors during demanding tasks such as gaming or video rendering. Therefore, knowing how to replace a CPU cooler is a valuable skill for any computer user.
2. Gathering the Right Tools and Materials
Before you dive into replacing your CPU cooler, it’s essential to gather all the necessary tools and materials. Here’s a quick checklist:
- A new CPU cooler (air or liquid, depending on your preference)
- Thermal paste (if your cooler doesn’t come pre-applied)
- Screwdriver (typically Phillips head)
- Static wrist strap (to prevent static damage)
- Microfiber cloth (for cleaning)
- Isopropyl alcohol (for cleaning off old thermal paste)
Having these items on hand will make the process smoother and reduce the risk of complications. Depending on the cooler type, you may need additional hardware like mounting brackets or adapters, so check your cooler’s specifications before starting.
3. Preparing Your Workspace
Next, creating an organized and safe workspace is crucial. Ensure that you’re working in a static-free environment. You can do this by wearing a static wrist strap or frequently grounding yourself by touching a metal object. This step can prevent static electricity from damaging your components.
Clear a flat and clean surface where you can comfortably work. Having good lighting will help you see small screws and connectors clearly. If possible, lay out a towel or anti-static mat to provide a stable surface for your computer components, especially if you need to place them down temporarily.
4. Removing the Old CPU Cooler
Now that you’re ready, it’s time to remove the old CPU cooler. Start by shutting down your computer and unplugging it from the power source. Open your computer case, which typically involves removing side panels or screws.
Identify the CPU cooler, which is usually located directly above the CPU socket on the motherboard. Depending on your cooler type, you may need to unscrew it or release latches to detach it. Be cautious of any cables connected to the cooler, especially if it has fans. If the cooler is stuck, gently twist it back and forth to break the thermal paste’s seal before lifting it off.
5. Cleaning the CPU and Motherboard
Once the old cooler is removed, you’ll see the CPU and some remaining thermal paste residue. It’s crucial to clean this off to ensure optimal thermal conductivity when you install the new cooler. Use a microfiber cloth or paper towel with a small amount of isopropyl alcohol to gently wipe the CPU surface and the cooler base.
Make sure to avoid scratching the CPU surface. After cleaning, let it dry completely before applying new thermal paste. A clean surface allows for a better connection and improved heat dissipation. (See: Understanding Central Processing Units.)
6. Applying Thermal Paste
Applying thermal paste is a critical step when you replace a CPU cooler. If your new cooler comes with pre-applied thermal paste, you can skip this step. Otherwise, follow these guidelines for optimal application:
- Use a small amount of thermal paste—about the size of a pea or grain of rice is ideal.
- Place the paste in the center of the CPU.
- When the cooler is pressed down, it will spread the paste evenly across the surface.
Using too much paste can lead to a mess and impede thermal transfer, while too little may not provide adequate coverage. Remember, high-quality thermal paste can make a significant difference in cooling efficiency.
7. Installing the New CPU Cooler
With everything prepped, it’s time to install your new CPU cooler. Follow the manufacturer’s instructions for mounting, as the installation method can vary significantly between different models. For air coolers, you may need to align it with the CPU socket and secure it using screws or clips.
If you’re installing a liquid cooler, ensure the radiator is mounted securely in your case, and the tubing is routed correctly. Connect the fan(s) to the appropriate headers on the motherboard to ensure proper airflow. Make sure everything is snug but don’t overtighten screws, as that can damage the components.
8. Testing Your System
Once the new cooler is installed, it’s time to power up your computer and test the system. Before you close up your case, check that all connections are secure and that there are no loose cables. Boot your computer and enter the BIOS or UEFI settings to monitor CPU temperatures. Ideally, your CPU temperature should remain within a safe range during idle and load conditions.
If everything looks good, you can close your case and enjoy the peace of mind that comes with a well-functioning CPU cooler. Keep an eye on temperatures over the next few days to ensure stability. If you encounter any issues, revisit your installation steps to troubleshoot.
9. When to Replace Your CPU Cooler
Knowing when to replace your CPU cooler is just as important as knowing how to do it. Signs that it might be time for a change include frequent overheating, increased noise from fans, or poor performance during demanding tasks. Additionally, if your cooler is several years old, consider upgrading to improve efficiency—especially if you’re planning to upgrade your CPU or push for higher performance in gaming or computational tasks.
Regular maintenance helps prolong your cooler’s life. Dust buildup can obstruct airflow and reduce cooling efficiency, so cleaning your cooler and surrounding components periodically is a good practice. By staying proactive, you can avoid unexpected failures and keep your system running efficiently.
10. Types of CPU Coolers: Which One is Right for You?
When deciding to replace your CPU cooler, you have a couple of main options: air coolers and liquid coolers. Each type has its own advantages and disadvantages, depending on your specific needs and preferences.
Air Coolers
Air coolers are typically more straightforward to install and maintain. They consist of a heatsink and a fan. The heatsink absorbs heat from the CPU, and the fan helps dissipate it. Some benefits include:
- Cost-Effective: Generally, air coolers are less expensive than liquid coolers.
- Reliability: Fewer moving parts mean less chance of failure.
- Easy Installation: Most air coolers are easier to install and require minimal setup.
A common example of a popular air cooler is the Noctua NH-D15, known for its excellent performance and quiet operation.
Liquid Coolers
Liquid coolers use liquid coolant to transfer heat away from the CPU. They tend to provide superior cooling performance, especially in high-demand situations like gaming or video editing. Here are some advantages:
- Better Cooling Capabilities: Liquid coolers can handle higher heat loads more efficiently.
- Quieter Operation: Many liquid coolers operate more quietly than air coolers because they can dissipate heat without high fan speeds.
- Space Efficiency: They often allow for better RAM clearance due to their design.
Examples of liquid coolers include the Corsair Hydro Series and the NZXT Kraken series, both of which offer customizable RGB lighting options and excellent cooling performance. (See: Importance of Proper Cooling Systems.)
11. Common Issues When Replacing a CPU Cooler
As with any DIY project, replacing a CPU cooler can have its challenges. Here are a few common issues you might encounter and how to address them:
1. Noisy Fans
If your new cooler’s fans are excessively loud, check to ensure they are securely connected and that the fan settings in your BIOS/UEFI are configured correctly. Sometimes, adjusting the fan curve can help reduce noise.
2. Overheating
If you notice your CPU temperatures are still high after replacing the cooler, double-check the thermal paste application and ensure the cooler is properly mounted. It’s possible that the cooler isn’t making full contact with the CPU.
3. Compatibility Issues
Before purchasing a new cooler, always verify compatibility with your CPU socket and case dimensions. Sometimes, larger coolers may not fit in smaller cases, and specific mounting brackets may be required for different CPUs.
12. Expert Tips for Long-Term Cooling Performance
To maximize the performance and longevity of your CPU cooler, consider these expert tips:
- Regular Cleaning: Dust can build up in your cooler and case, obstructing airflow. Clean your setup regularly using compressed air.
- Monitor Temperatures: Use software to keep an eye on your CPU temperatures. Applications like HWMonitor and Core Temp can provide real-time data.
- Consider a Case with Good Airflow: Ensure your case has adequate airflow to support your cooling solution, as poor case ventilation can hinder performance.
- Upgrade Components Gradually: If you plan to overclock or upgrade your CPU, invest in a high-performance cooler that can handle increased thermal output.
13. Frequently Asked Questions (FAQ)
1. How often should I replace my CPU cooler?
It largely depends on the cooler type and your usage. If you’re using a high-performance cooler in a gaming rig or workstation, consider checking it every few years. For regular users, replacing it every 5-7 years is a good practice unless you notice signs of failure.
2. Can I reuse thermal paste?
No, it’s advisable to apply fresh thermal paste every time you replace your CPU cooler. Old thermal paste can degrade and lose its effectiveness over time.
3. Is liquid cooling worth the investment?
Liquid cooling can be worth it if you’re looking for superior performance and quieter operation, especially for overclocking or high-performance builds. However, air coolers can be sufficient for casual users.
4. What should I do if I accidentally drop my CPU?
If you accidentally drop your CPU, inspect it for bent pins or damage. If everything looks fine, gently reinsert it into the socket. If you’re unsure, consult with a technician before turning on your computer.
5. What is the best thermal paste?
There are several high-quality thermal pastes available, including Arctic MX-4, Thermal Grizzly Kryonaut, and Noctua NT-H1. These provide excellent thermal conductivity for optimal cooling.
14. Additional Considerations When Replacing a CPU Cooler
When you decide to replace your CPU cooler, there are a few additional factors to consider that can enhance your overall experience and system performance. (See: Research on CPU Cooling Techniques.)
1. Cooling Performance vs. Noise Level
It’s essential to find a balance between effective cooling performance and acceptable noise levels. While some enthusiasts prefer high-performance coolers with loud fans for optimal thermal management, others may prioritize a quieter environment, particularly in home or office setups. Research user reviews and benchmarks to find coolers that fit your noise tolerance while still providing adequate cooling for your CPU.
2. Budget Considerations
CPU coolers come in a wide range of prices, and understanding your budget can help narrow down your choices. While high-end coolers often deliver exceptional performance, many mid-range options provide excellent value for gaming and general use. Analyze your needs and determine how much you’re willing to invest in your cooling solution.
3. Aesthetics and RGB Lighting
If aesthetics are important to you, consider how the cooler looks in your system. Many new coolers come equipped with RGB lighting and customizable features that can enhance your build’s visual appeal. Ensure that the cooler you choose complements your case and other components well.
15. Potential Upgrades: Beyond the CPU Cooler
Replacing your CPU cooler can be a gateway to other potential upgrades in your system. Here are some components you might consider upgrading alongside your cooler:
1. Power Supply Unit (PSU)
If you’re upgrading your cooling solution, it might also be beneficial to evaluate your PSU. A high-performance cooler may require more power, especially if paired with an upgraded processor or GPU. Ensuring you have a reliable PSU can help prevent instability.
2. Case Fans
In addition to your CPU cooler, consider the overall airflow in your case. Upgrading or adding case fans can improve cooling efficiency and create a more balanced airflow throughout your system. Look for fans with good static pressure and noise levels to enhance your cooling capabilities.
3. Thermal Management Software
After installing a new cooler, using software to manage and monitor temperatures and fan speeds can help optimize performance. Many motherboard manufacturers offer software that allows you to create custom fan profiles for better thermal management based on your specific needs.
16. Final Thoughts
Replacing your CPU cooler not only enhances your computer’s performance but also protects your investment by ensuring your CPU runs within safe temperature ranges. Whether you choose an air or liquid cooler, understanding the process, potential challenges, and maintenance tips can make all the difference. By following this guide, you can confidently take on the task of replacing your CPU cooler and enjoy a cooler, more reliable computing experience.
“`
Trending Now
Frequently Asked Questions
What tools do I need to replace a CPU cooler?
To replace a CPU cooler, you'll need a new cooler (air or liquid), thermal paste, a Phillips head screwdriver, a static wrist strap, a microfiber cloth, and isopropyl alcohol for cleaning. Having these tools ready will streamline the replacement process.
How do I know if my CPU cooler needs to be replaced?
If your computer experiences overheating, thermal throttling, or instability during demanding tasks, it may be time to replace your CPU cooler. Additionally, signs like excessive noise or physical damage to the cooler can indicate a need for replacement.
Can I use my old thermal paste when replacing a CPU cooler?
It's not advisable to reuse old thermal paste when replacing a CPU cooler. It's best to clean off the old paste with isopropyl alcohol and apply a fresh layer of thermal paste to ensure optimal heat transfer and cooling performance.
Is replacing a CPU cooler difficult?
Replacing a CPU cooler can seem challenging, especially for beginners, but it's manageable with proper guidance. Following a step-by-step guide can simplify the process, making it accessible even for those new to PC building or maintenance.
What happens if I don't replace a failing CPU cooler?
If you don't replace a failing CPU cooler, your CPU may overheat, leading to thermal throttling, reduced performance, and potential permanent damage. This can also cause system instability, crashes, and shorten the lifespan of your hardware.
What did we miss? Let us know in the comments and join the conversation.