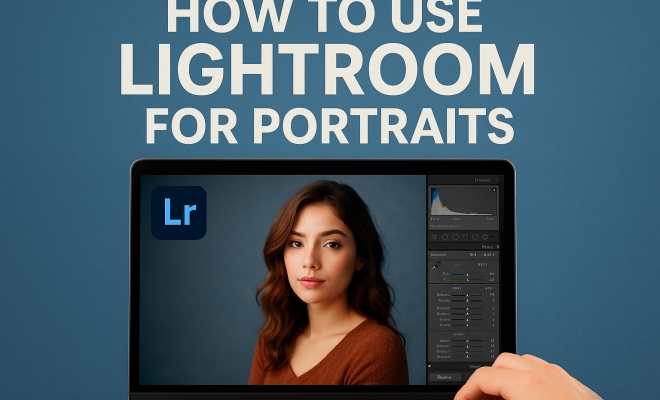
How to use Lightroom for portraits
“`html
When it comes to capturing the essence of a person through photography, portraits hold a special place. They can evoke emotions, tell stories, and showcase personalities. Enter Lightroom, the powerful editing tool that’s a go-to for photographers looking to enhance their portraits. Understanding how to use Lightroom for portraits can elevate your photography to new heights. Let’s explore eight essential techniques for effective Lightroom portrait editing.
1. Understanding the Basics of Lightroom
Before diving into portrait editing, it’s crucial to familiarize yourself with Lightroom’s interface and capabilities. Lightroom is a non-destructive photo editor, which means that any edits you make can be reverted, thus preserving your original image.
The software organizes images in a catalog system, allowing you to import, edit, and export photos with ease. You’ll find essential tools under the Develop module, where most of the magic happens. Here, you can adjust exposure, contrast, highlights, shadows, and more, tailoring each aspect to enhance your portrait’s clarity and vibrancy.
2. Enhancing Exposure and Contrast
The first step in Lightroom portrait editing often involves adjusting the exposure and contrast levels. Starting with exposure, ensure that your subject’s face is well-lit. Use the Exposure slider to brighten or darken the image. For portraits, a slight boost in exposure can help to bring out details in the subject’s face without losing highlights.
Next comes contrast, which adds depth to your image. Increasing contrast helps to differentiate between light and dark areas, making your subject stand out against the background. A general guideline is to keep the contrast adjustment subtle—too much contrast can lead to harsh shadows or blown-out highlights.
3. Color Correction and White Balance
Color correction is a game-changer in Lightroom portrait editing. The White Balance tool lets you adjust the color temperature of your image, shifting it towards warmer or cooler tones. This is especially critical in portrait photography, where skin tones should appear natural. Use the eyedropper tool to select a neutral area, or manually adjust the temperature and tint sliders until the skin tones look appealing.
Additionally, consider using the HSL (Hue, Saturation, Luminance) panel to fine-tune colors. For portraits, you might want to enhance the hues of skin tones while keeping background colors less saturated, ensuring the focus remains on the subject.
4. Utilizing the Adjustment Brush
The Adjustment Brush is one of Lightroom’s most powerful features for fine-tuning portraits. This tool allows you to make localized adjustments, which is essential when you want to enhance specific areas of the image without affecting the entire photo. You can use it to brighten the subject’s eyes, smooth out skin, or emphasize certain features.
To use the Adjustment Brush effectively, start with subtle changes. For instance, when brightening the eyes, decrease the exposure slightly and add a touch of contrast. This technique can create a captivating focal point, drawing viewers’ attention to the eyes while keeping the rest of the image balanced.
5. Skin Smoothing and Retouching
No portrait is complete without addressing skin imperfections. Lightroom provides several tools for skin retouching, with the Spot Removal tool and the Adjustment Brush being the most effective. Use the Spot Removal tool to eliminate blemishes and distractions. Click on the area you want to correct, and Lightroom will suggest a replacement area.
For a more refined approach, use the Adjustment Brush to apply a slight clarity reduction and increase the shadows in skin areas. This combination smooths the skin while maintaining the natural texture. Keep in mind that subtlety is vital; over-editing can lead to an unnatural appearance that distracts from the subject’s unique traits. (See: Lightroom in photography.)
6. Sharpening for Clarity
After completing your basic edits, sharpening your portrait can significantly enhance its appeal. In Lightroom, go to the Detail panel where you’ll find sharpening options. Start by adjusting the Amount slider to increase sharpness, then carefully tweak the Radius and Detail sliders for more control over how and where sharpening is applied.
Keep an eye on the edges of your subject to avoid a halo effect, which can occur if sharpening is applied too aggressively. Remember, effective sharpening should enhance details without making the image appear overly processed.
7. Creating a Mood with Presets and Filters
Lightroom offers a treasure trove of presets that can dramatically alter the mood of your portraits. Presets are pre-defined settings that apply a series of adjustments in a single click. They can range from color grading to black-and-white conversions, letting you experiment with different styles effortlessly.
When applying presets, consider how they complement the subject’s personality and the story you wish to convey. For instance, a moody preset may work well for a dramatic portrait, while a light, airy preset could suit a lively, cheerful subject. Always be open to tweaking presets after application; customization is key to achieving the desired effect.
8. Exporting Your Final Image
The final stage of your Lightroom portrait editing journey is exporting your masterpiece. Lightroom allows you to choose from various formats, including JPEG, TIFF, and PSD, depending on your end use. If you’re sharing online, JPEG at high quality is generally the best choice.
Before exporting, adjust the Image Sizing settings to fit your platform’s requirements, and consider applying a slight amount of sharpening for screen viewing. Pay attention to color space, ensuring that you export in sRGB for web use while Adobe RGB may be preferable for prints. These small details can make a significant impact on how your portrait is perceived by others.
9. Advanced Techniques for Lightroom Portrait Editing
After mastering the basics of Lightroom portrait editing, you can explore advanced techniques that can take your images to the next level. These methods require a deeper understanding of the software and a good eye for detail, but the results can be stunning.
One such technique is the use of the Gradient Filter. This tool allows you to create a gradual transition from one part of your image to another. For instance, you can darken the edges of a portrait, directing focus toward the subject’s face. By adjusting exposure, contrast, and even color temperature in the gradient area, you can achieve a more dynamic and engaging composition.
Another advanced method is to work with the Color Grading tool available in the latest versions of Lightroom. This allows you to manipulate the color tones in the shadows, midtones, and highlights independently, creating a tailored look for your portrait. For example, you can apply a cool tone to the shadows while keeping the highlights warm, adding a stylish contrast and depth that draws attention.
10. Bringing in Creative Elements
Incorporating creative elements into your portrait editing can enhance the overall storytelling aspect of your images. Consider using overlays or textures to add a unique feel. For example, a soft light overlay can create a dreamy effect, while a subtle texture can add warmth and richness to the background.
Lightroom lets you achieve this by using the Post-Crop Vignetting feature, which allows you to darken or lighten the corners of your image. This technique can create a more intimate feel, focusing attention on your subject. Just be careful to keep it subtle; you want to enhance, not overwhelm.
11. Sampling Real-World Examples
Looking at real-world examples can enhance your learning and inspire your own Lightroom portrait editing. Consider analyzing portraits from different genres—studio, lifestyle, or environmental portraits. Each requires a unique editing approach based on the lighting, background, and subject mood.
For instance, a studio portrait might necessitate precise color correction and skin smoothing for a polished look. In contrast, an environmental portrait may benefit from enhanced contrast to highlight the subject against a busy backdrop. Observing how different photographers use Lightroom can give you insights into diverse techniques that you can adopt or adapt in your own work. (See: Harvard University resources.)
12. Statistics and Trends in Portrait Photography
Understanding current trends and statistics in portrait photography can provide context for your work. For example, according to a recent survey by the Photographic Society, 67% of photographers believe that post-processing techniques significantly influence the quality of the final image. This underscores the importance of mastering Lightroom portrait editing for both amateurs and professionals alike.
Moreover, the rise of social media has transformed the way portraits are viewed and appreciated. About 60% of photographers report that they tailor their editing styles to fit Instagram aesthetics, often favoring vibrant colors and unique lighting effects. Keeping these trends in mind can inform your editing choices and help your portraits stand out in a crowded market.
13. Expert Perspectives on Lightroom Portrait Editing
Insights from industry experts can provide valuable information regarding Lightroom portrait editing. For instance, renowned portrait photographer Annie Leibovitz emphasizes the importance of capturing the subject’s personality before diving into editing. She notes that the best edits complement the emotion already present in the photograph.
Additionally, seasoned Lightroom users often recommend developing a personal editing style through consistent practice. They argue that while mastering the technical tools is crucial, it’s equally important to infuse your unique artistic vision into each portrait. This balance of technique and creativity can set you apart in the competitive world of portrait photography.
14. Common FAQs about Lightroom Portrait Editing
As you navigate the world of Lightroom portrait editing, you might have some questions. Here are some common FAQs that can help:
Q1: What are the best practices for editing skin tones in Lightroom?
A: To achieve natural-looking skin tones, it’s essential to use the White Balance tool to correct any color casts. Pay attention to the HSL panel to fine-tune skin tones specifically, and consider using the Adjustment Brush for localized adjustments to enhance natural textures while smoothing imperfections.
Q2: How can I avoid over-editing my portraits?
A: A good rule of thumb is to always zoom in and review your edits at 100% view. This helps you see the details and avoid making adjustments that might look fine at a smaller scale but become glaringly obvious when viewed closely. Less is often more when it comes to portrait editing.
Q3: Are there any specific Lightroom presets recommended for portrait photography?
A: While it largely depends on your style, many photographers enjoy using presets that enhance skin tones and add soft contrast. Look for presets designed specifically for portraits, as they often provide flattering results without overwhelming the image.
Q4: How do I develop my own editing style in Lightroom?
A: Experimentation is key. Try different techniques, presets, and color grading until you find a look that resonates with you. Additionally, study your favorite photographers and analyze how they approach editing to inform your own style.
Q5: How important is the organization of photos in Lightroom?
A: Organization is vital in Lightroom. It allows you to easily find, edit, and manage your portfolio. Use collections, keywords, and ratings to categorize your images, making the editing process more efficient and less stressful.
15. Exploring the Benefits of Lightroom for Portrait Editing
Lightroom offers numerous advantages for portrait photographers that make it a preferred tool in the industry. One major benefit is its ability to handle large batches of images. When working with multiple portraits from a session, you can apply the same settings to several images at once, ensuring consistency and saving time. (See: Lightroom features and studies.)
Additionally, Lightroom’s integration with Adobe’s Creative Cloud means you can seamlessly transition between different Adobe applications. For example, if you need to do more detailed retouching that Lightroom doesn’t support, you can send your images to Photoshop with just a click and then return to Lightroom for further organization and export.
16. Using Lightroom Mobile for On-the-Go Edits
In today’s fast-paced world, being able to edit portraits on the go is a significant advantage. Lightroom Mobile allows you to edit your images right from your smartphone or tablet, enabling you to refine your portraits anytime, anywhere. The mobile app shares many of the same features as its desktop counterpart, allowing you to do everything from adjusting exposure to applying presets.
This flexibility is especially useful for photographers who frequently travel or shoot on location, providing an efficient way to manage and edit images immediately after capturing them. Plus, edits made on the mobile app sync with the desktop version, ensuring you always have access to your latest adjustments.
17. Comparisons with Other Editing Software
While Lightroom is a powerful tool for portrait editing, it’s worth comparing it with other software options available. Adobe Photoshop, for instance, is often viewed as the gold standard for photo editing due to its advanced capabilities. However, it can be overwhelming for beginners and involves a steeper learning curve.
On the other hand, software like Capture One is praised for its exceptional color grading and tethering capabilities, especially for studio photography. It offers a different approach to editing that some photographers may prefer. Ultimately, the choice between these programs comes down to personal preference and the specific needs of your photography workflow.
18. Final Thoughts on Mastering Lightroom Portrait Editing
Mastering Lightroom portrait editing involves a blend of technical skill, creativity, and practice. As you continue to refine your editing process, remember that every portrait tells a story. Your edits should enhance that narrative rather than overshadow it.
Take the time to experiment with different techniques and tools within Lightroom, and don’t hesitate to seek feedback from fellow photographers or online communities. The more you practice, the more confident you’ll become in your editing abilities, and ultimately, your portraits will reflect your unique artistic vision.
Mastering Lightroom portrait editing involves understanding its tools, making thoughtful adjustments, and applying techniques that enhance your photography without compromising the subject’s authenticity. By implementing these techniques and exploring advanced options, you’ll not only improve your editing skills but also create stunning portraits that resonate with viewers. So, grab your camera, start clicking, and let Lightroom help you capture the essence of your subjects with clarity and creativity.
“`
Trending Now
Frequently Asked Questions
How do I edit portraits in Lightroom?
To edit portraits in Lightroom, start by adjusting exposure and contrast to ensure your subject is well-lit and stands out. Utilize the Develop module for color correction and white balance adjustments. Familiarize yourself with the interface to efficiently manage your edits and enhance the overall clarity and vibrancy of your images.
What are the best settings for portrait photography in Lightroom?
The best settings for portrait photography in Lightroom include adjusting exposure to brighten the subject's face, increasing contrast for depth, and fine-tuning color correction and white balance. Subtle adjustments in these areas can dramatically enhance your portrait's quality and appeal.
Can I improve the color of portraits in Lightroom?
Yes, you can significantly improve the color of portraits in Lightroom using the color correction tools. Adjust the white balance to achieve accurate skin tones and use the HSL sliders to fine-tune hues, saturation, and luminance for a more vibrant and appealing portrait.
What tools in Lightroom are best for portrait editing?
The best tools for portrait editing in Lightroom include the Exposure and Contrast sliders for lighting adjustments, the White Balance tool for color accuracy, and the HSL panel for fine-tuning colors. These tools allow for precise adjustments to enhance the clarity and emotional impact of your portraits.
Is Lightroom good for portrait photography?
Absolutely! Lightroom is an excellent tool for portrait photography as it offers non-destructive editing capabilities, allowing you to enhance your images without losing the original quality. Its user-friendly interface and powerful editing features make it a favorite among photographers for achieving stunning portrait results.
Agree or disagree? Drop a comment and tell us what you think.