Mastering Figma Constraints: Responsive Design Made Easy
“`html
1. Understanding Figma Constraints
Figma constraints are a powerful feature that allows designers to manage the behavior of objects within their frames as screen sizes change. With more design projects being responsive in nature, understanding how to effectively use these constraints is critical. Constraints help maintain the proportionality and positioning of elements when resizing frames, ensuring a consistent and harmonious design across various devices.
Essentially, constraints dictate how an object behaves in relation to its parent frame. They can be set to stay fixed to a particular side (like left, right, top, or bottom) or to scale proportionally with the frame. For anyone involved in UI/UX design, mastering Figma constraints is non-negotiable as it ensures designs are adaptable and user-friendly.
2. The Basics of Setting Constraints
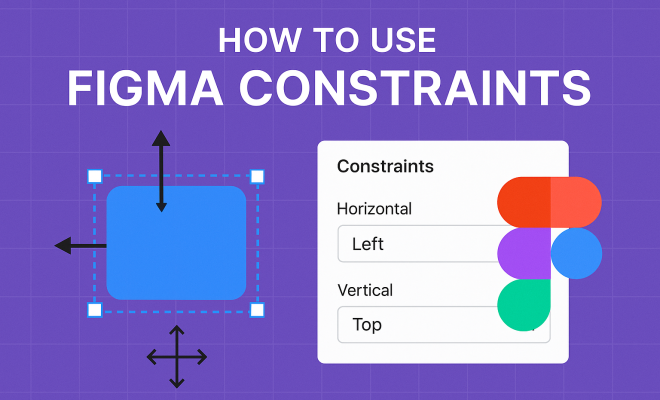
To start using constraints effectively, first, select the object you want to apply constraints to. On the right side of the Figma interface, you’ll see the properties panel where constraints can be adjusted. Here, you will find options for horizontal and vertical constraints: you can choose to attach the object to the left, right, top, bottom, or center of its parent frame.
Horizontal constraints apply to the width of the object, while vertical constraints apply to the height. For instance, if you set the horizontal constraint of a button to the left, it will remain anchored to the left edge of the parent frame even when the frame is resized. This flexibility allows for intricate designs that adapt to different screen sizes without losing integrity.
3. Types of Constraints Explained
Figma offers several types of constraints that you need to be familiar with to utilize this feature fully. The primary types include:
- Fixed: Keeping the object fixed to one edge of the parent frame.
- Scale: Allowing the object to resize proportionally with the frame.
- Center: Keeping the object centered as the frame resizes.
- Left/Right/Top/Bottom: Anchoring the object to one or more edges of the frame.
By combining these constraints in various ways, you can create more complex layouts where elements maintain their relationships to one another, regardless of changes in dimensions.
4. Using Constraints for Responsive Design
Responsive design is essential in today’s digital landscape, where users access content across a myriad of screen sizes. Figma’s constraints feature plays a pivotal role in achieving responsiveness. For instance, if you’re designing a mobile app that will also be viewed on tablets or desktops, setting constraints ensures your elements resize and reposition as intended without manual adjustments.
To design responsively, consider how users will interact with your design on different devices. Use constraints to create a fluid interface; for example, a navigation bar can be anchored to the top of the frame, ensuring it remains accessible regardless of the screen size. This approach takes user experience into account while adding a layer of professionalism to your design work.
5. Practical Examples of Using Constraints
Let’s explore a couple of practical scenarios where you might apply constraints in Figma. Imagine you’re working on a web page layout. You have a header, a main content area, and a footer. By setting the header to stick to the top and the footer to stick to the bottom, you can ensure these elements remain visible as the content area expands or contracts.
Another example is designing a card component. You might want the image at the top to scale while keeping the title text centered below it. Applying the appropriate constraints to both elements ensures that they maintain their intended layout as the card grows or shrinks. This not only saves time but also enhances the visual appeal of your designs. (See: Figma design tool overview.)
6. Common Mistakes to Avoid
When working with constraints in Figma, it’s easy to make mistakes that can lead to frustrating results. Here are a few common pitfalls to watch out for:
- Over-constraining: Applying too many constraints can lead to unexpected behaviors. Simplicity is key; only use constraints where necessary for functionality.
- Ineffectively grouping objects: If objects are grouped incorrectly, the constraints may not behave as expected. Always ensure you’re grouping elements that need to move or resize together.
- Ignoring prototype behavior: Constraints might work differently in your design file compared to how they behave in a prototype. Always test them in prototype mode to ensure functionality.
Avoiding these mistakes will not only streamline your workflow but also enhance the quality of your designs. mobile app developer overview offers useful background here.
7. Testing and Iterating Your Designs
Design isn’t just about aesthetics; it’s about functionality too. After implementing constraints, it’s crucial to test your designs. Figma allows you to preview your designs directly to see how they behave when resized. This feature is invaluable for identifying any issues early in the design process.
Iterate on your designs based on feedback from testing. Ask peers or potential users to interact with your prototypes. Observe how they navigate your design and whether any elements become difficult to use as the screen size changes. This real-world testing will provide insights that help you refine your constraints for better user experience.
8. Advanced Techniques with Constraints
For designers looking to leverage constraints to their full potential, there are a few advanced techniques worth considering. For example, you can combine constraints with Figma’s component system to create reusable design elements that maintain integrity across multiple instances.
Additionally, using Auto Layout in conjunction with constraints can further enhance your design’s adaptability. Auto Layout allows for dynamic resizing based on content changes, and when combined with constraints, it allows for a sophisticated approach to responsive design. This combination can be particularly powerful for building complex user interfaces efficiently.
9. Real-World Application and Case Studies
Understanding constraints is essential, but seeing how others use them can illuminate their practical benefits. Many digital products, from websites to mobile applications, utilize constraints to ensure a consistent user experience. For instance, Airbnb uses responsive layouts that change based on screen size, allowing users to seamlessly browse through listings whether on a smartphone or a desktop. Their design team likely relies on constraints to maintain visual hierarchy and usability across various devices.
Another example can be found in e-commerce platforms like Shopify. The adaptability of their product pages is crucial for conversion rates. By employing constraints, Shopify ensures that product images, descriptions, and add-to-cart buttons resize appropriately, making the shopping experience smooth and engaging regardless of how the site is accessed.
10. Statistics that Highlight the Importance of Responsive Design
Understanding the significance of constraints in responsive design is underscored by various statistics. According to a report by Statista, over 54% of all website traffic comes from mobile devices. This statistic alone emphasizes the necessity for designers to create adaptable layouts that cater to a multitude of devices. Furthermore, a study by Google revealed that 53% of mobile users abandon sites that take longer than three seconds to load. Therefore, effective use of constraints can directly impact load times and usability, making it critical for designers to understand and implement these features effectively.
11. Expert Perspectives on Figma Constraints
Experts in the field of UI/UX design often emphasize the importance of mastering Figma constraints. According to Jonathan Lee, a leading UI designer, “Understanding constraints is fundamental for any designer aiming to create fluid and functional designs. They help maintain consistency, especially when working in teams where multiple designers might be involved.” His sentiments are echoed by many in the industry, reinforcing the notion that constraints should be a primary focus in design education. (See: Harvard University resources.)
Another expert, Maria Gonzalez, suggests that “constraints should not just be seen as a technical necessity, but as a creative tool that empowers designers to explore new layouts and compositions.” This perspective can inspire designers to not only rely on constraints for practicality but also to leverage them for innovative design solutions.
12. FAQs About Figma Constraints
What are Figma constraints?
Figma constraints are settings that dictate how an object behaves within its parent frame when resizing occurs. They help maintain the position and scale of design elements, ensuring a responsive layout.
How do I set constraints in Figma?
To set constraints, select the object, navigate to the properties panel, and adjust the horizontal and vertical constraints according to your design needs. You can anchor the object to the top, bottom, left, right, or center of the parent frame.
Can I use constraints with components in Figma?
Yes! Constraints work seamlessly with components in Figma, allowing you to create reusable design elements that automatically adapt to different screen sizes while maintaining their intended layout.
What’s the difference between fixed and scale constraints?
Fixed constraints keep an object anchored to a specific point in relation to its parent frame, while scale constraints allow the object to resize proportionally as the parent frame changes size.
How can I test my design constraints?
You can test your design constraints by using the preview mode in Figma. This lets you see how your elements behave when the screen size changes, helping you identify any potential issues early on.
13. Advanced Strategies for Optimizing Figma Constraints
As you become more experienced with Figma constraints, exploring advanced strategies can enhance your design capabilities. One effective strategy is to use nested frames. By creating nested frames, you can apply constraints not just to the individual components but also to groups of elements, allowing for more complex designs while maintaining control over how elements behave as the frame changes size.
Additionally, consider utilizing Figma plugins that enhance constraints management. Plugins, such as “Auto Layout” and “Constraint Manager,” provide additional features for automating constraints and making bulk adjustments across multiple elements, saving you time and effort in the design process.
14. Experimenting with Constraints in Figma
Don’t be afraid to experiment with constraints in Figma! Testing different combinations of constraints can yield surprising and innovative results. For instance, try creating a multi-column layout that adjusts based on the amount of content in each column. By playing around with fixed and scale constraints, you can discover unique layouts that provide fresh user experiences.
Moreover, Figma’s collaborative features allow you to share your designs with team members for real-time feedback. This collaborative experimentation can lead to improvements you may not have considered on your own, making the design process more engaging and productive.
15. Tips for Teaching Figma Constraints
If you’re teaching others about Figma constraints, it’s essential to break down the concepts into digestible parts. Start with basic definitions and examples before moving into more complex applications. Use real-world scenarios to illustrate how constraints solve design problems, helping your students see their practical benefits.
Encouraging hands-on practice is also key. Provide exercises where learners must troubleshoot designs with incorrect constraints, guiding them to find solutions. This approach not only reinforces their understanding of constraints but also enhances their problem-solving skills, which are critical in design.
16. The Future of Design with Figma Constraints
Figma constraints are an essential tool for any designer aiming to create responsive, functional, and visually appealing designs. As the demand for adaptable designs continues to grow, mastering this feature will set you apart in the competitive landscape of design. By understanding the intricacies of constraints, avoiding common pitfalls, and testing your designs rigorously, you’ll be well on your way to creating exceptional user experiences.
In an industry where user experience is paramount, the ability to effectively use Figma constraints can significantly enhance your workflow and the quality of your designs. The future of design lies in adaptability, and with these tools at your disposal, you’re equipped to meet the challenges that lie ahead.
17. Conclusion: Embracing Figma Constraints
In summary, Figma constraints are not just a technical feature; they are a fundamental aspect of modern design practice. As more users access digital content on diverse devices, the need for responsive design grows stronger. By effectively using constraints, you’re not only improving your design’s aesthetics but also enhancing functionality and user experience.
As you continue your journey with Figma, make it a priority to explore these constraints deeply. Your ability to create adaptable, fluid designs will define your success in the ever-evolving landscape of UI/UX design. Remember, every adjustment you make with constraints could be the difference between a good design and a great one.
“`
Trending Now
Frequently Asked Questions
What are Figma constraints?
Figma constraints are a feature that helps designers control how objects behave within frames as screen sizes change. They maintain the positioning and proportionality of elements during resizing, which is essential for creating responsive designs.
How do you set constraints in Figma?
To set constraints in Figma, select the object you want to adjust, then go to the properties panel on the right. You can set horizontal and vertical constraints to anchor the object to the left, right, top, bottom, or center of its parent frame.
What types of constraints are available in Figma?
Figma offers several types of constraints, including Fixed, which keeps an object anchored to one edge; Scale, which allows an object to resize proportionally with the frame; and Center, which keeps the object centered within the parent frame.
Why are Figma constraints important for UI/UX design?
Figma constraints are crucial for UI/UX design because they ensure that designs are adaptable and user-friendly. They allow for consistent layouts that maintain integrity across different screen sizes, enhancing the overall user experience.
Can you use Figma constraints for responsive design?
Yes, Figma constraints are specifically designed to support responsive design. By setting constraints, you can ensure that elements adjust their size and position appropriately as the parent frame is resized, making your design more versatile across various devices.
Agree or disagree? Drop a comment and tell us what you think.