How to add music to video in Premiere Pro
“`html
Creating a captivating video often involves more than just stunning visuals; the right audio track can elevate your project to new heights. If you’re looking to add music to video in Premiere Pro, this guide will walk you through the essential steps, tips, and tricks needed to seamlessly integrate music into your videos. Whether you’re a budding filmmaker or a seasoned pro, understanding how to effectively add music can transform your video editing experience.
1. Understanding the Basics of Audio in Premiere Pro
Before diving into the practical steps of adding music, it’s crucial to grasp the fundamentals of audio in Premiere Pro. Adobe Premiere Pro is designed to handle multiple audio tracks, allowing you to layer sound effects, voiceovers, and music effectively. The audio workspace is intuitive, providing you with tools to adjust levels, fade-ins, and fade-outs, and much more.
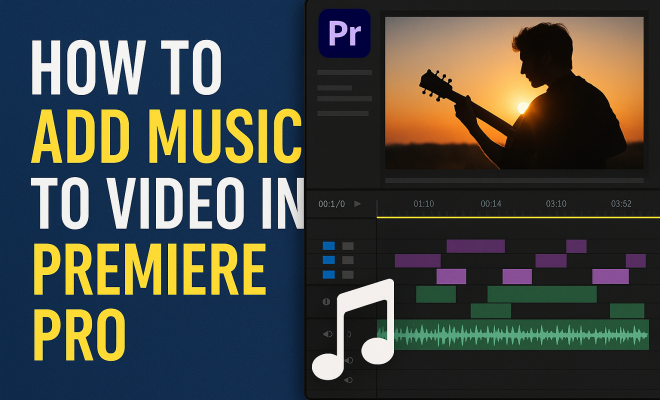
In Premiere Pro, audio tracks are displayed in the timeline beneath your video tracks. Each audio clip can be manipulated independently, giving you the flexibility to create a rich soundscape. Understanding how to navigate the audio workspace will make it easier for you to manage your audio elements as you learn to add music to video in Premiere Pro.
2. Choosing the Right Music for Your Video
Choosing the right music is essential for setting the tone of your video. Consider the mood you want to convey and the message of your content. Music can evoke emotions and enhance the storytelling aspect of your video, so selecting the right track is critical. You might prefer upbeat tracks for promotional videos or softer music for tutorials.
Additionally, be mindful of copyright laws when selecting music. Using copyrighted music without permission can lead to your videos being removed from platforms like YouTube. Instead, consider royalty-free music options from sites like Artlist, Epidemic Sound, or the Adobe Stock audio library, which offers a wide range of tracks that can be used legally.
It’s also worth exploring platforms like SoundCloud and YouTube’s Audio Library for free music options, keeping in mind the licensing agreements associated with each track.
Moreover, think about the genre of music that aligns well with your video’s theme. For instance, a documentary might benefit from orchestral or acoustic music to create an emotional connection, while a tech review might pair better with electronic or upbeat tracks.
3. Importing Music into Premiere Pro
Once you’ve selected your music, the next step is importing it into Premiere Pro. Start by downloading your chosen audio file to your computer, ensuring it’s in a supported format like MP3 or WAV. In Premiere Pro, navigate to the Media Browser, where you can find your audio file by locating the folder where it was saved.
To import, right-click on the audio file and select Import, or simply drag the file into your project panel. Once imported, your audio track will appear in the project panel, making it easy to drag and drop onto your timeline wherever you wish to add music to video in Premiere Pro.
For better organization, consider creating bins in your project panel. You can have separate bins for audio, video, and graphics. This will help streamline your editing process and keep your media easily accessible.
4. Adding Music to the Timeline
With your music file in the project panel, you can now add it to your timeline. Click and drag the audio file from the project panel and drop it onto an audio track in the timeline. If you have multiple audio tracks, choose one that suits your project layout. Typically, background music is placed on the first audio track, while voiceovers or sound effects are placed on additional tracks.
Ensure that your music aligns with the start of your video or wherever you want the audio to begin. You can easily reposition the audio clip by dragging it left or right in the timeline until you find the perfect start point. Remember, you can also split the audio track if you need to cut sections out, using the Razor Tool.
For more complex projects, consider layering multiple audio tracks to create a more immersive sound experience. For instance, adding ambient sounds or sound effects can help transport viewers into the video’s setting, enhancing the overall impact.
Think about the pacing of your video as you add music. If your video includes fast cuts or dynamic changes, you may want to select music that has a similar rhythm. This synchronization can create a more cohesive viewing experience and keep your audience engaged. (See: Using music in media projects.)
5. Adjusting Audio Levels
After adding music to your video, adjusting audio levels is vital for a balanced sound. Your background music should complement rather than overpower any dialogue or sound effects. To adjust the levels, click on the audio track and use the Audio Clip Mixer or Effect Controls panel to modify the volume.
As a general rule of thumb, keep your music volume between -12dB and -6dB when mixed with dialogue to ensure clarity. You can also apply keyframes to create dynamic changes in volume, such as fading music in and out smoothly. This technique can greatly enhance storytelling by ensuring the music elevates rather than distracts from your content.
Another important aspect is ensuring your audio levels stay consistent throughout the video. If you have varying music intensity, consider using compression tools available in Premiere Pro to even out the dynamics. This adjustment helps maintain a uniform listening experience for your viewers, regardless of changes in music intensity.
Additionally, take advantage of the built-in audio analysis tools in Premiere Pro. These can help you identify any problematic frequencies or levels that need adjustment, ensuring your final audio mix is professional and polished.
6. Applying Fades and Transitions
Fading your music in and out can create a polished and professional look for your video. Premiere Pro allows you to easily apply audio transitions to achieve this. To add a fade, navigate to the Effects Panel, and under the Audio Transitions section, you’ll find options like Constant Gain or Exponential Fade.
Drag and drop your selected transition onto the beginning or end of your audio clip in the timeline. You can adjust the duration of the fade by clicking and dragging the edge of the transition. Experimenting with different fade lengths can help you find the right balance for your video, ensuring that music blends seamlessly with visuals.
In addition to fades, consider using crossfades when transitioning between multiple music tracks. This technique can create a smoother auditory experience, especially when changing moods or themes within your video. By overlapping two audio tracks slightly, you can maintain continuity and keep your audience engaged.
Remember, transitions aren’t just for music changes. Try applying them to sound effects as well to create a cohesive audio narrative. For instance, if you have a sound effect that signals an action, fading in that sound can make it less jarring.
7. Syncing Music with Video Elements
One of the essential aspects of video editing is syncing audio with visual elements. If your video includes significant action or changes in scene, it’s crucial that your music complements those shifts. Pay close attention to key moments in your footage and adjust your music accordingly.
You can cut the music track to match specific beats or cues in the video. Use the waveform view to visualize the audio peaks and drops, which can help you identify where cuts or fades should occur. By taking the time to sync your audio precisely, you enhance viewer engagement and create a more immersive experience.
A practical technique for syncing is to use markers. By placing markers on your timeline where key visual moments occur, you can easily align your music cuts or transitions with those moments. To add a marker, simply hit the ‘M’ key on your keyboard while the playhead is at the desired point.
Also, consider using the audio waveforms to identify beats or significant changes in the music. This visual cue can guide you in cutting the music at impactful moments in your video, ensuring that the audio enhances the visual storytelling.
8. Exporting Your Video with Music
After you’ve finalized your video and are satisfied with how the music integrates, it’s time to export. Go to File > Export > Media. In the export settings, ensure to select the format that best suits your needs (H.264 is a common choice for most online platforms). Double-check that both video and audio settings are configured properly.
Once you’re ready, hit the Export button, and Premiere Pro will process your video with the music included. Remember to preview your exported video to ensure that the audio is balanced and sounds as intended. Adjustments can always be made if something seems off during playback.
It’s also a good practice to export a few different versions with varied audio levels to test how they sound on different devices. Sometimes, what sounds great on your studio monitors may not translate well to laptops or mobile devices, so testing is key.
After exporting, consider sharing your video with a small group of trusted viewers for feedback, particularly focusing on the audio experience. Their fresh perspective can reveal issues you might have overlooked. (See: The role of music in video.)
9. Learning and Experimenting with Audio Effects
Finally, don’t shy away from experimenting with audio effects in Premiere Pro. The software offers various audio effects, including reverb, EQ adjustments, and more. These effects can enhance the quality of your music and help it fit the style of your video.
To apply an audio effect, navigate to the Effects Panel and find the Audio Effects section. Drag your desired effect onto the audio clip, then use the Effect Controls panel to customize its settings. Experimentation is key; you might discover a unique sound that enhances your project beyond the music alone.
Consider including sound design techniques, such as layering different sound elements, to create a richer audio landscape. Integrating subtle sound effects like ambient noises or even Foley can significantly elevate the production quality of your video.
As you continue to explore how to add music to video in Premiere Pro, remember that practice makes perfect. The more you work with audio, the better you’ll become at integrating it with your video projects. By mastering these techniques, you’re well on your way to producing compelling and memorable videos that resonate with your audience.
10. Common Mistakes When Adding Music
As you learn to add music to your projects, it’s important to be aware of common pitfalls. One mistake is selecting music that is not suitable for the video’s theme or audience. Always consider the emotional response you want to evoke.
Another frequent issue is neglecting to check the audio levels. Too often, creators either have music that is too loud, drowning out dialogue, or too soft, making it barely audible. Regularly monitor audio levels during editing and adjust accordingly.
Additionally, failing to sync music properly with video elements can detract from the overall impact. If the music doesn’t align with key moments, it can feel disjointed. Always pay attention to how audio complements the visuals.
Also, be careful of overusing audio effects. While these can enhance your sound, too many effects can muddy your audio and distract from the main components of your video. Aim for subtlety when applying effects to maintain clarity.
11. Frequently Asked Questions
Can I use any music track in my videos?
No, you must ensure that you have the right to use any music track in your videos. Consider using royalty-free music or tracks that are licensed for commercial use to avoid copyright issues.
What audio formats does Premiere Pro support?
Premiere Pro supports various audio formats, including MP3, WAV, AAC, and AIFF. Make sure your audio file is in one of these formats before importing it.
How do I know if my audio levels are balanced?
During playback in Premiere Pro, observe the audio meters in the Audio Track Mixer. Your dialogue should typically peak around -6dB, and background music should be around -12dB to -6dB to maintain clarity without overpowering speech.
Can I adjust audio levels after exporting?
No, once your video is exported, you cannot adjust the audio levels without re-importing the video back into Premiere Pro and starting a new project. Always double-check your audio levels before exporting.
What is the best way to find music for my video?
Utilize royalty-free music libraries such as Epidemic Sound, Artlist, or the YouTube Audio Library. These platforms provide a wide range of music options suitable for various projects.
How can I create a unique audio experience for my viewers?
Experiment with layering multiple sound elements, use sound design techniques, and apply audio effects to create a tailored soundscape that aligns with your video’s theme and enhances viewer engagement.
12. Advanced Techniques for Audio Integration
Now that you’ve got a good grasp on the basics, let’s explore some advanced techniques that can further enhance your audio integration skills. One method is utilizing the Essential Sound Panel, which provides a simplified way to work with audio while offering advanced controls. This panel allows you to categorize audio clips as Dialogue, Music, Sound Effects, or Ambience, making it easier to apply the appropriate settings and effects for each type.
Another technique is using Sound Design. This involves creating audio environments that match the visual narrative. Instead of only relying on background music, incorporate sound effects that align with the action on screen. For example, if your video contains scenes of nature, adding subtle bird chirps or rustling leaves can significantly enhance the viewer’s immersion.
Consider the use of 3D audio effects if your project supports it. This can give your video a more realistic feel, particularly for virtual reality or 360-degree videos. By manipulating how sound comes from different directions, you can enhance the immersive quality of your content.
Don’t forget about the potential of dynamic audio adjustments during editing. For example, if your video has a scene with a loud sound effect, you can programmatically lower the music track’s volume at that moment to ensure the effect stands out. This technique requires careful tuning but can make a significant impact.
13. Using Third-Party Plugins for Audio Enhancement
If you’re looking to take your audio quality to the next level, consider exploring third-party plugins. There are several popular plugins available that can provide additional effects, equalization options, and mastering capabilities not natively found in Premiere Pro. For instance, iZotope Ozone is a powerful mastering suite that provides tools for finalizing your audio with precision.
Another excellent plugin is FabFilter Pro-Q, which offers advanced equalization options for fine-tuning your audio tracks. This can be particularly useful if you’re working with complex audio layers and want to ensure clarity between different sound elements.
Before integrating third-party plugins, make sure they are compatible with your version of Premiere Pro and check the system requirements to avoid any performance issues during editing. Utilizing these tools can greatly enhance your audio production, giving your projects a more professional sound.
14. Final Checklist for Successful Audio Integration
As you wrap up your editing process, it’s helpful to have a final checklist to ensure everything is in order. Here are some key points to review:
- Audio Levels: Confirm that dialogue is clear, and background music isn’t overpowering.
- Syncing: Double-check that all audio cues align perfectly with the visuals.
- Transitions: Ensure audio transitions are smooth and enhance the viewing experience.
- Effects: Review any audio effects you’ve applied to ensure they contribute positively to the audio mix.
- Export Settings: Verify that you’ve selected the right audio settings during export for clarity and quality.
By following these tips and integrating music thoughtfully into your video projects, you’ll enhance both the emotional impact and overall quality of your work. The more you practice and experiment, the more skilled you’ll become, making your videos not only visually stunning but also sonically captivating.
“`
Trending Now
Frequently Asked Questions
How do I import music into Premiere Pro?
To import music into Premiere Pro, go to the 'Media Browser' or use the 'Import' option under the 'File' menu. Locate your music file, select it, and click 'Open'. The music will appear in your project panel, ready to be dragged onto your timeline.
What types of audio tracks can I use in Premiere Pro?
In Premiere Pro, you can use various audio tracks including music, voiceovers, sound effects, and ambient sounds. The software supports multiple audio formats, allowing you to layer these elements for a richer sound experience.
Can I use copyrighted music in my Premiere Pro videos?
Using copyrighted music without permission can lead to content removal or legal issues. It's best to use royalty-free music from licensed sources, such as Artlist or Epidemic Sound, to avoid copyright infringement.
How do I adjust audio levels in Premiere Pro?
To adjust audio levels in Premiere Pro, select the audio clip in your timeline, then use the 'Audio Clip Mixer' or 'Effect Controls' panel to change the levels. You can also apply fade-ins and fade-outs for smoother transitions.
What is the best way to choose music for my video?
Choosing the right music involves considering the mood and message of your video. Select tracks that enhance your content and evoke the desired emotions, while also ensuring they are royalty-free to avoid copyright issues.
What did we miss? Let us know in the comments and join the conversation.