How to print labels from Excel
“`html
Have you ever found yourself overwhelmed by the prospect of printing labels? Whether you’re preparing for a mailing campaign, organizing your office, or labeling products for a business, the task can feel daunting. However, if you know how to print labels from Excel, it can be a straightforward and efficient process. This guide will walk you through everything you need to know, from preparing your data in Excel to properly formatting and printing your labels.
1. Understanding the Basics of Label Printing
Before diving into the specifics of how to print labels from Excel, it’s important to understand the basics. Labels are typically printed on sheets that are compatible with printers, and these sheets come in various sizes and formats. The most common label sizes include 1” x 2-5/8” (the standard for address labels) and 2” x 4” (often used for shipping).
If you’re using labels for business purposes, such as shipping products or creating inventory tags, knowing the right size and type of labels for your printing needs is crucial. This not only saves you time but also ensures that your labels stick properly and remain legible.
Labels can be classified into two main categories: permanent and removable. Permanent labels are typically used for shipping and inventory, while removable ones are useful for temporary applications, such as sample labeling or events. Understanding these categories can help you choose the right labels for your specific requirements.
Additionally, consider the material of the labels. Paper labels are cost-effective and suitable for indoor use, while vinyl labels are more durable and weather-resistant, making them ideal for outdoor applications. Being aware of these differences can enhance your labeling strategy.
2. Preparing Your Excel Data
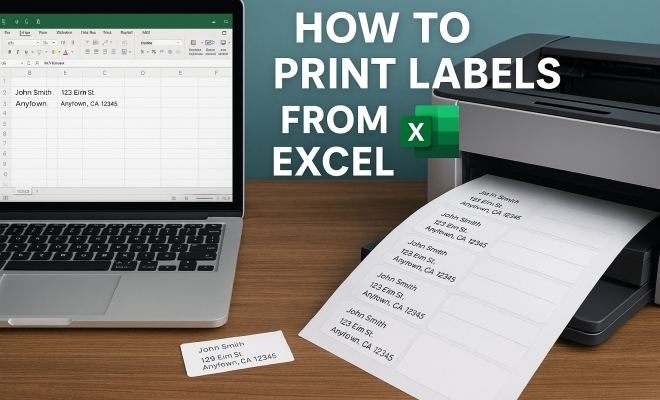
The first step in the process of printing labels from Excel is to ensure that your data is well-organized. Open Excel and start by entering your data in a clear and structured format. Ideally, you should have one column for each type of information you need on the labels. For example, if you are labeling mail, you might have columns for name, address, city, state, and zip code.
Consider using headers for your columns to make it clear what information belongs where. This organization makes it easier when you start the mail merge process. Make sure there are no blank rows or unnecessary data in the columns that will be used for your labels; this can cause problems during printing.
One effective technique is to use data validation in Excel to ensure that the information entered in your cells is accurate, such as ensuring the zip code is in the correct format. This can help prevent errors that might occur during the printing process.
Another useful practice is to sort your data. You might want to order your labels by last name or zip code, depending on your needs. Sorting your data can save time during distribution, as it allows for quicker access to specific labels when they are needed.
3. Choosing the Right Label Template
Once your data is set up, it’s time to select the appropriate label template. Many label manufacturers, such as Avery, provide templates that are compatible with Excel. These templates can be found online and often come in downloadable formats compatible with Microsoft Word.
To find the right template, look for the product number on the label packaging, which will guide you to the correct template. Make sure the template matches the size and layout of the labels you plan to use. Having the right template is essential for ensuring that your printed labels align perfectly with the actual label sheets. (See: Understanding label printing basics.)
Additionally, if you’re using a specific brand of labels, check their website for downloadable templates or support resources. Some websites even offer design tools that can help streamline the creation of your labels, making the process even easier.
4. Using Mail Merge in Word
After selecting the template, the next step involves using Microsoft Word’s Mail Merge feature to connect your Excel data with the label template. Start by opening Microsoft Word and then selecting the “Mailings” tab. Choose “Start Mail Merge” and then “Labels.”
Next, you’ll be prompted to select your label options, where you can choose the product number and layout that corresponds with your label sheets. After setting up the label document, you’ll need to link your Excel file by selecting “Select Recipients” and then “Use an Existing List.” Choose your Excel file and select the appropriate worksheet that contains your data.
It’s worth noting that if your Excel file contains multiple sheets, you need to ensure that you select the correct sheet that has your label data. This small detail can save you from potential headaches later in the process.
5. Designing Your Labels
With your data linked, it’s time to design your labels. Return to the Mailings tab and select “Insert Merge Field” to place the appropriate fields where you want them on the label. You can adjust the font, alignment, and spacing to customize the labels as needed.
Don’t forget to add any additional elements like logos or images if necessary. This is particularly important for businesses that want to maintain brand consistency. Make sure to preview your labels by selecting “Preview Results” in the Mailings tab to ensure everything looks correct before printing.
For enhanced visual appeal, consider using color backgrounds or borders. This can help your labels stand out, especially if they are being used in a competitive market or for promotional purposes. Just make sure that your text remains legible against any background colors you choose.
6. Testing Your Print Settings
Before you print your entire batch, it’s a good idea to test your print settings. Print a single label on regular paper to check for alignment and spacing. This step can save you from wasting label sheets due to misalignment.
Adjust your printer settings as needed. Some printers have specific preferences for printing on label sheets, while others may require adjustments in the print quality or paper type settings. Always refer to your printer’s manual for guidance on label printing.
If you’re using a laser printer, consider using labels specifically designed for laser printing to prevent the adhesive from melting during the printing process. Similarly, for inkjet printers, ensure that the labels are suitable for inkjet printing to avoid smudging.
7. Printing Your Labels
Once you’re satisfied with the test print, it’s time to print your labels. Go back to the Mailings tab in Word and choose “Finish & Merge,” then select “Print Documents.” This will allow you to print all your labels at once.
Make sure to load the label sheets into your printer correctly, following the manufacturer’s instructions. Often, this means placing them in a specific orientation to avoid any misprints. Once everything is set, hit print and watch your labels come to life!
It can also be helpful to print a small batch first, especially if you’re using a new type of label paper or a different printer than usual. This allows you to double-check everything before committing to a larger print run. (See: Guidelines for effective labeling.)
8. Common Troubleshooting Tips
Even with careful preparation, issues can arise when printing labels from Excel. Here are a few common problems and their solutions:
- Misalignment: If your labels are printing out of alignment, double-check your margins and label template settings in Word.
- Printer Jams: Make sure that your printer is compatible with the label sheets and that you’re not overloading the tray.
- Ink Smudging: Use high-quality label sheets designed for your printer type (laser or inkjet) to prevent smudging.
- Data Errors: If your labels are pulling incorrect data, re-check your Excel file to ensure there are no errors in the data entry.
In addition to these common issues, consider keeping a record of any printing problems you encounter and how you resolved them. This can serve as a handy reference for future label printing projects, making the process more efficient over time.
9. Advanced Techniques for Bulk Label Printing
If you’re regularly printing labels in bulk, there are advanced techniques you can use to streamline the process. Consider using dedicated label printing software that offers more advanced features than Excel and Word, such as bulk importing, advanced labeling options, and better design capabilities.
Additionally, integrating your label printing process with inventory management or CRM systems can automate the data population process, making it even easier to print labels on demand. This is especially beneficial for businesses that need to print labels quickly and efficiently.
Utilizing barcode or QR code technology can also be a game-changer for label printing. You can include these codes on your labels to simplify inventory tracking or provide customers with quick access to product information through scanning. This not only enhances the functionality of your labels but also adds a modern touch to your labeling strategy.
10. Staying Current with Label Printing Trends
The world of label printing continues to evolve, with new technologies and trends emerging regularly. For example, the rise of on-demand printing has made it easier for businesses to produce high-quality labels without the need for large inventories. Additionally, advancements in digital printing technology allow for more customization options and faster turnaround times.
Staying informed about these trends can help you make the most of your label printing efforts. Regularly explore new software options, label materials, and printing techniques to keep your labeling process efficient and effective.
Another trend to watch is sustainability in label printing. As more businesses look to minimize their environmental impact, using eco-friendly label materials and inks is becoming increasingly important. There are options available that use recycled materials or are biodegradable, aligning your labeling efforts with broader sustainability goals.
11. Frequently Asked Questions (FAQ)
Can I print labels directly from Excel without using Word?
Excel does not have built-in label printing features like Word’s Mail Merge, but you can create a layout and print labels directly from Excel. However, for best results and alignment, it’s recommended to use Word for the actual printing.
What type of labels should I use for shipping?
For shipping, you should typically opt for durable labels that are compatible with your printer type (inkjet or laser). Waterproof or weatherproof labels can also be beneficial if your packages will be exposed to the elements during transit.
How can I ensure my labels are printed correctly every time?
To ensure correct printing, always double-check your label template settings, perform a test print, and verify that your data in Excel is accurate and well-organized. Keeping your printer well-maintained and using high-quality label sheets can also help. (See: Tips for efficient label printing.)
Is it possible to add barcodes to my labels?
Yes, you can add barcodes to your labels using specialized barcode fonts or software. This can enhance the functionality of your labels, especially for inventory or tracking purposes.
What should I do if my labels are smudging after printing?
Smudging can occur if you’re using the wrong type of label for your printer. Ensure you’re using labels suitable for your printer (inkjet or laser) and allow sufficient drying time for inkjet prints. If issues persist, check your printer settings and use high-quality labels designed to minimize smudging.
12. Exploring Label Printing Software Options
If you’re looking to enhance your label printing experience, exploring dedicated software can be beneficial. Many businesses now rely on label design software that integrates seamlessly with Excel data, offering features such as drag-and-drop design capabilities, pre-made templates, and advanced printing options. Programs like BarTender, NiceLabel, and Avery Design & Print provide user-friendly interfaces that can save you significant time.
These tools often come equipped with features that allow you to create complex designs or include variable data fields, which can be particularly useful when printing labels for large events or shipments. For instance, if you’re organizing a conference, you can generate badges for attendees that include their name, company, and barcode—all drawn from your Excel data.
Additionally, some software solutions offer cloud-based options, enabling you to access your designs and data from any location, which is perfect for remote work or collaborative environments.
13. Best Practices for Efficient Label Printing
To optimize your label printing efficiency, consider implementing these best practices:
- Regular Maintenance: Keep your printer clean and well-maintained. Regularly check for software updates and clean print heads to ensure high-quality prints.
- Use Quality Supplies: Invest in high-quality label stock that suits your printing method. Whether inkjet or laser, quality materials can significantly improve print results.
- Back-Up Your Data: Regularly back up your Excel files as a precaution against data loss. Consider using cloud storage solutions for easy access and backup.
- Batch Printing: Organize your printing tasks into batches. This can streamline the process and reduce the frequency of printer setup adjustments.
- Document Your Processes: Create a checklist or document your process for future reference. This ensures consistency and helps train new team members on effective practices.
14. Label Design Considerations
When designing your labels, keep in mind several important considerations:
- Brand Identity: Ensure your label design aligns with your brand’s identity. Use consistent colors, fonts, and logos to create a cohesive look.
- Readability: Choose fonts that are easy to read, even at smaller sizes. Avoid overly decorative fonts that may detract from the key information.
- Color Contrast: Use contrasting colors for text and background to enhance readability. Dark text on a light background generally works best.
- Label Size: Consider the size of the label in relation to the information you need to include. Ensure there’s enough space for all elements to avoid a cluttered appearance.
15. Conclusion
Learning how to print labels from Excel can transform your approach to labeling, whether for personal use or business purposes. By following these steps and tips, you can ensure a smooth and successful label printing experience. Embrace the power of Excel and take control of your label printing needs today!
“`
Trending Now
Frequently Asked Questions
How do I print labels from Excel?
To print labels from Excel, first organize your data in a clear structure. Then, use the mail merge feature in Microsoft Word, linking it to your Excel data. Choose the appropriate label size, format your labels, and print. This method ensures that your labels are printed accurately and efficiently.
What size labels can I print from Excel?
You can print various label sizes from Excel, including standard sizes like 1” x 2-5/8” for address labels and 2” x 4” for shipping. It's essential to select the right size compatible with your printer and the labels you have to ensure proper alignment and readability.
What types of labels are best for printing?
The best types of labels for printing depend on your needs. Permanent labels are ideal for shipping and inventory, while removable labels work well for temporary uses. Consider the material as well; paper labels are cost-effective for indoor use, while vinyl labels are durable for outdoor applications.
Can I use Excel to create address labels?
Yes, you can use Excel to create address labels. Organize your addresses in a spreadsheet, then utilize the mail merge feature in Word to format and print your labels. This process allows for easy customization and efficient printing of multiple address labels.
How do I format labels in Excel for printing?
To format labels in Excel for printing, ensure your data is organized in columns. Use Word's mail merge feature to link your Excel file, select the label size, and format the layout accordingly. Preview your labels before printing to check for alignment and clarity.
What did we miss? Let us know in the comments and join the conversation.