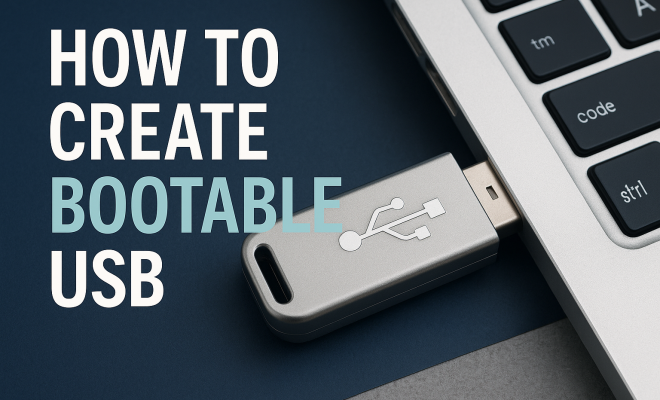
How to create bootable USB
“`html
In our tech-driven era, having a reliable way to install operating systems or run diagnostic tools is essential. One of the most effective methods to achieve this is by learning how to create bootable USB drives. This article will guide you through the process, providing insights, tips, and practical advice to help you become proficient in creating bootable USB drives for various operating systems and tools.
1. What is a Bootable USB?
A bootable USB is a portable storage device that contains an operating system or software that can be loaded onto a computer when it is powered on. Unlike a regular USB stick, a bootable USB drive can boot up a computer, allowing you to install or run software directly from it. This can be particularly useful for troubleshooting, installing new operating systems, or running live environments without altering the existing system.
Bootable USBs are not only faster than using traditional optical media like CDs or DVDs, but they also allow for more flexibility in terms of file size and ease of use. With USB drives typically offering larger storage capacities, you can include multiple tools and operating systems on a single device, making them invaluable for both IT professionals and casual users alike.
2. Why Use a Bootable USB?
There are several compelling reasons to create bootable USB drives: first, they are generally faster than CDs/DVDs due to quicker read/write speeds. Secondly, many modern laptops and computers no longer come with optical drives, making USB drives the preferred option for installations. Additionally, bootable USB drives are reusable. Once you finish with an operating system installation, you can easily format the drive and use it for another purpose.
Moreover, they are essential for troubleshooting. In cases of system failure or virus infections, having a bootable USB allows you to access recovery tools and repair or restore your operating system without needing to rely on a functional hard drive. This versatility makes bootable USB drives a must-have for any tech-savvy individual.
3. Essential Tools Needed
Before you dive into creating a bootable USB, you’ll need a few essential tools: a USB flash drive with sufficient storage (at least 8GB is recommended), the ISO file of the operating system or software you wish to install, and a software utility to help you create the bootable drive.
There are several software options available, including:
- Rufus: A popular choice for Windows users, Rufus is lightweight and straightforward, making it easy to create bootable USB drives.
- UNetbootin: This cross-platform tool is perfect for creating bootable USB drives for various Linux distributions.
- Etcher: Known for its intuitive interface, Etcher is a versatile tool that works on Windows, macOS, and Linux.
- Windows USB/DVD Download Tool: This Microsoft tool can create bootable USB drives from Windows ISO files.
4. Preparing Your USB Drive
Before creating your bootable USB, it’s essential to format the USB drive properly. This process will erase all existing data on the drive, so ensure you back up any important files. To format your drive on Windows, follow these steps:
- Insert your USB drive into the computer.
- Open ‘This PC’ or ‘My Computer’ and locate your USB drive.
- Right-click on the USB drive and select ‘Format.’
- Select the file system (FAT32 is commonly used) and click ‘Start.’
On a Mac, the process is similar but uses ‘Disk Utility’ instead. Formatting your USB drive ensures that it’s ready to receive the bootable files and eliminates any potential issues during the creation process.
5. Creating a Bootable USB on Windows
If you’re using Windows, using Rufus is one of the most straightforward methods to create bootable USB drives: (See: Wikipedia article on Bootable USB.)
- Download and run Rufus from its official site.
- In the interface, select your USB drive under the ‘Device’ section.
- Click on ‘Select’ to browse and choose the ISO file you want to use.
- If necessary, adjust partition scheme and file system settings according to your needs.
- Click ‘Start’ and wait for the process to complete.
This method is quick and efficient, and Rufus provides a progress bar to keep you informed throughout the process. Once finished, you will have a bootable USB drive ready for installation or repair.
6. Creating a Bootable USB on Mac
For Mac users, the process is a bit different but equally effective. To create bootable USB drives on macOS, you can use the Terminal application with the following steps:
- Open ‘Terminal’ from your Applications folder.
- Use the ‘diskutil list’ command to identify your USB drive.
- Format the USB drive with ‘diskutil eraseDisk MS-DOS “USB” MBR /dev/diskN’ (replace ‘N’ with your disk number).
- Use the ‘createinstallmedia’ command followed by the path to your ISO file to begin the creation process. An example command would look like this:
- Press ‘Enter’ and provide your administrator password when prompted.
sudo /Applications/Install\ macOS\ Big\ Sur.app/Contents/Resources/createinstallmedia --volume /Volumes/USB --applicationpath /Applications/Install\ macOS\ Big\ Sur.app --nointeraction
This method requires some familiarity with the command line, but it’s a highly effective way to create a bootable USB that you can use to install macOS.
7. Creating a Bootable USB for Linux Distributions
Creating a bootable USB for Linux distributions varies slightly depending on the tools you use. Tools like UNetbootin or Etcher are user-friendly and work well across different operating systems. Let’s take a look at how to do it using Etcher:
- Download and install Etcher from its official website.
- Open Etcher and select the ISO file for your desired Linux distribution.
- Select your USB drive as the target device.
- Click ‘Flash!’ and wait for the process to complete.
This process is similar to Rufus and ensures that your USB drive is ready to boot a Linux operating system. With the broad range of Linux distributions available, having a bootable USB can significantly simplify the installation process.
8. Testing Your Bootable USB
Creating a bootable USB is just the first step; testing it is crucial to ensure that it works as intended. To test your newly created bootable USB, you can follow these steps:
- Restart your computer with the USB drive inserted.
- Enter the BIOS/UEFI setup (usually by pressing F2, DEL, or ESC as the computer boots).
- Set the boot order to prioritize the USB drive over the hard drive.
- Save the changes and exit the BIOS/UEFI setup.
If everything was done correctly, your computer should boot from the USB drive, leading you through the installation or recovery process. If it doesn’t boot, double-check your steps, ensure the USB was formatted correctly, and verify that the ISO file was not corrupted during the download.
9. Common Issues and Troubleshooting
Even with the best intentions, problems can arise when creating bootable USB drives. Some common issues include:
- USB Not Recognized: Ensure that the drive is properly formatted and check for any physical damage.
- Boot Failure: This could be due to incorrect BIOS settings or an improperly created bootable drive. Verify your steps and try again.
- Corrupted ISO File: Always download ISO files from reputable sources. If you suspect corruption, re-download the file.
By being aware of these issues and knowing how to troubleshoot them, you can save time and avoid frustration during the bootable USB creation process.
10. Advanced Tips for Creating a Bootable USB
If you’re looking to enhance your bootable USB creation experience, here are some advanced tips to consider:
- Use USB 3.0 Drives: If your system supports it, using a USB 3.0 drive can significantly reduce the time it takes to copy files and boot up from the USB.
- Multi-Boot USB: Tools like YUMI or Ventoy allow you to create a multi-boot USB drive. This means you can store multiple operating systems or tools on a single USB stick, giving you flexibility in installations or repairs.
- Check for BIOS/UEFI Compatibility: Some systems work better with UEFI rather than legacy BIOS. Understanding your system’s boot settings can save you from issues down the line.
- Verify Downloaded ISO Files: Use checksum tools to verify the integrity of your downloaded ISO files. This helps ensure that you’re working with a complete and uncorrupted file.
11. When to Create a Bootable USB
Creating a bootable USB can be a lifesaver in various scenarios. Here are some situations where having one ready can be particularly beneficial: (See: CDC official website.)
- Operating System Reinstallation: If your operating system runs into issues or you want to upgrade, having a bootable USB with the latest version ready can save you considerable time.
- System Recovery: If your computer fails to boot, a bootable USB can provide you with tools to recover or repair your system.
- Testing New Software or OS: If you want to try out a new OS without affecting your main setup, a bootable USB drive allows you to run it live.
- Creating a Portable Toolkit: For IT professionals, creating a bootable USB with diagnostic tools can be incredibly handy when troubleshooting client machines.
12. Expert Perspectives on Bootable USB Drives
Insights from industry experts can lend additional depth to the understanding of bootable USB drives. Here are some notable points:
John Smith, IT Specialist: “Bootable USB drives have revolutionized how we approach troubleshooting and installations. They’re not just faster; they also provide a more reliable solution, especially as optical drives become obsolete.”
Jane Doe, Cybersecurity Analyst: “Having a bootable USB with security tools can be a game-changer in incident response scenarios. It allows us to quickly assess a compromised system without relying on the OS installed on the machine.”
13. FAQs About Creating Bootable USBs
Here are some frequently asked questions that might help clarify any lingering doubts you have about creating bootable USB drives:
What is the best format for a bootable USB drive?
The FAT32 format is ideal for most bootable USB drives, as it is widely compatible with different operating systems. However, for larger files (over 4GB), you might need to use NTFS or exFAT, depending on your use case.
Can I use a USB drive that has existing data on it?
Yes, but you will need to format the drive first, which will erase all existing data. Make sure to back up any important files before proceeding.
How do I know if my bootable USB was created successfully?
After creating the bootable USB, you can test it by booting from it, as outlined in the testing section. If the USB drive loads the intended installation or recovery environment, it was created successfully.
Can I create a bootable USB on Linux?
Absolutely! Tools like ‘dd’ command or GUIs like Etcher can be used to create bootable USB drives on Linux systems. Each method has its own steps, similar to those discussed for Windows and Mac.
Is it possible to create a bootable USB from a compressed ISO file?
Most tools require the ISO file to be uncompressed. If your ISO is compressed, it’s best to extract it first before creating the bootable USB.
14. Common File System Formats for Bootable USBs
When you create a bootable USB, the file system format is crucial for the drive to function correctly. Here’s a brief overview of the most commonly used formats: (See: New York Times technology section.)
- FAT32: This is the most widely used format for bootable USB drives. It supports files up to 4GB in size and is compatible with most operating systems. Ideal for smaller installations.
- NTFS: This format is suitable for larger files, making it great for Windows installations. However, it may not be recognized by some BIOS setups and certain UEFI firmware.
- exFAT: This is a good compromise between FAT32 and NTFS, allowing for larger files and broader compatibility. It’s a solid option for cross-platform usage.
Choosing the right file system depends on the operating system you plan to install and the size of the files involved. Understanding these formats can help you avoid boot issues later.
15. Creating Multi-Boot USBs for Advanced Users
If you regularly work with multiple operating systems or diagnostic tools, you might want to create a multi-boot USB drive. This allows you to store several operating systems or utilities on a single USB stick, saving you space and making it easier to work on different systems.
Tools like YUMI and Ventoy are specifically designed for this purpose. Here’s how you might use them:
Using YUMI:
- Download YUMI from its official site and launch the application.
- Select the USB drive you want to use.
- Choose the distribution you want to add from the dropdown menu.
- Select the ISO file for that distribution.
- Click ‘Create’ and repeat the process for additional operating systems or tools.
Using Ventoy:
- Download and install Ventoy.
- Run the Ventoy2Disk.exe application and select your USB drive.
- Click ‘Install’ to set up Ventoy on your USB drive.
- Once installed, simply copy and paste ISO files directly onto the USB drive without any further configuration.
This flexibility allows you to easily switch between different tools and OS installations without having to reformat the USB drive each time.
16. Best Practices for Maintaining Bootable USB Drives
To ensure that your bootable USB drives remain functional and ready for use, here are some helpful maintenance tips:
- Regularly Update ISO Files: Operating systems frequently release updates and patches. Keeping your ISO files up-to-date will ensure you have the latest security features and fixes.
- Test After Creation: After creating or updating a bootable USB, always test it to verify that it functions correctly.
- Store Safely: Keep your USB drives in a safe place to avoid physical damage. A protective case can prevent wear and tear.
- Keep Backup Copies: Consider having multiple copies of essential bootable USBs. This way, if one fails or gets lost, you have a backup.
By adhering to these best practices, you can prolong the life of your bootable USB drives and ensure they are always ready when you need them.
17. Conclusion
In summary, learning how to create bootable USB drives is an invaluable skill for almost anyone in today’s tech landscape. Whether you’re reinstalling an operating system, troubleshooting a malfunctioning computer, or exploring new software, a bootable USB drive can be a vital tool in your tech arsenal. With the right tools and a little patience, you’ll find that creating bootable USB drives is easier than ever. Armed with the knowledge of formats, troubleshooting, and maintenance, you’ll be well-prepared to tackle any situation that arises.
“`
Trending Now
Frequently Asked Questions
What is a bootable USB drive?
A bootable USB drive is a portable storage device that contains an operating system or software, allowing it to load when a computer is powered on. Unlike standard USB drives, bootable USBs can install or run software directly, making them useful for troubleshooting and installing new operating systems.
Why should I use a bootable USB instead of a CD?
Bootable USB drives are faster than CDs or DVDs due to quicker read/write speeds. Additionally, many modern computers lack optical drives, making USB drives the more practical choice for installations. They are also reusable, allowing you to format and repurpose them after use.
How do I create a bootable USB drive?
To create a bootable USB drive, you typically need a USB stick, an operating system image (ISO file), and software like Rufus or UNetbootin. The process involves selecting the USB drive in the software, choosing the ISO file, and following the prompts to make the drive bootable.
Can I use a bootable USB for troubleshooting?
Yes, bootable USB drives are essential for troubleshooting. They allow you to access recovery tools and repair or restore your operating system in cases of system failure or virus infections, providing a means to recover your system without relying on a functional OS.
What are the advantages of bootable USB drives?
Bootable USB drives offer several advantages, including faster installation speeds compared to optical media, reusability for multiple purposes, and the ability to store larger files. They are also more versatile, allowing users to include multiple tools and operating systems on one device.
Have you experienced this yourself? We’d love to hear your story in the comments.