How to set up Raspberry Pi
“`html
Raspberry Pi has revolutionized the way we think about computers, making it possible for anyone to dive into the world of programming and electronics. If you’re looking to set up Raspberry Pi, you’re in the right place. This guide will walk you through everything you need to know, from the initial setup to advanced projects.
1. What is Raspberry Pi?
The Raspberry Pi is a low-cost, credit-card-sized computer that has gained significant popularity since its launch in 2012. Designed for educational purposes, it enables users of all ages to learn programming and develop small-scale projects. With various models available, including the Raspberry Pi 4 and Raspberry Pi Zero, it caters to a wide range of users, from beginners to advanced enthusiasts.
Originally aimed at promoting computer science education in schools, the Raspberry Pi Foundation has expanded its reach into numerous applications, including home automation, robotics, digital signage, and even media centers. Its versatility and affordability have made it a favorite among hobbyists and professionals alike.
2. Essential Components for Your Raspberry Pi Setup
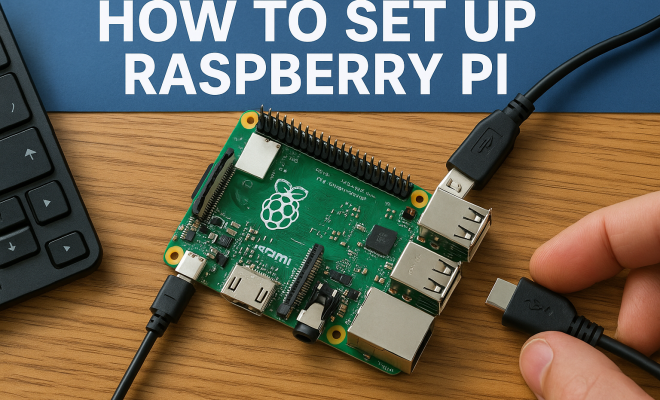
Before you can set up Raspberry Pi, you need to gather some essential components. First and foremost is the Raspberry Pi board itself. Depending on your project, you might choose a model with more processing power, like the Raspberry Pi 4, which features up to 8GB of RAM.
- Power Supply: Use a reliable power adapter that meets the requirements of your specific model (typically 5V with at least 2.5A for Raspberry Pi 4).
- MicroSD Card: This is your primary storage device. Aim for at least 16GB Class 10 for optimal performance.
- HDMI Cable: Needed to connect your Raspberry Pi to a monitor or TV.
- Keyboard and Mouse: Essential input devices for initial setup and configuration.
- Case: Protects your Raspberry Pi from physical damage.
- Cooling Solution: Depending on your usage, consider a heatsink or fan to prevent overheating, especially for resource-intensive projects.
- Wi-Fi Dongle or Ethernet Cable: Required for network connectivity, unless your model has built-in Wi-Fi, as in the Raspberry Pi 3 and 4.
- USB Flash Drive: Useful for additional storage or backup, especially if you’re running multiple projects.
Having these components on hand will set you up for success as you embark on your Raspberry Pi journey.
3. Installing the Operating System
To set up Raspberry Pi effectively, you’ll need to install an operating system (OS). The most popular choice is Raspberry Pi OS, a Debian-based OS tailored specifically for the Raspberry Pi. You can download the OS image from the official Raspberry Pi website.
Once downloaded, you’ll need to write the OS image to your microSD card. This can be done using software like Balena Etcher or Raspberry Pi Imager. Just select the downloaded OS file, choose your microSD card, and let the software handle the rest. After the writing process is complete, safely eject the card from your computer and insert it into your Raspberry Pi.
If you’re interested in more features or specialized applications, consider alternatives like Ubuntu Mate or LibreELEC. Ubuntu Mate provides a full desktop experience while LibreELEC is specifically designed for media playback. Each OS has unique benefits, so exploring these options can enhance your Raspberry Pi’s capabilities based on your needs.
4. Initial Setup and Configuration
After inserting the microSD card, connect your Raspberry Pi to a monitor, keyboard, and mouse, and then plug in the power supply. The system should boot up, and you’ll be greeted with a setup wizard. Here, you can configure your language, time zone, and Wi-Fi settings, making it easier to get started on your projects.
Don’t forget to update your operating system once you’re connected to the internet. You can do this by opening the terminal and typing the commands sudo apt update and sudo apt upgrade. Keeping your software up to date ensures you have the latest features and security patches.
Setting up users and permissions is another important step. You can create multiple users so that family members or friends can also use the device without affecting your personal settings. This way, everyone can customize their own environments while keeping your primary setup intact. (See: Raspberry Pi on Wikipedia.)
5. Exploring the Raspberry Pi Desktop Environment
The Raspberry Pi OS features a user-friendly desktop environment that is reminiscent of traditional operating systems like Windows. Familiarizing yourself with this interface is crucial for efficient navigation. Explore the menu options, where you’ll find several pre-installed applications, including programming tools like Python and Scratch.
You can customize your desktop by adding shortcuts to your favorite applications or configuring the panel settings. This personal touch can make your experience more enjoyable and tailored to your workflow. Don’t hesitate to experiment with different aspects of the desktop environment to find what works best for you.
For those who prefer using the command line, mastering terminal commands can greatly enhance your efficiency. Familiarize yourself with basic commands for file management, system monitoring, and package installation. The command line opens up a wealth of possibilities and is especially vital for advanced projects.
6. Connecting to the Internet
Internet connectivity is essential for many Raspberry Pi projects, whether you’re downloading software, accessing online tutorials, or collaborating on programming projects. If you’re using the Raspberry Pi 4, you can connect via Wi-Fi or Ethernet. For earlier models, Wi-Fi dongles may be necessary.
To connect to Wi-Fi, click on the network icon in the top right corner of the desktop and select your network. Enter your Wi-Fi password, and you should be good to go. If you prefer a wired connection, simply plug an Ethernet cable into your Raspberry Pi and your router, and the device should automatically connect.
Some users might want to set up a static IP address to avoid changes in their network configuration. This can be particularly helpful if you plan to run servers or access your Pi remotely. You can set this up via the router settings or directly on the Raspberry Pi, depending on your network’s configuration.
7. Common Projects to Kickstart Your Raspberry Pi Journey
Once you’ve successfully set up Raspberry Pi, it’s time to dive into some projects. Here are a few beginner-friendly ideas to get you started:
- Media Center: Turn your Raspberry Pi into a media center using software like Kodi to stream your favorite movies and shows.
- Retro Gaming Console: With RetroPie, you can emulate classic gaming consoles and play your favorite retro games.
- Home Automation System: Use your Raspberry Pi to control smart devices in your home via open-source home automation platforms.
- Personal Web Server: Host your own website or blog using a LAMP stack (Linux, Apache, MySQL, PHP).
- Network-Attached Storage (NAS): Utilize your Raspberry Pi as a NAS to store and access files over your home network.
- Weather Station: Combine sensors with your Raspberry Pi to create a weather station that logs temperature, humidity, and atmospheric pressure.
- IoT Projects: Connect your Raspberry Pi with various sensors and actuators to create Internet of Things (IoT) applications.
These projects not only enhance your technical skills but also provide a sense of accomplishment as you see your ideas come to life. Remember to document your projects, as sharing your process can inspire others and contribute to the Raspberry Pi community.
8. Expanding Your Skills with Programming
Programming is a key aspect of working with Raspberry Pi. While you can start with block-based coding using Scratch, advancing to Python is often a natural progression due to its versatility and ease of use. Python is the primary language for Raspberry Pi, and a wealth of libraries and resources are available for beginners.
Consider exploring platforms like Codecademy or Coursera for courses tailored to learning Python programming with a focus on Raspberry Pi projects. Engaging with online communities, such as forums or social media groups, can also provide invaluable support as you learn and grow your skills.
As you get more comfortable, you might want to dive into more advanced programming languages and frameworks. For example, exploring Node.js for server-side programming or JavaScript for web applications can open up new avenues for your projects. Each skill you develop can lead to more complex and rewarding endeavors.
9. Troubleshooting Common Issues
Even with a successful set up Raspberry Pi, you may encounter issues along the way. Here are some common problems and their solutions:
- Power Problems: Ensure your power supply meets the recommended specifications; insufficient power can cause instability.
- No Display: Check your HDMI connection and ensure your monitor is set to the correct input source.
- Network Connectivity Issues: If you’re having trouble connecting to Wi-Fi, double-check your password and ensure your router is functioning properly.
- Overheating: If your Raspberry Pi is shutting down unexpectedly, it may be overheating. Ensure there’s adequate airflow and consider adding cooling solutions.
- SD Card Issues: Corrupted microSD cards can prevent booting. Regularly back up your data and consider using high-quality cards to reduce this risk.
By anticipating these common challenges, you can smoothly navigate your Raspberry Pi journey and focus on the fun aspects of your projects. (See: Raspberry Pi research articles on ScienceDirect.)
10. Advanced Projects for Enthusiasts
For those who have gained confidence and wish to take their Raspberry Pi skills to the next level, here are some advanced project ideas:
- Smart Mirror: Create a smart mirror that displays information like the weather, news, and calendar events using a two-way mirror and a Raspberry Pi.
- Home Surveillance System: Set up a security camera system using your Raspberry Pi and various cameras to monitor your home remotely.
- Voice Assistant: Build your own voice-controlled assistant using software like Mycroft to interact with your environment.
- AI Projects: Integrate machine learning capabilities into your projects using TensorFlow Lite or similar frameworks to analyze data and respond intelligently.
These projects can significantly boost your skills and understanding of various technologies and principles, setting you up for even more complex creations in the future.
11. Frequently Asked Questions (FAQ)
What do I need to set up Raspberry Pi?
You’ll need a Raspberry Pi board, a power supply, a microSD card, HDMI cable, keyboard, mouse, and a monitor. Depending on your model, additional accessories like cases and cooling solutions might also be beneficial.
Can I connect my Raspberry Pi to Wi-Fi?
Absolutely! Most Raspberry Pi models, including the Raspberry Pi 3 and 4, have built-in Wi-Fi capabilities. You can connect by selecting your network from the desktop interface.
How can I use Raspberry Pi for programming?
You can use languages like Python, Scratch, and Java. Raspberry Pi OS comes with Python pre-installed, and you can access various resources and libraries to enhance your programming experience.
What projects are suitable for beginners?
Beginner projects include creating a media center, retro gaming console, personal web server, and home automation system. These projects help you become familiar with the capabilities of Raspberry Pi.
Is Raspberry Pi suitable for kids?
Yes! Raspberry Pi is designed to be educational and is excellent for teaching kids about programming, electronics, and problem-solving in a fun way.
How do I back up my Raspberry Pi?
You can back up your Raspberry Pi by creating an image of your microSD card using software like Win32 Disk Imager or Raspberry Pi Imager. It’s also a good idea to regularly back up important files and projects to an external drive or cloud storage.
12. Joining the Raspberry Pi Community
One of the best parts of working with Raspberry Pi is the community that surrounds it. There are countless forums, social media groups, and websites where you can connect with fellow enthusiasts. Joining these communities can provide support, inspiration, and resources to help you with your projects.
Consider attending local meetups or Raspberry Pi events, where you can share your projects, learn from others, and perhaps even collaborate on new ideas. Participating in competitions or hackathons can also provide an exciting way to challenge yourself and connect with like-minded individuals.
13. Understanding the Raspberry Pi Hardware
Getting to know the hardware of your Raspberry Pi can enhance your understanding and help prevent issues during your projects. The Raspberry Pi features multiple GPIO (General Purpose Input/Output) pins that allow you to connect various peripherals and sensors easily. Each GPIO pin can be configured as an input or output, enabling you to control lights, motors, and other devices directly.
Additionally, understanding the USB ports—both standard and powered—helps in connecting external devices such as cameras or additional storage. The Raspberry Pi’s HDMI ports allow for easy display connections, while the audio jack can be used for sound output. Familiarizing yourself with these hardware components will empower you to create more complex projects.
14. Enhancing Your Raspberry Pi with Add-ons
Several add-ons can expand your Raspberry Pi’s capabilities. HATs (Hardware Attached on Top) are a popular option; these are additional boards that can be plugged onto the Raspberry Pi and provide extra features like sensors and displays. For instance, a HAT with a temperature sensor can enable you to create a smart thermostat.
Other add-ons include cameras for photography projects, touchscreens for interactive applications, and various sensor modules for robotics or environmental monitoring. By integrating these add-ons, you can create a myriad of projects that push the Raspberry Pi’s boundaries.
15. Tips for Effective Project Management
When working on Raspberry Pi projects, managing your time and resources effectively is crucial. Start by defining the scope of your projects clearly. Knowing what you want to achieve can help you stay focused and avoid getting overwhelmed. Break down larger projects into smaller, manageable tasks and set deadlines to keep yourself accountable.
Document your progress. Keeping a journal or blog about your projects not only helps track your development but can serve as a useful resource for sharing with the community. Online platforms like GitHub are also great for version control and collaboration when working on more extensive projects.
16. Future Possibilities with Raspberry Pi
The versatility of the Raspberry Pi means that the future of projects using this platform is virtually limitless. As technology continues to evolve, so too will the possibilities for creating innovative solutions. With growing interest in AI and machine learning, Raspberry Pi will likely play a significant role in bringing these technologies to hobbyists and developers alike.
For example, as the Internet of Things (IoT) expands, Raspberry Pi can serve as a central hub for managing devices in smart homes or cities. The ability to integrate with cloud computing services also opens up new avenues for project development, allowing users to leverage powerful analytics and storage solutions.
Setting up a Raspberry Pi opens up a world of possibilities. Whether you’re a hobbyist looking to learn or a professional seeking to prototype, the steps outlined above will help you get started on the right foot. With a little creativity and experimentation, there’s no limit to what you can accomplish with this incredible little computer.
“`
Trending Now
Frequently Asked Questions
What do I need to set up a Raspberry Pi?
To set up a Raspberry Pi, you will need the Raspberry Pi board, a reliable power supply (typically 5V, 2.5A for Raspberry Pi 4), a microSD card (at least 16GB Class 10), an HDMI cable, a keyboard, a mouse, and optionally, a case and cooling solution to protect and maintain your device.
How do I power my Raspberry Pi?
You can power your Raspberry Pi using a suitable power adapter that meets the voltage and current requirements of your specific model. For Raspberry Pi 4, a power supply that provides 5V and at least 2.5A is recommended to ensure stable operation.
Can I use any microSD card with Raspberry Pi?
While you can technically use any microSD card, it's best to choose a Class 10 microSD card with a minimum capacity of 16GB for optimal performance. This ensures faster read and write speeds, improving the overall experience when using your Raspberry Pi.
What is the best Raspberry Pi model for beginners?
The Raspberry Pi 4 is often recommended for beginners due to its powerful processing capabilities and up to 8GB of RAM. However, if you're looking for a more compact and less expensive option, the Raspberry Pi Zero is also a great choice for simple projects and learning programming.
Do I need a case for my Raspberry Pi?
While not strictly necessary, using a case for your Raspberry Pi is highly recommended. It protects the board from physical damage, dust, and accidental short circuits, ensuring the longevity and reliability of your device during use.
What’s your take on this? Share your thoughts in the comments below — we read every one.