How to photograph stars with phone
“`html
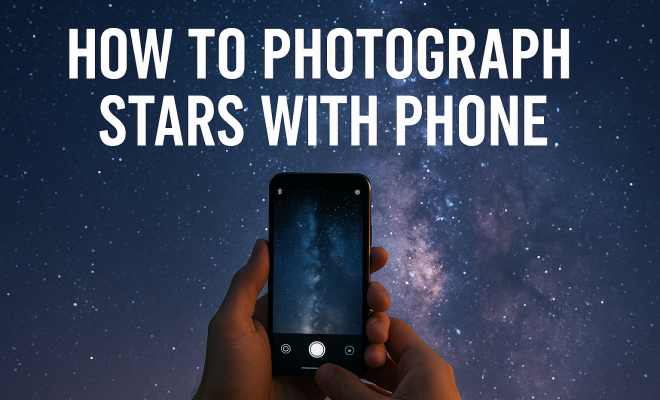
Capturing the breathtaking beauty of the night sky has never been easier, thanks to advances in smartphone technology. You might be surprised at what your phone is capable of when it comes to astrophotography. In this guide, we’ll explore how to photograph stars with your phone, covering everything from basic techniques to advanced tips that will elevate your starry snapshots.
1. Understanding Your Smartphone’s Camera
The first step to effectively photographing stars with your phone is understanding the capabilities of your device’s camera. Modern smartphones come equipped with impressive features like larger sensors, image stabilization, and various shooting modes that can significantly enhance your night sky photography.
Most smartphones now include a night mode, which automatically adjusts the camera settings to optimize low-light performance. Familiarize yourself with your camera app and explore its settings. Look for options that allow manual control over ISO, shutter speed, and focus, as these will be crucial for successful astrophotography.
2. Choosing the Right Location
To photograph stars with your phone effectively, location is key. Light pollution from urban areas can significantly hinder your ability to see and capture stars. Aim to find a dark location away from city lights. National parks or rural areas are often ideal spots for stargazing.
Also, consider the atmospheric conditions. A clear night with low humidity and minimal cloud cover is perfect for capturing stars. Apps like Clear Dark Sky can help you determine the best nights for stargazing by predicting cloud cover and light pollution levels.
3. Timing Your Shots
Timing can make or break your astrophotography. The best time to photograph stars is during the new moon phase when the sky is darkest. Additionally, the hours just after sunset and just before sunrise are often less polluted by light, providing clearer skies.
Check the phase of the moon and plan your stargazing sessions accordingly. If you want to capture the Milky Way, the summer months are typically best, especially in the Northern Hemisphere, as the Milky Way is more visible during these times.
4. Using Tripods and Stabilization
One of the biggest challenges in photographing stars with your phone is camera shake, which can blur your images. Using a tripod is one of the best ways to stabilize your phone while you shoot. If a tripod isn’t available, find a flat surface to rest your phone, or use a makeshift support, like a bag filled with rocks.
For those without a tripod, many smartphones come with built-in image stabilization features. Ensure these settings are activated, as they can help reduce the impact of minor movements, allowing for sharper images.
5. Mastering Camera Settings
To truly photograph stars with your phone, you need to master the camera settings. Look for options like manual mode, which allows you to control ISO, shutter speed, and white balance. For star photography, setting a high ISO (800 or higher) can help capture more light. Just be cautious, as higher ISO settings can introduce noise into your images.
Your shutter speed is also critical. A longer exposure (10-30 seconds) will allow more light to hit the sensor, making stars appear brighter. However, you’ll need to balance this with the risk of star trails—if your exposure is too long, stars will appear streaked instead of as points of light. (See: Learn about astrophotography techniques.)
6. Focusing on the Stars
Autofocus can be unreliable in low light, so it’s advisable to switch to manual focus when photographing stars. Tap on a star in your camera’s viewfinder to ensure it’s in sharp focus. Some smartphones even allow you to lock focus, which is beneficial for astrophotography.
Additionally, consider using an app that aids in focusing specifically for astrophotography. Apps like NightCap or ProCamera provide features that can help you achieve the best focus possible, making the stars pop in your images.
7. Editing Your Astrophotography
Once you’ve captured your images, the editing process can significantly enhance your photos. Use editing apps like Adobe Lightroom or Snapseed to adjust brightness, contrast, and color balance. Increasing the contrast can help the stars stand out against the dark sky.
Don’t be afraid to experiment with editing techniques. Some astrophotographers use stacking methods, where multiple images are combined to reduce noise and enhance detail. While this may require more advanced software, it can lead to stunning results.
8. Experimenting with Different Techniques
There are many creative techniques you can explore when you photograph stars with your phone. For instance, consider incorporating foreground elements into your shots. Silhouetting trees, mountains, or buildings against the starry sky can add depth and context to your images.
Another technique to explore is star trails, which can be created by taking multiple long-exposure photos and combining them. This effect showcases the movement of stars across the sky and can result in some genuinely mesmerizing images.
9. Learning from the Community
The astrophotography community is vast and welcoming, filled with enthusiasts keen to share their knowledge and experiences. Online platforms and social media groups can be invaluable resources for learning new techniques and finding inspiration. Websites like Reddit’s r/astrophotography or dedicated Facebook groups offer a supportive environment where you can ask questions and receive feedback on your work.
Additionally, consider attending workshops or local stargazing events. Many organizations host star parties where you can learn from experienced photographers, share tips, and connect with fellow enthusiasts. Engaging with the community can deepen your appreciation for astrophotography and enhance your skills as you learn to photograph stars with your phone.
10. Understanding Light Pollution
Light pollution is a significant barrier to successful astrophotography. It not only reduces visibility of stars but also affects the color and brightness of your images. Understanding the types of light pollution can help you make better choices about where to shoot. For example, skyglow occurs when artificial lights scatter in the atmosphere, creating a bright haze that obscures celestial objects.
To combat this, consider using light pollution maps available online, which display areas with varying levels of artificial light. These tools can guide you to the best locations for star photography. Additionally, using a red flashlight can help preserve your night vision while setting up your shots.
11. Essential Gear for Astrophotography
While a smartphone is a fantastic tool for capturing stars, some additional gear can enhance your photography experience. Here’s a quick rundown of some essentials:
- Tripod: A sturdy tripod is essential for eliminating camera shake, especially in low-light conditions.
- Phone Mount: If you’re using a telescope or binoculars, a phone mount can help you stabilize your phone for clearer shots.
- Lens Attachments: Consider investing in external lenses that can enhance your smartphone’s capabilities, such as wide-angle or fish-eye lenses designed for astrophotography.
- Portable Power Bank: Long nights of shooting can drain your battery quickly, so having a power bank on hand can ensure you don’t miss out on capturing the perfect shot.
12. Understanding Astrophotography Terms
Getting familiar with astrophotography-specific terms can significantly improve your understanding and execution of techniques. Here are a few key terms to know:
- ISO: The sensitivity of your camera’s sensor to light. Higher ISO settings increase sensitivity but can introduce noise.
- Shutter Speed: The duration your camera’s shutter is open to allow light in. Longer shutter speeds are often required for night photography.
- Aperture: The opening in your camera lens through which light passes. A lower f-stop number means a wider aperture, allowing more light to hit the sensor.
- Star Trails: The streaks created when stars move across the sky during a long exposure. This is often used for artistic effect.
13. Exploring the Night Sky
A big part of photographing stars with your phone is understanding what you’re looking at. Familiarize yourself with constellations and celestial events. There are numerous apps available, such as SkySafari or Star Walk, which allow you to identify stars and constellations in real time. Knowing what to look for can enhance your shooting experience and help you plan your shoots around celestial events like meteor showers or eclipses. (See: NASA's guide on photography in space.)
Consider taking photos of these events, as they provide unique opportunities. For instance, during a meteor shower, you can capture streaks of light across your night sky photos, adding dynamic elements to your shots.
14. Comparing Different Smartphone Models
Not all smartphones are created equal when it comes to astrophotography. Some devices come equipped with features specifically designed to enhance low-light performance. For example, the Google Pixel series has received high praise for its Night Sight mode, which allows users to capture stunning images in very low light. On the other hand, the latest iPhone models also offer advanced night modes with great results.
When considering a smartphone for astrophotography, look at reviews focusing on camera performance in low-light conditions. Also, pay attention to the manual settings available, as the ability to control ISO and shutter speed can greatly impact your results.
15. Common Mistakes to Avoid
Even the most seasoned astrophotographers can make mistakes. Here are some common pitfalls to avoid:
- Ignoring Light Pollution: Make sure you’re aware of your surroundings. Shooting in a well-lit area will yield disappointing results.
- Not Using a Tripod: Failing to stabilize your phone can lead to blurry images. Always use a tripod or another stable surface.
- Too Short or Too Long Exposure: Striking the right balance in shutter speed is crucial. Experiment with different durations to find what works best for your specific situation.
- Forgetting to Focus: Always double-check your focus before shooting, especially if you’re relying on manual settings. Blurry stars can ruin an otherwise perfect shot.
16. Frequently Asked Questions
Can I really capture good star photos with my smartphone?
Absolutely! With the right techniques and settings, you can take stunning astrophotography images. Smartphones are becoming increasingly capable, allowing you to create beautiful photos of the night sky.
What smartphone features are best for astrophotography?
Look for smartphones with advanced night modes, manual camera settings, and good low-light performance. Features like image stabilization and a high-quality sensor are also important.
How do I prevent star trails in my photos?
To avoid star trails, use a shorter shutter speed. If you want to capture star movement, consider techniques that involve multiple exposures or stacking images in editing software.
Do I need any special apps for astrophotography?
While you can achieve great results with standard camera apps, specialized apps like NightCap, ProCamera, or even astrophotography-specific apps can provide additional features to enhance your results.
What should I do if my photos come out too noisy?
If you notice noise in your images, try lowering your ISO settings. You can also use editing software to reduce noise in post-processing, but starting with lower ISO is always best.
Are there specific times of the year that are better for stargazing?
Yes! The best times for stargazing typically occur during the new moon phase, and summer months provide clearer views of the Milky Way. Check astronomical calendars for celestial events that might enhance your photography.
Is it possible to photograph the Milky Way with a smartphone?
Yes, you can photograph the Milky Way with a smartphone, especially with devices equipped with advanced low-light capabilities. Just ensure you’re in a dark location with minimal light pollution. (See: New York Times on night sky photography.)
How can I improve my astrophotography skills?
Keep practicing and experimenting with different techniques. Join online communities, attend workshops, and study the work of established astrophotographers to continually improve your skills and knowledge.
17. Planning for Seasonal Celestial Events
One of the exciting aspects of astrophotography is capturing seasonal celestial events. There are several key events throughout the year that you should mark on your calendar:
- Meteor Showers: Events like the Perseids in August and the Geminids in December can provide spectacular opportunities to capture shooting stars. Set your alarm for the peak times, usually around midnight to 4 AM, to maximize your chances.
- Planetary Alignments: Occasionally, planets align in a way that they can be seen in the same part of the sky. This is a great chance to photograph multiple celestial objects in one frame.
- Eclipses: Solar and lunar eclipses present unique opportunities for dramatic photography. Make sure to research the specific timing and safety precautions necessary for solar photography.
- Seasonal Constellations: Different constellations are prominent during various seasons. Learning these can help you know what to expect in the night sky, making it easier to plan your shoots.
18. Utilizing Smartphone Accessories
While smartphones are powerful tools for astrophotography, adding a few accessories can significantly improve your results. Here are some recommended accessories:
- External Lenses: Invest in clip-on lenses that allow for wider angles or macro shots. These can help you capture more of the sky in your frame.
- Bluetooth Remote Shutter: This accessory allows you to trigger your camera without touching the phone. Reducing touch will limit the chance of camera shake, resulting in clearer images.
- Light Pollution Filters: These filters can help reduce the effects of light pollution when shooting in urban areas, ensuring stars are more prominent in your photos.
19. Advanced Techniques for Capturing Stars
Once you’ve mastered the basics of photographing stars with your phone, consider experimenting with advanced techniques:
- Time-lapse Photography: Utilize your smartphone’s time-lapse feature to capture the movement of stars over a longer duration. This technique creates compelling videos that showcase star movement across the sky.
- Multi-Exposure Techniques: Take several photos with varying exposure settings and blend them in editing software. This can create a more balanced image that showcases both the stars and the foreground.
- HDR Imaging: Some smartphones offer High Dynamic Range (HDR) modes which can help balance the bright stars against darker landscapes. Just be cautious, as this can also introduce artifacts if not done correctly.
20. Understanding Composition in Astrophotography
Composition is crucial in photography, and astrophotography is no different. Here are several composition techniques to consider:
- Rule of Thirds: Imagine dividing your frame into a 3×3 grid. Positioning your main subjects (like the Milky Way or notable constellations) along these lines can create a more balanced and engaging photo.
- Framing: Use natural elements like trees, rocks, or buildings to frame your shot. This can create depth and draw the viewer’s eye to the stars.
- Leading Lines: Incorporate lines in the landscape (like paths or rivers) that lead towards your celestial subject. This guides the viewer’s attention and adds interest to your photos.
21. The Role of Community and Online Resources
Connecting with fellow astrophotographers can greatly enhance your skills. Many online communities share tips, tricks, and critiques of each other’s work. Websites like AstroBin allow you to showcase your photos, and forums can provide advice on specific challenges you face while shooting.
YouTube is another excellent resource, as many channels focus on astrophotography tutorials. Watching different techniques in action can spark creativity and help you learn faster than text alone. Don’t hesitate to reach out for feedback; constructive criticism can be a fantastic tool for growth.
22. Final Thoughts on Photographing Stars with Your Phone
With the right knowledge, tools, and techniques, photographing stars with your phone can be a rewarding and enjoyable endeavor. Remember to be patient and practice regularly. The night sky is always changing, providing endless opportunities to capture its beauty. Embrace your creativity, experiment with different styles, and most importantly, have fun!
“`
Trending Now
Frequently Asked Questions
How can I take pictures of stars with my phone?
To photograph stars with your phone, start by understanding your camera's features, such as night mode and manual controls for ISO and shutter speed. Choose a dark location away from city lights, and time your shots during the new moon or early morning for optimal conditions.
What is the best phone for astrophotography?
The best phones for astrophotography typically feature advanced camera systems with larger sensors, excellent low-light performance, and dedicated night modes. Look for models from brands like Apple, Samsung, and Google that offer high-quality camera capabilities specifically for low-light conditions.
Do I need a special app to take star photos with my phone?
While many smartphones come equipped with built-in night modes, using specialized apps can enhance your astrophotography experience. Apps like NightCap or ProCam allow for more manual control over settings like ISO and shutter speed, improving your ability to capture stars.
What time of year is best for photographing stars?
The best time of year for photographing stars is typically during the fall and winter months when the nights are longer and skies are clearer. Additionally, aim for nights around the new moon phase to minimize light pollution and maximize visibility of celestial bodies.
How do I reduce light pollution when photographing stars?
To reduce light pollution while photographing stars, choose a location far from city lights, such as national parks or rural areas. Use apps like Clear Dark Sky to check for optimal stargazing conditions, and plan your photos around the new moon for the darkest skies.
Have you experienced this yourself? We’d love to hear your story in the comments.