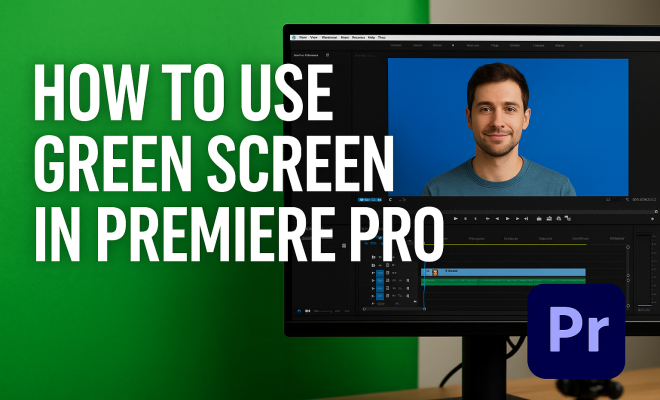
How to use green screen in Premiere Pro
“`html
Creating stunning video content has never been more accessible, thanks to tools like Adobe Premiere Pro. One of the most exciting techniques you can utilize is the green screen effect. This powerful feature allows you to transport your subjects to any environment, be it a tropical paradise or a futuristic cityscape. In this article, we’ll explore how to effectively use the green screen in Premiere Pro, providing you with actionable insights and practical tips to enhance your video projects.
1. Understanding the Green Screen Technique
The green screen technique, also known as chroma keying, has been a staple in the film and television industry for decades. At its core, it involves filming a subject against a solid green background, which can later be replaced with any desired image or video during post-production. The reason green is typically used is due to its distinct separation from most skin tones, making it easier for the software to differentiate between the subject and the background. There’s a fuller look at best green screen apps.
Green screen technology has been used in everything from blockbuster films to YouTube tutorials. Today, it allows creators to craft high-quality visuals that can transport viewers to different realms, making it a vital skill for anyone looking to elevate their video editing game.
2. Setting Up Your Green Screen
Before diving into Premiere Pro, it’s crucial to set up your green screen correctly. Your setup can significantly impact the quality of your final video. Here are some essential tips:
- Choose a Proper Location: Select a space with minimal shadows and good lighting. Natural light can be beneficial, but additional soft lighting may be needed to ensure an even illumination of the green screen.
- Ensure Smooth Surface: The green fabric should be taut and free of wrinkles, as these can create shadows that complicate the keying process.
- Distance from the Screen: Position your subject at least a few feet away from the green screen to help avoid green spill on the subject, which can complicate the keying process.
Taking the time to set up your green screen effectively will save you time and headaches during the editing phase.
3. Importing Your Footage into Premiere Pro
Once you’ve filmed your content, the next step is to import your footage into Premiere Pro. Begin by launching the application and creating a new project. From there, navigate to the Media Browser to find the clips you want to use. Simply drag and drop your footage into the timeline.
Keep in mind that Premiere Pro supports various file formats, including MOV, MP4, and AVI. Ensure your video is compatible to avoid any technical issues. After importing, take a moment to review your clips in the source monitor, which will help you identify the best parts to work with later.
4. Applying the Ultra Key Effect
To achieve the green screen effect in Premiere Pro, you’ll primarily use the Ultra Key effect. This powerful tool allows you to remove the green background from your footage seamlessly. To access it, follow these steps:
– Go to the Effects panel and search for “Ultra Key.” You can find it quickly by typing in the search bar. (See: Understanding chroma key technology.)
– Drag the Ultra Key effect onto your footage in the timeline.
After applying the effect, you’ll see a range of options in the Effects Control panel, including the “Key Color” option, where you can specify the color you want to remove.
5. Choosing the Right Key Color
The next step is to select the key color that you want to remove from the footage. Click on the eyedropper tool next to the Key Color option in the Effects Control panel and then click on the green background in your video preview. Premiere Pro will automatically remove that color, revealing the layer below.
However, if your green screen isn’t perfectly lit or if there are variations in the green shade, you may need to refine your keying settings. Adjust the Matte Generation parameters, such as Transparency, Highlight, and Shadow, to achieve a seamless look. These adjustments can help eliminate any remaining green hues or fringing around your subject.
6. Refining the Keying Process
Perfecting the keying process is vital for achieving a professional-looking result. Once you’ve applied the Ultra Key effect, you may still notice some artifacts or edges that need refinement. Here’s how to improve the quality of your key:
- Matte Cleanup: Utilize the Matte Cleanup options to refine the edges of your subject. Adjust the Choke setting to tighten the matte around your subject, eliminating any unwanted green spill.
- Spill Suppression: If you see a green tint on your subject, use the Spill Suppression slider to reduce it. This setting will help neutralize any green reflections from the background.
By meticulously refining your keying process, you can create a polished final product that captivates your audience.
7. Adding Backgrounds to Your Project
Once you’ve successfully keyed out the green background, it’s time to add your desired background. You can do this by importing a new video or image that you want to use as your background layer. Drag this new layer to the timeline, placing it beneath your keyed footage.
Ensure that the background complements the subject both visually and thematically. If you’re using a moving background, be aware of how it interacts with your subject. You may need to apply motion or scaling effects to make it feel cohesive within the scene. Related reading: using green screen in teaching.
8. Exporting Your Final Project
After all your editing is complete, the last step is to export your video. Go to File > Export > Media. In the export settings, select the appropriate format and preset for your project, such as H.264 for a standard web video.
Take a moment to review the settings, ensuring the resolution and bitrate align with your intended distribution platform. Once everything looks good, hit Export, and Premiere Pro will render your finished project.
9. Tips and Tricks for Successful Green Screen Projects
To maximize the effectiveness of your green screen projects in Premiere Pro, consider these additional tips: (See: Green screen safety guidelines.)
- Test Footage: Always shoot test footage before starting your main project. This will give you a chance to fine-tune your lighting and camera settings.
- Use High-Quality Green Screens: Invest in a quality green screen fabric or paint. Cheaper options often result in uneven color, making keying more challenging.
- Keep It Simple: For beginners, start with simple backgrounds and gradual complexity as you gain confidence with the technique.
With these tips in mind, you’ll be well on your way to creating stunning videos using the green screen feature in Premiere Pro. The possibilities are limited only by your imagination!
10. Common Mistakes to Avoid
Even seasoned creators can run into issues while working with green screens. Here are some common pitfalls to be aware of and tips on how to avoid them:
- Poor Lighting: Uneven lighting on the green screen can cause shadows and hotspots, making it harder to key out the background. Always aim for soft, even lighting to create a uniform color for keying.
- Wearing Green: If your subject is wearing green clothing or accessories, it could get keyed out along with the background. Make sure to choose outfits that contrast with the green screen.
- Neglecting the Background: Always consider the background in relation to your subject. A poorly chosen background can detract from the overall quality of your video. Use backgrounds that enhance your story rather than distract from it.
- Not Testing Before Final Shoot: Skipping test shoots can lead to surprises during editing. Always test your settings and lighting to ensure everything translates well during the keying process.
11. Exploring Advanced Techniques
Once you’re comfortable with the basics, you might want to explore advanced techniques for using green screens in Premiere Pro. Here are a few that can add a professional touch to your videos:
- Layering Multiple Backgrounds: Instead of using just one background, try layering multiple backgrounds together. This can create depth and a more engaging environment for your subject.
- Motion Tracking: For more dynamic shots, consider using motion tracking to have your background move in sync with your subject. This technique can make your scene feel more cohesive and realistic.
- Color Grading: After adding your background, don’t forget to color grade both your subject and background to ensure they match in terms of lighting and ambiance. This will create a seamless integration between the two.
12. Real-World Applications of Green Screen
The green screen effect is not just for movies or YouTube videos. It has applications across various fields, each with unique requirements. Here are some notable uses:
- Marketing and Advertising: Brands often leverage green screens for commercials and promotional videos. It allows for creative and eye-catching visual storytelling without the need for elaborate set designs.
- Education and Training: Educational videos can use green screens to create engaging content. For example, instructors can place themselves in various educational contexts, like historical events or scientific environments, to enhance learning experiences.
- Virtual Events: As the demand for virtual events has surged, green screens have become essential for creating immersive experiences. Hosts can create backgrounds that match the theme of the event, making it more visually appealing.
13. FAQs about Green Screen in Premiere Pro
What type of green screen material should I use?
The best green screens are made from non-reflective fabric or painted surfaces that can easily absorb light. Muslin fabric is a popular choice because it is lightweight, portable, and can be easily hung or stretched.
Can I use colors other than green for my background?
Yes, you can use other solid colors, like blue, especially if your subject has green elements. The key is to choose a color that contrasts well with your subject to avoid unwanted keying issues.
How do I fix a green spill on my subject?
Green spill can often be corrected by adjusting the Spill Suppression settings in the Ultra Key effect. You can also use color correction tools to adjust the hue and saturation of your subject to neutralize the spill.
Is it necessary to use a green screen for all video projects?
While a green screen can enhance many video projects, it’s not always necessary. Depending on your content, simpler setups may suffice, especially for vlogs or straightforward tutorials.
Can I use a digital green screen without physical equipment?
Yes! Some software solutions allow for digital green screens using artificial intelligence and machine learning to isolate subjects without a physical background. However, the effectiveness varies based on the technology and lighting conditions. (See: The evolution of green screen technology.)
What are some software alternatives to Premiere Pro for green screen editing?
There are several alternatives to Premiere Pro for green screen editing, including Final Cut Pro, DaVinci Resolve, and iMovie. Each software offers its own unique features, so it’s worth experimenting with a few to see which one fits your style best.
14. Green Screen Equipment and Accessories
To get the most out of your green screen experience, it’s important to consider the equipment and accessories you’ll use. Here are a few items that can elevate your green screen setups:
- Lighting Kits: Proper lighting is crucial for green screen shoots. A good lighting kit can include softbox lights, LED panels, or ring lights. These can help illuminate your green screen evenly, reducing shadows and creating a more uniform background.
- Light Meters: Using a light meter can help you achieve the right exposure and lighting balance. This tool can help you measure the light intensity to ensure it’s even across the green screen.
- Camera Stabilizers: To ensure your shot is steady and fluid, consider employing camera stabilizers, like gimbals or tripods. This stability will enhance the quality of your footage and make the keying process smoother.
- Green Screen Kits: For those starting out, many companies offer portable green screen kits that come with everything you need—fabric, stands, and carrying cases. These kits are ideal for both indoor and outdoor shoots.
15. Case Studies: Successful Green Screen Projects
Examining real-world examples of successful green screen projects can provide valuable insights and inspiration. Here are a couple of notable case studies:
- The Weather Channel: Often utilizing green screens, The Weather Channel incorporates this technique to provide engaging weather reports. The anchors appear in front of dynamic graphics, illustrating weather conditions that enhance storytelling and viewer understanding.
- Film and Television Productions: Many blockbuster films have used green screen technology to create immersive environments. Movies like “Avatar” and “The Avengers” employed complex green screen techniques to generate stunning visual effects, placing actors in breathtaking CGI worlds.
These case studies illustrate how seriously the green screen can transform narratives and enhance viewer engagement across various media.
16. Ethical Considerations in Green Screen Usage
As with any powerful tool, there are ethical considerations to keep in mind when using green screens. Misinformation can easily be spread through manipulated footage. Here are some points to consider:
- Transparency: Always disclose when content has been digitally altered, especially if the changes could mislead viewers about reality.
- Copyright Concerns: When using backgrounds or images, ensure you have the rights to use them to avoid legal issues.
- Respect for Subjects: When incorporating backgrounds that depict sensitive or controversial subjects, be cautious about how they are portrayed and ensure that they respect the dignity of all individuals involved.
17. Conclusion: Take Your Video Projects to the Next Level
By understanding the nuances of green screen technology and mastering it in Premiere Pro, you can create compelling videos that captivate your audience and elevate your projects to new heights. Whether you’re a seasoned professional or just starting out, the green screen effect opens up endless creative possibilities.
“`
Trending Now
Frequently Asked Questions
What is the green screen technique in video editing?
The green screen technique, or chroma keying, involves filming a subject against a solid green background. This allows the green background to be replaced with any desired image or video during post-production, enabling creators to transport subjects to various environments.
How do I set up a green screen for Premiere Pro?
To set up a green screen for Premiere Pro, choose a location with good lighting and minimal shadows, ensure the green fabric is taut and wrinkle-free, and position the subject several feet away from the screen to avoid shadows and ensure effective keying.
Why is green used for green screens?
Green is used for green screens because it provides a distinct color that is usually separate from most skin tones. This contrast helps video editing software easily differentiate between the subject and the background, making keying more effective.
What are some tips for using a green screen in Premiere Pro?
To effectively use a green screen in Premiere Pro, ensure proper lighting, maintain a smooth and taut green surface, and position your subject away from the screen. These steps help minimize shadows and improve the quality of your final video.
Can I use a different color for my green screen?
While green is the most common color for chroma keying due to its contrast with skin tones, other colors like blue can be used if they do not appear in the subject’s clothing or features. However, it’s essential to maintain a solid color background for best results.
Agree or disagree? Drop a comment and tell us what you think.