How to resize image in Photoshop
“`html
When it comes to digital design, knowing how to resize images in Photoshop is a fundamental skill every creative must master. Whether you’re a professional photographer, graphic designer, or simply someone looking to improve their image-editing game, resizing images effectively can significantly impact your projects. It’s not just about making things fit; it’s about preserving quality while adjusting dimensions to meet various needs. Let’s explore the best practices to resize images in Photoshop and unlock the full potential of your designs.
1. Understanding Image Resolution
Before diving into resizing techniques, it’s crucial to understand the concept of image resolution. Resolution refers to the amount of detail an image holds, typically measured in pixels per inch (PPI). The higher the resolution, the more detail the image contains, which is especially important for print media. For instance, print images usually require a resolution of 300 PPI, while images for web use may only need 72 PPI.
When resizing an image, the resolution plays a pivotal role in the final output quality. If you reduce the pixel dimensions of an image without adjusting the resolution, you may end up with a pixelated result. Conversely, increasing size without maintaining the resolution can lead to a blurred image. Understanding these fundamentals will help you make informed decisions when resizing.
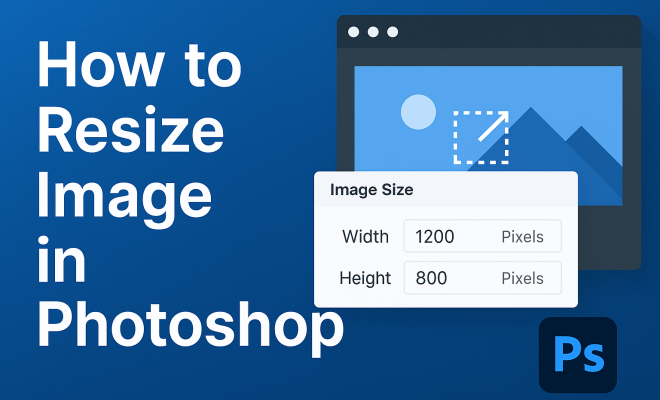
2. Using the Image Size Dialog Box
One of the primary methods to resize images in Photoshop is through the Image Size dialog box. To access this feature, navigate to the top menu and select Image > Image Size. Here, you’ll see several options, including Width, Height, Resolution, and the units of measurement (pixels, inches, etc.).
When you change the Width or Height, make sure the Constrain Proportions option is checked. This ensures that your image maintains its aspect ratio, preventing any distortion. For example, if you increase the width to 800 pixels, the height will adjust automatically, keeping the proportions consistent. This is vital for professional-looking results.
3. Resampling Images: What You Need to Know
Resampling is a key aspect of resizing images. When you check the Resample option in the Image Size dialog, Photoshop alters the pixel dimensions of your image. This is essential when you need to change both size and resolution. Photoshop uses different resampling algorithms, such as Bicubic Smoother for enlargements and Bicubic Sharper for reductions, to maintain quality.
Choosing the right resampling method can significantly affect the final product. For enlarging images, select Bicubic Smoother for better quality, while for reducing, opt for Bicubic Sharper to enhance details. Experimenting with these settings can lead to impressive outcomes, particularly for images that require high fidelity.
4. Batch Resizing: A Time-Saving Technique
If you’re working with multiple images, batch resizing can save you a ton of time. Photoshop allows you to automate the resizing process using Actions. Start by recording a new Action that resizes an image to your desired dimensions. After recording, you can apply this Action to a batch of images through the File > Automate > Batch feature.
This method is particularly useful for photographers who need to prepare multiple images for web use or social media platforms. By setting consistent dimensions and resolutions, you ensure that all images maintain a uniform look and feel, enhancing your overall presentation.
5. Resizing for Different Platforms
Different platforms have varied specifications for image sizes. For instance, Instagram recommends a square image of 1080×1080 pixels for posts, while Facebook has its own standards for cover photos and profile images. When you resize images in Photoshop, it’s essential to tailor your dimensions to meet these requirements.
Adapting to platform-specific guidelines helps ensure that your images display correctly and attractively. It’s a good practice to keep a reference chart of these dimensions handy, allowing you to quickly resize images without having to look up the specs each time. (See: Understanding image resolution.)
6. Maintaining Quality During Resizing
One of the biggest challenges when resizing images in Photoshop is maintaining quality. No one wants a beautiful photo to turn into a blurry mess. To minimize quality loss, always work with the highest resolution file available. When you downsize, avoid significant reductions, as drastic changes can introduce artifacts and decrease sharpness.
After resizing, consider using the Unsharp Mask filter to enhance details. This technique can be particularly effective after reducing image size, as it adds back some sharpness that might be lost during the resizing process. Remember, a little goes a long way — too much sharpening can lead to unnatural results.
7. Advanced Techniques for Professional Results
For those looking to take their resizing skills to the next level, consider utilizing Smart Objects. When you convert a layer to a Smart Object, you can resize it non-destructively, meaning you can adjust the dimensions without affecting the original file. This feature is particularly useful for graphic designers who may need to make changes later.
Additionally, learn about the Content-Aware Scale feature in Photoshop. This allows you to resize an image while preserving the important visual elements. For instance, if you need to adjust the width of a photo but keep the subject intact, this feature intelligently adapts the background to fit the new dimensions, resulting in a seamless look.
8. Common Mistakes to Avoid
Even seasoned users can make mistakes when resizing. One common error is forgetting to check the resolution before exporting. If your image is intended for print, a resolution of 72 PPI will produce disappointing results. Always double-check the settings to ensure your final product meets the intended use.
Another mistake is failing to save your image in the right format. JPEGs are great for photography, but they compress quality, while PNGs maintain higher quality at the cost of file size. Knowing when to use each format can help you present your work more effectively.
9. Practical Applications of Image Resizing
Understanding how to resize images in Photoshop opens up a world of practical applications. From creating web graphics to preparing images for print, the skill is invaluable. Whether you’re designing a blog post, crafting social media content, or developing marketing materials, the ability to resize images effectively ensures that your visuals captivate and engage your audience.
In today’s digital world, where image quality can make or break a project, honing your resizing skills in Photoshop is essential. With these techniques at your disposal, you’re well on your way to creating stunning visuals that resonate with your audience.
10. Understanding Different File Formats
To effectively resize images in Photoshop, it’s also important to understand the various file formats available. Each format serves different purposes and can influence the final output of your resized image.
JPEG is one of the most widely used formats for photographs due to its balance between file size and image quality. However, repeatedly saving a JPEG can degrade its quality over time because of its lossy compression. If you plan to resize and edit extensively, consider using the PSD or TIFF formats while working, as they preserve layers and quality.
PNG is another popular format, especially for graphics that require transparency. It’s a lossless format, meaning the quality remains consistent even after multiple saves. However, PNG files tend to be larger than JPEGs, which can be a consideration if file size is a concern.
For web use, understanding the differences can help you choose the best format for your needs, ensuring your resized images look their best regardless of the platform.
11. Expert Tips for Creatives
Industry professionals often leverage advanced techniques to refine their image resizing process. Here are some expert tips you can adopt: (See: CDC on image quality and resolution.)
- Use Shortcuts: Familiarize yourself with keyboard shortcuts for quicker navigation. For example, pressing Ctrl + Alt + I (Cmd + Option + I on Mac) opens the Image Size dialog box directly.
- Keep Original Files: Always save a copy of your original file before resizing. This way, you can revert back if the resized version doesn’t work out as planned.
- Regular Backups: Make it a routine to back up your work, especially when handling batches of images. This prevents data loss due to unexpected software crashes or file corruption.
By adopting these practices, you can streamline your workflow and ensure a higher quality of output in your projects.
12. Frequently Asked Questions (FAQ)
How do I ensure the quality remains high when resizing images?
To maintain quality, always start with the highest resolution image possible. Use the appropriate resampling method in Photoshop and consider sharpening your image after resizing.
Can I resize images for print and web using the same dimensions?
No, print images typically require a higher resolution (300 PPI) compared to web images (72 PPI). Make sure to adjust both dimensions and resolution based on the intended use.
What’s the best way to resize an image without losing details?
Use the Preserve Details 2.0 option in the resampling settings, especially for enlarging images. This option is designed to reduce noise and retain detail during resizing.
How can I resize images for social media platforms?
Research the specific size requirements for each platform and use the Image Size dialog box in Photoshop to set the precise dimensions before exporting your images.
What file format should I save my resized images in?
The best format depends on how you plan to use the image. Use JPEG for photographs, PNG for graphics with transparency, and TIFF or PSD for highest quality during editing.
Is there a quick way to resize images in bulk?
Yes, using the Actions tool in Photoshop allows you to create a resizing action and apply it to multiple images through the Batch command, significantly speeding up the process.
What if I need to resize an image, but I also want to change its aspect ratio?
You can uncheck the “Constrain Proportions” option in the Image Size dialog box to change the aspect ratio. However, be cautious as this can lead to distortion unless done carefully.
13. Challenges to Consider When Resizing Images
While resizing images in Photoshop is generally straightforward, there are specific challenges that you may encounter. One common issue is the loss of detail when reducing image size significantly. This loss can manifest as pixelation, especially in images with fine details, such as those containing text or intricate patterns.
Another challenge arises from the format you choose to save your resized images. As mentioned earlier, JPEGs compress data, which can be detrimental if the image is resized multiple times. Always ensure you’re saving in a format that suits your future editing needs. If you plan to print your image, ensure you maintain a high resolution throughout the process.
It’s also worth noting that some images may not resize well due to their original composition. For instance, images that are heavily reliant on detail in the background may lose that essence when scaled down. Always review your images after resizing to ensure they meet your quality standards. (See: How to resize images effectively.)
14. Real-world Examples of Resizing in Action
To better understand the importance of resizing images, let’s look at a couple of real-world scenarios:
Scenario 1: A wedding photographer delivers digital albums to clients. Each photo needs to be resized for both high-quality prints and online sharing. By using batch actions in Photoshop, the photographer can efficiently resize all images to the required dimensions and resolutions for different platforms, ensuring a cohesive look across various formats.
Scenario 2: A small business owner is creating promotional material for social media. The owner needs to resize product photos to fit Instagram’s requirements. By meticulously adjusting each image to the optimal size (1080×1080 pixels) while checking for quality, the owner can present their products in the best light, increasing engagement and visibility.
These examples highlight how mastering the ability to resize images effectively can enhance the presentation and professionalism of your work.
15. Utilizing Third-Party Tools for Image Resizing
While Photoshop is a powerful tool for resizing images, there are also various third-party tools available that can complement your workflow. Applications like Lightroom provide robust options for batch processing images, allowing you to resize and apply adjustments simultaneously.
Online tools like Canva and PicResize offer web-based alternatives that can be convenient for quick resizing tasks without the need for complex software. These tools often come with user-friendly interfaces, making them accessible for those who may not be as familiar with Photoshop’s extensive capabilities.
However, it’s essential to note that while these third-party tools can offer convenience, they may not always provide the same level of detail and control that Photoshop does. Depending on your needs, you might find that a combination of both Photoshop and these tools can yield the best results.
16. Final Thoughts on Resizing Images in Photoshop
Resizing images in Photoshop is more than just a simple task; it’s an essential skill that can enhance the visual impact of your work. By understanding resolution, mastering the tools available, and avoiding common pitfalls, you can produce high-quality images suited for any purpose. Whether for personal projects or professional portfolios, effective image resizing can elevate your designs to a new level. With practice and the tips provided, you’re well-equipped to tackle any resizing challenge that comes your way.
“`
Trending Now
- this guide on 7 proven strategies to boost your brand visibility in chatgpt for 2026
- the complete explanation
- our breakdown of why official development assistance is more crucial than ever for global stability
- the complete explanation
- this guide on the hidden importance of legal disclaimers: what you need to know
Frequently Asked Questions
How do I resize an image in Photoshop without losing quality?
To resize an image in Photoshop without losing quality, use the Image Size dialog box. Ensure you maintain the appropriate resolution for your intended use—300 PPI for print and 72 PPI for web. Check the 'Constrain Proportions' option to keep the aspect ratio intact while adjusting dimensions.
What is the best resolution for resizing images for print?
The best resolution for resizing images for print is typically 300 pixels per inch (PPI). This resolution ensures that the image retains its detail and clarity when printed, making it ideal for high-quality prints.
Can I resize images in Photoshop for web use?
Yes, you can resize images in Photoshop for web use. For web images, a resolution of 72 PPI is usually sufficient. Use the Image Size dialog box to adjust the dimensions and ensure the image looks sharp and loads quickly on websites.
What happens if I resize an image too much in Photoshop?
If you resize an image too much in Photoshop, especially if you increase its dimensions without maintaining resolution, you may end up with a pixelated or blurred image. It's essential to balance size and resolution to preserve quality.
How do I access the Image Size dialog box in Photoshop?
To access the Image Size dialog box in Photoshop, go to the top menu and select 'Image,' then choose 'Image Size.' This will open a window where you can adjust the width, height, and resolution of your image.
What’s your take on this? Share your thoughts in the comments below — we read every one.