How to make background transparent Photoshop
“`html
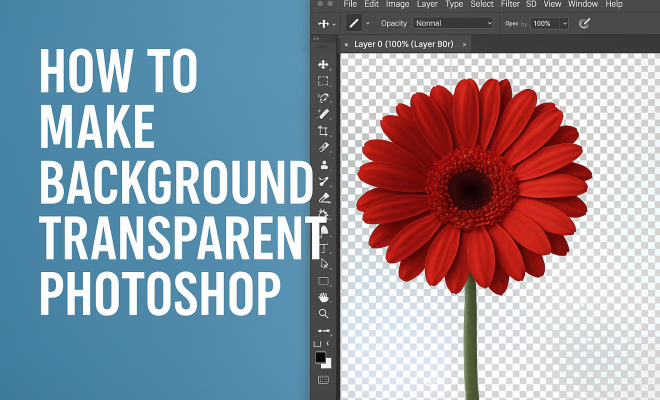
Creating a transparent background in Photoshop is a skill that many graphic designers, photographers, and digital artists find incredibly useful. Not only does it allow for seamless integration of images in various projects, but it also enhances the visual appeal of your work. This guide will walk you through different methods to achieve a transparent background, provide insights into best practices, and discuss practical applications of this technique.
1. Understanding Transparency in Image Editing
Before diving into the specifics, it’s crucial to understand what a transparent background means. In Photoshop, a transparent background allows you to remove any solid colors, such as white or black, making the background see-through. This is particularly beneficial for layering images, creating logos, or designing web graphics where you want to place elements against varying backgrounds.
Transparency is represented in image files using an alpha channel, which defines the opacity of each pixel. When saving images, formats like PNG and GIF support transparency, while formats like JPEG do not. Thus, knowing how to create a transparent background in Photoshop not only impacts your current project but also affects how your images are used in the digital realm.
2. Tools You’ll Need in Photoshop
To create a transparent background, you’ll be using several tools available in Photoshop. Familiarizing yourself with these tools will enhance your efficiency:
- Magic Wand Tool: This tool allows you to select an area based on color similarity, making it ideal for removing solid backgrounds.
- Quick Selection Tool: Useful for selecting intricate shapes and objects, this tool lets you brush over areas to create a selection.
- Layer Mask: A non-destructive way to hide parts of an image without deleting them, allowing for easy adjustments later.
- Pen Tool: For precise selections, especially around complex shapes, the Pen Tool offers control that other selection methods may not.
These tools, along with your creativity, will help in achieving a polished transparent background.
3. Step-by-Step Guide: Removing a Background with the Magic Wand Tool
The Magic Wand Tool is one of the quickest methods for achieving a transparent background. Here’s how to use it:
- Open Your Image: Launch Photoshop and open the image from which you want to remove the background.
- Select the Magic Wand Tool: You can find this tool in the toolbar or by pressing W on your keyboard. Click on the background area you wish to remove.
- Adjust Tolerance: If the selection isn’t accurate, adjust the tolerance in the options bar. A lower tolerance will select colors closer to the clicked area, while a higher tolerance will select a broader range.
- Refine Your Selection: Hold down the Shift key to add to your selection or Alt (or Option on Mac) to subtract from it.
- Delete the Background: Once satisfied with your selection, hit the Delete key. This will remove the selected area, revealing a checkerboard pattern indicating transparency.
Keep in mind that the Magic Wand Tool works best for images with solid color backgrounds. For more complex images, you might want to explore other methods.
4. Using the Quick Selection Tool for Complex Backgrounds
When the background is more intricate, the Quick Selection Tool is a better option. Here’s how to utilize it:
- Open Your Image: As before, start by opening the image in Photoshop.
- Select the Quick Selection Tool: Find it in the toolbar or press W. Click and drag over the area you want to keep.
- Refine Your Selection: Use the +/- options in the options bar to add or subtract from your selection. Zooming in can help you make more precise adjustments.
- Invert the Selection: Once you have the desired selection, go to Select > Inverse to select the background instead.
- Delete the Background: Hit Delete to remove the background, leaving a transparent space around your subject.
This method may require patience, especially for detailed images, but it often yields better results than the Magic Wand Tool.
5. Refining Edges for a Cleaner Look
After removing the background, you might notice rough edges or areas that need improvement. To refine your selection, you can use the Select and Mask feature:
- Access Select and Mask: With your selection active, go to Select > Select and Mask.
- Use the Refine Edge Brush: This tool allows you to paint over the edges of your selection to improve them. It’s especially useful for hair or intricate details.
- Adjust Settings: Play around with the sliders for smoothness, feather, and contrast to enhance the transition between your subject and the transparent background.
- Output Settings: Choose to output your selection to a new layer with a mask for flexibility.
Refining edges can make a substantial difference in the professionalism of your final image, ensuring a clean look that integrates well into various design elements. (See: Understanding transparency in computer graphics.)
6. Saving Your Image with Transparent Background
Once you’ve achieved the desired transparent background, the next step is saving your image correctly. To retain the transparency, follow these steps:
- Go to File > Save As: Choose the location where you want to save your file.
- Select PNG or GIF Format: These formats support transparency. Avoid formats like JPEG, which will fill transparent areas with a solid color.
- Name Your File: Give your file a recognizable name and click Save.
- Adjust PNG Options: If saving as a PNG, you might see options for compression. Choose the settings that best suit your needs and click OK.
By saving in a format that supports transparency, you ensure that your edited image can be used in various projects without losing the transparent effect you worked hard to achieve.
7. Practical Applications of Transparent Backgrounds
Creating transparent backgrounds in Photoshop opens up a world of possibilities. Here are some practical applications:
- Graphic Design: Designers often use transparent backgrounds for logos and icons, allowing them to be placed over different colors or textures without a border.
- Marketing Materials: In digital marketing, transparent backgrounds help create engaging visuals for social media, ads, and presentations.
- Web Design: Transparent images seamlessly integrate into website layouts, providing a clean look and enhancing user experience.
- Product Photography: E-commerce businesses use transparent backgrounds to showcase products clearly and attractively, making them stand out.
Understanding these applications can help you leverage your skills effectively in real-world scenarios, enhancing your portfolio and making your work more marketable.
8. Common Mistakes to Avoid
Even experienced users can make mistakes when working to create a transparent background. Here are some pitfalls to watch out for:
- Not Using Layers: Always work on a duplicate layer or use layer masks instead of permanently deleting background elements, enabling easy corrections.
- Ignoring Edge Refinement: Neglecting to refine edges can result in harsh lines that diminish the quality of your image.
- Forget to Save in the Right Format: This is a common error. Always double-check that you are saving your image in a format that supports transparency.
Being aware of these common mistakes can save you time and frustration, allowing you to produce high-quality images more efficiently.
9. Exploring Alternatives: Online Tools for Transparent Backgrounds
While Photoshop is a powerful tool for image editing, sometimes you might need a quicker solution. Several online tools can help create transparent backgrounds without requiring extensive knowledge of Photoshop:
- Remove.bg: This online tool automatically removes backgrounds from images, making it quick and user-friendly.
- Canva: Known for its design capabilities, Canva also offers a background removal tool, which is useful for social media graphics.
- Clipping Magic: This service provides a user-friendly interface for manually adjusting selections and backgrounds.
While these tools can be useful, they may not offer the same level of precision as Photoshop. However, for quick edits or non-professional needs, they can be a great alternative.
10. Final Thoughts on Achieving Transparent Backgrounds in Photoshop
Mastering the art of creating transparent backgrounds in Photoshop is an invaluable skill for anyone involved in digital media. Whether you’re designing logos, preparing images for web use, or enhancing photographs, understanding how to effectively remove backgrounds is essential.
With practice, you’ll find the methods that work best for your workflow, allowing you to produce professional-quality images efficiently. As you gain confidence, consider experimenting with layering techniques and advanced selections to further enhance your skills. Remember, the key is to keep practicing and refining your technique, enabling you to create visually stunning graphics with transparent backgrounds that captivate your audience.
11. Advanced Techniques for Creating Transparent Backgrounds
While the basic methods described above are effective for most projects, there are advanced techniques that can take your skills to the next level. These methods can help you achieve even finer results, especially in challenging images:
- Color Range Selection: This feature allows you to select pixels based on color characteristics instead of relying solely on manual tools. You can access it via Select > Color Range. By choosing the specific color you want to remove, Photoshop creates a selection based on similarity, which can be particularly useful for images with complex color gradients.
- Using Blending Modes: When working with layers, blending modes can help you achieve a more seamless integration of your subject against a transparent background. Experiment with different blending modes in the Layers panel to see how they affect the final result, particularly with partially transparent or textured backgrounds.
- Channels Panel for Precision: For those who are comfortable with a more detailed approach, the Channels panel can be a powerful ally. By selecting a channel that has the most contrast between your subject and the background, you can create a precise selection that can later be refined using the methods discussed previously.
12. Examples of Successful Transparent Background Projects
Seeing real-world examples can inspire your own work and help you understand the impact of transparent backgrounds. Here are some successful projects that utilized this technique: (See: Research on image editing techniques.)
- Logos: Many brands opt for transparent backgrounds for their logos to ensure they can be placed on any surface without appearing bulky. For instance, the Nike Swoosh is often displayed on transparent backgrounds in promotional materials, ensuring versatility across various media.
- Product Listings: E-commerce platforms like Amazon and Etsy benefit significantly from transparent background images. Products displayed with transparent backgrounds allow for a clean presentation, making the products stand out, regardless of the website’s color scheme.
- Infographics: Designers creating infographics often incorporate transparent background elements to merge text and visuals seamlessly, enhancing readability and visual appeal. For instance, using transparent icons against colored backgrounds helps maintain focus on the data presented.
13. Statistics on Image Quality and Engagement
Understanding the impact of transparent backgrounds on image quality and user engagement can help you appreciate the significance of this skill:
- According to a study by Adobe, images with transparent backgrounds can increase engagement by up to 30% in social media posts, as they allow for a more professional appearance.
- DesignRush reports that 67% of online shoppers say that high-quality product photography, including the use of transparent backgrounds, significantly influences their purchasing decisions.
- Research by HubSpot indicates that content that includes images is 94% more likely to be shared on social media platforms, highlighting the importance of visually appealing graphics.
14. FAQs About Creating Transparent Backgrounds in Photoshop
Here are some frequently asked questions that can clarify common concerns regarding transparent backgrounds in Photoshop:
Q1: Can I create a transparent background from any image type?
A1: You can create a transparent background from any image type, but the final format needs to support transparency. PNG and GIF are ideal formats to save in after editing.
Q2: What if my image has a gradient background? Can I still make it transparent?
A2: Yes! While it may require more time and care, you can use tools like the Quick Selection Tool or Color Range Selection to achieve a transparent background even with gradient backgrounds.
Q3: Are there any limitations to using the Magic Wand Tool?
A3: The Magic Wand Tool is best for solid color backgrounds. It can struggle with complex images or those with shades that blend into the subject, making other tools more suitable in those cases.
Q4: How do I ensure my edges remain smooth after removing the background?
A4: Utilizing the Refine Edge feature and adjusting the feathering and contrast settings in the Select and Mask workspace can help keep edges smooth and natural.
Q5: Is there a way to automate the process of removing backgrounds?
A5: Yes, Photoshop has actions and scripts that can automate the background removal process, saving you time, especially for batch processing numerous images.
15. Next Steps: Enhancing Your Skills in Photoshop
If you’ve mastered creating transparent backgrounds, consider exploring more advanced Photoshop techniques to further enhance your skills. Learning about photo manipulation, advanced color correction, or even 3D design can take your capabilities to new heights. Online tutorials, forums, and courses can supplement your self-study and help you stay updated with the latest trends in graphic design.
Whether you’re working on personal projects or professional assignments, the ability to create and manipulate transparent backgrounds will remain a vital tool in your digital toolkit. Keep experimenting and pushing the boundaries of your creativity!
16. Enhancing Your Workflow with Shortcuts
Efficiency is key when working in Photoshop, especially when you’re frequently creating transparent backgrounds. Learning keyboard shortcuts can drastically speed up your workflow: (See: Best practices for graphic design.)
- Ctrl + J (Cmd + J on Mac): Duplicates the selected layer, allowing you to work non-destructively.
- Ctrl + Z (Cmd + Z on Mac): Undo your last action, giving you a quick way to correct mistakes.
- Ctrl + T (Cmd + T on Mac): Allows you to transform your selection, making resizing and rotating elements easier.
- Ctrl + D (Cmd + D on Mac): Deselects your current selection, freeing you to make new selections without interference.
Mastering these shortcuts will not only save you time but also enhance your overall productivity in Photoshop.
17. Understanding Layer Styles and Effects
Once you’ve created a transparent background, you might want to apply layer styles or effects to further enhance your image. Here are some techniques to consider:
- Drop Shadows: Adding a drop shadow to your subject can create a sense of depth, making it stand out against the transparent background.
- Outer Glow: This effect can add a soft halo around your subject, enhancing visibility and drawing attention to it.
- Stroke: Applying a stroke around your subject can help define its edges, especially if the background is complex.
Experimenting with these effects can give your images a polished and professional appearance, further showcasing your design skills.
18. Feedback and Iteration: The Importance of Peer Review
Getting feedback on your work can provide fresh perspectives and identify areas for improvement. Consider sharing your transparent background projects with peers or mentors. Constructive criticism can guide you toward refining your technique and achieving better results in future projects.
Additionally, engaging in design communities or forums online can offer you insights and tips from other experienced users. This collaborative approach can significantly enhance your learning process and lead to innovative ideas.
19. Future Trends in Image Editing
The world of digital media is ever-evolving, and staying ahead of trends in image editing is crucial. Here are some trends to watch:
- AI in Image Editing: As artificial intelligence continues to advance, expect more tools that automate tedious tasks, such as background removal and image enhancement.
- Increased Demand for Custom Graphics: Businesses are moving towards unique, custom graphics rather than stock images, making skills in creating transparent backgrounds more valuable.
- Interactive and Animated Graphics: The rise of interactive content will require images with transparent backgrounds to blend seamlessly with various media formats.
Staying informed about these trends will help you adapt your skills and keep your work relevant in a competitive market.
“`
Trending Now
Frequently Asked Questions
How do I make a background transparent in Photoshop?
To make a background transparent in Photoshop, use the Magic Wand Tool or the Quick Selection Tool to select the area you want to remove. Once selected, hit the delete key to remove the background. Make sure to save your image in a format that supports transparency, like PNG.
What tools do I need to create a transparent background in Photoshop?
To create a transparent background in Photoshop, you'll primarily use the Magic Wand Tool for selecting areas based on color, the Quick Selection Tool for intricate shapes, Layer Masks for non-destructive editing, and the Pen Tool for precise selections around complex shapes.
Can I save a transparent background image as a JPEG?
No, JPEG format does not support transparency. To retain a transparent background, save your image in PNG or GIF formats, which preserve the alpha channel and allow for see-through areas in your images.
What is the best way to remove a background in Photoshop?
The best way to remove a background in Photoshop depends on the image complexity. For simple backgrounds, the Magic Wand Tool is effective. For more complex images, consider using the Quick Selection Tool or the Pen Tool for precise selections and adjustments.
Why is a transparent background useful in design?
A transparent background is useful in design because it allows for seamless layering of images, enhances visual appeal, and enables graphics to integrate well with various backgrounds. This is especially beneficial for logos and web graphics where versatility is key.
What did we miss? Let us know in the comments and join the conversation.