How to remove background in Photoshop
“`html
Photoshop has long been the go-to tool for graphic designers, photographers, and digital artists looking to create stunning visuals. One of the most crucial skills within this software is knowing how to remove background in Photoshop. Whether you’re eliminating distractions from an image, isolating a subject for a promotional piece, or crafting a clean composition for a website, mastering this skill can elevate your work significantly. In this article, we’ll delve into eight effective methods to remove backgrounds in Photoshop, ensuring you have the right tools and techniques at your fingertips.
1. Using the Quick Selection Tool
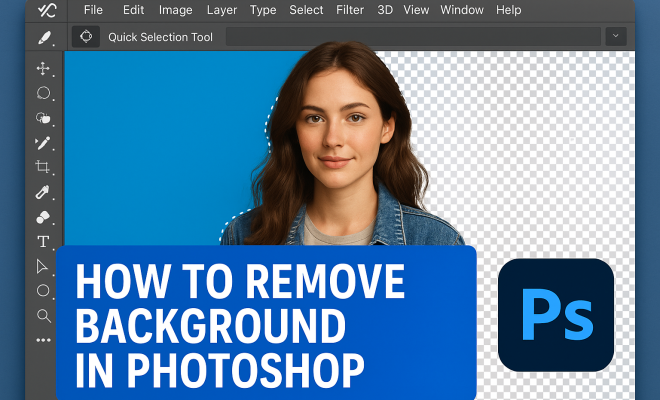
The Quick Selection Tool is one of the most straightforward options in Photoshop for removing backgrounds. It allows you to paint over the area you want to keep, making it easy to select complex shapes like hair or intricate designs.
To begin, select the Quick Selection Tool from the toolbar or press W. Click and drag over the subject you want to retain. The tool tries to intelligently recognize edges, so you don’t have to be overly precise. Once the selection is made, navigate to the top menu and choose Layer > Layer Mask > Reveal Selection. This will mask out the background seamlessly. If any parts of the background remain, you can refine the selection using the Refine Edge feature to smooth out any rough edges.
2. Leveraging the Pen Tool for Precision
If you’re looking for an ultra-precise way to remove background in Photoshop, the Pen Tool is your best friend. Although it has a steeper learning curve, the results are often worth it.
To use the Pen Tool, select it from the toolbar or press P. Click to create points around the subject, forming a path. The more points you create, the smoother and more accurate your selection will be. Once you’ve traced the subject, right-click and choose Make Selection. After adjusting the feather radius to soften the edges, click OK. Then, apply a layer mask to remove the unwanted background.
3. Employing the Magic Wand Tool
The Magic Wand Tool is another convenient option, especially for images with solid or uniform backgrounds. This tool selects areas based on color similarity, allowing for quick background removal.
Select the Magic Wand Tool from the toolbar or press W. Click on the background area you wish to remove. Adjust the Tolerance level in the options bar to control how closely related the colors must be for selection. Once everything you want to remove is selected, click on the Layer menu and choose Layer Mask > Hide Selection to isolate your subject.
4. Using Select and Mask for Advanced Editing
If your image features complex edges, such as hair or fur, the Select and Mask feature can provide enhanced control. This allows you to refine your selections with greater precision.
Start by selecting your subject with any of the selection tools mentioned earlier. Once you have a basic selection, go to Select > Select and Mask. This opens a new workspace where you can fine-tune your selection using tools like the Refine Edge Brush Tool to adjust the edges around complex areas. After making your adjustments, click OK and apply a layer mask to remove the background.
5. Color Range Selection for Complex Images
For images with intricate backgrounds where manual selection may be cumbersome, the Color Range option is extremely useful. This tool allows you to select areas based on color values, which is particularly handy for removing backgrounds with patterns.
To use Color Range, navigate to Select > Color Range. Click on the background area you wish to remove. Adjust the Fuzziness slider to increase or decrease the range of selected colors. Once satisfied, click OK to create a selection. As with the other methods, apply a layer mask to finalize the removal of the background. (See: Adobe Photoshop overview on Wikipedia.)
6. Layer Masks for Non-Destructive Editing
Layer masks are an essential tool in Photoshop that allow for non-destructive editing when removing backgrounds. Instead of permanently altering the image, masks enable you to hide and reveal parts of a layer.
To create a layer mask, make a selection using any of the techniques discussed. Then, click on the Layer Mask icon at the bottom of the Layers panel. This will add a mask to your layer. You can use a soft brush to paint on the mask with black to hide parts of the layer or with white to reveal them, providing ultimate flexibility in your editing process.
7. Smart Selection with the Object Selection Tool
Introduced in more recent versions of Photoshop, the Object Selection Tool simplifies the process of removing background in Photoshop. This tool automatically detects and selects the main subject of an image, making it especially user-friendly.
To use the Object Selection Tool, select it from the toolbar (it might be nested with the Quick Selection Tool). Click and drag a rectangle around the subject you want to keep. Photoshop will analyze the image and create a selection around the object. Once selected, you can either delete the background or apply a layer mask to hide it. This tool is particularly valuable for users who may not have extensive experience with Photoshop, as it speeds up the selection process significantly.
8. Final Touches: Cleanup and Exporting
Once you’ve successfully removed the background, it’s essential to polish your image for a professional finish. Use the Clone Stamp Tool or the Healing Brush Tool to clean up any rough edges or leftover background remnants. Zoom into your image to ensure everything looks seamless.
After refining your image, exporting is the next step. Depending on your intended use, choose the appropriate file format. JPEG is ideal for photographs, while PNG is better for graphics with transparent backgrounds. Always check your image quality settings during export to maintain the best resolution. And there you have it—your image is ready for use in whatever project you have planned.
9. Understanding the Importance of Background Removal
Understanding why you might want to remove background in Photoshop can help you approach your projects with greater intention. For instance, in e-commerce, products need to stand out against their backgrounds to attract potential buyers. Clean, distraction-free images can significantly increase conversion rates. According to a study by the Nielsen Norman Group, users often judge the credibility of a website based on the quality of its images. Poorly edited photos can lead to a loss of trust and a decrease in sales.
Additionally, social media platforms thrive on visually appealing content. Brands that utilize professional images often see higher engagement rates. An image with a clean background can elevate a brand’s aesthetics and make marketing materials more cohesive. So, mastering background removal isn’t just about technical skills—it’s about enhancing the effectiveness of your visual communication.
10. Common Background Removal Scenarios
Many scenarios call for background removal, and understanding these can guide your approach to each project.
- Product Photography: E-commerce businesses need images of their products that remove distractions, highlighting the items themselves. A white or neutral background is often preferred.
- Portraits: When creating portraits, isolating the subject can help focus attention on their expressions. This can be especially important for promotional materials, such as flyers or social media posts.
- Graphic Design: Designers often need to integrate images into various backgrounds or layouts. Removing the background allows for more creative freedom and integration into different contexts.
- Real Estate Listings: High-quality images of properties are essential to attract buyers. Background removal can help create a more polished and appealing presentation of houses or apartments.
11. Best Practices for Background Removal
While knowing the tools is important, implementing best practices can take your work to the next level. Here are some tips to keep in mind:
- Work in High Resolution: Always start with high-resolution images. This ensures that the details are sharp and clean when you remove the background.
- Tidy Up Your Workspace: Before starting, clean up your workspace by hiding unnecessary layers and organizing your tools. A tidy workspace can enhance focus and efficiency.
- Zoom In: Take the time to zoom in on edges when cleaning up after removing a background. It’s easy to miss small details that could affect the overall look of your image.
- Save a Copy: Always save a copy of your original image. This allows you to return to the unedited version if needed, providing a safety net for potential mistakes.
12. Frequently Asked Questions (FAQ)
How do I choose the best tool for background removal?
The choice of tool largely depends on the complexity of your image. For simple backgrounds, the Magic Wand Tool might suffice. For intricate details, the Pen Tool or Quick Selection Tool could yield better results.
Can I remove backgrounds from images with textures?
Yes, but it can be more challenging. Tools like Color Range and Select and Mask can help isolate textures, but additional cleanup may be necessary to maintain the quality of the image. (See: Photoshop tips from The New York Times.)
Is there a way to automate background removal?
Photoshop has actions and scripts that can automate repetitive tasks, including background removal. However, for nuanced images, manual adjustments will usually be necessary to achieve the best results.
Does background removal affect image quality?
When done correctly, background removal should not negatively affect image quality. However, if the edges are not refined properly, it can result in jagged lines or artifacts, which can detract from the overall appearance.
What file formats support transparent backgrounds?
PNG is the most common format for images with transparent backgrounds. It allows for high-quality images while maintaining transparency, making it ideal for web use and graphic design.
Are there plugins that can help with background removal?
Yes, several plugins and extensions are available for Photoshop that can streamline the background removal process. Many of these tools use AI technology to enhance selection capabilities, making the job faster and often more efficient.
13. Advanced Techniques for Background Removal
While the basic methods are effective, exploring advanced techniques can yield even better results, especially in professional settings.
Using the Background Eraser Tool
The Background Eraser Tool is particularly useful when dealing with backgrounds that have soft or blended edges. To use this tool, select it from the toolbar (it might be nested under the Eraser Tool). Adjust the brush size and hardness according to your needs, then click and drag over the background. The tool erases pixels on the layer based on the color under the brush, making it great for images with varied backgrounds.
Utilizing Layer Styles for a Blended Effect
In some cases, you might want to blend your subject into a new background rather than just removing it. Layer styles can help create a seamless transition between the subject and the new background. Start by duplicating the subject layer, then experiment with drop shadows, inner shadows, or glows to integrate the subject more naturally into the new setting.
Combining Multiple Techniques
Don’t hesitate to mix and match these techniques. For instance, you can start with the Quick Selection Tool to get a rough selection, then switch to the Pen Tool for precision on complex edges. Combining methods can often yield the most polished results.
Practicing with Different Textures and Backgrounds
The more you practice with varied images, the better you’ll become at background removal. Try working with images that have different textures, colors, and complexities. This will help you learn how to adapt your approach based on the specific challenges each image presents.
14. Case Studies: Successful Background Removals
Looking at real-world applications can provide insight into how background removal can enhance visual storytelling. (See: Image processing techniques on ScienceDirect.)
E-commerce Success Story
A local clothing store decided to revamp its online presence by investing in professional product photography. The store utilized Photoshop to remove backgrounds from their images, opting for a clean white background that made the clothing items pop. As a result, the store reported a 40% increase in online sales within the first month, showcasing the impact of professional images on consumer behavior.
Social Media Campaign Case Study
A tech company launched a new product and aimed to create buzz on social media. By using background removal techniques, they were able to create striking promotional images featuring their product against vibrant, eye-catching backgrounds. The campaign not only gained significant traction, with thousands of shares and likes, but also helped establish a strong brand identity.
15. Trends in Background Removal Techniques
The landscape of digital editing continuously evolves, and staying current with trends can give you an edge. Here are a few trends in background removal you might want to consider:
AI-Powered Tools
With advancements in artificial intelligence, several tools now offer automatic background removal, reducing the need for manual selection. These tools analyze images and can often produce results that are nearly as good as manual editing, saving time for graphic designers.
Integration with Mobile Editing Apps
As mobile photography gains popularity, many editing apps now incorporate background removal features. This trend allows users to edit on-the-go, making high-quality edits accessible to a broader audience.
Augmented Reality (AR) Applications
Background removal is becoming increasingly important in augmented reality applications, where seamless integration of subjects into different environments is crucial. Knowing how to remove backgrounds effectively will be an invaluable skill for designers working in AR.
16. Conclusion
In summary, knowing how to remove background in Photoshop is an invaluable skill for anyone involved in digital art or design. With these eight methods at your disposal, you’ll be able to tackle any background removal task with confidence. Advanced techniques, case studies, and trends highlight just how extensive and impactful this skill can be. Practice these techniques, and don’t hesitate to combine them for even better results. Happy editing!
“`
Trending Now
- the complete explanation
- Why Official Development Assistance Is More Crucial Than Ever for Global Stability
- this guide on why iran oil prices aren’t spiking: the market’s surprising reaction explained
- this guide on the hidden importance of legal disclaimers: what you need to know
Frequently Asked Questions
How do I remove the background from an image in Photoshop?
To remove the background in Photoshop, you can use the Quick Selection Tool to select the area you want to keep, then apply a layer mask. Alternatively, the Pen Tool offers a more precise method by allowing you to create a path around your subject, which can then be converted into a selection.
What is the best tool for removing backgrounds in Photoshop?
The best tool for removing backgrounds in Photoshop depends on your needs. The Quick Selection Tool is great for quick selections, while the Pen Tool offers precision for complex shapes. Both tools can effectively isolate your subject from the background.
Can I refine my selection after removing the background in Photoshop?
Yes, after making a selection and applying a layer mask, you can refine it using the Refine Edge feature. This tool helps smooth out rough edges and improves the overall quality of your subject against the background.
Is it possible to remove a background without losing quality in Photoshop?
Absolutely! By using layer masks instead of deleting the background, you can remove it without losing image quality. Layer masks allow you to hide parts of the image non-destructively, ensuring that your original image remains intact.
What are the steps to use the Quick Selection Tool in Photoshop?
To use the Quick Selection Tool, select it from the toolbar or press 'W'. Click and drag over the subject you want to keep. Then, go to Layer > Layer Mask > Reveal Selection to mask out the background. You can refine the selection further if needed.
What did we miss? Let us know in the comments and join the conversation.