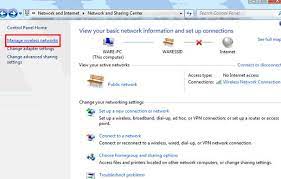
How to Manage Your Wireless Network Profiles in Windows

Wireless networks have become a ubiquitous feature of modern computing, providing people with the ability to connect their devices to the Internet without the use of wires or cables. However, managing multiple wireless network connections can be a challenging task, especially if you are using a laptop or mobile device. Fortunately, Windows provides a built-in utility that can help you manage your wireless network connections effectively. In this article, we’ll outline the steps to manage your wireless network profiles in Windows.
What is a Wi-Fi Network Profile?
Before we dive into the steps to manage your wireless network profiles, it’s essential to understand what a wireless network profile is. A wireless network profile is a collection of settings that configure a particular wireless network connection. Every time you connect to a wireless network, Windows saves the network’s settings in a wireless network profile, including the network name or SSID, the network security type (WEP, WPA, WPA2), and the network password or key.
Whether you use your laptop or mobile device to connect to different wireless networks, you might have multiple wireless network profiles created in your Windows operating system. It’s crucial to manage these profiles regularly to maintain proper connectivity and security.
Steps to Manage Your Wireless Network Profiles in Windows
Follow the steps below to manage your wireless network profiles in Windows.
Step 1: Open the Network and Internet Settings
Click the Start button and select the Settings icon. When the Settings window appears, click on the Network & Internet icon.
Step 2: Manage Your Wi-Fi Connections
Once you’re in the Network & Internet settings, click on the Wi-Fi tab on the left-hand side of the screen. Next, click on the “Change adapter options” link to open the Network Connections window.
Step 3: Find Network Connections
In the Network Connections window, you will see several icons, each representing a different network connection. Find the Wi-Fi icon, right-click on it, and select “Properties” from the context menu.
Step 4: Manage Wi-Fi Properties
In the Wi-Fi Properties window, click on the “Configure” button. This will open the Wi-Fi Adapter Properties window. Go to the “Advanced” tab and select “Preferred Networks” in the list of Advanced settings.
Step 5: Edit Wireless Network Profile
Here, you’ll find a list of all the wireless networks that your computer has ever accessed. You can now edit, remove, or add new wireless network profiles. To edit a network profile, simply select the network name and click on the “Properties” button. You can change the network name, security type, and password from here.
Step 6: Remove a Wireless Network Profile
To remove a network profile, select the network you want to delete, and click on “Remove.” A confirmation message will appear. Click “Yes” to confirm the removal.
Step 7: Add a New Wireless Network Profile
To add a new wireless network profile, click on the “Add” button. Enter the network name (SSID), select the security type, and enter the password. Once you’ve entered all the details, click the “OK” button to add the new profile.
Conclusion
Managing your wireless network profiles is a crucial task, especially if you connect to different networks with your laptop or mobile device. With these simple steps, you can easily manage your wireless network profiles in Windows and ensure a seamless and secure connectivity experience. By removing obsolete profiles, updating security settings, and adding new networks, you can maintain optimal network health and security.


