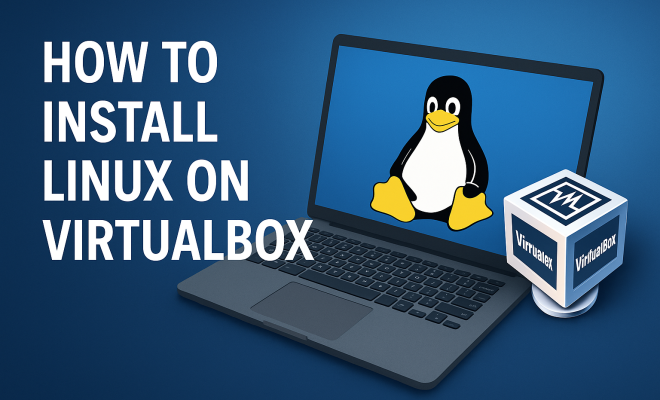
How to install Linux on VirtualBox
“`html
Installing Linux on VirtualBox can open up a world of possibilities for tech enthusiasts, developers, and anyone interested in exploring the vast landscape of operating systems without disrupting their existing setup. Whether you’re looking to learn Linux for development, testing software, or simply to explore its rich functionalities, this guide will walk you through the process in detail. In this article, we’ll cover everything you need to know about installing Linux on VirtualBox, making it an accessible task for everyone.
1. What is VirtualBox?
VirtualBox is a powerful open-source virtualization software developed by Oracle. It allows users to run multiple operating systems simultaneously on a single physical machine. This functionality is particularly useful for developers who need to test their applications across different platforms or for users who want to experiment with different operating systems, such as various Linux distributions.
The beauty of VirtualBox lies in its user-friendly interface and extensive compatibility. It supports various host operating systems, including Windows, macOS, Linux, and Solaris. Furthermore, VirtualBox can emulate a wide range of guest operating systems, making it a versatile tool in any tech arsenal.
2. Why Choose Linux?
Linux has gained popularity over the years for several reasons. First, it is open-source, meaning that anyone can inspect, modify, and enhance the source code. This transparency fosters a vibrant community that continually contributes to its development, ensuring it remains secure, stable, and up-to-date.
In addition to its collaborative nature, Linux is known for its performance and flexibility. It is highly customizable, allowing users to tailor their operating system environments to meet their specific needs. From lightweight distributions designed for older hardware to feature-rich versions suitable for modern development, Linux offers an option for everyone.
Statistics show that Linux powers a significant portion of the world’s web servers, with around 70% of these servers using some form of Linux. This dominance illustrates the trust and reliability the community places in Linux, particularly for robust, enterprise-level applications.
Moreover, Linux is often regarded as more secure than many proprietary operating systems. Its open-source nature allows for quicker identification and patching of vulnerabilities, and several distributions are designed specifically for security-oriented tasks, such as Kali Linux.
3. System Requirements for VirtualBox and Linux
Before you proceed to install Linux on VirtualBox, you should ensure that your system meets the necessary requirements. The basic system requirements for VirtualBox include a supported host operating system, at least 4 GB of RAM (though 8 GB is recommended for better performance), and sufficient storage space to accommodate both VirtualBox and the Linux distribution you plan to install.
Additionally, check that your CPU supports virtualization technology (Intel VT-x or AMD-V). This feature is crucial for optimal performance when running virtual machines. You can usually enable this option in your computer’s BIOS or UEFI settings. Once you’ve confirmed that your hardware can support these requirements, you’re ready to move forward.
For those interested in running resource-intensive applications or multiple virtual machines simultaneously, consider upgrading to a machine with at least 16 GB of RAM and a multi-core processor. This will ensure smoother operation and less lag when switching between environments.
Lastly, ensure that your hard drive has enough space to accommodate virtual machines. Ideally, allocate at least 20 GB for each Linux installation, but larger distributions or those requiring additional software may need more.
4. Downloading and Installing VirtualBox
To get started, the first step is to download VirtualBox from its official website. You’ll find versions available for various operating systems. Choose the version that matches your host OS and follow these steps:
- Visit the VirtualBox homepage and click on the “Downloads” section.
- Select the appropriate installer for your operating system and download it.
- Run the installer and follow the on-screen instructions. Most installations can be completed by clicking “Next” a few times.
Once the installation is complete, launch VirtualBox. You’ll be greeted by a clean interface that’s easy to navigate, where you can start creating your virtual machines.
In addition to the core VirtualBox installation, you might want to download the VirtualBox Extension Pack. This add-on provides additional features, such as USB 2.0 and USB 3.0 support, VirtualBox RDP, disk encryption, and more. It can enhance your VirtualBox experience significantly, particularly if you plan on using peripherals with your virtual machines. (See: VirtualBox overview on Wikipedia.)
5. Choosing a Linux Distribution
With numerous Linux distributions available, choosing the right one can be daunting. Popular options include Ubuntu, Fedora, Debian, and CentOS, each catering to different user needs. For beginners, Ubuntu is often recommended due to its user-friendly interface and robust community support.
To download a Linux distribution, visit its official website. Most distributions offer ISO files, which are disk images containing the entire operating system. Ensure you download the appropriate version (32-bit or 64-bit) depending on your hardware capabilities and your VirtualBox settings.
Consider your goals when selecting a distribution. If you’re looking for a lightweight option, you might explore distributions like Lubuntu or Xubuntu, which are streamlined for older hardware. If you’re interested in server environments, CentOS or Ubuntu Server editions might be more suitable.
Additionally, you can look into specialized distributions such as Kali Linux, which is tailored for penetration testing and cybersecurity, or Arch Linux, known for its flexibility and the ability to build a system from the ground up. Knowing your requirements can help narrow down the choices significantly.
Don’t forget to check user reviews and community support for the distributions you’re considering. A vibrant community can help troubleshoot issues and provide valuable guidance as you learn to navigate your new operating system.
6. Creating a New Virtual Machine
Now that you have VirtualBox installed and your Linux distribution downloaded, it’s time to create your virtual machine. Here’s how to do it:
- Open VirtualBox and click on the “New” button.
- Enter a name for your virtual machine and select the type and version of the operating system. For example, if you’re installing Ubuntu, select “Linux” and then “Ubuntu (64-bit)”.
- Allocate memory (RAM) to the virtual machine. A minimum of 2 GB is recommended for most distributions, but more may be required for better performance.
- Choose to create a virtual hard disk now, and select the type of hard disk file (VDI is commonly used). Choose dynamically allocated or fixed size based on your preference.
- Set the size of your virtual hard disk. A minimum of 20 GB is generally recommended.
Once you’ve completed these steps, your virtual machine will be created and ready for the operating system installation.
Don’t forget to customize the settings of your virtual machine for optimal performance. You can adjust CPU cores, video memory, and network settings in the virtual machine’s settings menu. Allocating more CPU and video memory can significantly enhance speed and graphics performance, especially if you plan to run more demanding applications within your Linux environment.
It’s also worth noting that you can assign multiple processors to your virtual machine to further enhance performance. This is particularly useful for tasks that require heavy computational power, such as data analysis or software development.
7. Installing Linux on the Virtual Machine
With your virtual machine set up, it’s time to install Linux. Follow these steps:
- Select your newly created virtual machine and click on “Start”.
- When prompted to select a startup disk, click on the folder icon and browse to the ISO file you downloaded earlier.
- Click “Start” to begin the installation process. The Linux installer will boot, and you’ll be guided through the installation steps, which typically include selecting your language, timezone, and keyboard layout.
- Follow the prompts to complete the installation. You may need to create a user account and set a password.
Once finished, the installer will prompt you to restart the virtual machine. Ensure to remove the installation media (the ISO file) from your virtual drive to avoid booting into the installer again.
During the installation, take the time to explore the options presented by the installer. Many distributions offer customizable installation processes, where you can select different software packages to install or choose between desktop environments like GNOME, KDE, or XFCE. Picking the right environment can enhance your user experience based on your preferences and intended use.
Once installed, you may want to update the system right away. Most distributions will have an update manager or package manager that can be used via command line to ensure you’re running the latest software and security patches.
8. Post-Installation Configuration
After installing Linux on VirtualBox, you may want to make adjustments to enhance your experience. Start by installing the VirtualBox Guest Additions, which provide better performance and improved integration with your host operating system. To do this, follow these steps:
- With your Linux virtual machine running, navigate to the menu bar and select “Devices” > “Insert Guest Additions CD image”.
- Follow the prompts to install Guest Additions.
- After installation, restart your virtual machine to apply the changes.
This process enables features such as clipboard sharing, folder sharing, and better display capabilities, making your virtual machine experience smoother.
Additionally, consider adjusting the display settings for optimal viewing. You can increase the screen resolution to match your host system or enable auto-resizing of the guest display. These adjustments can make working within your virtual machine much more convenient.
Another important task is to install essential software packages. Depending on your needs, you may want to install development tools, web browsers, or media players. Most distributions come with a software installer that makes this process easy.
9. Troubleshooting Common Issues
While installing Linux on VirtualBox is generally straightforward, you may run into some common issues. Here are a few troubleshooting tips:
- Virtual Machine Won’t Start: Ensure that your virtualization technology is enabled in BIOS/UEFI settings and that you have allocated sufficient RAM and CPU resources.
- Low Performance: Check that you have assigned enough RAM and CPU cores to your virtual machine and consider increasing the video memory in the settings.
- Network Connection Problems: If your virtual machine cannot access the internet, verify that the network adapter is set to “NAT” or “Bridged Adapter” in the virtual machine settings.
If you encounter specific error messages during the installation or operation of your Linux virtual machine, a quick search online can often yield instant solutions from community forums and documentation. The Linux community is incredibly supportive, and chances are, someone else has faced the same issue and documented their solution.
Also, keep an eye on logs located in the `/var/log` directory of your Linux installation. These logs can provide insights into issues related to system performance, hardware recognition, and other operational questions.
10. Advanced Configuration Options
After getting accustomed to the basics of VirtualBox, you might want to explore more advanced features that can enhance your workflow. VirtualBox offers various configurations that can optimize your virtual machine’s performance and usability.
For example, consider configuring shared folders between your host and guest systems. This feature allows you to easily transfer files back and forth without the need for external drives or cloud services. To set this up, go to the ‘Settings’ of your virtual machine, navigate to ‘Shared Folders’, and add your desired folder from the host machine.
Another advanced option is configuring snapshots. Snapshots allow you to save the state of your virtual machine at a specific point in time. This is particularly useful before making major changes, such as system upgrades or installations. If something goes wrong, you can revert to the previous snapshot without significant hassle.
Additionally, consider configuring network settings for specific use cases. You can set up a host-only adapter for internal testing or a bridged adapter to allow your virtual machine to appear as a separate device on your local network. This can be immensely helpful for testing network applications or configurations.
Finally, you can also create and manage virtual networks within VirtualBox. This allows for complex setups where multiple virtual machines can communicate with each other, simulating a real network environment for development or testing.
11. Linux Command Line Basics
Understanding the Linux command line can significantly enhance your experience when using a Linux distribution. While many distributions come with a graphical user interface (GUI), the command line often offers more powerful tools for managing your system.
Here are a few essential commands to get you started:
- ls: Lists files and directories in the current directory.
- cd: Changes the current directory. For example,
cd /home/userwill take you to the specified path. - mkdir: Creates a new directory. For instance,
mkdir new_folderwill create a folder named “new_folder”. - rm: Removes files or directories. Use with caution, as deleted files are not easily recoverable.
- sudo: Executes commands with superuser privileges, allowing changes to system files and configurations.
Familiarizing yourself with these commands will empower you to navigate your Linux environment more effectively. As you continue to use Linux, you’ll discover a myriad of commands and scripts that can automate tasks and streamline your workflow.
For a more advanced experience, consider learning about bash scripting. It allows you to write scripts to automate repetitive tasks, significantly boosting your productivity.
12. Frequently Asked Questions (FAQ)
Q1: Can I run multiple Linux distributions on VirtualBox at the same time?
Absolutely! Each virtual machine operates independently, allowing you to run multiple distributions simultaneously. Just ensure your host machine has enough resources (RAM and CPU) to support them.
Q2: Is there a performance difference between running Linux on VirtualBox and a native installation?
Typically, native installations offer better performance, especially for resource-intensive applications. However, VirtualBox is well-optimized and can handle most tasks, particularly for development and testing purposes.
Q3: Can I use VirtualBox on Linux as a host operating system?
Yes! VirtualBox can run on various host operating systems, including Linux itself. You can virtualize other operating systems within your Linux environment with ease.
Q4: What if my Linux distribution doesn’t support VirtualBox Guest Additions?
Most popular Linux distributions support Guest Additions, but if you encounter issues, you can check the distribution’s forums or documentation for specific instructions or alternative methods to enhance integration.
Q5: How do I uninstall VirtualBox or a virtual machine?
To uninstall VirtualBox, follow the typical software uninstallation process for your operating system. To remove a virtual machine, open VirtualBox, right-click on the virtual machine you want to delete, and select “Remove”. You can choose to delete all files associated with the machine in that process.
Q6: How can I share files between my host and virtual machine?
You can set up shared folders in VirtualBox. In your virtual machine settings under “Shared Folders”, add the folder you want to share from your host. Ensure you have the proper permissions set in your Linux system to access these folders.
Q7: Is it possible to use GPU acceleration with VirtualBox?
VirtualBox does support 3D acceleration, which can enhance graphical performance in your virtual machines. To enable this, go to the virtual machine settings under “Display” and check “Enable 3D Acceleration”. Ensure you also have the appropriate drivers installed on both host and guest systems for the best results.
Q8: Can I use VirtualBox for learning purposes, like preparing for certifications?
Definitely! VirtualBox is an excellent tool for setting up a lab environment where you can practice and learn about different Linux distributions, configurations, and even server setups. It allows for a safe space to experiment without risk to your main system.
Installing Linux on VirtualBox is an empowering skill that opens up new horizons for experimentation and learning. Whether you’re a seasoned professional or a curious beginner, this guide provides a comprehensive roadmap to help you make the most of your virtual environment. So, what are you waiting for? Dive into the world of Linux today!
“`
Trending Now
Frequently Asked Questions
How do I install Linux on VirtualBox?
To install Linux on VirtualBox, first download and install VirtualBox on your host machine. Next, download the desired Linux distribution ISO file. Open VirtualBox, create a new virtual machine, select the ISO file as the startup disk, and follow the installation prompts. Ensure you allocate sufficient resources like RAM and storage for optimal performance.
What are the system requirements for VirtualBox?
VirtualBox's system requirements vary based on the host operating system, but generally, you need a compatible CPU with virtualization support, at least 4GB of RAM, and sufficient disk space for the virtual machines. It's recommended to have a 64-bit operating system for better performance and compatibility.
Is VirtualBox free to use?
Yes, VirtualBox is free and open-source software developed by Oracle. It allows users to create and manage virtual machines without any licensing costs, making it an accessible option for both personal and professional use.
Can I run multiple Linux distributions on VirtualBox?
Absolutely! VirtualBox allows you to run multiple virtual machines simultaneously, so you can install and test different Linux distributions side by side. This feature is particularly useful for developers and users wanting to explore various Linux environments.
What Linux distribution should I install on VirtualBox?
The choice of Linux distribution depends on your needs. Popular options include Ubuntu for beginners, Fedora for cutting-edge features, and CentOS for server environments. If you prefer lightweight options, consider distributions like Lubuntu or Xubuntu, which are designed for older hardware.
What did we miss? Let us know in the comments and join the conversation.