How to create presets in Lightroom
“`html
Creating presets in Lightroom can be a transformative experience for photographers and editors alike. Whether you’re a novice looking to streamline your workflow or an experienced professional aiming to maintain a consistent style across your portfolio, presets offer a powerful way to enhance your editing process. In this comprehensive guide, we’ll explore the ins and outs of creating presets in Lightroom, from understanding their purpose to practical steps that will have you crafting your own in no time.
1. Understanding Lightroom Presets
Before we dive into the nitty-gritty of how to create presets in Lightroom, it’s crucial to understand what they are and why they matter. A preset is essentially a saved configuration of settings that you can apply to your images in Lightroom, allowing you to replicate specific edits with a single click. This not only saves time but also helps in maintaining a uniform look across your work.
Presets can include adjustments for exposure, contrast, color balance, saturation, and more. They are particularly useful for batch editing, where you might want to apply the same style or correction to a series of images. Think of presets as your personal editing signature — once you’ve created them, you can easily apply them to different photos, making your workflow more efficient.
2. Preparing for Preset Creation
Getting ready to create presets in Lightroom requires some preparation. First, ensure that you have a clear vision of the style or effect you want to achieve. Experiment with various adjustments on a sample photo until you’re happy with the results. This is a great opportunity to refine your editing skills and discover what works best for your photography. This builds on digital photography in education.
Additionally, consider the type of images you frequently edit. Are you primarily working with landscapes, portraits, or perhaps street photography? Tailor your presets to suit the most common scenarios you encounter. This targeted approach will make your presets more effective and useful in the long run.
3. Step-by-Step: Creating Your First Preset
Now that you’re prepared, let’s get into the step-by-step process of creating your own preset in Lightroom. Follow these simple instructions:
- Open Lightroom and select an image: Start by importing an image that you want to edit. This will serve as your test image for creating the preset.
- Edit the image: Use the Develop module to make adjustments to your image. Play around with the sliders for exposure, contrast, highlights, shadows, and color settings until you achieve the desired effect.
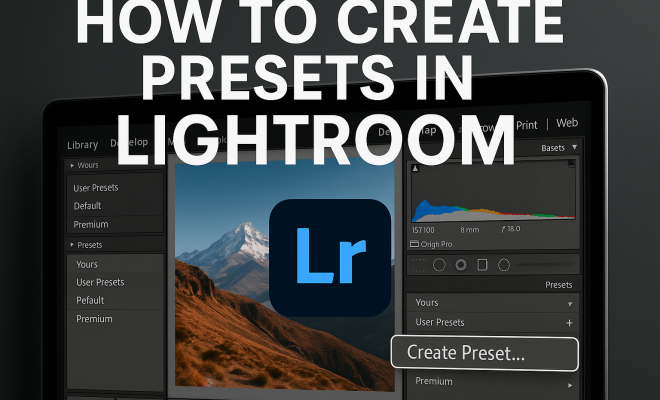
- Save the preset: Once you’re satisfied with your adjustments, navigate to the left panel and click on the “+” icon next to the Presets section. Choose “Create Preset” from the dropdown menu.
- Name your preset: Enter a descriptive name for your preset and select which settings you want to include. You can choose to include all adjustments or just specific ones.
- Click Create: Finally, hit the Create button, and your preset will now appear in the Presets panel for you to use on future images.
Congratulations! You’ve just taken your first step in creating presets in Lightroom.
4. Organizing Your Presets Effectively
As you start to create more presets, organization becomes crucial. Without a solid organizational system, you might find yourself sifting through a long list of presets, making it difficult to find the one you need. Here are some tips on how to keep your presets organized:
- Create folders: Lightroom allows you to create folders within the Presets panel. Group similar presets together, such as all black and white presets, or landscape enhancements, to quickly locate them later.
- Use descriptive names: When naming your presets, choose titles that clearly describe the effect or style. This will make it much easier when you’re searching for a specific look.
- Delete unused presets: If you find presets that you no longer use, don’t hesitate to delete them. Keeping your presets list tidy will help improve your workflow.
With an effective organization system, you’ll save time and frustration when searching for the right preset during editing sessions. (See: Overview of Adobe Lightroom.)
5. Experimenting with Advanced Settings
Once you’re comfortable with the basics of creating presets in Lightroom, it’s time to push the envelope by experimenting with advanced settings. Adjusting elements like tone curves, HSL (Hue, Saturation, and Luminance), and split toning can greatly influence the final look of your images.
For instance, the tone curve can help you enhance contrast and brightness in specific areas of your photo. By manipulating the curve, you can create dramatic effects or subtle enhancements that set your work apart. Similarly, the HSL panel allows you to tweak individual colors, making it possible to create vibrant landscapes or moody portraits. favorite photography apps offers useful background here.
Don’t shy away from experimenting! Some of the most unique presets come from trying unusual combinations of settings that you wouldn’t typically consider.
6. Sharing and Selling Your Presets
Once you’ve built a collection of presets that you’re proud of, consider sharing them with others. Sharing your presets can help fellow photographers while also building your reputation in the community. You might choose to upload them to platforms like Instagram or your personal website.
If you’re feeling entrepreneurial, you can even sell your presets online. Many photographers are willing to pay for high-quality, unique presets. Platforms like Etsy and your own website can serve as excellent outlets for selling your work. Just make sure to provide clear usage instructions and showcase before-and-after images to demonstrate the value of your presets.
By sharing or selling your presets, you not only help others improve their editing but also establish yourself as a knowledgeable resource in the photography community.
7. Staying Updated with New Features
Lightroom is constantly evolving, with Adobe frequently rolling out new features and updates. Staying informed about these changes can enhance your ability to create presets in Lightroom effectively. New features may include enhanced editing tools, improved preset functionalities, or entirely new ways to adjust images.
Follow Adobe’s official blog or subscribe to photography forums to keep up with the latest updates. Also, consider joining online communities where photographers share tips, tricks, and their own presets. By engaging with these groups, you can learn from others’ experiences and adapt your workflow accordingly.
Embracing new features not only keeps your presets relevant but can also inspire you to innovate your editing style.
8. Common Mistakes to Avoid When Creating Presets
As you embark on the journey of creating presets in Lightroom, it’s important to be aware of some common pitfalls that can limit your effectiveness. Here are a few mistakes to avoid: (See: Using presets in photography editing.)
- Overcomplicating settings: Sometimes, less is more. Avoid cramming too many adjustments into a single preset, as this can make it less versatile and workable across different images.
- Ignoring consistency: When adjusting settings, ensure that your presets maintain a consistent look and feel. This is particularly important if you’re creating a set of presets for a specific theme or series of photos.
- Not testing on various images: Make sure to test your presets on a variety of images. A preset that works perfectly on one photo may not yield the same results on another due to differences in lighting, color, and subject matter.
- Failing to document adjustments: Keep track of what settings you’ve adjusted while creating your presets. This can be helpful for future tweaks and adjustments and for consistency in your editing process.
9. Examples of Popular Styles for Presets
To help spark your creativity, let’s take a look at some popular styles that photographers often create presets for:
- Bright and Airy: This style emphasizes light and often features high exposure, reduced contrast, and soft pastel colors. It’s perfect for wedding and portrait photography.
- Moody and Dark: On the opposite end of the spectrum, this style often incorporates deep shadows, rich colors, and increased contrast. It’s great for dramatic landscapes or portraits.
- Film Emulation: Many photographers create presets that mimic the look of classic film stock. This can include grain, specific color shifts, and unique contrast adjustments.
- Black and White: Timeless and classic, black and white presets can vary widely, from high contrast to soft tones. They often emphasize textures and shapes in the absence of color.
10. Statistics and Trends in Preset Usage
Looking at the broader landscape of photography, it’s interesting to note the trends surrounding preset usage. Recent surveys indicate that approximately 80% of photographers rely on presets in their editing workflow. This highlights the significant impact that time-saving tools have on creative processes. We covered Google Classroom photography tips in more detail.
Additionally, with the rise of social media platforms like Instagram, the demand for unique, eye-catching images has surged. As a result, many photographers are turning to presets to achieve distinct styles quickly. In fact, studies show that posts edited with cohesive color palettes or consistent styles receive 30% more engagement than those that do not.
11. Expert Perspectives on Preset Creation
Many photography experts and educators emphasize the importance of presets in enhancing both efficiency and creativity. For instance, renowned photographer Sue Bryce highlights that “presets allow photographers to focus on their art rather than get bogged down in the technical details of editing.” This sentiment echoes through many discussions in the photography community, where the balance of creativity and technical skill is often a topic of debate.
Additionally, leading educators like Julia Trotti advocate for the use of presets as a foundation for developing your unique style. “Start with presets, but don’t be afraid to tweak them as you grow,” she advises. This perspective encourages photographers to view presets not just as end products, but as starting points for exploration and growth.
12. Frequently Asked Questions (FAQ)
Q1: Can I use presets on mobile versions of Lightroom?
Yes! Lightroom Mobile allows you to create and apply presets just like the desktop version. You can sync your presets across devices if you use the same Adobe account.
Q2: Are presets compatible with raw images?
Absolutely! Presets work exceptionally well with raw images, which allows you to take advantage of the higher dynamic range and quality that raw files offer. See also teens making a difference with photography.
Q3: How can I troubleshoot issues with my presets?
If your presets aren’t working as expected, try resetting them by re-importing or ensuring they’re not being overridden by other settings. Additionally, make sure your Lightroom software is up to date.
Q4: How many presets should I create?
There’s no set number, but having a diverse range can help you adapt to various scenarios. Start with a few essential presets and expand your collection as you see fit. (See: Harvard University resources.)
Q5: Can I modify existing presets?
Yes, you can modify existing presets to better suit your style. Simply apply the preset to an image, make your adjustments, and then save it as a new preset.
13. Optimizing Your Presets for Different Genres of Photography
Each genre of photography may require different adjustments to achieve the desired effects. Here’s how you can optimize your presets based on your preferred photography style:
- Portrait Photography: Focus on skin tones, using adjustments that soften the contrast while enhancing warmth. Consider presets that balance vibrancy and smoothness for a natural look. Look for skin tone adjustments that prevent color casts.
- Landscape Photography: When creating presets for landscapes, emphasize details in the shadows and highlights. Use settings that enhance dynamic range and saturation for vibrant colors, such as greens for foliage or blues for skies.
- Product Photography: Here, clarity and sharpness are critical. Presets should be designed to enhance details and reduce shadows, making sure products look appealing. Consider using high exposure with minimal contrast for an even look.
- Street Photography: Opt for presets that deliver a gritty or moody effect. High contrast settings work well here, paired with black and white adjustments for urban scenes.
14. Resources for Learning More
To deepen your understanding of creating presets in Lightroom, you might want to explore various resources:
- Online Courses: Websites like Udemy and Skillshare offer a range of courses on Lightroom presets and photo editing techniques.
- YouTube Tutorials: Many photographers share their preset creation processes and tips on YouTube. Channels dedicated to photography often feature in-depth tutorials.
- Photography Blogs: Blogs from established photographers can provide insights into their editing processes and the presets they use.
- Books: Consider reading books focused on Lightroom editing to grasp more advanced techniques and philosophies behind editing styles.
15. Staying Inspired: The Role of Presets in Creative Development
Presets don’t just streamline your workflow; they can also serve as a launchpad for creativity. By applying different presets, you may discover new styles that resonate with you. Don’t hesitate to mix and match settings from different presets to create something uniquely yours!
Additionally, consider keeping a mood board or inspiration gallery. This could be a collection of images that inspire you, which you can refer back to when creating new presets. Engaging with other photographers, participating in challenges, or collaborating on projects can also offer fresh perspectives. Often, the pressure of creating something new can be alleviated by seeing how others approach their editing.
16. Final Thoughts on Creating Presets in Lightroom
Creating presets in Lightroom is a rewarding endeavor that can significantly enhance your editing workflow. By understanding their purpose, preparing effectively, and following a structured approach, you can craft presets that suit your unique style and needs. Whether you choose to keep them for personal use or share them with the world, presets are a powerful tool that every photographer should utilize. Get started today and see where your creativity takes you!
“`
Trending Now
Frequently Asked Questions
What are presets in Lightroom?
Presets in Lightroom are saved configurations of editing settings that you can apply to your images with a single click. They help replicate specific edits, saving time and ensuring a consistent look across your portfolio.
How do I create a preset in Lightroom?
To create a preset in Lightroom, first adjust your photo to the desired settings. Then, navigate to the Presets panel, click the '+' icon, name your preset, and save it. Your new preset will be available for future use.
Why should I use presets in Lightroom?
Using presets in Lightroom streamlines your editing workflow, allowing for quick application of consistent styles across multiple images. They are especially useful for batch editing and maintaining a cohesive aesthetic in your photography.
Can I edit a preset in Lightroom?
Yes, you can edit a preset in Lightroom. Simply apply the preset to an image, make the desired adjustments, and then save those changes as a new preset or overwrite the existing one.
What types of images are best suited for Lightroom presets?
Lightroom presets can be tailored for various types of images, including landscapes, portraits, and street photography. It's best to create presets that suit the specific styles and themes you frequently work with.
Have you experienced this yourself? We'd love to hear your story in the comments.