How to create HDR in Lightroom
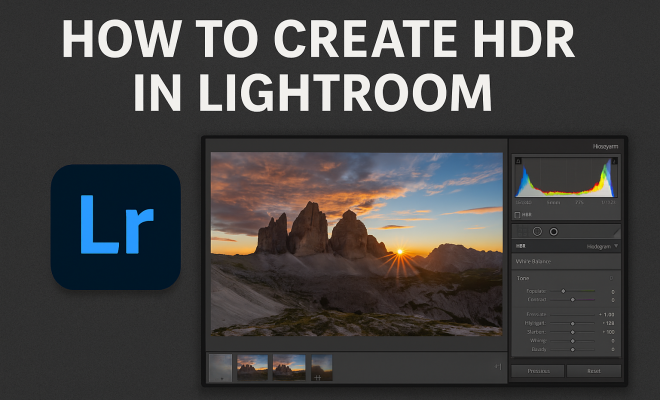
“`html
High Dynamic Range (HDR) photography has transformed the way photographers capture and showcase the nuances of light and shadow in their images. If you’re looking to create HDR in Lightroom, you’re in the right place. This guide will take you through the essentials of HDR photography, the steps involved in creating stunning HDR images using Lightroom, and some tips to elevate your editing game.
1. Understanding HDR Photography
Before diving into the technical aspects, it’s essential to grasp what HDR photography is all about. HDR involves capturing a wider range of light and color than traditional photography. This is particularly useful in scenes with high contrast, where both highlights (like the sun) and shadows (like dark buildings) are present. The result is a more balanced image that accurately reflects the scene as the human eye perceives it.
The process typically requires multiple exposures of the same scene, each taken at different settings. These images are then merged to create a single photograph that displays the full tonal range of the scene. By effectively balancing highlights, midtones, and shadows, HDR brings out the details that might otherwise be lost in standard photography.
2. Preparing Your Images for HDR
To create HDR in Lightroom, you’ll first need to capture the right images. Most HDR images are created using a tripod to ensure that all exposures align perfectly. Here are some steps to prepare:
- Choose Your Scene Wisely: Look for scenes with significant contrast, such as sunsets, landscapes, or indoor settings with bright windows.
- Bracket Your Exposures: Typically, you’ll want three to five images at different exposure levels (e.g., -2, 0, +2 stops). This bracketing captures the full dynamic range.
- Use Manual Mode: Set your camera to manual mode to maintain consistent settings (except for exposure) across all shots.
- Focus and Composition: Ensure that your focus and composition remain consistent across all images to prevent misalignment in the final HDR image.
3. Importing Images into Lightroom
Once you have your bracketed images, it’s time to bring them into Lightroom. Start by launching the software and following these steps:
- Open Lightroom: Launch the application and select the Library module.
- Import Your Images: Click on the Import button and navigate to the folder containing your bracketed images. Select them all and click Import.
- Create a Collection: For better organization, create a collection where you can batch process your HDR images.
By organizing your images right from the start, you streamline the process and make it easier to find the files you need for HDR creation.
4. Creating HDR in Lightroom
Now for the exciting part: creating HDR images! Lightroom offers a straightforward process to merge your bracketed images. Here’s how:
- Select Your Images: In the Library module, select the bracketed images you want to merge.
- Merge to HDR: Right-click on the selected images and choose the option for Merge > HDR. Alternatively, you can find this option under the Photo menu.
- Adjust HDR Settings: A dialog box will appear with various settings. You can check the ‘Auto Align’ and ‘Auto Tone’ boxes to ensure your images register correctly. Auto Tone can help optimize the exposure levels.
- Hit Merge: Click the Merge button, and Lightroom will process your images. Once complete, you’ll see a new HDR file appear in your Library.
This process allows Lightroom to handle the complex merging of exposures, producing a single image that showcases the full dynamic range. (See: High Dynamic Range Imaging.)
5. Editing Your HDR Image
After successfully creating your HDR image, it’s time to refine it. Lightroom provides an array of editing tools that can help you enhance your HDR photograph:
- Basic Adjustments: Start with the Basic panel to adjust exposure, contrast, highlights, shadows, whites, and blacks to achieve the desired look.
- Presence Controls: Use Clarity, Vibrance, and Saturation to bring out details and color depth.
- Tone Curve: The Tone Curve panel allows you to fine-tune the tonal range further. Experimenting with the curve can create depth and drama in your image.
- Detail Panel: Apply sharpening and noise reduction as needed to ensure your HDR image appears crisp without excessive noise.
The beauty of Lightroom lies in its non-destructive editing capabilities. Feel free to experiment with various adjustments until you achieve the desired aesthetic.
6. Using Local Adjustments for Precision
Local adjustments can take your HDR images to the next level by allowing you to edit specific areas without affecting the entire photograph. Here’s how you can utilize this feature:
- Adjustment Brush: Use the Adjustment Brush for local adjustments like exposure, contrast, and clarity in specific areas. For example, you might want to brighten a shadowed region without affecting the highlights.
- Graduated Filter: This tool is fantastic for landscapes. It helps you selectively adjust exposure and color in specific areas, such as darkening the sky while maintaining the brightness of the foreground.
- Radial Filter: Use this for creating vignettes or highlighting focal points in your image, giving it a polished look.
By using these local adjustments, you can create compelling emphasis in your HDR images, making them more dynamic and engaging.
7. Exporting Your Final HDR Image
Once you’ve made all necessary adjustments, it’s time to export your HDR masterpiece. Here’s the process:
- Select Your Image: In the Library module, select the HDR image you wish to export.
- Click Export: Navigate to File > Export or click the Export button. This brings up the Export dialog box.
- Set Your Preferences: Choose your file format (JPEG, TIFF, etc.), quality settings, and destination folder. Additionally, you can adjust the color space (sRGB for web, Adobe RGB for print).
- Export Settings: Once all settings are in place, click the Export button to save your file.
Be sure to select settings that suit your intended use, whether for online sharing or high-quality prints.
8. Common Mistakes to Avoid When Creating HDR in Lightroom
Even experienced photographers can stumble when creating HDR images. Here are some common pitfalls to watch out for:
- Over-Processing: It can be tempting to push sliders too far, resulting in unnatural images. Aim for a natural look rather than exaggerated contrasts.
- Neglecting Composition: Always remember that HDR doesn’t guarantee a great photo. Composition still matters! Pay attention to framing and focal points.
- Ignoring Lens Distortion: Wide-angle lenses can introduce distortion. Use Lightroom’s lens correction tools to fix this before merging images.
- Forgetting to Use RAW Files: Shooting in RAW gives you more data to work with, providing greater flexibility in post-processing.
By being aware of these common mistakes, you can ensure that your HDR images are both technically sound and visually appealing.
9. Exploring Advanced Techniques
Once you’ve mastered the basics of creating HDR in Lightroom, consider exploring some advanced techniques to push your editing skills even further:
- Creating Faux HDR: If you lack proper bracketed images, you can simulate HDR using a single RAW file. Adjust the exposure, highlights, and shadows significantly to mimic an HDR effect.
- Blending Techniques: Use layer blending methods in Photoshop for more control over your HDR images, especially if working with multiple bracketed shots.
- Experimenting with Textures: Incorporate textures or overlays to add depth and character to your final images, making them stand out.
By continually experimenting and pushing your boundaries, you can develop a distinct style in HDR photography that showcases your creative vision. (See: Scientific study on HDR techniques.)
10. Tips for Shooting HDR Photography
Capturing the right images for HDR processing is just as important as the editing process itself. Here are some tips to improve your HDR photography:
- Choose the Right Time of Day: The golden hour—just after sunrise or just before sunset—provides soft light and reduces the chance of harsh contrasts.
- Use a Tripod: This cannot be overstated. A tripod stabilizes your camera for consistent shots across different exposures, essential for creating aligned HDR images.
- Watch Your Histogram: Keep an eye on the histogram in your camera to ensure you’re capturing a wide range of tones without clipping the highlights or shadows.
- Consider Using Auto Exposure Bracketing (AEB): Many cameras offer this feature to automatically take multiple exposures at different settings, simplifying the bracketing process.
11. Understanding HDR Software Alternatives
While Lightroom is a powerful tool for creating HDR images, several other software options are available. Here’s a quick look at some popular alternatives:
- Adobe Photoshop: Known for its comprehensive editing tools, Photoshop also has HDR capabilities through the Merge to HDR Pro feature, allowing for more detailed adjustments.
- Photomatix Pro: Focused entirely on HDR photography, Photomatix offers specialized tools and presets for creating HDR images, along with advanced merging options.
- Aurora HDR: This software is designed specifically for HDR photography and offers a wide range of presets and AI-driven tools to streamline the HDR processing workflow.
- Capture One: While it’s more commonly recognized for tethering and RAW processing, Capture One also includes HDR features that can create stunning results.
12. FAQs About Creating HDR in Lightroom
What is the best number of exposures to use for HDR?
For most scenes, three to five exposures will suffice. However, challenging lighting conditions may benefit from using more exposures to capture the full dynamic range.
Can I create HDR images from JPEG files?
While it’s possible to create HDR images from JPEGs, using RAW files is highly recommended due to the additional data and flexibility they offer during editing.
How do I prevent ghosting in HDR images?
Ghosting occurs when subjects in your images move between exposures. To minimize this, use Auto Align in Lightroom and ensure your subjects are static during the shooting process.
Is HDR photography suitable for all types of scenes?
While HDR can dramatically improve high-contrast scenes, it’s not always necessary for every type of photography. Simple scenes or those with minimal contrast may not benefit from HDR techniques.
Can I apply HDR effects to single images?
Yes, you can use a single image to create an HDR-like effect in Lightroom by adjusting the exposure, shadows, and highlights significantly to mimic a more dynamic range. (See: Photography and public health.)
13. Advanced HDR Techniques
As you become more proficient at creating HDR images in Lightroom, you might want to dive into some advanced techniques. These can add depth and uniqueness to your photographs:
- HDR Panorama: Combine HDR techniques with panorama stitching. By capturing multiple exposures across a wide scene and merging them, you can create an expansive image with rich detail throughout.
- Focus Stacking: If you’re shooting landscapes with foreground interest and a distant background, focus stacking is a technique where you capture multiple images at different focus points and blend them to achieve depth of field clarity.
- Using Color Grading: Experiment with color grading to add artistic flair to your HDR images. This can be done in Lightroom’s color grading panel, allowing you to influence shadow, midtone, and highlight colors to create mood.
14. Exploring the History of HDR Photography
Understanding the history of HDR photography can enhance your appreciation for the technique. HDR has its roots in film photography, where photographers would often create multi-exposure images to capture details in both shadows and highlights. With the advent of digital photography, HDR became more accessible. The first digital HDR software was developed in the early 2000s, and the technique quickly gained popularity among photographers for its ability to create striking images that mirror what the human eye can see.
Today, HDR photography is a staple in landscape, architectural, and real estate photography, allowing photographers to showcase details that would be otherwise lost in conventional images. The evolution of HDR has also been aided by improvements in camera technology that allow for wider dynamic range capture, making it easier to create breathtaking images.
15. Case Studies: Successful HDR Images
Looking at case studies of successful HDR images can inspire your own work. For instance:
- Landscape Photography: A landscape photographer captures a mountain scene at sunset, using five bracketed exposures to fully capture the vibrant colors in the sky and the details in the shadowed valley below, resulting in a breathtaking image that feels alive.
- Architectural Photography: An architectural photographer uses HDR to showcase a building’s interior with large windows. By bracketing their images, they manage to capture the view outside while maintaining detail in the bright interior space, providing a complete view of the scene.
These examples illustrate how HDR can transform ordinary scenes into visually stunning representations and serve as a roadmap for your experimentation.
16. Final Thoughts on Creating HDR in Lightroom
Creating HDR in Lightroom is more than just a technical process; it’s an art form that allows you to tell stories through your images. As you practice and integrate these tips and techniques, remember to keep your unique style in mind. Each image you create is an opportunity to share your perspective and vision of the world around you. With patience, creativity, and the right tools, your HDR photography can resonate deeply with viewers, sparking interest and admiration. So get out there, experiment, and watch as you elevate your photography to new heights.
“`
Trending Now
Frequently Asked Questions
What is HDR photography?
HDR photography stands for High Dynamic Range photography, which captures a wider range of light and color than traditional photography. It is particularly useful in high-contrast scenes, allowing both highlights and shadows to be represented accurately, resulting in images that reflect how the human eye perceives the scene.
How do I prepare images for HDR in Lightroom?
To prepare images for HDR in Lightroom, capture multiple exposures of the same scene using a tripod for alignment. Typically, you should bracket your exposures with three to five images at different exposure levels, and use manual mode to maintain consistent settings across all shots.
What settings should I use for HDR photography?
For HDR photography, use manual mode on your camera to keep settings consistent, except for exposure. Bracket your shots with different exposure levels, typically ranging from -2 to +2 stops, to capture the full dynamic range of the scene.
Can I create HDR images without a tripod?
While it's recommended to use a tripod for HDR photography to ensure all exposures align perfectly, you can still create HDR images without one. However, you may encounter alignment issues, which can be corrected in post-processing but might not yield the best results.
What are some tips for creating stunning HDR images?
To create stunning HDR images, choose scenes with significant contrast, use a tripod for stability, and ensure consistent focus and composition. Additionally, experiment with different software settings in Lightroom to balance highlights, midtones, and shadows effectively.
Agree or disagree? Drop a comment and tell us what you think.