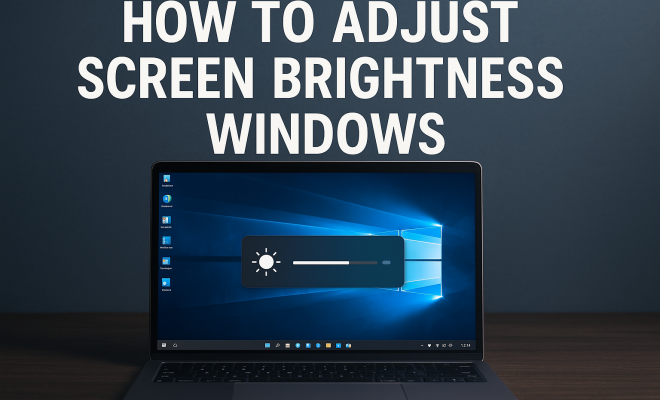
How to adjust screen brightness Windows
“`html
Adjusting the screen brightness on your Windows device is not merely a matter of comfort; it can significantly enhance your viewing experience, protect your eyes, and even save battery life. However, many users are unaware of the various methods available to adjust screen brightness on Windows systems. Whether you’re working on a laptop, desktop, or tablet, this guide will take you through nine essential ways to control your display settings effectively.
1. Using the Action Center
The quickest way to adjust screen brightness on Windows is through the Action Center. This feature is conveniently located on your taskbar, allowing for swift adjustments without digging through menus. Simply click on the speech bubble icon at the bottom right of your screen to open the Action Center.
Once the Action Center is open, look for the brightness slider. Usually labeled as “Brightness” with a sun icon, you can drag the slider left or right to decrease or increase the brightness, respectively. It’s quick, intuitive, and perfect for users who need to make adjustments frequently while working.
2. Using Windows Settings
If you’re looking for a more detailed approach, the Settings app in Windows offers comprehensive options for customizing your display. To access it, click on the Start menu and select the “Settings” gear icon. From there, navigate to “System” and then to “Display.” Here you will find a brightness slider similar to that in the Action Center.
This method allows you to adjust not only the brightness but also other display settings such as scaling and resolution. If you have multiple displays connected, you can select each one individually to make specific adjustments, ensuring that your setup fits your needs perfectly.
3. Keyboard Shortcuts
Many laptops come equipped with dedicated function keys for brightness control. These keys typically feature a sun icon with arrows pointing up and down. To use them, simply hold the “Fn” key while pressing the corresponding brightness key.
This method is incredibly efficient for on-the-go adjustments, especially when you don’t want to interrupt your workflow. Be mindful that not all keyboards have this function, and the shortcuts may vary depending on the manufacturer.
4. Using the Control Panel
For those who enjoy a more traditional approach, the Control Panel still exists in Windows and is another method to adjust screen brightness. Open the Control Panel by searching for it in the Start menu. Once inside, navigate to “Hardware and Sound,” then click on “Power Options.” Depending on your plan, you can find brightness settings that you can adjust.
This method is beneficial if you’re already in the Control Panel for other settings. It allows you to tie your brightness levels to power-saving options, making your device more energy-efficient when on battery.
5. Using Graphics Control Panel
If your computer has a dedicated graphics card, like NVIDIA or AMD, you can also adjust your brightness through their respective control panels. Right-click on your desktop and select the graphics control panel option. Once opened, navigate to the display settings where you’ll find brightness controls.
This method offers more granular control over your display settings. For instance, you can adjust contrast and gamma settings alongside brightness, which can help you achieve a more tailored visual experience, especially for graphic design or video editing tasks. (See: CDC on ergonomics and eye health.)
6. Using Adaptive Brightness
Windows also provides an Adaptive Brightness feature that automatically adjusts your screen brightness based on the lighting conditions around you. This feature is particularly useful for laptop users who move between different environments. To enable Adaptive Brightness, navigate to the “Settings” menu, proceed to “System,” and then to “Display.” Scroll down to find the “Change brightness automatically when lighting changes” option and toggle it on.
While this feature can save battery life and enhance comfort, it’s not without its drawbacks. Some users find that automatic adjustments can be jarring or not accurate to their preferences. Therefore, it’s advisable to monitor how well it works in practice and adjust settings accordingly.
7. Adjusting Brightness for External Monitors
If you use an external monitor, it’s essential to know that adjusting its brightness can differ from your laptop’s screen. Most external displays come with physical buttons or an on-screen display (OSD) menu that you can navigate to change brightness settings.
To find the right buttons, look for symbols that resemble the sun or brightness levels. By using the OSD menu, you can also adjust other parameters such as contrast and color balance, allowing for a customized viewing experience tailored specifically for your work or entertainment needs.
8. Using Third-Party Software
For those who want even more control, third-party applications can offer advanced features for screen brightness adjustments. Programs like f.lux or Iris not only allow for brightness changes but also adapt the color temperature of your screen based on the time of day, reducing blue light exposure in the evenings.
These applications can be a game-changer for those who work late or suffer from eye strain. They often include additional features like scheduling and custom brightness settings for specific applications, making them a worthy consideration for anyone serious about their screen time.
9. Understanding Brightness Levels and Eye Health
While adjusting screen brightness on Windows is vital for comfort and productivity, it’s also essential to consider the impact of brightness levels on eye health. Prolonged exposure to bright screens can lead to digital eye strain, fatigue, and headaches. Experts recommend maintaining a brightness level that matches your ambient lighting conditions to reduce strain.
Additionally, regular breaks using the 20-20-20 rule—look at something 20 feet away for 20 seconds every 20 minutes—can help mitigate some of the adverse effects of long hours spent in front of a screen. By being mindful of how you adjust your screen brightness and your overall screen habits, you can create a more comfortable and healthy computing environment.
10. How Brightness Affects Battery Life
When it comes to laptops and tablets, screen brightness is one of the most significant factors affecting battery life. Higher brightness levels drain the battery faster, while lower settings can extend usage time significantly. For instance, studies show that reducing brightness from 100% to around 50% can increase battery life by as much as 30% or more, depending on the device.
If you regularly work away from power sources, it’s wise to manage your brightness settings diligently. Using the battery saver feature in Windows can also help, as it often automatically lowers brightness when the battery is running low, ensuring you get the most out of your device.
11. Common Issues with Brightness Adjustments
Sometimes, users face issues where the brightness slider doesn’t seem to work. This can stem from several causes, including outdated drivers, hardware incompatibilities, or even Windows updates that may disrupt existing settings. If you’re facing such problems, here are a few troubleshooting steps:
- Update Your Graphics Drivers: Go to the manufacturer’s website of your graphics card and download the latest drivers. Keeping your drivers updated ensures compatibility with Windows and can resolve many display-related issues.
- Check Power Plan Settings: Navigate to your Control Panel, click on “Power Options,” and make sure your selected plan allows for brightness adjustments.
- Reinstall Display Drivers: If updating doesn’t work, consider uninstalling the display drivers and reinstalling them. This can sometimes resolve problems where the system fails to recognize display settings.
After taking these steps, you’ll likely find that you can adjust the brightness again without issue. (See: WHO fact sheet on eye health.)
12. Expert Advice on Screen Brightness
Consulting with experts or eye care professionals can provide additional insights into managing screen brightness. Dr. Lindsey Jones, an optometrist, notes that “maintaining an appropriate brightness level in relation to your environment can help greatly reduce discomfort. Users should experiment with various settings to find what works best for them.”
Another expert, Dr. Rebecca Miles, emphasizes the importance of ambient light: “If you’re in a dark room, a high brightness setting can be jarring to your eyes. Conversely, a bright screen in a well-lit room can help ease strain.” Following such advice can help you create a more balanced visual environment.
13. Frequently Asked Questions (FAQ)
How do I know what brightness level is best for my eyes?
The best brightness level often corresponds with your surroundings. A general rule of thumb is to set your screen brightness to match the light in your environment. If you’re in a bright room, increase your brightness. In a dim environment, decrease it.
Can I adjust brightness on a desktop monitor?
Yes, most desktop monitors have built-in buttons or an OSD (On Screen Display) menu that allows you to adjust brightness and other settings. You can also adjust brightness through the graphics control panel if you have a dedicated GPU.
Is it harmful to have my screen brightness too high?
Yes, excessively high brightness can lead to eye strain, discomfort, and headaches, especially in low-light environments. It’s essential to find a balance that keeps your eyes comfortable and reduces strain.
What is the 20-20-20 rule?
The 20-20-20 rule is a guideline to help reduce eye strain. Every 20 minutes, look at something 20 feet away for at least 20 seconds. This practice helps relax your eye muscles and can alleviate discomfort caused by prolonged screen time.
Can adjusting brightness settings help with battery life?
Absolutely! Lowering your screen brightness can significantly improve battery life, especially on laptops and tablets. It’s one of the simplest yet most effective ways to conserve energy when you’re on the go.
Are there apps that help manage screen brightness automatically?
Yes, applications like f.lux and Iris can automatically adjust your screen brightness and color temperature based on the time of day, helping reduce blue light exposure and eye strain, particularly in the evening.
What should I do if the brightness won’t adjust on my laptop?
If you’re facing issues adjusting brightness, check your display drivers for updates, ensure that your power settings allow brightness adjustments, and consider restarting your device. If problems persist, a consult with technical support may be necessary.
14. Understanding Brightness Settings Across Different Devices
Different Windows devices may have varying methods for adjusting brightness. For instance, tablets and laptops typically offer integrated brightness control via hardware buttons and software sliders. On the other hand, desktop monitors often rely on physical buttons or menus for brightness adjustments. Understanding these differences can save you time and help you find the right method for your specific device. (See: New York Times guide on screen adjustments.)
15. Importance of Screen Brightness in Gaming
For gamers, screen brightness settings can play a crucial role in the overall gaming experience. High brightness can make games visually stunning, allowing you to see details in darker areas. However, too much brightness can wash out colors and reduce the overall quality of the experience. Many gamers use specific brightness settings to enhance visibility in first-person shooters or other fast-paced genres. It’s often a good practice to adjust brightness according to the specific game settings or your gaming environment.
16. Tips for Optimizing Brightness for Video Editing
If you’re a video editor, proper brightness settings are vital for accurate color grading and editing. Adjusting your screen brightness to match the conditions of your editing environment can help ensure that the colors you perceive on screen are true to life. Many professionals recommend calibrating your monitor and adjusting brightness levels to 50-70% for the most accurate representation, depending on the ambient light in your editing space. Tools like color calibration devices can also aid in achieving the perfect settings.
17. Statistics on Screen Brightness and Eye Health
Recent studies indicate that around 70% of adults experience some form of digital eye strain, with one of the leading causes being prolonged exposure to bright screens. An American Optometric Association survey found that 58% of respondents reported experiencing symptoms such as headaches and blurred vision, directly linked to screen brightness levels. According to the Vision Council, adjusting screen brightness can reduce the risk of eye-related issues, making it a simple yet effective preventive measure.
18. Adjusting Brightness on Windows Updates
After a major Windows update, some users may find their brightness settings not working as expected. This can happen due to driver incompatibilities or changes in system settings. It’s advisable to check for graphic driver updates post-update to ensure everything works smoothly. Sometimes, users may need to reset their display settings or run the Windows Troubleshooter for hardware and devices to resolve any lingering issues. Keeping your system updated is crucial for a seamless experience.
19. Comparing Built-in Brightness Adjustment Features with Third-Party Solutions
While Windows provides multiple built-in methods for adjusting screen brightness, third-party applications offer unique advantages. Built-in features are usually straightforward and easily accessible, but they may lack advanced functionalities like scheduling and automation. In contrast, third-party tools can provide more customized control over brightness and color settings. For instance, f.lux adjusts color temperature based on the time of day, which can be particularly beneficial for night-time use, reducing eye strain from blue light exposure.
20. Additional Brightness Management Tools
In addition to popular applications like f.lux and Iris, there are other tools available that can improve your brightness management. Softwares like Dimmer can reduce screen brightness beyond the default settings, which can be particularly helpful for users who find the minimum brightness still too bright for their comfort. Another option, Brightness Slider, allows you to control brightness via a slider on the taskbar, providing an alternative method to adjust brightness quickly without navigating through menus.
21. Best Practices for Screen Brightness Management
- Adjust According to Environment: Always set your screen brightness according to the ambient light conditions. Use higher brightness settings in bright rooms and lower settings in dark areas.
- Take Regular Breaks: Incorporate breaks into your routine to help prevent eye strain. Follow the 20-20-20 rule to give your eyes a rest.
- Use Blue Light Filters: Consider using blue light filter features or applications in the evenings to ease eye strain and improve sleep quality.
- Calibrate Your Display: Regularly calibrate your monitor to maintain accuracy in color representation, especially for creative work.
22. Conclusion
Adjusting screen brightness on your Windows device is essential for comfort, productivity, and eye health. With a variety of methods at your disposal—from the Action Center to third-party applications—finding the right adjustment method to suit your needs is easier than ever. By understanding the impact of brightness levels on your overall experience and following best practices, you can ensure a healthier and more enjoyable time spent in front of your screen.
“`
Trending Now
Frequently Asked Questions
How do I change the brightness on my Windows laptop?
To change the brightness on your Windows laptop, you can use the Action Center by clicking the speech bubble icon on the taskbar and adjusting the brightness slider. Alternatively, access the Settings app, navigate to 'System' and then 'Display' to find a similar brightness slider.
Where can I find the brightness settings in Windows?
You can find the brightness settings in Windows by clicking on the Start menu, selecting the 'Settings' gear icon, and navigating to 'System' followed by 'Display.' Here, you will see a brightness slider to adjust your screen brightness.
Are there keyboard shortcuts to adjust screen brightness in Windows?
Yes, many Windows laptops have dedicated function keys for adjusting screen brightness. Typically, these keys feature a sun icon with arrows. You can adjust brightness by holding the 'Fn' key while pressing the appropriate function key.
What is the quickest way to adjust brightness in Windows?
The quickest way to adjust brightness in Windows is through the Action Center. Click the speech bubble icon on your taskbar to open it, then use the brightness slider to quickly increase or decrease your screen brightness.
Can I adjust brightness for multiple displays in Windows?
Yes, in Windows, you can adjust brightness for multiple displays. Go to 'Settings,' then 'System,' and 'Display.' Select each display individually to customize the brightness settings according to your preferences.
What’s your take on this? Share your thoughts in the comments below — we read every one.