How to add subtitles in Premiere Pro
“`html
Adding subtitles in Premiere Pro can seem daunting at first, but with the right approach and knowledge, it becomes a straightforward process. In an increasingly globalized world, subtitles are crucial for accessibility, helping viewers who speak different languages or those with hearing impairments. Plus, they can enhance viewer engagement, making your content more appealing. If you’re ready to learn how to add subtitles in Premiere Pro effectively, you’re in the right place!
1. Understanding Subtitles and Their Importance
Subtitles serve a dual purpose: they provide dialogue translations for foreign content and transcribe spoken words for those who cannot hear. This inclusion makes media more accessible and inclusive. According to a study by the Nielsen Company, around 85% of videos on social media are watched without sound, meaning subtitles can dramatically increase viewer retention.
Furthermore, subtitles can also assist in reaching international audiences. As content creators, understanding the diverse needs of viewers can open up new markets and demographics, boosting your content’s effectiveness and reach.
2. Getting Started: Setting Up Your Project
Before you even think of adding subtitles in Premiere Pro, ensure your project is set up correctly. Open the software and create a new project or open an existing one. Make sure your sequence settings match the video’s resolution and frame rate to avoid syncing issues later on. If you’re unsure, you can go to File > New > Project and configure the settings appropriately.
Your first step with subtitles is to import your video file. Simply drag your video into the Project panel or use File > Import. Once your video is in the timeline, you can begin the subtitle process, which can be done manually or automatically.
3. Manual Subtitling: Step-by-Step Guide
To add subtitles manually in Premiere Pro, follow these steps:
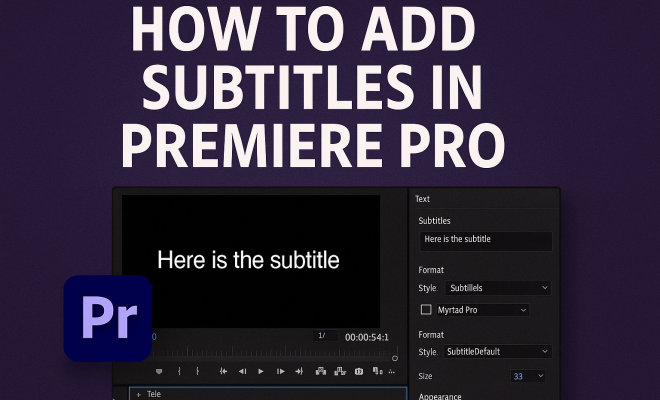
- Navigate to the Text panel (Window > Text) and select New Captions Track.
- Select the caption format that suits your needs; typically, Open Captions work well as they allow for more customization.
- Once your captions track is created, you can begin typing the text for your subtitles. Place the Playhead where the dialogue occurs, and enter the text in the Caption panel.
- Adjust the timing by dragging the ends of the caption box to sync with the dialogue in your video.
This process allows you to have complete control over your subtitles, from timing to design and placement.
4. Using Automated Tools for Subtitles
If you’re looking for a quicker method to add subtitles in Premiere Pro, consider using the automated transcription feature. Premiere Pro offers a powerful tool that uses Adobe Sensei, an AI technology, to transcribe audio to text automatically.
To use this feature, go to the Text panel and select Transcribe Sequence. Premiere Pro will analyze the audio in your sequence and generate a transcript. Once that’s done, you can create captions from the transcript, adjusting any inaccuracies that may occur in the automated process.
This tool not only saves time but can also significantly reduce the manual effort needed to create subtitles, allowing you to focus more on editing and creative aspects of your project.
5. Styling Your Subtitles for Maximum Impact
Once you’ve added subtitles to your project, it’s time to style them. The appearance of your captions can significantly affect viewer engagement. Go back to the Text panel and select your captions. Here, you can adjust the font, size, color, and background to make your subtitles stand out. (See: Disability and health fact sheet.)
Consider using a readable font like Arial or Helvetica, typically in white or yellow with a dark background, to ensure visibility against various video backgrounds. Additionally, avoid cluttering the screen; keep subtitles centered and within the lower third of the frame to maintain focus on the visual content.
It’s essential to keep viewer experience in mind. Good subtitle design can enhance comprehension and accessibility, making your content more appealing to a broader audience.
6. Exporting Your Video with Subtitles
After you’ve meticulously added and styled your subtitles, the next step is exporting your video. Go to File > Export > Media. In the export settings, ensure that your captions are selected to be included in the final output. You can choose to embed the captions into the video or export them as a separate file.
If you’re opting to embed them, choose the option for ‘Burn-in’ captions in the settings. This ensures that the subtitles appear directly on the video, which is ideal for platforms with limited subtitle support. Alternatively, exporting as a separate file (like a .srt) allows viewers to toggle subtitles on and off when watching on platforms that support external subtitle files.
7. Best Practices for Adding Subtitles
To ensure your subtitles are effective, consider these best practices:
- Keep it concise: Aim for a maximum of two lines per subtitle. Each line should ideally contain no more than 32 characters to allow quick reading.
- Timing is everything: Ensure that your subtitles sync perfectly with the audio. Aim for a duration of at least one second for viewers to read comfortably.
- Use appropriate language: Avoid jargon and complex language unless absolutely necessary. Keep your audience in mind and use language they will easily understand.
- Test your video: Before finalizing, watch your video with the subtitles enabled. Ensure they are readable, timed correctly, and do not distract from the visual elements.
Following these best practices will enhance the quality of your subtitles, ensuring they serve their purpose effectively.
8. Advanced Subtitle Techniques
Once you’ve mastered the basics of adding subtitles in Premiere Pro, you can explore more advanced techniques to enhance your videos even further. These methods can help create more engaging viewing experiences and can cater to specific audience needs.
8.1. Incorporating SDH (Subtitles for the Deaf and Hard-of-Hearing)
SDH subtitles not only convey dialogue but also provide descriptions of non-verbal sounds, such as sound effects and music cues. This is important for viewers who are deaf or hard of hearing. To add SDH in Premiere Pro, simply include text that describes these sounds within your subtitles, using a different style or color to differentiate them from spoken dialogue. For more on this, see enhancing accessibility in education.
For example, instead of just showing “Hello,” you might have: [door creaks] Hello! This informs the viewer that there was a door creaking sound before the dialogue, adding depth to the viewing experience.
8.2. Using Multiple Languages
If you’re catering to a diverse audience, consider adding subtitles in multiple languages. Premiere Pro allows you to create multiple captions tracks within the same project. You can duplicate your existing subtitles and then translate them into the desired languages, ensuring each track is timed correctly with the original audio.
This approach can significantly broaden your audience, as it helps engage non-native speakers or viewers who prefer a different language. It’s a fantastic way to reach international markets and increase content accessibility.
9. Statistics on Subtitles and Viewer Engagement
Understanding the impact of subtitles on viewer engagement can help reinforce their importance in your projects. Various studies and reports highlight how subtitles can affect viewership: (See: Understanding disability and accessibility.)
- According to a Wowza report, videos with subtitles are viewed 40% longer than those without.
- A study published by Netflix found that 80% of viewers use subtitles at least occasionally, with many choosing to watch with subtitles even when they can hear the audio.
- The Journal of Language Teaching and Research states that subtitles can enhance vocabulary retention and comprehension for language learners, making them a valuable tool in educational content.
- A report by the Pulitzer Center highlighted that only about 10% of digital content produced is accessible to people in need of subtitles, emphasizing a significant gap in content accessibility that creators can address.
10. Expert Perspectives on Subtitling
Industry experts emphasize the importance of high-quality subtitles. According to Dr. David G. L. Waller, a linguistics professor and subtitle specialist, “Subtitling is an art that can greatly enhance storytelling. It’s not just about translating words; it’s about capturing the essence of dialogue and conveying emotions effectively.”
Another expert, Julia Matthews, a content strategist, notes, “Well-crafted subtitles can act as a bridge to your audience’s understanding. They expand the reach of your content and can significantly increase viewer loyalty, as people are more likely to return to content that they can easily access.”
11. Frequently Asked Questions (FAQ)
11.1. Can I add subtitles in Premiere Pro for free?
Premiere Pro requires a subscription, but it offers a free trial. If you’re looking for free alternatives to add subtitles, you might consider other software like Shotcut or Aegisub, which allow you to create subtitles without cost.
11.2. How do I change the font and size of my subtitles?
To change the font and size, select your captions in the Text panel. You can access various styling options, including font type, size, and color adjustments, to customize your subtitles as desired.
11.3. Is there a way to automate the subtitle timing?
Yes, when you use the transcription feature in Premiere Pro, the software automatically times the subtitles according to the audio. You can then make minor adjustments to ensure perfect syncing.
11.4. What file formats can I export my subtitles in?
You can export subtitles in various formats, including SRT, VTT, and SCC. Each format has its own use case, with SRT being widely supported across most platforms.
11.5. Can I edit the subtitles after they’ve been added?
Absolutely! You can go back into the Text panel at any time to adjust text, timing, or style even after you’ve added them to your project.
12. The Future of Subtitling in Video Production
As technology advances, the future of subtitling in video production looks promising. Machine learning and AI are making automatic transcription and translation more accurate. This means creators can produce content with high-quality subtitles faster than ever before.
Additionally, the demand for multilingual content is on the rise, as more creators aim to reach global audiences. As a result, investing time in learning how to add subtitles in Premiere Pro is not just a trend; it’s becoming a necessity in the video production landscape. This builds on importance of accessibility in e-learning.
13. Common Challenges in Subtitling and How to Overcome Them
While adding subtitles is essential, it does come with its share of challenges. Here are some common issues you might face and tips on how to manage them:
13.1. Sync Issues
One of the most frequent challenges is syncing subtitles with the audio. If subtitles are out of sync, viewers may feel confused or frustrated. To avoid this, always preview your video after adding subtitles. Use the playback controls within Premiere Pro to check that the timing aligns properly. If necessary, make adjustments to the duration of each subtitle to ensure it matches the dialogue.
13.2. Length of Subtitles
Overly long subtitles can lead to viewer fatigue because readers may miss subsequent dialogue while trying to read the text. To combat this, maintain a maximum of two lines per subtitle and ensure each line contains no more than 32 characters. Use concise language and break longer sentences into multiple subtitles to improve readability.
13.3. Language and Cultural Nuances
When translating subtitles, it’s crucial to consider cultural nuances to retain the original sentiment and humor. Consulting with native speakers or professional translators can help ensure that the subtitles resonate with the target audience. Tools like Google Translate can assist, but they often miss context and colloquialisms.
14. Subtitling for Different Platforms
Depending on where your video will be shared, subtitle requirements may vary. Here’s a breakdown of considerations for popular platforms:
14.1. YouTube
YouTube supports several subtitle formats including SRT and VTT, allowing creators to upload captions directly or use its built-in captioning tools. It’s also beneficial to create subtitles for YouTube as it improves SEO and increases discoverability.
14.2. Social Media
Platforms like Facebook and Instagram often auto-play videos without sound. Hence, having subtitles is essential for engagement. When exporting videos for these platforms, ensure subtitles are embedded or available as separate files to maximize reach.
14.3. Streaming Services
Streaming platforms like Netflix and Amazon Prime Video have specific guidelines for subtitle formatting, including font size, placement, and timing. Familiarizing yourself with these guidelines is essential if you’re working on content for these services. Using a professional subtitling tool may also help in adhering to these standards.
15. Conclusion: The Power of Subtitles in Video Content
Subtitles are more than just a translation tool; they are a vital component of effective video communication. By adding subtitles in Premiere Pro, you enhance the accessibility of your content, engage a broader audience, and improve overall viewer experience. Whether you choose to do it manually or utilize automated tools, embracing subtitle creation is an essential skill in today’s multimedia landscape. Take the time to explore and perfect your subtitling techniques, and watch your audience grow as you create content that resonates with everyone!
“`
Trending Now
Frequently Asked Questions
How do I add subtitles in Premiere Pro?
To add subtitles in Premiere Pro, open the Text panel by navigating to Window > Text. You can then create new captions or subtitles manually by entering text corresponding to the dialogue in your video. Adjust timing and positioning as needed to ensure they sync properly with the audio.
What are the benefits of adding subtitles to videos?
Adding subtitles enhances accessibility, allowing viewers who are deaf or hard of hearing to engage with your content. They also facilitate understanding for non-native speakers and can improve viewer retention, as many people watch videos without sound, especially on social media.
Can I automatically generate subtitles in Premiere Pro?
Yes, Premiere Pro offers an automatic captioning feature that can generate subtitles for your video. You can access this by using the speech-to-text functionality, which analyzes the audio and creates captions, although manual adjustments may still be necessary for accuracy.
What format should I use for subtitles in Premiere Pro?
In Premiere Pro, you can use the SubRip Subtitle (.srt) format or create captions directly within the software. The Text panel allows you to customize the appearance and timing of your subtitles, ensuring they fit your video style.
Is it necessary to add subtitles to all videos?
While not mandatory, adding subtitles is highly recommended, especially for content aimed at a global audience or for platforms where videos are often watched without sound. Subtitles improve accessibility and can significantly enhance viewer engagement.
Agree or disagree? Drop a comment and tell us what you think.