How to add printer to Mac
“`html
Adding a printer to your Mac can feel daunting, especially if you’re not particularly tech-savvy. But fear not! With the right guidance and a clear understanding of the process, you can seamlessly connect your printer to your Mac in no time. In this article, we’ll walk you through the essential steps to add printer to Mac, along with some helpful tips and tricks.
1. Understanding Printer Compatibility
Before diving into the actual process of adding a printer to your Mac, it’s crucial to ensure that the printer you’re considering is compatible with macOS. Most modern printers support macOS, especially those that connect via Wi-Fi or USB. However, if you have a vintage printer or an obscure model, you might want to check the manufacturer’s website for compatibility information.
Additionally, Macs usually support AirPrint, Apple’s built-in wireless printing technology, which allows you to print directly from your Mac or iOS devices without needing to install additional drivers. If you have an AirPrint-compatible printer, adding it to your Mac is straightforward and quick.
2. Gathering Necessary Information
Before you start the setup process, gather all the necessary information about your printer. This includes:
- The printer’s model number
- The method of connection (USB or Wi-Fi)
- The network name and password, if connecting wirelessly
Having these details at your fingertips will help streamline the process when you begin to add printer to Mac. If you’re connecting via USB, ensure that the cord is long enough to reach your Mac without strain.
3. Connecting the Printer
Once you have all the essential information, it’s time to connect your printer to your Mac. If you’re using a USB printer, simply plug it into an available USB port on your Mac. macOS should recognize the printer automatically and may prompt you to download any necessary drivers. Ensure your printer is turned on during this process.
If you’re opting for a wireless connection, make sure your printer is connected to the same Wi-Fi network as your Mac. Most printers will have a built-in interface that you can use to connect to the Wi-Fi. Follow the on-screen prompts on the printer’s display to enter your Wi-Fi credentials.
4. Configuring the Printer on Your Mac
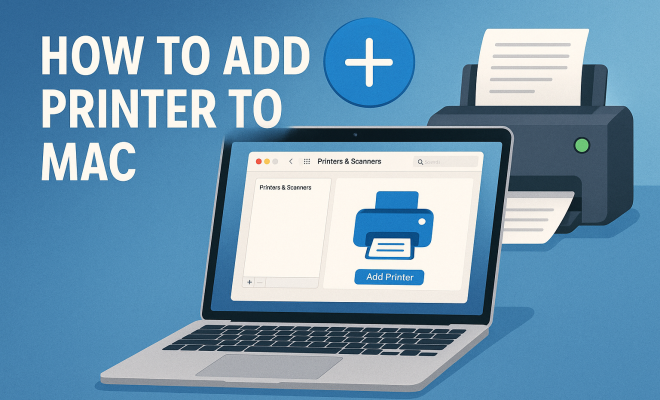
With your printer connected, the next step is to configure it on your Mac. Go to the Apple menu in the upper-left corner, select System Preferences, and then click on Printers & Scanners. This is where you can manage your printer settings.
In the Printers & Scanners menu, you’ll see a list of printers connected to your Mac. If your printer isn’t listed, click the + sign underneath the list to add a new printer. Your Mac will search for available printers. Once you see your printer’s name, select it and click Add. That’s it! Your printer should now be ready for use.
5. Installing Printer Drivers
While many printers will install automatically with the appropriate drivers, some may require manual installation. If prompted for a driver during the setup process, you have a couple of options: (See: CDC cleaning printers guidelines.)
- Download the latest driver from the manufacturer’s website.
- Use the CD that came with the printer, if available.
Driver installation is crucial as it ensures compatibility between your printer and Mac, allowing for full functionality. If you encounter issues, try restarting your Mac after installation. This can resolve potential conflicts and ensure that the printer is recognized by the system.
6. Testing the Printer
Now that you’ve added the printer, it’s time to test it out. Open any document or image on your Mac that you’d like to print. Go to File and select Print or simply hit Command + P. Ensure your newly added printer is selected in the printer dropdown menu.
Before finalizing the print job, check the print settings, such as number of copies, color vs. black and white, and paper size. After confirming everything looks good, hit Print. If the printer produces a clean copy of your document, congratulations! You’ve successfully added a printer to your Mac.
7. Troubleshooting Common Issues
Sometimes, despite following all the steps, you may face issues while trying to add printer to Mac. Here are some common problems and their solutions:
- Printer Not Found: Ensure that the printer is powered on and connected to the same Wi-Fi network. Restart your printer and Mac, then try adding the printer again.
- Print Jobs Stuck in Queue: Open the Printers & Scanners menu, select your printer, and click Open Print Queue. Here, you can see the pending jobs. Cancel any stuck print jobs and try printing again.
- Driver Issues: If you receive an error regarding drivers, revisit the manufacturer’s website to download the latest version specifically for your printer model and macOS version.
Knowing how to troubleshoot common issues can save you time and frustration, letting you enjoy seamless printing on your Mac.
8. Advanced Printing Options
Now that you know the basics, let’s explore some advanced features and options available when printing from your Mac. Many printers come with additional settings that can enhance your printing experience:
- Duplex Printing: If your printer supports double-sided printing, you can find this option in the print settings. This not only saves paper but also gives your documents a professional touch.
- Custom Paper Sizes: If you’re printing on non-standard paper sizes, you can set custom dimensions in the page setup options.
- Quality Settings: Adjusting the print quality can help you save ink. For draft printing, choose a lower quality setting, while for photographs, opt for high quality to capture details.
Exploring these advanced features not only optimizes your printing process but also enhances the overall quality of your printed materials.
9. Regular Maintenance for Optimal Performance
To keep your printer running smoothly, regular maintenance is essential. Here are a few tips to consider:
- Cleansing Print Heads: If you notice streaks or faded prints, it may be time to clean the print heads. Most printers have a built-in option for this.
- Updating Drivers: Regularly check for driver updates to ensure compatibility and functionality with new features in macOS.
- Paper Jam Prevention: Always use the correct type of paper and avoid overloading the tray to prevent jams.
Maintaining your printer not only extends its lifespan but also ensures that it produces the best quality prints every time.
10. FAQs About Adding a Printer to Mac
Here are some frequently asked questions that can provide additional insights and help you navigate the process of adding a printer to your Mac:
1. Can I add multiple printers to my Mac?
Absolutely! You can add multiple printers to your Mac. Just go through the same process for each printer you want to add. In the Printers & Scanners menu, you will see all of them listed, so you can easily select which one to print from.
2. What should I do if my printer isn’t showing up in the Printers & Scanners list?
If your printer isn’t showing up, ensure it’s connected to the network and switched on. For USB printers, check the cable connection. Sometimes, restarting both your printer and Mac can help. If it still doesn’t appear, consider reinstalling the printer drivers.
3. How do I remove a printer from my Mac?
To remove a printer, go to the Printers & Scanners menu, select the printer you want to remove, and click the – button below the printer list. This removes the printer from your system.
4. Is there a way to print from my iPhone or iPad to my Mac-connected printer?
Yes, if your printer is AirPrint compatible, you can print directly from your iPhone or iPad to the printer connected to your Mac. Just ensure that your iOS device is on the same Wi-Fi network as the printer.
5. What if my printer supports Wi-Fi Direct?
If your printer supports Wi-Fi Direct, you can connect directly to the printer without needing a router. This can be particularly useful if you’re in a location without a network. Just check your printer’s manual for specific instructions on enabling Wi-Fi Direct.
6. Can I print from my Mac using third-party applications?
Yes, many third-party applications support printing directly from your Mac. Applications such as Adobe Acrobat, Microsoft Office, and most image editing software have built-in print features. Just select Print from the File menu, and you can print your documents easily.
7. How can I make my printer default?
To set a default printer on your Mac, go to Printers & Scanners, select the printer you want to make default, and click on the Default Printer dropdown menu at the bottom of the window. From there, select the printer you’d like to set as default.
8. What if my printer keeps going offline?
An offline printer can be frustrating. First, ensure it’s powered on and connected to the right network. If it’s a USB printer, check the cable connection. Restarting both the printer and your Mac often resolves this issue. You may also want to check the printer’s status in the Printers & Scanners menu and clear any pending print jobs.
9. Are there any specific security settings I should consider?
When connecting your printer to a network, consider changing the default password on the printer to prevent unauthorized access. Ensure your Wi-Fi network is secure, and regularly update your printer’s firmware for security patches.
10. Can I use my printer with a VPN?
Using a printer with a VPN can sometimes lead to connectivity issues, especially if the printer is on a different subnet. If you encounter problems, try disconnecting from the VPN and printing again. Some VPNs also have configurations that allow local network printing; check your VPN settings for more details.
11. Exploring Printer Types
When adding a printer to your Mac, it’s important to understand the different types of printers available. Each type of printer has unique features and benefits that can cater to specific printing needs:
- Inkjet Printers: Ideal for home use, inkjet printers are versatile and can handle various print jobs, including photos and documents. They tend to be more affordable upfront but can have higher running costs due to ink replacement.
- Laser Printers: Best for high-volume printing, laser printers can produce sharp text and images quickly. They are more expensive initially but cost less per page in the long run.
- All-in-One Printers: These printers combine printing, scanning, copying, and sometimes faxing capabilities into one device. They’re great for small offices or home use where multifunctionality is desired.
- Thermal Printers: Primarily used for printing shipping labels and receipts, thermal printers use heat instead of ink. They’re popular in retail and shipping industries.
- 3D Printers: For those interested in creating physical objects from digital designs, 3D printers are an exciting option. They typically have a steeper learning curve and higher initial costs.
Understanding these types can help you make a more informed decision when it comes to adding a printer to your Mac.
12. Choosing the Right Printer for Your Needs
When you’re ready to add printer to Mac, consider your specific needs. Take into account the following factors:
- Volume of Printing: Assess how much you plan to print. If you’re only printing a few documents occasionally, a basic inkjet may suffice. If you need to print hundreds of pages a week, a laser printer might be more appropriate.
- Quality of Print: If you’re printing high-quality photos or graphics, look for a printer with high DPI (dots per inch) and good color accuracy.
- Connectivity Options: Ensure the printer has the connectivity options you need. USB is standard, but Wi-Fi or Ethernet can be vital for networked environments. AirPrint compatibility is a plus!
- Operating Costs: Look beyond the purchase price. Check the cost of replacement cartridges or toner, as well as any maintenance fees that may apply over time.
- Space Considerations: Consider the size of the printer. Some high-volume printers can take up a lot of space. Make sure you have enough room in your home office or workspace.
By weighing these factors, you’ll be able to choose a printer that not only fits your budget but also meets your functional requirements.
13. Conclusion: Making Printing Seamless
In this digital age, printing remains a crucial function for both personal and professional tasks. Knowing how to add a printer to your Mac is just the beginning. From selecting the right printer to maintaining it for optimal performance, each step is essential in ensuring a smooth experience.
As technology evolves, printers continue to adapt, offering features that can enhance productivity and creativity. Whether you’re printing school assignments, business reports, or cherished family photos, a properly configured printer can make all the difference.
Don’t hesitate to explore various printer models, configurations, and features. With the right setup and a little maintenance, you’ll enjoy reliable printing for years to come.
“`
Trending Now
Frequently Asked Questions
How do I add a printer to my Mac?
To add a printer to your Mac, go to 'System Preferences' and select 'Printers & Scanners.' Click the '+' button to add a new printer. Ensure your printer is connected via USB or Wi-Fi, and follow the prompts to complete the setup.
What do I need to connect a printer to my Mac?
To connect a printer to your Mac, you need the printer's model number, connection method (USB or Wi-Fi), and the network name and password if connecting wirelessly. Ensure your printer is compatible with macOS.
Is my printer compatible with Mac?
Most modern printers are compatible with macOS, especially those that support AirPrint or connect via USB. Check the manufacturer's website for compatibility details if you're using an older or less common printer.
How do I set up a wireless printer on my Mac?
To set up a wireless printer on your Mac, ensure the printer is connected to the same Wi-Fi network as your Mac. Then, go to 'System Preferences,' select 'Printers & Scanners,' click the '+' button, and choose your printer from the list.
What is AirPrint and how does it work on Mac?
AirPrint is Apple's wireless printing technology that allows you to print from your Mac or iOS devices without needing additional drivers. If you have an AirPrint-compatible printer, simply select it from your print options to start printing.
Have you experienced this yourself? We’d love to hear your story in the comments.