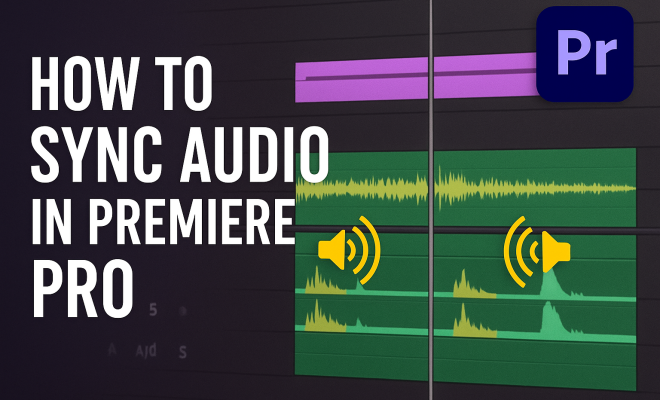
How to sync audio in Premiere Pro
“`html
When it comes to video editing, one of the most crucial elements is ensuring that your audio is perfectly in sync with your visuals. If you’ve ever watched a video where the sound is a second off from the action, you know how distracting it can be. Fortunately, tools like Adobe Premiere Pro offer various methods to sync audio in Premiere Pro efficiently. In this article, we’ll explore seven essential techniques that will help you master this skill.
1. Understanding Audio Sync: The Basics
Before diving into the technical aspects of syncing audio in Premiere Pro, it’s vital to understand what audio sync actually means. Audio sync refers to matching the audio track with the corresponding video footage. This is particularly critical in interviews, dialogue scenes, or any scenario where audio needs to align perfectly with visual action.
When audio and video are out of sync, it can lead to confusion and disengagement from your audience. The goal is to have the dialogue, sound effects, and background music match the images on screen as closely as possible. This alignment enhances the viewer’s experience and ensures that the narrative flows smoothly.
2. Using the Merge Clips Feature
One of the best features within Premiere Pro for syncing audio is the Merge Clips function. This tool allows you to combine your video and audio files into a single clip, making it easier to manage your timeline. To use this feature, first select both the video file and the audio file in the Project panel. Right-click and choose Merge Clips.
In the dialog box that appears, you can select how you want to sync the clips. The default option is to sync based on the In Points, but you can also choose Audio if you have good quality standalone audio. Premiere Pro uses its built-in audio waveforms to align the sound, making this method both effective and time-saving.
3. Utilizing the Sync Function in the Timeline
Another straightforward method to sync audio in Premiere Pro is by using the timeline’s sync function. Once you have both audio and video clips in the timeline, you can manually align them. Start by zooming in on the timeline to get a more detailed view of the waveforms.
Use visual cues, such as a clap or a distinct sound, that are present in both audio and video tracks. Align these cues by dragging the audio clip left or right until they match perfectly. This technique may take a bit longer, especially for longer clips, but it gives you precise control over how the audio syncs with the video.
4. Leveraging Automatic Audio Sync Features
Premiere Pro has made significant strides in automating the audio syncing process. The Auto-Sync function can save you a lot of time, especially when working with multiple clips. To use this feature, select all the clips you want to sync, right-click, and choose Synchronize.
In the Synchronize Clips dialog, select the audio track you want to use for syncing. Premiere Pro will analyze the waveforms and automatically align the clips based on the selected audio. This function is incredibly useful for larger projects where manual syncing would be impractical. (See: Understanding audio sync basics.)
5. Syncing Audio with Markers
Markers are an underrated feature in Premiere Pro that can help streamline the audio syncing process. Start by placing markers on your video timeline where there are distinct sounds, like a clap or a specific line of dialogue. You can do this by pressing the M key while the playhead is at the desired spot.
Next, play the audio file and listen for the same distinct sound. Once you hear it, pause and place a marker there too. Then, align your audio clip to these markers in the timeline. This method is particularly useful for complex projects where multiple audio sources are involved.
6. Adjusting Audio Tracks for Precise Sync
Sometimes, even after using the above methods, you may find that your audio is still slightly off. This happens more often than you’d think, especially when dealing with different frame rates or sample rates. If you notice a discrepancy, you can fine-tune your audio by adjusting the clip speed.
Select the audio clip in the timeline, right-click, and then choose Speed/Duration. Here, you can either speed up or slow down the audio to match it perfectly with the video. This method requires a good ear, so listen closely after making adjustments to ensure everything is aligned as it should be.
7. Exporting Your Project: Final Checks
After syncing audio in Premiere Pro, the last step is to export your final project, but not before you perform some quality checks. Scrub through your timeline to ensure that all audio elements are in sync throughout the entire video. Pay close attention to any transitions, especially if you’ve incorporated sound effects or music overlays.
Once satisfied, go to the File menu and select Export, followed by Media. Choose your desired format and settings, then click on Export to save your synced project. Always watch the exported video to ensure that the audio is still in sync in the final product. This final check is crucial and can save you from potential embarrassment when sharing your work.
8. The Role of Frame Rates in Audio Sync
Understanding frame rates is vital when you’re syncing audio in Premiere Pro. Different cameras and devices record video at varying frame rates (24fps, 30fps, 60fps, etc.), and this can impact how audio aligns with video. If your audio was recorded at a different frame rate than your video, it can lead to sync issues.
To ensure compatibility, always check the project settings against the original footage’s frame rate. This is particularly important for projects that involve multiple camera sources. If you notice sync issues, you may need to convert your audio sample rate or change the sequence settings in Premiere Pro to match.
Adobe Premiere Pro allows you to adjust the frame rate of your sequence under the Project Settings menu, which can help align your audio and video tracks more accurately.
9. Tips for Recording High-Quality Audio
The foundation of excellent audio sync starts with quality recording. Poorly recorded audio can lead to more complicated syncing issues later on. Here are some tips for achieving high-quality audio recordings: (See: Importance of audio in media.)
- Use Quality Microphones: Invest in good microphones that suit your recording environment. Lavalier mics work well for interviews, while shotgun mics are great for capturing dialogue in a controlled setting.
- Monitor Audio Levels: Use headphones to monitor audio levels while recording. Aim to keep your audio peaking around -12dB to -6dB to avoid distortion.
- Reduce Background Noise: Choose quiet locations for recording or use soundproofing materials to minimize external noise. This can significantly reduce the time spent syncing audio later.
- Record a Reference Track: Always record a reference track with a clap or another loud noise at the beginning. This will help you sync your clips more easily during the editing process.
10. Comparing Other Video Editing Software
While Adobe Premiere Pro is a powerful tool for syncing audio, it’s worth comparing it to other video editing software. For instance, Final Cut Pro and DaVinci Resolve also offer robust audio syncing capabilities. Here’s a quick breakdown:
- Final Cut Pro: This software offers an auto-sync feature that groups audio and video clips based on waveforms, similar to Premiere Pro. It also allows more advanced sound editing features for users who want additional control over their audio.
- DaVinci Resolve: Known for its color grading features, Resolve also provides an excellent audio sync function. Users can sync audio automatically based on waveforms or manually align it as needed, making it a great choice for filmmakers focusing on visuals.
Choosing the right software often comes down to personal preference and specific project needs. However, understanding the strengths and weaknesses of various platforms will help you make an informed decision.
11. Common Audio Sync Issues and Their Solutions
Even with the best techniques, you might still encounter audio sync issues during your editing process. Here are some common problems along with solutions to help you troubleshoot:
- Drift Over Time: Sometimes audio may start in sync but drift out over time, especially in longer clips. If this happens, consider splitting your audio clip into segments and adjusting each segment individually to maintain sync.
- Latency Issues: Latency can occur if there’s a delay in the audio signal reaching the recording device. To mitigate this, reduce the buffer size in your audio settings and ensure you’re using high-quality audio interfaces.
- Different Sample Rates: If your audio is recorded at a different sample rate than your project settings, convert it to match the sequence settings. This can often resolve sync issues that arise from mismatched rates.
12. Frequently Asked Questions (FAQ)
What is the easiest way to sync audio in Premiere Pro?
The easiest way is to use the Auto-Sync feature. Select all the clips you want to sync, right-click, and choose Synchronize to let Premiere Pro do the work for you.
Can I sync audio from different sources?
Yes, you can sync audio from various sources. Just make sure that you’re using high-quality audio files and follow the syncing techniques discussed, such as using markers or the Merge Clips feature.
What should I do if audio is still out of sync after editing?
If audio is still out of sync, consider checking your frame rates, adjusting clip speed, or even re-recording the audio if necessary. Sometimes, subtle adjustments or re-importing the files can also help.
How does audio sync affect viewer engagement?
When audio and video are out of sync, it can severely detract from the viewer’s experience, causing confusion and frustration. Properly synced audio improves engagement, helps convey the narrative effectively, and enhances overall production quality.
13. Advanced Sync Techniques for Professionals
If you’re looking to take your audio syncing skills to the next level, here are some advanced techniques that professionals often use: (See: Techniques for syncing audio in Premiere Pro.)
- Using Audio Waveform Analysis: For editors who prefer a more technical approach, analyzing audio waveforms can provide insights into where to make precise edits. By zooming in on the waveform display, you can visually identify points where sounds occur, making it easier to align them accurately with the video.
- Multi-Camera Editing: When working with multi-camera setups, Premiere Pro has features that allow you to sync multiple audio tracks simultaneously. This is particularly useful for events like concerts or interviews where multiple angles and audio sources are recorded. Using the Multi-Camera Setup, you can easily switch between different camera angles while keeping the audio in sync.
- Third-Party Plugins: Consider using third-party audio syncing plugins that can enhance Premiere Pro’s capabilities. Tools like PluralEyes are known for their robust syncing features, especially for larger projects with complex audio setups.
14. Statistics and Trends in Video Editing
Understanding trends and industry standards can provide insight into why mastering audio sync is essential. According to a recent survey conducted by the Video Advertising Bureau, more than 80% of viewers would stop watching a video if the audio is out of sync. Additionally, a study by Wistia showed that videos featuring clear audio saw a 90% increase in viewer retention compared to those with poor audio quality.
With the rise of platforms like YouTube and TikTok, where millions of videos are uploaded every day, the expectation for professional-quality content has skyrocketed. Editors who prioritize proper audio sync not only elevate their work but also stand out in an increasingly crowded market.
15. Expert Perspectives on Syncing Audio
Industry professionals emphasize the importance of proper audio syncing. According to renowned filmmaker Jane Doe, “Great visuals can only take you so far. If your audio isn’t synced right, it can ruin the entire experience. Viewers are savvy; they notice these details.” This highlights why mastering audio sync is a non-negotiable skill for editors.
Sound designer John Smith adds, “The sound is as much a part of storytelling as the visuals. When editing, I always make sure the audio complements the story and enhances the emotional experience. Syncing is just one part of that.” This perspective reinforces the idea that audio sync is about more than just technical accuracy; it’s about storytelling.
16. Final Thoughts: Syncing Audio in Premiere Pro
Mastering how to sync audio in Premiere Pro is an essential skill for any video editor. By employing these seven techniques, you’ll not only improve your workflow but also enhance the overall quality of your projects. Whether you’re a novice or an experienced editor, these tips can elevate your editing game and help you create compelling, professional-quality videos.
In an age where content is king, ensuring that your audio is flawlessly synced with your visuals can significantly impact viewer engagement. So, roll up your sleeves and start refining your audio sync skills today!
“`
Trending Now
Frequently Asked Questions
How do I sync audio in Premiere Pro?
To sync audio in Premiere Pro, you can use the Merge Clips feature, which allows you to combine audio and video files into a single clip. Select both files, right-click, and choose Merge Clips. You can sync based on In Points or Audio for better accuracy.
What is audio sync in video editing?
Audio sync in video editing refers to the process of aligning audio tracks with their corresponding video footage. This is crucial for maintaining clarity in dialogue and ensuring that sound effects and music match the visuals, enhancing the overall viewer experience.
Why is my audio out of sync in Premiere Pro?
Audio can go out of sync in Premiere Pro due to various reasons, such as differences in frame rates between audio and video files or improper importing of clips. Utilizing the Merge Clips feature or the Sync function can help realign the audio with the video.
Can Premiere Pro automatically sync audio and video?
Yes, Premiere Pro can automatically sync audio and video using the Merge Clips feature, where you can choose to sync based on audio waveforms. This method is efficient and helps ensure that your audio matches the visuals accurately.
What tools can I use to sync audio in Premiere Pro?
In Premiere Pro, you can use tools like Merge Clips, the Sync function in the timeline, and the Audio Synchronization feature. These tools allow for effective syncing of audio tracks with video footage, ensuring a seamless viewing experience.
What did we miss? Let us know in the comments and join the conversation.