How to use clipping mask in Illustrator
“`html
Working with graphics can be both exciting and challenging, especially when it comes to software like Adobe Illustrator. One powerful feature that allows for dynamic design is the clipping mask in Illustrator. This technique is a favorite among designers for its versatility and ability to create complex visuals with ease. Whether you’re new to Illustrator or looking to refine your skills, understanding how to effectively use clipping masks can elevate your design work significantly. In this article, we’ll explore ten essential techniques and insights into using clipping masks in Illustrator.
1. What is a Clipping Mask?
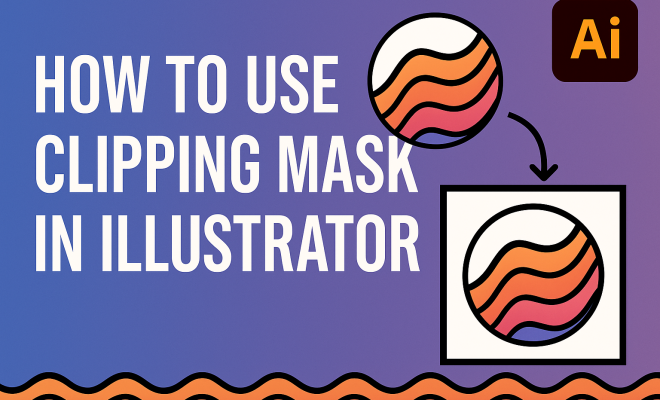
Before diving into the practical applications, let’s clarify what a clipping mask is. Essentially, a clipping mask is an object (or a group of objects) that serves as a mask to hide parts of other artwork, allowing only what’s inside the mask to be visible. The areas outside the clipping mask become invisible, which makes it a crucial tool for creating effects without altering the original artwork.
This feature is particularly useful for designers looking to create unique shapes and compositions. By utilizing a clipping mask, you can maintain the integrity of your underlying artwork while showcasing only the desired sections. The flexibility of this tool is part of what makes it so popular among professionals and hobbyists alike.
2. How to Create a Clipping Mask
Creating a clipping mask in Illustrator is a straightforward process. Start by selecting the object you want to serve as the mask — it can be a shape, text, or any vector artwork. Then, simply select the artwork you want to mask along with the clipping mask shape. With both items selected, you can apply the clipping mask by going to the menu and choosing Object > Clipping Mask > Make (or use the shortcut Ctrl + 7 on Windows or Cmd + 7 on Mac). This action will hide all areas outside the mask, leaving only the section of the artwork you want to show.
Understanding the layers is also key. When you create a clipping mask, the mask object must be on top of the artwork you wish to reveal. If it’s not, the mask won’t work as intended, and you might end up confused about why your artwork isn’t displaying correctly. Always check your layers for proper order before applying the mask.
3. Editing a Clipping Mask
One of the significant advantages of using a clipping mask in Illustrator is the ability to edit it post-creation. If you find you need to adjust the mask or the artwork inside, it’s quite simple. You can do this by selecting the clipping group and using the Direct Selection Tool (A) to manipulate the mask or the contents directly. This flexibility allows designers to experiment and make changes without starting from scratch, making it an invaluable tool for iterative design processes.
If you want to release a clipping mask, select the group and go to Object > Clipping Mask > Release. This will separate the mask from the artwork, allowing you to make adjustments. Once you’ve finished, you can recreate the mask with any new modifications.
4. Using Multiple Clipping Masks
Did you know that you can use multiple clipping masks in Illustrator? This technique is often used in more complex designs where you need to combine several elements. You can create a clipping mask from a group of objects, allowing you to control which parts of each element are visible simultaneously.
For instance, imagine you want to create a multi-layered effect with different textures or colors. Start by grouping the objects you want to mask together. Then, create a new shape that will act as your clipping mask. Once everything is selected, apply the clipping mask as previously described. This method allows for intricate designs while still keeping everything organized and manageable.
5. Practical Applications of Clipping Masks
Clipping masks can be used in countless ways, from simple image cropping to more advanced design techniques. Graphic designers often use them to create dynamic text effects, where the inside of the text is filled with an image or pattern without affecting the text’s outline. This adds depth and interest to typography, making designs pop.
Additionally, clipping masks are prevalent in creating mockups, logos, or illustrations where specific areas need emphasis. For instance, you might want to show a product within a specific frame; a clipping mask can easily allow this without distorting the size or proportions of either element.
6. Combining Clipping Masks with Effects
Another exciting aspect of using clipping masks in Illustrator is their compatibility with various effects. You can apply gradients, shadows, and other styles to the masked artwork, adding another layer of sophistication to your designs. For example, if you use a clipping mask to fill a shape with a gradient, the gradient will only affect the visible areas defined by the mask.
Moreover, combining clipping masks with effects such as opacity or blending modes can yield stunning results. Experimenting with these settings can lead to unexpected and visually striking designs. This aspect is especially useful for creating backgrounds or textures in more complex illustrations.
7. Common Mistakes to Avoid
While clipping masks are powerful, beginners often make some common mistakes that can lead to frustration. One frequent issue is forgetting to select both the mask and the object you want to mask. Always double-check your selection before applying the mask. Another common pitfall is not paying attention to the stacking order of layers. If the mask is beneath the artwork, it won’t work as expected.
Additionally, keep in mind that once a clipping mask is created, the masked artwork is inaccessible unless you release the mask. This can lead to confusion if you’re trying to edit the artwork and can’t find it. Always plan ahead and consider your workflow to avoid these obstacles.
8. Clipping Masks vs. Opacity Masks
While both clipping masks and opacity masks serve to hide parts of artwork, they operate differently. A clipping mask uses the shape to define what’s visible, while an opacity mask uses grayscale values to control the transparency of the artwork. This means that with an opacity mask, you can create smooth transitions and gradients of visibility.
In practice, clipping masks are great for clear, defined edges, while opacity masks allow for more intricate designs involving transparency. Understanding these differences can help you choose the right method for your project. For instance, if you want sharp cuts or shapes, go for a clipping mask. However, if you’re looking to create a fade effect or soft edges, opt for an opacity mask.
9. Tips for Advanced Users
For those looking to take their use of clipping masks to the next level, consider integrating them with other Illustrator features. For example, using the Pathfinder tool alongside clipping masks can help you create more complex designs. By combining various shapes and then applying a clipping mask, you can achieve results that are both intricate and visually appealing.
Another advanced technique involves using clipping masks with artboards. This allows you to create different design variations within the same project file easily. You can apply different clipping masks to each artboard to maintain a cohesive design style while exploring various concepts. This technique is invaluable during client presentations or when iterating on design options.
10. Real-World Examples and Inspirations
To truly appreciate the capabilities of a clipping mask in Illustrator, examining real-world examples can be incredibly inspiring. Graphic designers and illustrators often showcase their work on platforms like Behance or Dribbble, where you can see how clipping masks enhance their projects. For instance, many logo designs leverage clipping masks to create unique shapes that stand out in competitive markets.
Additionally, consider how artists use clipping masks to create illustrations in children’s books, where vibrant images often need to be contained within specific shapes. This technique helps maintain visual interest while ensuring that the artwork remains appropriate for the intended audience. By exploring these examples, you can gain insights into how to apply clipping masks creatively in your designs.
11. Benefits of Using Clipping Masks
Utilizing clipping masks offers several benefits that can significantly enhance your design workflow. One of the primary advantages is the non-destructive nature of clipping masks. Unlike cropping images or altering vector shapes directly, clipping masks allow you to experiment freely without compromising the original artwork. If you don’t like the outcome, you can easily adjust or remove the mask without losing the underlying elements.
This flexibility is particularly beneficial in a collaborative environment where designs may need to be revised multiple times. You can maintain a clean design file, keeping all elements intact while showcasing different iterations through clipping masks. This approach not only saves time but also reduces the hassle of recreating designs from scratch.
12. Advanced Techniques with Clipping Masks
If you’re ready to push your skills further, consider some advanced techniques that can elevate your use of clipping masks. One such technique is to create a clipping mask with a textured surface. By first applying a texture to your mask shape, you can create a unique visual effect that can make your design stand out. For instance, a grainy texture applied to a clipping mask can give your artwork an organic feel or a vintage aesthetic.
Another technique involves using clipping masks in combination with Illustrator’s 3D effect. You can create a 3D object and use a clipping mask to reveal only certain parts of it. This can be particularly effective for product presentations or advertisements where you want to highlight specific features while keeping the overall design cohesive and professional.
13. Statistics on Clipping Mask Usage
While exact statistics on clipping mask usage can be hard to come by, various surveys indicate a growing reliance on Adobe Illustrator for professional graphic design work. According to a recent report, over 80% of graphic designers use Illustrator regularly, and among these users, a significant percentage note that clipping masks are an essential feature in their toolkit. This statistic highlights the importance of mastering clipping masks for anyone serious about graphic design.
Moreover, with the rise of digital media and online content, the demand for visually striking graphics has increased. Designers who leverage tools like clipping masks efficiently are often able to create more engaging content, which is crucial in today’s visually-driven market.
14. Frequently Asked Questions (FAQ)
What is the difference between a clipping mask and a group in Illustrator?
A clipping mask is specifically designed to hide parts of artwork based on the shape of another object, while a group simply combines multiple objects for easier manipulation. A clipping mask affects visibility, whereas grouping merely allows for collective movement and adjustment.
Can I use bitmap images as a clipping mask?
Yes, you can use bitmap images as a clipping mask in Illustrator. The bitmap image needs to be placed on top of the artwork you want to mask, just like you would with vector shapes. However, keep in mind that the quality of the mask may vary depending on the resolution of the bitmap image.
How can I save a design with clipping masks?
When saving your design, you can save it as an Illustrator (.ai) file, which maintains all the layers and clipping masks intact. If you save it as a raster format (like JPEG or PNG), the clipping masks will be flattened, and you’ll lose the ability to edit them in the future. Always save a copy in Illustrator format for future edits.
Are there any performance issues with using clipping masks?
Using a large number of complex clipping masks can impact Illustrator’s performance, especially on older machines. If you notice lagging or freezing, try simplifying your clipping masks or reducing the number of layers in your artwork. Keeping your file organized can also help maintain better performance.
Can I create clipping masks with text?
Absolutely! Text can serve as a clipping mask. Just make sure that the text object is converted to outlines (using the Type > Create Outlines option) if you want to use it as a clipping mask. This makes sure that the text shape is defined as a vector path, allowing it to mask other artwork effectively.
15. Exploring Clipping Masks in Different Design Disciplines
Clipping masks aren’t just for graphic designers; they’re also widely used in various other fields such as web design, illustration, and even UI/UX design. For web designers, clipping masks allow for stylish image presentations and layout designs that can enhance the user experience. For instance, you can create custom shapes for buttons or images, giving a more polished and professional appearance to web projects.
In the realm of illustration, artists leverage clipping masks to manage complex compositions. For example, an illustrator might use clipping masks to overlay detailed textures on character designs, ensuring that illustrations remain vibrant and engaging while maintaining a clean design hierarchy. This technique is especially useful in digital painting, where layers can quickly become overwhelming. By using masks, artists can isolate areas for adjustment or enhancement while keeping the overall composition intact.
16. Trends and Innovations in Clipping Masks
As design trends evolve, so do the techniques and applications of clipping masks. Currently, there is a growing trend towards minimalism and flat design, where clipping masks play a crucial role in maintaining a clean look. Designers are experimenting with negative space and abstract shapes, using clipping masks to creatively hide and reveal elements in their work. For example, you might see intricate geometric patterns that utilize clipping masks to provide depth without overwhelming the viewer.
Furthermore, the integration of clipping masks in animation and motion graphics is becoming increasingly popular. Designers are using masks to create dynamic transitions and effects in animations, providing a smooth viewing experience that captures attention. This cross-disciplinary use of clipping masks shows their versatility and importance in modern design practices.
17. Challenges and Solutions When Working with Clipping Masks
While clipping masks are incredibly useful, they can also come with their own set of challenges. One common challenge is managing visibility when working with numerous clipping masks in a single document. To mitigate this, consider using layers effectively. Organizing your clipping masks into folders or groups can help you keep track of which masks correspond to specific artwork, making it easier to navigate your project.
Another challenge arises when dealing with complex shapes. Sometimes, a clipping mask may not behave as expected, especially with intricate designs. In these cases, simplifying the shape or ensuring that paths are closed properly can help resolve issues. Additionally, utilizing the Expand function on your clipping masks can help avoid unexpected results, as this will convert your vector shapes into more manageable paths.
18. Conclusion
Clipping masks are a versatile and powerful tool in Adobe Illustrator that can significantly improve your design capabilities. By understanding how to create, edit, and apply clipping masks properly, you can create stunning visuals that stand out. Whether you’re using them for basic cropping, advanced design techniques, or unique artistic expressions, mastering clipping masks is essential for any graphic designer. So, get experimenting with clipping masks today, and take your designs to the next level!
“`
Trending Now
Frequently Asked Questions
What is a clipping mask in Illustrator?
A clipping mask in Illustrator is an object or group of objects that masks other artwork, revealing only the parts within the mask. Areas outside the mask become invisible, making it a valuable tool for creating complex designs while preserving the original artwork.
How do I create a clipping mask in Illustrator?
To create a clipping mask in Illustrator, select the object you want to use as the mask, along with the artwork you want to mask. Then, go to Object > Clipping Mask > Make or use the shortcut Ctrl + 7 on Windows or Cmd + 7 on Mac to apply the mask.
What are the benefits of using a clipping mask?
Using a clipping mask allows designers to create unique shapes and compositions without altering the original artwork. It provides flexibility in design and helps maintain the integrity of underlying graphics while showcasing only desired sections.
Can I use text as a clipping mask in Illustrator?
Yes, you can use text as a clipping mask in Illustrator. Simply create your text, position it over the artwork you wish to mask, and then apply the clipping mask. This technique is effective for creating text effects and dynamic visuals.
What should I do if my clipping mask isn't working?
If your clipping mask isn't working, ensure that the clipping mask object is on top of the artwork you want to mask and that both are selected before applying the mask. Additionally, check that the mask is a closed path; open paths won't work properly.
Have you experienced this yourself? We'd love to hear your story in the comments.