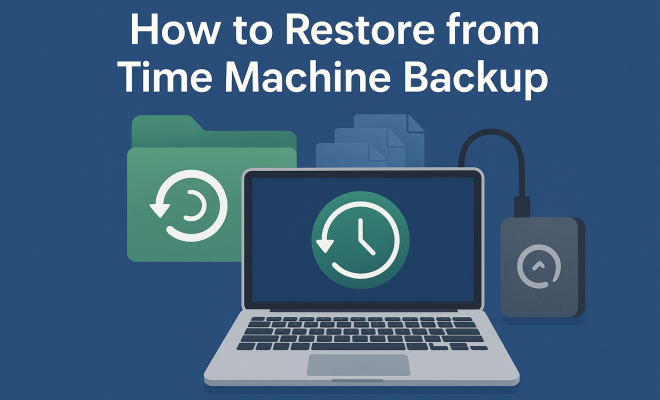
How to restore from Time Machine backup
“`html
For Mac users, the anxiety of losing important files can be overwhelming. Whether it’s due to accidental deletion, a system crash, or a malware attack, knowing how to restore from Time Machine backup can be a lifesaver. Time Machine, Apple’s built-in backup solution, automatically takes snapshots of your files and system settings, making it relatively easy to retrieve the information you need. In this comprehensive guide, we’ll walk you through everything you need to know about effectively restoring from a Time Machine backup.
1. Understanding Time Machine
Before diving into the restoration process, it’s crucial to understand what Time Machine is and how it works. Launched in Mac OS X Leopard (10.5) in 2007, Time Machine functions as a backup software that continuously saves your files. It allows users to restore the entire system, including applications, files, and settings.
Time Machine backs up your data incrementally, meaning after the first full backup, only changes made since the last backup are saved. This optimization conserves storage space and speeds up the operation. Backup drives can be external hard drives, network-attached storage (NAS), or even Apple’s own Time Capsule.
In addition to incremental backups, Time Machine offers a unique feature: versioning. This means you can access multiple copies of files from different points in time, allowing you to revert to a specific version of a document if needed. This is particularly helpful for users who work with documents and want to track changes over time.
2. When to Restore from Time Machine Backup
There are several situations where restoring from a Time Machine backup is necessary. Perhaps your Mac has crashed, or you mistakenly deleted important files. In other cases, you might want to revert your system to a previous state, such as after a software update that didn’t go as planned.
Recognizing the right moment to restore is essential. If you find your Mac running slowly, experiencing crashes, or applications behaving erratically, a restoration could resolve underlying issues. It’s also wise to keep backups handy before making significant changes, like software installations or system upgrades.
Statistics show that nearly 40% of users experience data loss each year, underscoring the importance of having a reliable backup strategy. Knowing when to restore can save you from countless hours of work and frustration.
3. Preparing for Restoration
Before you begin the restoration process, there are a few steps you should take to prepare your Mac. First, ensure that your Time Machine backup drive is connected. If you’re using an external drive, plug it in directly; for a network-based backup, verify that you’re connected to the network.
Next, ensure your Mac is updated. If you’re restoring a system that’s been backed up, it’s advisable to check for macOS updates to prevent compatibility issues. Lastly, if you’re planning to restore an entire system, consider whether you want to erase your current setup—this is often the cleaner option for a full restoration.
It’s also a good idea to make a list of critical files or applications you want to prioritize in your restoration process. This helps streamline the recovery, especially if you’re working against a tight timeline or have many backups to sift through.
4. How to Access Time Machine
Accessing Time Machine is simple. You can do this through the Time Machine icon in the menu bar or by going to System Preferences. Once you’ve opened the Time Machine interface, you’ll see a timeline on the right side of your screen, showing all available backups.
To enter Time Machine, click on the Time Machine icon, and select “Enter Time Machine.” You’ll be taken back in time to view your files and folders as they appeared during the backup period. This feature makes it easy to browse files and find what you need. (See: Time Machine on Wikipedia.)
Another method to access Time Machine involves using the Finder. Open Finder, select a folder, and then click the Time Machine icon in the menu bar. This allows you to see backups pertaining to that specific folder, offering a targeted approach to file recovery.
5. Restoring Individual Files
If you’re looking to restore specific files instead of the entire system, Time Machine makes this process straightforward. While in the Time Machine interface, you can navigate through your folders and select the files you want to restore.
Once you find the file, select it and click the “Restore” button. The file will be copied back to its original location. This method is especially useful for recovering accidental deletions without the need to restore the entire system.
For example, if you accidentally deleted a crucial presentation, rather than restoring your entire Mac, you can simply retrieve the presentation from the appropriate backup date. This targeted restoration method saves time and reduces the risk of losing any new data created since your last backup.
6. Restoring Your Entire System
When major issues occur, you might find yourself needing to restore your entire system. To do this, you’ll need to boot from macOS Recovery. Restart your Mac and hold down Command (⌘) + R immediately until you see the Apple logo or a spinning globe.
Once in Recovery mode, select “Restore from Time Machine Backup.” Follow the prompts to select your Time Machine backup disk and choose the backup you wish to restore. This method reinstates your Mac’s operating system, applications, and files as they were at the time of the backup.
It’s crucial to note that restoring your entire system will erase any data created after the selected backup date. If you have critical files stored on your Mac that were created after that point, consider backing them up to an external drive or cloud service before proceeding with the restoration.
7. Common Issues and Troubleshooting
While restoring from Time Machine is typically seamless, issues can arise. A common problem is the backup drive not being recognized. If this happens, ensure that the drive is properly connected, powered, and formatted for macOS.
Another issue could be limited space on your Mac. If your hard drive is full, the restoration may not proceed. In such cases, consider freeing up space or using an external drive for the restoration. Additionally, if a backup is corrupted, you may need to use a different backup or seek professional help.
Some users also report issues with the Time Machine interface being slow. This can happen if there are many backups in the list. If you encounter this, you might want to delete older backups that are no longer needed to streamline the process.
8. Best Practices for Time Machine Backups
To ensure a smooth restoration process, establishing good backup habits is essential. Regularly check that Time Machine is functioning properly and that backups are being completed. Set a schedule that suits your usage—daily backups are ideal for those who frequently create or modify files.
Consider having multiple backup locations. While Time Machine offers a reliable backup solution, having a secondary backup on cloud services or additional drives adds an extra layer of security. This strategy safeguards your data against hardware failures or disasters.
Additionally, it’s wise to occasionally test your backups by restoring a file or two to ensure everything is functioning correctly. This offers peace of mind and can help catch any issues before a critical moment arises.
9. Using Terminal for Advanced Restoration
For advanced users, Terminal offers a powerful way to restore from Time Machine backup. By using command-line instructions, you can access more granular options than the GUI provides. This method is particularly useful for script automation or when the standard restoration methods fail. (See: CDC on computer safety and data protection.)
To perform a restoration using Terminal, you’ll need to enter specific commands, such as ‘tmutil’, which is the command-line utility for managing Time Machine backups. However, this method requires more technical know-how and should be approached carefully.
For instance, to list all available backups, you can use the command `tmutil listbackups`. And to restore a specific backup, you might use `tmutil restore /path/to/file /destination/path`. While this method provides flexibility, be cautious; improper commands can lead to data loss.
10. Moving Forward After Restoration
Once you’ve successfully restored your system or files, it’s essential to ensure everything is functioning correctly. Double-check that software is updated and that important files are accessible. Take this opportunity to reflect on your backup strategy—consider if you need to adjust your schedule or backup locations.
Additionally, if you’ve restored as a result of system issues, monitor your Mac for any recurring problems. Keeping software up to date and performing regular maintenance can help prevent future issues.
In summary, knowing how to restore from Time Machine backup is a valuable skill for any Mac user. With the right knowledge and practices in place, you can safeguard your data and recover it effortlessly when needed.
11. Frequently Asked Questions (FAQ)
Can I restore from Time Machine backup without an external drive?
Yes, if you have a Time Capsule or are using network-attached storage (NAS), you can restore backups without having a physical external drive connected. Just ensure your Mac is connected to the same network where your Time Machine backup resides.
What happens to my current files when I restore from a Time Machine backup?
If you restore specific files, only those files will be reverted to their previous states. However, if you restore your entire system, any files created or modified after the backup date will be lost unless they are backed up elsewhere.
How do I know if my Time Machine backups are working?
You can check the status of your Time Machine backups by going to System Preferences and selecting Time Machine. You can see the date and time of the last backup. Additionally, you can periodically attempt to restore a file to ensure the backup is intact.
Is there a limit to how long Time Machine keeps backups?
Time Machine automatically manages storage space by deleting the oldest backups as new ones are created. If you have enough space, it can keep backups going back months or even years, but this depends on your available storage and backup frequency.
Can I use Time Machine with macOS Big Sur or later?
Absolutely! Time Machine is compatible with macOS Big Sur and later versions. However, it’s always a good idea to make sure your Time Machine and macOS are updated to their latest versions for optimal performance and security.
What if my Time Machine backup is corrupted?
If you suspect your backup is corrupted, you can try to restore using an older backup if available. Additionally, running Disk Utility to check and repair your backup disk may help. If issues persist, consider consulting Apple Support or a professional data recovery service.
Can I restore from Time Machine on a different Mac?
Yes, you can restore from a Time Machine backup on a different Mac as long as it’s compatible with the macOS version used during the backup. You can do this by booting the new Mac into Recovery Mode and selecting the option to restore from a Time Machine backup.
12. Advanced Features of Time Machine
Time Machine isn’t just a basic backup tool; it has several advanced features that can enhance your data recovery experience. For instance, you can use it to back up not just your documents and applications but also your system settings and preferences. This means that when you restore your system, you’re not only getting your files back but also your personalized setup.
Another feature is the ability to exclude certain files or folders from the backup. This can be handy if you have large files that you don’t need to back up, such as video files or applications that are easily redownloaded. You can set these exclusions in the Time Machine settings under “Options.”
13. Time Machine vs. Other Backup Solutions
Many users wonder how Time Machine stacks up against other backup solutions. One popular alternative is cloud-based backup services like Backblaze or Carbonite. While these services offer remote backups, Time Machine provides a unique advantage in that it offers local backups, which can be faster for recovery. Additionally, Time Machine’s versioning system allows you to retrieve files from specific points in time, which some cloud services may not support as intuitively.
Another common comparison is between Time Machine and third-party backup software like Acronis True Image or ChronoSync. These programs often come with additional features, such as scheduled backups and different types of backup strategies (like incremental, differential, or full backups). However, Time Machine’s seamless integration with macOS makes it a user-friendly option for many who just want a straightforward backup solution.
14. User Experiences and Case Studies
Real-world examples can illustrate the effectiveness of Time Machine. Many Mac users have shared stories about how Time Machine saved their work. For instance, a graphic designer who accidentally deleted a month’s worth of project files managed to recover everything thanks to a Time Machine backup. This highlights the importance of routine backups for creative professionals who work with large files and need reliable recovery options.
Another user, who experienced a system crash during a critical presentation, was able to restore their Mac completely using Time Machine in less than an hour. They had set up regular backups every evening, and when the crash occurred, they could revert to their last working state without losing any progress.
These user experiences serve as reminders of how crucial it is to have a reliable backup system in place and to keep it updated regularly.
15. Final Thoughts on Time Machine Backup
As a Mac user, understanding how to restore from Time Machine backup is not just a nice skill to have; it’s essential for safeguarding your data. From individual file recovery to complete system restoration, Time Machine provides various tools that make the process easy and efficient.
Staying proactive with your backup strategy can save you from future headaches. By leveraging Time Machine’s features, you can ensure that your data is always protected and can be restored quickly when needed. Whether you’re an everyday user or a professional, taking the time to understand and utilize Time Machine effectively enhances your overall Mac experience.
“`
Trending Now
Frequently Asked Questions
How do I restore my Mac from a Time Machine backup?
To restore your Mac from a Time Machine backup, connect your backup drive, then restart your Mac and hold down Command (⌘) + R to enter Recovery Mode. Select 'Restore from Time Machine Backup' and follow the on-screen instructions to choose the backup you wish to restore.
What is Time Machine and how does it work?
Time Machine is Apple's built-in backup software that automatically saves snapshots of your files and system settings. It performs incremental backups, meaning it only saves changes made since the last backup, optimizing storage space and allowing users to restore files from different points in time.
When should I use Time Machine to restore?
You should consider restoring from Time Machine when your Mac crashes, you accidentally delete important files, or you want to revert your system to a previous state after an unsuccessful software update. Recognizing these moments can help prevent further data loss.
Can I restore individual files from a Time Machine backup?
Yes, you can restore individual files from a Time Machine backup. Open the Time Machine application, navigate to the folder where the file was located, and use the timeline on the right to find the version you need. Select the file and click 'Restore' to recover it.
What types of drives can I use for Time Machine backups?
You can use various types of drives for Time Machine backups, including external hard drives, network-attached storage (NAS), and Apple's Time Capsule. Ensure the drive is formatted correctly for macOS to be compatible with Time Machine.
Have you experienced this yourself? We’d love to hear your story in the comments.