
How to backup Mac to external drive
“`html
In the digital age, the importance of data backup cannot be overstated. Whether you’re working on critical projects, saving cherished memories, or managing important documents, ensuring that your data is secure is essential. One of the most effective ways to preserve your information is by learning how to backup Mac to external drive. In this comprehensive guide, we will delve into how you can set up your Mac for backups, the tools available, and best practices to ensure your data remains safe.
1. Understanding the Need for Backups
Backing up your data is like having an insurance policy. Mac users often believe that their devices are invulnerable, but accidents, hardware failures, or malicious software can strike at any time. According to a study by BackBlaze, approximately 140,000 hard drives fail each year. The best way to mitigate the risk of data loss is by regularly backing up your Mac. This practice not only safeguards your files but also helps you recover from unforeseen circumstances.
Furthermore, a survey conducted by the Digital Guardian revealed that 70% of workers have lost data at some point in their careers, leading to costly downtime and loss of productivity. By prioritizing backups, you can avoid the stress of losing essential files and maintain smooth operational flow.
2. Choosing the Right External Drive
When considering how to backup Mac to external drive, the first step is selecting the right external drive. There are various types available, including traditional hard disk drives (HDDs), solid-state drives (SSDs), and network-attached storage (NAS). HDDs are generally more affordable and offer larger capacities, while SSDs are faster and more durable but come at a higher price point.
If you’re frequently on the go, a portable SSD might be your best option due to its ruggedness and lightweight nature. However, if you’re looking for extensive storage for backups, a desktop HDD would suit better, given its larger capacity. It’s also wise to consider the interface; USB 3.0 or Thunderbolt connections typically provide faster data transfer speeds than USB 2.0.
When making your choice, consider how much data you need to back up. For example, if you’re a photographer with large collections of high-resolution images, an external drive with at least 2 TB of storage may be necessary. Additionally, look for drives with good reviews regarding speed and durability, as these factors can significantly impact your overall experience.
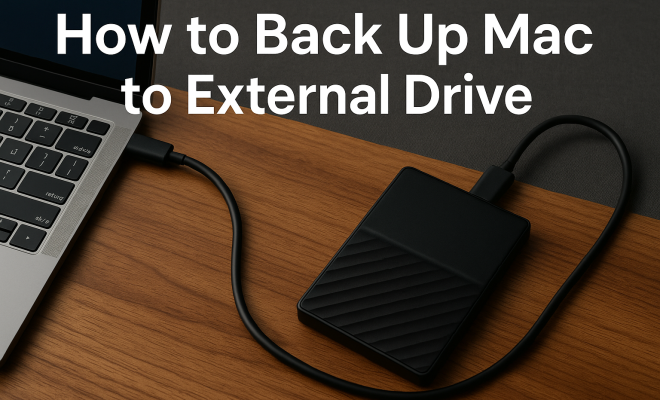
3. Connecting Your External Drive
Once you’ve chosen your external drive, the next step is connecting it to your Mac. Most external drives use USB or Thunderbolt cables, which make the process straightforward. Simply plug the drive into an available port on your Mac. Once connected, your Mac should recognize the drive automatically, and you may see it appear on your desktop or in the Finder sidebar.
If you encounter any issues, try a different port or cable. Sometimes, restarting your Mac can also help resolve connectivity problems. It’s worth noting that some drives may come pre-formatted for Windows, so you may need to format your drive to a Mac-compatible format like APFS or HFS+ before proceeding with backups.
Another consideration is the power supply for your external drive. Some larger drives require an external power source, while others draw power directly from the Mac. If you’re using a power-hungry desktop external drive, ensure you’re in a suitable location to plug it in and keep it powered during backups.
4. Using Time Machine for Seamless Backups
Apple’s Time Machine is a built-in feature designed to make backing up your Mac a hassle-free experience. To use Time Machine, simply connect your external drive, go to System Preferences, and select Time Machine. You can then select your external drive as the backup destination.
Time Machine offers incremental backups, meaning it only copies files that have changed since the last backup. This not only saves time but also conserves space on your external drive. Additionally, Time Machine allows for easy recovery of files. If you accidentally delete something, you can simply open Time Machine, browse through your backups, and restore the file with just a few clicks.
One of the advantages of using Time Machine is its ability to work seamlessly in the background, allowing you to focus on your tasks without worrying about backups. However, it’s important to note that Time Machine performs hourly backups for the past 24 hours, daily backups for the past month, and weekly backups for all previous months until the drive is full. If space runs low, older backups will be deleted automatically to make room for new ones. (See: importance of data backup.)
5. Manual Backups: A Hands-On Approach
While Time Machine is an excellent option for automated backups, some users prefer a more manual method of backing up their data. If you choose to backup Mac to external drive manually, start by creating a folder on your external drive where you can organize your files. You might want to categorize them by document type, date, or project.
To transfer files, simply drag and drop the folders or files you want to back up from your Mac to the external drive. This method gives you more control over what gets backed up and when. However, it requires a more active approach since you need to remember to back up your data regularly to ensure you don’t lose anything important.
Manual backups can also be an opportunity to evaluate which files are essential and which can be archived or deleted, helping you manage your data better. Consider using a consistent naming convention for your files and folders to make it easier to find what you need in the future.
6. Best Practices for Data Backup
To maximize the effectiveness of your backups, it’s crucial to establish a solid routine and follow best practices. First and foremost, back up your data regularly. Depending on how often your data changes, you may want to perform backups daily, weekly, or monthly. Additionally, consider keeping multiple backups in different locations. For instance, you could use both an external drive and a cloud storage service, ensuring your data is safe from physical damage or theft.
Another important aspect is verifying your backups. Occasionally check your external drive to ensure that backups are being created correctly and that you can access your files when needed. Also, regularly update your backup strategy as your data needs grow. As you accumulate more files, you may need a larger drive or a different backup method to accommodate them.
It’s also beneficial to have a backup plan in place for your most critical files. This could involve using a second external drive to ensure redundancy or implementing a cloud service that automatically backs up your key documents. This extra layer of security can save you a lot of headaches in the event of a drive failure or accidental deletion.
7. Restoring Files from Your Backup
Knowing how to restore files from your backup is just as important as backing them up in the first place. If you’re using Time Machine, restore is simple. Open the Time Machine application, navigate to the date of the backup, and select the files or folders you wish to recover. After selecting, click the “Restore” button, and your files will be returned to their original location on your Mac.
If you’ve manually backed up your data, the process is straightforward. Simply connect your external drive, locate the files or folders you want to restore, and drag them back to your Mac. It’s a handy way to recover data without needing complex procedures, ensuring you can quickly regain access to your essential files.
It’s wise to test your restoration process periodically, especially after making significant changes or updates to your backup strategy. By practicing restoring files, you can ensure you’re familiar with the process when a real data loss occurs. This preparedness can significantly reduce stress and downtime during an actual emergency.
8. Dealing with Disk Errors and Maintenance
Like any technology, external drives can experience issues over time. If you encounter disk errors when trying to access your backup, it may be time to perform maintenance. Macs come with a built-in utility called Disk Utility, which can help diagnose and repair disk-related issues.
To use Disk Utility, navigate to Applications > Utilities > Disk Utility. Select your external drive from the sidebar and click on the “First Aid” tab. This process will scan your drive for errors and attempt to repair them. Regular maintenance of your external drive can prolong its lifespan and ensure your data remains accessible.
Additionally, be mindful of the physical condition of your external drive. Avoid dropping it, and store it in a safe, dry place to prevent damage from moisture or extreme temperatures. If you notice unusual sounds coming from the drive, such as clicking or grinding, it may indicate a failure, and it’s best to stop using it immediately to prevent further data loss.
9. Exploring Alternative Backup Solutions
While backing up your Mac to an external drive is highly effective, it’s not the only option available. Cloud storage solutions like iCloud, Google Drive, and Dropbox offer convenient ways to back up and access your files from anywhere with an internet connection. These services often include automatic syncing features, which can be an attractive option for users who prefer a set-it-and-forget-it approach.
Additionally, third-party backup software like Carbon Copy Cloner and SuperDuper! can provide more advanced backup options, allowing for features like bootable backups and scheduled backups. Depending on your specific needs, exploring these alternative solutions could enhance your overall data protection strategy. (See: computer safety and data loss.)
Cloud solutions can also serve as a great complement to your external drive backup strategy. For instance, backing up your most critical files to a cloud service ensures that you have access to them even if your external drive fails or is lost. Plus, many cloud services offer versioning, which allows you to recover previous versions of files, a feature that can be invaluable in case of accidental edits or deletions.
10. Staying Informed and Adapting to New Technologies
The landscape of technology is always changing, and so are the best practices for data backup. Remaining informed about the latest developments in backup solutions, security threats, and hardware capabilities ensures that your data remains secure. Subscribe to tech blogs, participate in forums, and attend webinars to stay updated.
As you grow more comfortable with managing your backups, don’t hesitate to adapt your strategies. Whether it’s incorporating cloud solutions, switching to a faster external drive, or exploring new software, continuous adaptation is key to effective data management. Remember, safeguarding your data isn’t just about having backups; it’s about being proactive and prepared for whatever the future holds.
11. Common Backup Myths Debunked
Many myths surround data backups, leading users to make decisions that could jeopardize their data security. One of the most common myths is that simply deleting files from your Mac frees up space, which means they’re gone for good. In reality, unless you’ve backed up your files, deleting them from your Mac can lead to irreversible data loss. It’s crucial to understand that data may still be recoverable until it’s overwritten, but relying on this can be risky.
Another myth is that backups are only necessary for businesses or professionals. In truth, anyone who uses a computer can benefit from regular backups. Regardless of whether you’re a casual user or a professional, losing personal photos, emails, or documents can be devastating.
Lastly, some users believe that having files on the cloud means they don’t need to back up their data. While cloud storage is a great solution, a good practice is to have multiple backup methods. Combining the cloud with an external drive can offer the best of both worlds, providing accessibility and security.
12. Frequently Asked Questions (FAQ)
1. How often should I back up my Mac to an external drive?
The frequency of your backups depends on how often your files change. If you work on critical documents daily, consider daily backups. If your data changes less frequently, weekly backups might be sufficient. The key is to create a backup routine that fits your needs.
2. What’s the best format for my external drive?
For Macs, the best formats are APFS (Apple File System) or HFS+ (Mac OS Extended). These formats ensure compatibility and allow you to utilize macOS features like Time Machine. If you plan on using the drive with both Mac and Windows, consider formatting it to exFAT.
3. Can I use multiple external drives for backups?
Absolutely! Using multiple external drives can enhance your backup strategy. You can keep one drive at home and another at a different location to protect against theft, fire, or other disasters.
4. What should I do if my external drive is full?
If your external drive is full, consider upgrading to a larger drive or deleting older backups if you’ve verified that they’re no longer needed. You can also explore cloud storage options for additional space.
5. Is it safe to leave my external drive connected all the time?
While it’s generally safe to leave your external drive connected when using Time Machine, doing so continuously can wear the drive out faster. If you’re not actively using the drive, it’s best to disconnect it to extend its lifespan.
6. What should I do if Time Machine fails to back up?
If Time Machine fails, check your external drive’s connection and ensure it’s properly formatted. You can also review the Time Machine preferences to confirm the drive is selected and not full. Restarting your Mac may also resolve temporary issues.
7. Can I back up my applications as well?
Yes, you can back up applications, but keep in mind that some applications may require additional steps for reinstallation, such as having their license keys. Time Machine typically backs up applications, but for manual backups, you may need to drag application files from the Applications folder to the external drive.
13. The Role of Encryption in Data Security
When you’re considering how to backup Mac to external drive, the security of your data should be a top priority. Encrypting your external drive is a smart way to protect sensitive information. macOS provides built-in encryption options that you can enable when formatting your drive, ensuring that all data written to it is secure.
Encryption works by converting your data into a code that can only be deciphered with the correct password. This means that if your external drive falls into the wrong hands, the data on it remains unreadable without the right credentials. It’s particularly important for users handling confidential information, such as personal records or business documents.
To encrypt your external drive, you can use the Disk Utility app. Simply select your drive, choose the “Erase” option, then check the box to encrypt the data. After that, you’ll be prompted to create a password. Remember to keep this password secure, as losing it means losing access to your encrypted data.
14. Monitoring Backup Progress and Success
Keeping track of your backup process is vital to ensure everything works smoothly. When using Time Machine, you can check the backup status at any time by clicking on the Time Machine icon in the menu bar. This will show you when the last backup was completed and whether it was successful.
For manual backups, maintain a simple log or checklist to document backups. Note the dates and types of files backed up, which can help you confirm that recent data has been saved. This practice can also help you notice any irregularities in your backup routine, making it easier to pinpoint issues if they arise.
Additionally, consider checking the integrity of your backups periodically. This could be as simple as restoring a small file from your backup to ensure it works correctly. Regular checks can give you peace of mind and help prevent surprises in case of data loss.
15. Conclusion: The Importance of a Backup Strategy
In a world where digital data is central to both our personal and professional lives, having a robust backup strategy is not optional; it’s essential. Learning how to backup Mac to external drive is a crucial step in safeguarding your information. Remember, the best backups are those that are done consistently, securely, and with an understanding of the tools at your disposal. By following the guidelines and tips shared in this guide, you can ensure that your valuable data remains safe and accessible.