Run CHKDSK: Scan & Repair Windows Drive Errors
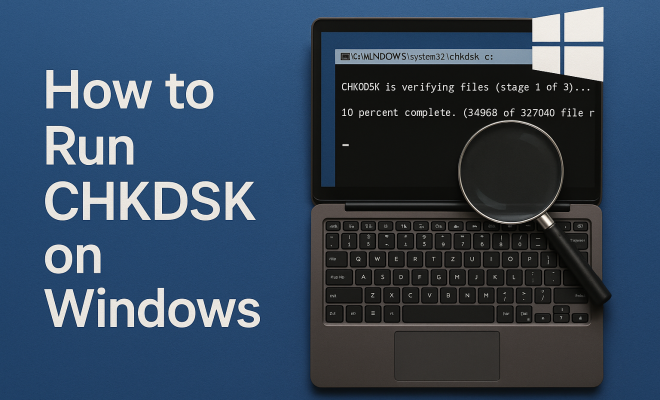
“`html
1. Understanding CHKDSK
CHKDSK, short for Check Disk, is a built-in Windows utility designed to scan and repair file system errors and bad sectors on your hard drive or storage device. This tool is crucial for maintaining the health of your system, especially if you notice performance issues, unexpected crashes, or file corruption. By running CHKDSK, you can identify and fix problems before they escalate into more serious issues.
When your computer encounters issues with file integrity, it can lead to data loss or a significant slowdown in performance. CHKDSK works by checking the file system structure and metadata for problems, ensuring that your files are accessible and your system runs smoothly. It’s a preventive measure that helps users maintain system reliability, making it an essential tool for every Windows user.
2. Why You Should Run CHKDSK Regularly
Running CHKDSK regularly can help prevent data corruption and improve system stability. Even if you don’t notice any immediate issues, performing routine checks can uncover hidden problems. Hard drives can develop bad sectors over time, which can lead to data loss. If left unchecked, these minor problems can become major headaches, resulting in expensive repairs or data recovery services.
Moreover, regular checks with CHKDSK can help ensure optimal performance. A fragmented file system can slow down access times, while errors may lead to application crashes. By proactively maintaining your hard drive, you can ensure your Windows environment is running at peak efficiency.
Research shows that nearly 30% of computer users have experienced some form of disk-related issue, with many being unaware of the underlying problems until it’s too late. Running CHKDSK can help identify these issues early, significantly reducing the risk of data loss.
3. Getting Started: Accessing CHKDSK
There are several ways to access CHKDSK in Windows, depending on your preferences. The simplest method is through the Command Prompt, but you can also run it through the properties menu of your hard drive in File Explorer. To get started, you first need to ensure you have administrative privileges, as running CHKDSK requires these permissions.
To access Command Prompt, search for it in the Start menu, right-click, and select ‘Run as Administrator.’ If you prefer using File Explorer, right-click on the drive you want to check, go to ‘Properties,’ and then navigate to the ‘Tools’ tab where you’ll find the ‘Check’ button under Error checking.
For users of Windows 10 or Windows 11, it’s as simple as typing “CHKDSK” in the search bar and selecting the appropriate option. This makes it even more accessible for everyday users who may not be familiar with navigating through menus.
4. How to Run CHKDSK via Command Prompt
Running CHKDSK via Command Prompt is one of the most effective methods. Here’s how you can do it:
- Open Command Prompt as an administrator.
- Type the command chkdsk C: (replace ‘C:’ with the appropriate drive letter if you’re checking a different drive).
- Press Enter. You’ll see a prompt indicating whether the drive is in use and whether you want to schedule the check for the next reboot.
If you want a more thorough check, you can add additional parameters to the command. For example, chkdsk C: /f will automatically fix any errors it finds, while chkdsk C: /r locates and repairs bad sectors on the disk.
For advanced users, combining both parameters like chkdsk C: /f /r is highly recommended. This combination addresses both logical errors and physical disk issues, making it a comprehensive command for ensuring disk health.
5. Running CHKDSK through File Explorer
If you prefer a graphical interface, you can run CHKDSK through File Explorer. Here’s how: (See: Wikipedia article on CHKDSK.)
- Open File Explorer and locate the drive you want to check.
- Right-click on the drive, and select ‘Properties.’
- Navigate to the ‘Tools’ tab and click on ‘Check’ under the Error-checking section.
Windows will scan the drive for errors. If issues are found, you’ll be given the option to repair them. This method is user-friendly and ideal for those who may not be comfortable using the command line.
Additionally, running CHKDSK through File Explorer offers a visual representation of the error-checking process, making it easier to understand and follow along compared to the command line interface.
6. Interpreting CHKDSK Results
After running CHKDSK, you’ll receive a report detailing the scan results. Understanding this report is crucial for determining the next steps. Common messages include:
- “No problems found”: This means your drive is in good health, and no action is needed.
- “Errors found and fixed”: This indicates that CHKDSK found issues and successfully repaired them.
- “Unable to fix all errors”: In this case, further actions may be required, such as more advanced repair tools or consulting a professional.
Be vigilant for recurring errors, as they can signal deeper issues with your hardware that might need addressing. If you see the same errors repeatedly after running CHKDSK, it could indicate an impending drive failure.
In instances where CHKDSK finds errors but can’t fix them, consider using more powerful tools like S.M.A.R.T. diagnostics, which can give insight into hardware health, helping you make informed decisions about disk replacement or repair.
7. CHKDSK Parameters Explained
CHKDSK has various parameters that enhance its functionality. Understanding these can help you customize how you run the utility:
- /f: Fixes any errors found on the disk.
- /r: Locates bad sectors and recovers readable information.
- /x: Forces the volume to dismount first, if necessary.
- /v: Displays the names of files on the disk while checking.
By combining these switches, you can run a comprehensive check that fits your specific needs. For example, typing chkdsk C: /f /r is a common command that repairs errors and checks for bad sectors.
For those wanting an even more detailed analysis, using the /scan option allows for quick checking without dismounting the volume, ideal for systems that require uptime.
8. Common Issues and Troubleshooting
While CHKDSK is a powerful tool, you may encounter issues while running it. Here are some common problems and their solutions:
- CHKDSK Stuck at 100%: Sometimes, the process may seem stuck. If it remains at 100% for an extended period, it could indicate a severe issue with the drive. Restarting the computer may help.
- Access Denied Errors: If you get permission errors, ensure you are running Command Prompt as an administrator.
- Drive in Use: CHKDSK cannot run on a drive that is currently in use. You may need to run it during boot-up by scheduling the check.
Addressing these issues promptly is essential to maintaining the health of your computer. If problems persist, seeking professional help may be necessary.
It’s also helpful to check for software or drivers that could be conflicting with CHKDSK. Sometimes, security software or system utilities may block CHKDSK from accessing the drive properly.
9. The Relevance of CHKDSK Today
With the increasing reliance on digital data, maintaining disk health has never been more critical. As files become larger and systems more complex, issues like file corruption and data loss can have serious repercussions. Running CHKDSK regularly can help mitigate these risks, ensuring your data remains intact.
In an age where cyber threats and data breaches are prevalent, preventative measures like CHKDSK are vital. The ability to identify and fix issues before they escalate not only saves time but also protects against irreversible damage to your data and system integrity. Staying proactive about disk maintenance is a smart practice for any Windows user.
Statistically, hard drives have an average lifespan of 3-5 years. Running CHKDSK regularly can extend that lifespan by identifying problems early on, thus helping users avoid the panic and expense of data loss. (See: CDC guidelines on data integrity.)
10. Advanced Uses of CHKDSK
Beyond basic error checking, CHKDSK can be used for more advanced diagnostics and repairs. For example, if you suspect a recent power outage caused issues, using the /scan parameter can help identify logical errors in real-time without unmounting the drive. This method is helpful in scenarios where you need to keep the system running while monitoring disk health.
Another advanced technique involves using CHKDSK in conjunction with the Windows Event Viewer. After running CHKDSK, you can review detailed logs of the operation in Event Viewer. This can provide insights into recurring issues or deep-seated problems that haven’t been resolved, allowing for a targeted approach in troubleshooting.
Additionally, users can leverage the /l parameter to change the logging level of CHKDSK, which can be particularly useful for developers or IT professionals who need detailed insights into the disk’s performance and health over time.
11. CHKDSK vs. Other Disk Maintenance Tools
While CHKDSK is a robust tool, it’s not the only option available for disk maintenance. Other third-party utilities, such as Defraggler or SpinRite, offer additional features that might suit specific needs better.
Defraggler, for example, not only optimizes disk performance by rearranging fragmented data but also provides options for folder-specific defragmentation, which can be more efficient in specific scenarios. SpinRite, on the other hand, specializes in recovering data from failing hard drives, utilizing sophisticated techniques to read data from damaged sectors that CHKDSK might not be able to recover.
Choosing the right tool depends on your needs. If your goal is to maintain a healthy disk primarily and you want a built-in solution, CHKDSK is excellent. However, in cases of severe corruption or recovery needs, supplementing with third-party software may be necessary.
Some users may prefer tools like CrystalDiskInfo, which focuses on monitoring the drive’s S.M.A.R.T. status. This software can provide real-time insights into the drive’s health, temperature, and anticipated failures, offering a comprehensive view of your disk status alongside CHKDSK.
12. When to Seek Professional Help
Even with powerful tools like CHKDSK at your disposal, there are situations where professional help is warranted. If you see persistent errors even after multiple CHKDSK runs, or if you encounter physical symptoms of drive failure (like strange noises, frequent crashes, or the drive not being recognized), it’s time to consult with a data recovery specialist.
Professional services can provide advanced diagnostic tools, and while they may come at a cost, the peace of mind and potential data recovery can be worth it. Many times, these professionals can recover data even when standard tools fail, using techniques that are not available to the average user.
In some cases, if your hard drive is still under warranty, contacting the manufacturer can be beneficial. They may offer replacements or repairs as part of their service, saving you from further headaches down the line.
13. Frequently Asked Questions (FAQ)
What does CHKDSK do?
CHKDSK scans your disk for file system errors, bad sectors, and other potential issues. It can repair many of these problems automatically, helping to maintain system stability and prevent data loss.
How often should I run CHKDSK?
It’s a good idea to run CHKDSK at least once every few months. If you notice specific issues, such as slow performance or file corruption, it’s wise to run it more frequently. (See: New York Times on computer maintenance.)
Can CHKDSK fix all disk problems?
While CHKDSK can fix many file system errors, it may not resolve all physical problems, such as hardware failure or serious corruption. In such cases, professional help may be needed.
Will running CHKDSK delete my files?
Running CHKDSK typically does not delete files. However, if it encounters unrecoverable data in bad sectors, it may mark that space as unusable, which can lead to data loss if those sectors contain files.
Is there a risk in running CHKDSK?
Generally, running CHKDSK is safe. However, if your drive is failing or there are substantial issues, running it might exacerbate the situation, leading to further data loss. Always back up your data before running CHKDSK if you’re experiencing problems.
How long does CHKDSK take to run?
The time it takes for CHKDSK to complete depends on the size of the drive and the extent of the problems it finds. It can take anywhere from a few minutes to several hours for larger drives with significant issues.
Can I run CHKDSK while using my computer?
You can run CHKDSK on non-system drives while using your computer, but if you want to check the system drive (typically C:), you may need to schedule it for the next reboot, as it requires exclusive access to the drive.
What should I do if CHKDSK fails?
If CHKDSK fails, consider the following steps: check for hardware issues, try running the tool again with different parameters, or use third-party disk utilities. If issues persist, professional help may be the best course of action.
Can I run CHKDSK on an external drive?
Yes, you can run CHKDSK on external drives. Just connect the drive to your computer and follow the same steps applicable for internal drives, using either Command Prompt or File Explorer.
What is the difference between CHKDSK and SFC?
CHKDSK checks the disk for file system errors and bad sectors, while System File Checker (SFC) scans for and repairs corrupted system files within Windows. Both tools serve distinct purposes but are important for overall system health.
Will CHKDSK fix my computer’s slow performance?
Running CHKDSK can resolve underlying disk errors that may contribute to slow performance. However, if the slowdown is due to software issues, insufficient RAM, or other factors, additional troubleshooting may be necessary.
“`
Trending Now
Frequently Asked Questions
What does CHKDSK do in Windows?
CHKDSK, or Check Disk, is a built-in Windows utility that scans and repairs file system errors and bad sectors on your hard drive. It helps maintain system health by ensuring files are accessible and preventing data loss due to corruption or performance issues.
How often should I run CHKDSK?
It's recommended to run CHKDSK regularly, even if you don't notice immediate issues. Routine checks can uncover hidden problems and prevent data corruption, ensuring optimal performance and system stability over time.
How do I access CHKDSK in Windows?
You can access CHKDSK in several ways, but the simplest method is through the Command Prompt. Just type 'chkdsk' followed by the drive letter you want to check, and press Enter to initiate the scan.
What are the signs that I need to run CHKDSK?
Signs that you should run CHKDSK include performance issues, unexpected crashes, file corruption, or if your computer is running unusually slow. Regular checks can help identify and fix these problems before they escalate.
Can CHKDSK fix bad sectors on my hard drive?
Yes, CHKDSK can identify and attempt to repair bad sectors on your hard drive. By checking the file system structure, it helps prevent data loss and maintains the overall reliability of your storage device.
Have you experienced this yourself? We’d love to hear your story in the comments.