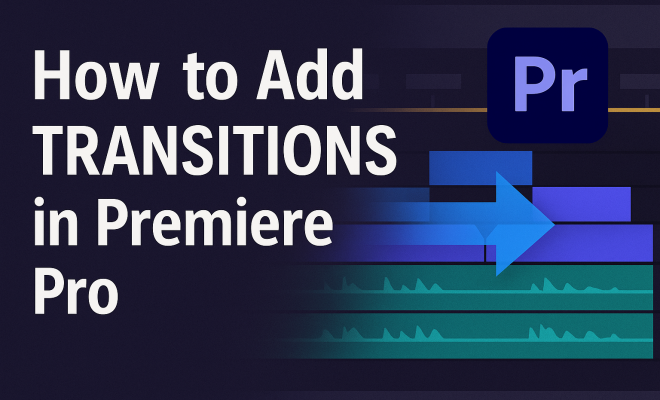
How to add transitions in Premiere Pro
“`html
1. Understanding Transitions in Video Editing
When you’re diving into video editing, you might wonder what makes a video more engaging. One often-used technique is the transition, which serves as a bridge between two clips. Transitions can significantly enhance the storytelling aspect of your video. They help manage the viewer’s attention, guide them through your narrative, and set the tone for what’s to come. In Adobe Premiere Pro, you have a plethora of options to choose from, allowing you to create seamless and visually appealing cuts.
Understanding the purpose of different transitions is crucial. Whether you want to make a quick cut feel smoother or introduce a dramatic shift in tone, the right transition can elevate your content. Common types include fades, wipes, and dissolves, each serving its unique purpose in creating a specific atmosphere or effect.
2. Getting Started: Setting Up Your Premiere Pro Project
Before you can add transitions in Premiere Pro, you need to ensure your project is set up correctly. Start by launching Premiere Pro and creating a new project or opening an existing one. Make sure your clips are imported and organized on the timeline. This organization allows for smoother editing and helps you identify where transitions will fit best.
Once your clips are in place, it’s time to preview them. Playback your video to determine where you want to add transitions. This step is crucial because the right timing can make or break the effectiveness of your transition, so make notes of the specific points where you feel a transition could enhance the viewer’s experience.
3. Navigating the Effects Panel
The Effects panel in Premiere Pro is your gateway to a wide range of transitions. To access it, go to the ‘Window’ menu and ensure that ‘Effects’ is checked. Once you have the panel open, look for the ‘Video Transitions’ folder. Here, you’ll find categories like ‘Dissolve,’ ‘Wipe,’ and ‘Slide.’ Each category contains multiple transition options that you can experiment with.
Understanding the different categories is vital. For instance, if you’re looking for a smooth transition, you might want to explore options within the ‘Dissolve’ category, such as Cross Dissolve or Film Dissolve. On the other hand, if you’re aiming for a more dynamic feel, consider the ‘Wipe’ or ‘Slide’ transitions. Familiarizing yourself with these options allows you to utilize the best transition for your narrative effectively.
4. Adding a Transition to Your Clips
Once you’ve selected a transition, adding it to your clips is easy. Simply drag the chosen transition from the Effects panel and drop it between the two clips you want to transition between. Premiere Pro will automatically apply the transition to the timeline. You’ll notice that the transition appears as a small icon on the timeline, indicating its position.
It’s important to review the transition in the Program Monitor after adding it. You can adjust the length of the transition by dragging its edges. A longer transition will create a more gradual change between clips, while a shorter one will produce a quicker effect. Experimenting with these lengths can help you find the right balance that fits the pacing of your video.
5. Customizing Your Transitions
Adobe Premiere Pro allows for extensive customization of transitions beyond just selecting and placing them. Once you’ve added a transition, click on it in the timeline to access the Effect Controls panel. Here, you can modify various parameters such as duration, alignment, and even the specific properties of the transition.
For instance, if you’re using a Cross Dissolve, you might want to adjust the opacity settings for a more subtle effect. Alternatively, with a Wipe transition, you could change the direction of the wipe for a different visual impact. Customizing your transitions can lead to a more polished and professional-looking final product. (See: Understanding video editing techniques.)
6. Utilizing Audio Transitions
When you’re working on adding transitions in Premiere Pro, it’s essential not to overlook audio transitions. Just as video transitions help smooth the visual flow, audio transitions can significantly enhance the auditory experience. Audio transitions, such as Constant Power or Exponential Fade, help in seamlessly blending audio tracks, ensuring that abrupt audio cuts are avoided.
To add an audio transition, simply navigate to the Effects panel, find the ‘Audio Transitions’ folder, and drag your chosen transition to the audio clips on your timeline. Similar to video transitions, you can customize audio transitions in the Effect Controls panel to better match your video’s rhythm and emotional tone.
7. Creating Custom Transitions
While the built-in transitions in Premiere Pro are great, sometimes you want something unique. Creating custom transitions allows you to personalize your edits further. You can achieve this using effects like keyframing, scaling, or rotation. For instance, by keyframing a clip’s position or scale, you can create a dynamic zoom or slide effect that transitions into your next scene.
To create a custom transition, you would typically start by layering two clips on the timeline. You can then apply keyframes to adjust properties like opacity, scale, or position over time. This technique offers a lot of creative freedom, allowing you to design transitions that fit perfectly with your video’s style and narrative.
8. Common Transition Mistakes to Avoid
Even seasoned editors can fall into the trap of overusing transitions or applying them inappropriately. One of the most common mistakes is using too many different transitions in a single project, which can distract rather than enhance. It’s essential to maintain a cohesive style throughout your video.
Another mistake is neglecting the timing of transitions. If a transition is too long or too short for the context, it can disrupt the flow of the narrative. Always consider the pacing of the clips before and after the transition. Take time to review your video and ensure that each transition aligns with your story and enhances the viewing experience.
9. Exporting Your Video with Transitions
Once you’ve finished adding transitions in Premiere Pro and are satisfied with your edits, it’s time to export your video. To do this, go to the ‘File’ menu and select ‘Export’ followed by ‘Media.’ Here, you can choose your desired format, resolution, and other settings before exporting your project.
Make sure to double-check the preview before finalizing your export. This step allows you to catch any last-minute issues with your transitions or overall video quality. Once exported, you can share your masterpiece with the world, knowing that you’ve added engaging transitions that enhance your storytelling.
10. Advanced Transition Techniques
For those looking to take their editing skills to the next level, exploring advanced transition techniques can be a game changer. One popular method is using Motion Graphics templates available in Adobe Premiere Pro. These templates offer pre-designed transitions that can be customized to fit the theme of your video.
Another advanced technique involves using nested sequences. By nesting clips, you can apply effects to a group of clips, including transitions, without having to adjust each individually. This method is particularly useful when you want to create complex transitions that involve multiple clips or layers. For example, you might create a split-screen effect that requires several clips to transition simultaneously, enhancing the visual impact of your story. (See: Importance of video editing in communication.)
Layering transitions is another creative approach. For instance, you can combine a Cross Dissolve with a Wipe transition to achieve a unique effect that captivates your audience. This layering can be achieved by stacking transitions on different video layers, adjusting their timing and properties to create a cohesive look.
11. Case Studies: Successful Use of Transitions in Videos
Looking at real-world examples can significantly enhance your understanding of how transitions can be used effectively. In a well-known travel vlog, the creator used quick cuts interspersed with smooth Cross Dissolves to convey the excitement of moving between locations. This combination allowed viewers to experience the fast pace of travel while also having moments of calm reflection between scenes.
Another example comes from narrative films where transitions are used to signify changes in time or perspective. For instance, a fade to black can indicate a shift in time, signaling to the audience that some time has passed. This subtle cue keeps the storytelling flowing without necessitating a jarring cut that could disrupt immersion.
Statistics from industry surveys reveal that videos with well-placed transitions see up to a 20% increase in viewer retention. This highlights the importance of mastering transitions to keep your audience engaged. Different platforms may favor various types of transitions; for instance, fast-paced cuts might work better on platforms like TikTok, while smoother transitions might suit YouTube vlogs better.
12. Frequently Asked Questions
What are the most common types of transitions in Premiere Pro?
The most common types include Cross Dissolve, Film Dissolve, Wipe, Slide, and Fade. Each serves a unique narrative purpose, so it’s essential to choose the one that fits your content best.
How can I adjust the speed of a transition?
You can adjust the speed of a transition by clicking on it in the timeline and dragging the edges to make it longer or shorter. A longer transition generally feels slower and more gradual, while a shorter one feels quicker and more abrupt.
Can I create my own custom transitions?
Yes! You can create custom transitions using keyframes, scaling, position changes, and effects. This approach offers flexibility and allows your transitions to align more closely with your project’s aesthetic.
Are audio transitions necessary when adding video transitions?
While not strictly necessary, audio transitions can greatly enhance the auditory experience of your video. They help smooth out any abrupt changes in audio that may occur when scenes change, ensuring a more polished final product.
What should I avoid when adding transitions in Premiere Pro?
Avoid overusing transitions, as this can distract viewers. Also, ensure that the timing of your transitions matches the pacing of your clips to maintain narrative flow. (See: Latest trends in video editing.)
How can I find inspiration for creative transitions?
Look at other video creators’ work, especially those in your field. Platforms like Vimeo, YouTube, and even Instagram can provide a wealth of ideas. Don’t hesitate to experiment with different combinations and styles in Premiere Pro to find what resonates with your vision.
13. Practical Tips for Using Transitions
When it comes to adding transitions, there are some practical tips you can follow to ensure effectiveness:
- Match the Style: Ensure the transition style matches the theme of your video. For instance, if you’re editing a romantic video, soft fades may be more appropriate than harsh wipes.
- Use Transitions Sparingly: Too many transitions can clutter your video. Use them strategically to maintain the viewer’s focus on the content.
- Timing is Key: Pay attention to the rhythm of your video. The best transitions often occur at natural breaks or shifts in the narrative.
- Test Different Options: Don’t hesitate to experiment with multiple transitions to see which one feels right. Sometimes, a transition that seems appropriate might not resonate during playback.
- Watch Other Videos: Analyze how professional videographers use transitions in their projects. This can provide insight and inspiration for your own editing.
14. Understanding the Psychological Impact of Transitions
Transitions aren’t just a technical aspect of video editing; they can also have a psychological impact on viewers. For instance, abrupt transitions may create tension or surprise, making them effective in horror or action genres. Conversely, smooth transitions can promote a sense of calm and continuity, suitable for storytelling and documentaries.
Research in cognitive psychology shows that viewers emotionally respond to visual stimuli. Transitions can manipulate these responses by pacing the viewer’s experience. For example, a slow fade might encourage reflection, while a quick cut might evoke excitement. Understanding these psychological aspects can enhance your editing choices.
15. Transition Trends in 2023
As video editing evolves, so do the trends in transitions. In 2023, several styles have begun to dominate the landscape:
- Dynamic Transitions: Fast-paced transitions that sync with music beats are popular, especially in social media content.
- Seamless Transitions: These create the illusion of continuous motion, perfect for travel vlogs and lifestyle videos.
- Layered Transitions: Combining multiple types of transitions for a complex effect is becoming increasingly popular, allowing for more creativity.
- Color and Graphic Overlays: Using colored graphic elements as part of the transition adds a modern twist, making content visually striking.
16. Resources for Further Learning
If you’re eager to deepen your knowledge and skills in using transitions in Premiere Pro, several resources can help:
- Adobe Tutorials: Adobe offers a range of official tutorials, ideal for learning both basic and advanced transition techniques.
- YouTube Channels: Following video editing channels can provide insights into new techniques and creative uses of transitions.
- Online Courses: Websites like Udemy or Skillshare have courses specifically focused on Premiere Pro that delve into transitions and other editing techniques.
- Editing Communities: Joining online forums or social media groups dedicated to video editing can offer feedback, ideas, and support.
17. Conclusion: Mastering Transitions for Engaging Videos
Mastering how to add transitions in Premiere Pro is essential for creating engaging and visually dynamic videos. By understanding the various types of transitions, customizing them to fit your narrative, and avoiding common pitfalls, you can significantly enhance your editing skills. With practice, experimentation, and continuous learning, you can develop a unique style that resonates with your audience, ultimately making your videos more impactful and memorable.
“`
Trending Now
Frequently Asked Questions
What are transitions in video editing?
Transitions in video editing are techniques that create a smooth change between two clips. They enhance storytelling by guiding viewer attention and setting the tone. Common types include fades, wipes, and dissolves, each serving a unique purpose to elevate the visual experience.
How do I set up a project in Premiere Pro for transitions?
To set up a project in Premiere Pro for transitions, launch the software and create or open a project. Import your clips and organize them on the timeline. Preview your video to identify the best points for adding transitions, ensuring effective timing to enhance viewer experience.
Where can I find transitions in Premiere Pro?
Transitions in Premiere Pro can be found in the Effects panel. Access it through the 'Window' menu and ensure 'Effects' is checked. Look for the 'Video Transitions' folder, which contains categories like 'Dissolve,' 'Wipe,' and 'Slide' for various transition options.
What types of transitions can I use in Premiere Pro?
In Premiere Pro, you can use various types of transitions, including fades, wipes, and dissolves. Each type serves a different purpose, such as creating a smooth cut or introducing a dramatic shift, enhancing the overall storytelling of your video.
Why are transitions important in video editing?
Transitions are important in video editing because they help manage viewer attention and create a seamless flow between clips. They can enhance storytelling, set the mood, and improve the overall visual appeal of your video, making it more engaging for the audience.
Have you experienced this yourself? We’d love to hear your story in the comments.