Mastering iPhone App Testing: A Comprehensive Guide
“`html
1. Understanding the Importance of Testing
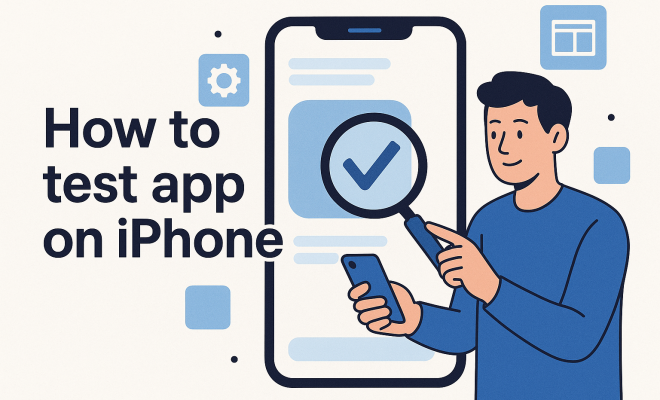
Testing an app on iPhone is a crucial phase in the development of any iOS application. It not only ensures functionality but also enhances user experience. With Apple’s strict app store guidelines, the need for thorough testing becomes even more pronounced. A well-tested app minimizes the chances of bugs slipping through, which could lead to poor reviews and low user retention.
Moreover, as iPhones come with various hardware specs and iOS versions, testing helps identify potential compatibility issues. This not only saves time in the long run but also secures your app’s reputation on the App Store. By prioritizing rigorous testing, you set your application up for success, ensuring it meets both user expectations and Apple’s quality standards.
2. Setting Up Your Testing Environment
Before you dive into testing, it’s essential to establish a proper testing environment. Start by ensuring you have the latest version of Xcode, Apple’s integrated development environment (IDE). Xcode comes equipped with essential tools for testing your app on iPhone, including the iOS Simulator and XCTest framework.
Additionally, you should also consider using physical devices for testing. While simulators are incredibly powerful, they cannot perfectly emulate the nuances of real devices. Testing on actual iPhones can reveal performance issues, battery consumption, and user interface inconsistencies that might not appear in a simulated environment. Therefore, having a mix of both is ideal for comprehensive testing.
You might also want to set up a continuous integration (CI) system. Using CI tools like Jenkins or CircleCI can automate your testing processes. By integrating testing into your build process, you can catch issues early and streamline your workflow. This approach helps ensure that every change pushed to your app is tested automatically, giving you peace of mind as you build new features.
3. Exploring Automated Testing Tools
Automated testing tools can significantly streamline the process of testing your app on iPhone. Tools like XCTest and Appium allow developers to create automated scripts that can run a series of tests without manual intervention. This not only saves time but also ensures consistency in testing.
For example, XCTest integrates seamlessly with Xcode, enabling you to write unit tests, UI tests, and performance tests. On the other hand, Appium supports cross-platform testing, making it a flexible choice if you’re developing apps for both iOS and Android. By incorporating automated testing, you can catch bugs early and focus on enhancing your app’s features.
Another notable tool is XCTest, which allows for UI testing. This means you can simulate user interaction with your app, ensuring that all elements work as expected. With XCTest, you can create tests that mimic user actions, such as scrolling, tapping, and entering text, providing a thorough assessment of your app’s usability.
Also, consider using tools like Fastlane, which can automate tedious tasks like building and releasing your app. This can be particularly helpful for ensuring that your testing environment is always up to date and that your app is continuously delivered with the latest features and fixes.
4. Implementing Manual Testing Strategies
While automation plays a crucial role, manual testing remains an indispensable aspect of the app testing process. It allows testers to evaluate the app’s user experience, perform exploratory testing, and identify usability issues that automated tests might overlook. Manual testing ensures that the app functions as intended in real-life scenarios.
When testing manually, consider using different testing techniques such as exploratory testing, usability testing, and regression testing. Exploratory testing encourages testers to navigate through the app without predefined scripts, helping uncover hidden bugs. Usability testing focuses on how easy and intuitive it is for users to navigate your app. By combining both manual and automated testing, you create a robust testing strategy. (See: Apple App Store testing guidelines.)
Another effective manual testing strategy is A/B testing, where you release two versions of your app to different user groups and compare their interactions. This method helps identify which features resonate better with users and can guide future updates or feature additions.
Documenting your manual testing process is equally important. Keeping a detailed log of test cases, issues found, and steps taken to resolve them not only helps in tracking progress but also provides insights for future testing cycles. It creates a knowledge base that can be referred back to, ensuring continuous improvement.
5. Conducting Beta Testing with Real Users
Beta testing is a critical step in the journey of testing an app on iPhone. By releasing your app to a select group of real users before the official launch, you can gain valuable feedback on functionality and user experience. Beta testers can provide insights into unique issues that you might not have encountered during internal testing.
Apple offers TestFlight, a user-friendly platform that allows developers to invite beta testers easily. You can distribute your app to up to 10,000 testers and gather valuable feedback on performance, bugs, and usability. By engaging with real users, you not only improve your app but also build a community that feels invested in your product.
During the beta testing phase, create clear communication channels for testers to report feedback. Consider utilizing platforms like Slack or Discord to create a dedicated space for discussion. This not only facilitates reporting issues but also allows testers to share their experiences and suggest improvements.
Additionally, consider incentivizing beta testers with rewards or early access to premium features. This can motivate users to participate actively and provide more detailed feedback, ultimately leading to a better app experience.
6. Utilizing Analytics for Insightful Feedback
In the world of app testing, numbers tell a story. Utilizing analytics tools can provide in-depth insights into how users interact with your app. Tools like Firebase Analytics and Mixpanel allow you to track user behavior, engagement, and retention metrics. By leveraging this data, you can make informed decisions about improvements and identify areas that require further testing.
For instance, if analytics show that users are dropping off at a specific point in your app, it could indicate a usability issue or a bug that needs to be addressed. By continuously monitoring these metrics, you can iterate on your app effectively, ensuring it meets user needs and expectations.
Consider setting up funnels in your analytics tool to visualize the user journey through your app. This can help pinpoint where users might be facing challenges or what features are most engaging. Tracking events, like button clicks or screen views, can further clarify user behavior and inform design choices.
It’s also important to analyze user feedback collected from app reviews and ratings on the App Store. These insights can offer a qualitative dimension to your analytics, helping you understand the “why” behind user behavior. Regularly reviewing this feedback will give you a holistic understanding of your app’s performance and areas for improvement.
7. Preparing for Submission to the App Store
Once you’ve thoroughly tested your app on iPhone, it’s time to prepare for submission to the App Store. This step involves ensuring that your app meets all of Apple’s guidelines, such as privacy policies, user interface design, and functionality. It’s crucial to review the App Store Review Guidelines to avoid rejection.
Additionally, consider the app’s metadata, including its title, description, and keywords. A well-optimized app listing can significantly impact your app’s visibility. Ensure you’ve also prepared high-quality screenshots and promotional materials, as these will attract users. Remember, the goal is to present your app as polished and professional, reflecting the effort you’ve put into testing and development.
As part of your submission process, consider writing a compelling app description that highlights its unique features and benefits. Use keywords strategically to improve searchability, but make sure the description remains engaging and informative. (See: Research on mobile app testing.)
Before hitting that submit button, conduct a final review of your app. Check for any last-minute bugs, ensure all resources are correctly linked, and verify that your app complies with Apple’s latest guidelines. A thorough final check can save you the headache of rejection and delays in getting your app into users’ hands.
8. Ongoing Testing and Updates
Testing doesn’t stop once your app is live on the App Store. Continuous testing and updates are vital to maintaining your app’s quality and relevance in a fast-paced market. As user feedback comes in, analyze it and prioritize updates that address common issues or requests.
Implementing a regular update cycle can help you stay ahead of bugs and incorporate new features based on user feedback. For instance, consider releasing minor updates every few weeks, with major updates quarterly. This approach keeps users engaged and shows that you are committed to improving their experience.
In addition to bug fixes, think about including new features in your updates. Monitor trends in app development and user preferences to ensure your app evolves with your audience’s needs. Regularly updating your app can help maintain its position in App Store rankings and increase user retention.
Utilizing user feedback in your update cycles is essential. Create surveys or polls within your app to gather insights from your users about what they would like to see next. This not only fosters a sense of community but also ensures that your updates are user-driven.
9. Common Testing Challenges
Even the best-planned testing processes can encounter challenges. Understanding these common issues can help you better prepare and mitigate potential pitfalls in your app testing journey.
One major challenge is device fragmentation. With numerous iPhone models and iOS versions in circulation, ensuring compatibility can be tricky. Building a comprehensive device matrix can help you manage testing across different platforms effectively. Make sure to prioritize testing on devices that represent your user base.
Another issue is the complexity of testing user interactions. Users may behave unexpectedly, making it hard to predict how they will interact with your app. Implementing user behavior analytics can help you gather data about real user interactions, allowing you to refine your app based on actual usage patterns.
Lastly, keeping up with evolving App Store guidelines can be daunting. Apple frequently updates its rules and requirements, which can affect your app’s eligibility. Subscribe to Apple Developer news and forums to stay informed about changes and ensure your app remains compliant.
10. FAQ: Testing an App on iPhone
What is the best way to test an app on iPhone?
The best way to test an app on iPhone is to combine both automated and manual testing strategies. Automated testing tools help streamline the process, while manual testing allows for a better evaluation of user experience.
How do I set up a testing environment for my iPhone app?
To set up a testing environment, you need to install the latest version of Xcode and utilize both the iOS Simulator and real devices. It’s also beneficial to integrate continuous testing tools to streamline your processes.
What should I include in beta testing?
In beta testing, you should include a diverse group of users who can provide feedback on functionality, usability, and performance. Use platforms like TestFlight to manage your beta testing efficiently, and create channels for testers to report issues and suggestions.
How can I improve my app’s performance during testing?
Improving app performance can be achieved through iterative testing and using analytics tools to track user behavior. Focus on optimizing loading times, memory usage, and responsiveness based on feedback from testing phases.
What are some common mistakes to avoid during app testing?
Common mistakes include not testing on real devices, failing to gather user feedback, overlooking documentation, and neglecting to keep up with App Store guidelines. Each of these can significantly affect the success of your app in the market.
How often should I update my app after launch?
It’s ideal to release minor updates every few weeks and significant updates quarterly. Regular updates based on user feedback keep your app relevant and engaged with your users.
What are the differences between manual and automated testing?
Manual testing involves human testers executing test cases without automation, allowing for a nuanced evaluation of user experience and usability. Automated testing, on the other hand, uses scripts and tools to perform tests, making it faster and more efficient for repetitive tasks. Each approach has its strengths, and using a combination can yield the best results.
How do I address user feedback post-launch?
After your app is live, actively monitor user reviews and feedback. Use tools to track common issues and suggestions. Consider engaging with users directly through social media or in-app feedback forms to understand their experiences better. Prioritize updates that address frequent concerns and communicate your improvements to your user base.
What types of testing should I prioritize?
Prioritize functional testing to verify that your app operates as expected. Follow that with usability testing to ensure a seamless user experience. Performance testing is also essential, particularly for apps with high traffic or resource-intensive functionalities. Finally, security testing should not be overlooked, especially if your app handles sensitive user data.
By following these steps, you can effectively test your app on iPhone, ensuring quality and user satisfaction. Testing is not just a phase; it’s a continuous journey that supports your app’s growth and success in the competitive landscape of the App Store.
“`
Trending Now
Frequently Asked Questions
How do I test my app on an iPhone?
To test your app on an iPhone, set up a proper testing environment using the latest version of Xcode. Utilize the iOS Simulator for initial testing, but ensure to test on physical devices as well to uncover performance issues and UI inconsistencies.
Why is it important to test an app before release?
Testing an app before release is crucial as it ensures functionality, enhances user experience, and minimizes the risk of bugs. Thorough testing helps meet Apple’s app store guidelines and secures your app's reputation, ultimately improving user retention.
What tools are needed for testing an iOS app?
Essential tools for testing an iOS app include Xcode, which provides the iOS Simulator and XCTest framework. Additionally, consider using continuous integration tools like Jenkins or CircleCI to automate your testing processes and catch issues early.
Should I use a simulator or a real device for testing?
While simulators are useful for initial testing, real devices are essential for identifying performance issues, battery consumption, and user interface inconsistencies. A combination of both methods provides the most comprehensive testing experience.
What is continuous integration in app testing?
Continuous integration (CI) in app testing involves integrating automated testing into your build process. Using CI tools like Jenkins or CircleCI allows you to automatically test every code change, catching issues early and improving your development workflow.
What did we miss? Let us know in the comments and join the conversation.