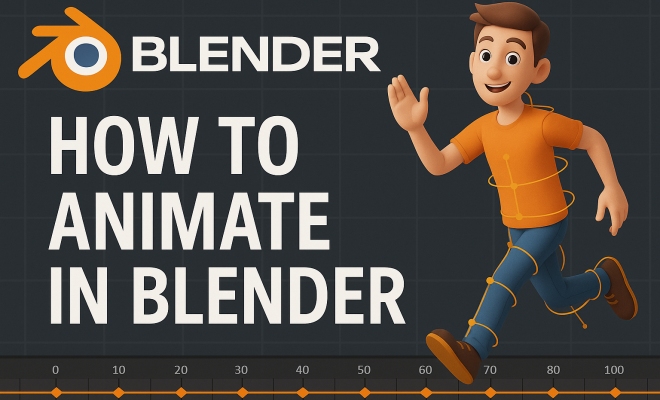
How to animate in Blender
“`html
Creating stunning animations has never been more accessible, thanks to powerful tools like Blender. If you want to animate in Blender, you’re in the right place. This comprehensive guide will explore the essential aspects of animation in Blender, from basic concepts to advanced techniques. Whether you’re a novice or have some experience, these tips will help you elevate your animation skills and achieve the results you desire.
1. Understanding Blender’s Interface
Before you dive into animation, it’s crucial to familiarize yourself with Blender’s interface. Upon opening Blender, you’ll be greeted by the default layout, which includes the 3D view, timeline, and property panels. Understanding where to find each tool is fundamental to efficiently animate in Blender.
The top bar features your menu options, while the sidebar contains essential tools like the transform and properties panels. Customize your workspace according to your needs by moving or resizing panels. Utilizing multiple screens can also help you manage complex animations by allowing you to view different aspects simultaneously.
2. Essentials of Keyframe Animation
Keyframe animation is the backbone of most animations created in Blender. Keyframes mark specific points in time where a change occurs, such as the position or rotation of an object. To start, select your object, move it to your desired position, and insert a keyframe by pressing ‘I’ on your keyboard. Choose the property you want to animate — location, rotation, or scale.
Once you’ve set your initial keyframe, move down the timeline and make adjustments. Blender will interpolate between these keyframes, creating smooth transitions. Mastering this technique will allow you to create fluid animations that captivate your audience.
3. Using the Graph Editor
The Graph Editor is a powerful tool that allows you to refine your animations beyond simple keyframe adjustments. It visualizes the curves of your animated properties, enabling you to manipulate the timing and spacing of your animations effectively. Select an object and open the Graph Editor to see the curves associated with your keyframes.
Adjusting these curves can help you create more dynamic animations. For instance, you can make movements more realistic by tweaking the speed of acceleration and deceleration. Learning how to use the Graph Editor is essential for anyone serious about mastering animation in Blender.
4. Animation Workflow: Planning and Storyboarding
Every great animation starts with a solid plan. Before you even open Blender, take the time to storyboard your animation. This process involves sketching out your scenes, identifying key moments, and determining the overall flow of your animation. Storyboarding helps clarify your vision and saves time during the actual animation process.
After storyboarding, create an animation workflow that includes blocking out key poses and timing. This method allows you to focus on the essential parts of your animation before adding details and refining movements. A well-thought-out workflow can significantly enhance the quality of your final product.
5. Character Rigging Basics
Animating characters in Blender requires a solid understanding of rigging. Rigging involves creating a skeleton for your character, allowing for realistic movement. Start by adding an armature object and then position the bones within your character model. Ensure that the bones are correctly parented to the mesh for effective deformations.
Once your character is rigged, you’ll need to create animations using pose modes. This allows you to manipulate the bones and bring your character to life. Proper rigging is essential for creating believable character movements and is a skill every animator should master.
6. Exploring the Dope Sheet
The Dope Sheet is another vital component of Blender’s animation toolkit. It provides an overview of all your keyframes and allows you to manage them effectively. You can select, move, and duplicate keyframes, making it easier to adjust timing across your animation. (See: Blender software overview on Wikipedia.)
This tool is particularly useful for complex animations with multiple objects. By organizing your keyframes in the Dope Sheet, you can quickly identify areas that require adjustments without having to navigate through the timeline repeatedly. Understanding this tool can streamline your animation process and enhance productivity.
7. Adding Materials and Lighting for Impact
Animation goes beyond just movement; it’s also about creating a captivating visual experience. To achieve this, focus on your materials and lighting. Blender offers a robust shader editor where you can create and customize materials for your objects. Experiment with different textures and shaders to give your animation depth and realism.
Lighting plays a critical role in setting the mood of your animation. Use a combination of different light sources — point lights, area lights, and spotlights — to create a dynamic atmosphere. Learning how to properly light your scenes will enhance the visual storytelling aspect of your animations and make them more engaging.
8. Mastering Animation Techniques: Ease In and Ease Out
One of the key principles of animation is the concept of “ease in” and “ease out.” This technique involves gradually accelerating and decelerating movements rather than having them start and stop abruptly. To apply this in Blender, adjust the interpolation settings in the Graph Editor.
By utilizing ease in and ease out, you can create more natural and fluid animations. This technique is particularly important for character animations where movement realism is crucial. It adds a level of sophistication to your animations that can significantly impact how they are perceived.
9. Utilizing Add-ons and Tools
Blender has a vibrant community that contributes to its extensive library of add-ons and tools. These resources can enhance your animation capabilities and streamline your workflow. For instance, consider using add-ons like Animation Nodes or Easy Rig, which can simplify complex animation tasks and allow for greater creativity.
Keep an eye on Blender’s updates and community forums to discover new tools and techniques that can aid your animation process. Regularly exploring available resources can keep your skills sharp and help you stay ahead in the ever-evolving world of animation.
10. Practice and Community Engagement
The most effective way to improve your ability to animate in Blender is through consistent practice. Dedicate time each week to experiment with different techniques and styles. Participate in animation challenges or create personal projects to push your boundaries.
Moreover, engaging with the Blender community can provide valuable feedback and inspiration. Join forums, attend workshops, or follow tutorials from experienced animators. Collaboration and sharing knowledge can lead to significant skill growth and open up new opportunities in the animation field.
11. Advanced Animation Techniques
Once you’ve mastered the basics, it’s time to explore some advanced animation techniques that can elevate your skills even further. Techniques such as motion capture, physics simulations, and non-linear animation can add depth and complexity to your projects.
For instance, motion capture allows you to apply real-world movements to your characters, creating realistic animations without the need for extensive keyframing. You can achieve this by using motion capture devices or software that tracks human movement. Blender supports various formats, including BVH, making it easier to integrate motion capture data into your projects.
Physics simulations also provide a way to create more dynamic animations. For example, simulating cloth, fluids, or soft bodies can add a layer of realism to your animations. Blender’s built-in physics engine allows you to create these effects easily. Experimenting with these tools will not only improve your animations but will also give you a competitive edge in the industry.
12. Animating for Different Media
Understanding how to animate in Blender for different media types can broaden your skill set. Whether you’re creating animations for games, films, or web applications, each medium has specific requirements and best practices.
For instance, game animations often require lower polygon counts and optimized rigs to ensure smooth performance. You might need to use techniques like baking animations or creating sprite sheets for 2D game assets. In contrast, film animations might allow for more detailed models and richer animations, as performance isn’t as much of a concern. (See: New York Times article on Blender.)
By tailoring your approach to the specific medium, you can produce better results that align with the intended use of your animations.
13. Showcasing Your Work
After spending countless hours perfecting your animations, showcasing your work becomes essential. Building a portfolio that highlights your best projects is crucial for attracting potential clients or employers. Consider creating a demo reel that includes snippets of your animations, demonstrating your range and skill.
Platforms like ArtStation and Behance are excellent for sharing your work with a larger audience. Additionally, social media channels such as Instagram and TikTok are great for quick shares and reaching out to potential followers. Networking through these platforms can also lead to collaborations and job opportunities.
Don’t forget to include detailed descriptions of your projects, explaining your process and the techniques you used. This context can help viewers appreciate the effort and skill involved in your work.
14. Frequently Asked Questions
What are the system requirements for Blender?
Blender is available for Windows, macOS, and Linux. While it can run on a variety of systems, a good GPU is recommended for smooth performance, especially during rendering and complex simulations. A minimum of 8 GB of RAM is advisable, though 16 GB or more is preferred for larger projects.
Can I use Blender for 2D animation?
Absolutely! Blender has a feature called Grease Pencil, which allows for 2D animation within a 3D environment. This tool provides artists with the flexibility to create hybrid animations and integrate 2D elements seamlessly into their 3D projects.
Is Blender suitable for beginners?
Yes, Blender is designed to cater to users of all skill levels. There are plenty of tutorials and community resources available to help beginners get started. The interface can be overwhelming at first, but with practice, you’ll find it to be user-friendly.
What’s the best way to learn Blender animation?
The best way to learn is by doing. Start with simple projects and gradually increase the complexity as you gain more confidence. Online tutorials, forums, and community events can provide additional support and guidance. Consider joining an online course or workshop for structured learning.
Are there any alternatives to Blender for animation?
While Blender is a powerful open-source option, there are other alternatives like Maya, Cinema 4D, and 3ds Max. Each of these has its strengths and is widely used in the industry. Your choice will depend on your specific needs, budget, and the type of animation you’re interested in.
Can Blender handle animation for virtual reality (VR)?
Yes, Blender is capable of creating animations tailored for VR applications. You can design immersive environments and animate objects to enhance the user experience in VR. Understanding how to optimize your animations for VR, including frame rates and interactivity, will be essential for producing quality content.
How do I optimize my animations for better performance?
Optimizing animations involves reducing polygon counts, using lower resolution textures, and baking animations where possible. This can drastically improve performance, especially for games or interactive projects. Additionally, consider using LOD (Level of Detail) techniques to manage resources efficiently.
What are some common mistakes to avoid when animating in Blender?
Common mistakes include neglecting the use of reference material, resulting in unrealistic movements, and failing to plan animations ahead of time. Not utilizing Blender’s powerful tools like the Graph Editor and Dope Sheet can also lead to inefficient workflows. Always take the time to review and refine your animations. (See: Blender in computer science research.)
Mastering animation in Blender isn’t an overnight process, but with dedication and the right mindset, you can create captivating animations that tell powerful stories. Explore the tips outlined in this guide, and you’ll be well on your way to becoming a skilled animator!
15. Inspiration from the Animation Industry
To truly excel at animating in Blender, it’s helpful to draw inspiration from successful animations in the industry. Films by studios like Pixar and DreamWorks often showcase innovative animation techniques, character design, and storytelling. Analyzing these works can provide insight into crafting your animations.
Additionally, attending animation film festivals or watching award-winning shorts can expose you to various styles and techniques that you may want to incorporate into your own work. Look into the ‘making of’ documentaries which often accompany these films, as they reveal the behind-the-scenes processes and challenges the animators faced.
16. Trends in Animation
Animation is an ever-evolving field, and staying updated with current trends can help you remain relevant. For instance, the rise of augmented reality (AR) is changing the way animations are created and experienced. Understanding how to create animations that can be integrated into AR environments will broaden your skill set and marketability.
Additionally, trends like stylized animations or hyper-realistic characters are gaining traction. Keeping an eye on platforms like YouTube and Instagram, where many animators share their processes, can provide a glimpse into what’s currently popular in the animation sphere.
17. Building a Creative Workflow
A creative workflow is crucial for ensuring that your animation projects progress smoothly. Start by organizing your assets in a systematic manner; use folders to keep models, textures, and animations separate. This organization will save you time and frustration when working on larger projects.
Consider using a project management tool or software to track your progress and deadlines. Set achievable milestones to keep your motivation high. Collaboration tools can also be beneficial if you’re working with a team, allowing for better communication and resource sharing.
18. Future of Animation with Blender
The future of animation with Blender looks promising, especially with the continuous updates and innovations being introduced. The developers are consistently enhancing the software with new features that push the boundaries of what’s possible in animation. Technologies like real-time rendering and machine learning are starting to be integrated into Blender, making the process faster and more intuitive.
As virtual and augmented reality become more mainstream, Blender’s capabilities are likely to expand to accommodate these mediums effectively. Keeping up with software updates and actively participating in the community can prepare you for the changes that lie ahead in the animation landscape.
“`
Trending Now
Frequently Asked Questions
How do I get started with animation in Blender?
To get started with animation in Blender, familiarize yourself with the interface, focusing on the 3D view, timeline, and property panels. Learn the basics of keyframe animation, where you mark specific points in time for changes in your objects, and practice inserting keyframes to create smooth transitions.
What is keyframe animation in Blender?
Keyframe animation in Blender involves setting specific points in time, called keyframes, where changes occur in an object's properties, such as location, rotation, or scale. By inserting keyframes and adjusting them over time, Blender interpolates between these points, resulting in fluid animations.
How can I use the Graph Editor in Blender?
The Graph Editor in Blender is a tool that allows you to visualize and refine your animations by adjusting the curves of your keyframes. It provides a more detailed control over the timing and easing of your animations, enabling you to create more polished and dynamic results.
What are the essential tools for animating in Blender?
Essential tools for animating in Blender include the 3D view for modeling, the timeline for managing keyframes, and the Graph Editor for fine-tuning animations. Familiarizing yourself with these tools and customizing your workspace can significantly enhance your animation workflow.
Can beginners learn animation in Blender?
Yes, beginners can learn animation in Blender! The software offers a user-friendly interface and a wealth of resources. By starting with basic concepts like keyframe animation and gradually exploring advanced techniques, anyone can develop their animation skills and create impressive projects.
What did we miss? Let us know in the comments and join the conversation.