Mastering Blender Rendering: A Comprehensive Tutorial
“`html
Rendering in Blender is a crucial skill for anyone involved in 3D modeling and animation. Whether you are a hobbyist or a professional, mastering the rendering process can drastically improve the quality of your projects. This Blender rendering tutorial aims to guide you through the intricacies of rendering in Blender, from initial setup to advanced techniques that will make your renders stand out.
1. Understanding Rendering in Blender
Rendering is the process of generating an image from a 3D model through computer algorithms. In Blender, rendering allows you to bring your digital creations to life by converting them into 2D images or animations. The rendering engine takes into account various factors like lighting, textures, and camera angles to produce the final output. Blender supports multiple render engines, including Eevee and Cycles, each with its strengths and weaknesses.
Cycles is a ray tracing engine that simulates realistic lighting and material properties, making it ideal for photorealistic renders. On the other hand, Eevee is a real-time render engine that prioritizes speed, allowing for quick previews and animations without sacrificing too much visual quality. Understanding which engine to use for your project is essential, as it can influence the final appearance and render time significantly.
2. Setting Up Your Scene for Rendering
Before diving into rendering, it’s essential to set up your scene correctly. This process involves arranging your models, lights, and camera. Start by ensuring that your models are positioned in a way that highlights their best features. Use reference images if necessary to guide your layout.
Lighting plays a vital role in rendering. In Blender, you can add various light sources such as point lights, area lights, and sun lamps. Experiment with the intensity and color of the lights, as they can dramatically change the mood and impact of your final render. Once your models and lighting are set, position your camera at a suitable angle. Use the camera view (Numpad 0) to see what the final render will capture, making adjustments as needed.
3. Material Setup for Realistic Renders
The materials you apply to your models significantly affect how they look in the final render. Blender allows for extensive material customization using the Shader Editor, where you can create complex materials with nodes. For realistic results, pay close attention to properties like color, glossiness, and roughness.
Textures also play a crucial role in material realism. You can use image textures for more detailed surfaces or procedural textures for generating patterns and effects. Make sure to UV unwrap your models as this will allow the textures to be mapped correctly. Once you’ve set up your materials, it’s advisable to render a few test images to see how they appear under different lighting conditions.
4. Camera Settings and Composition Techniques
Camera settings can have a profound impact on the quality of your renders. Adjusting properties such as focal length, depth of field, and sensor size can help achieve the desired effect in your final image. A longer focal length can compress your scene, while a shorter one can create a more dramatic perspective.
Composition is equally important. Employ techniques like the rule of thirds or leading lines to draw the viewer’s eye to the focal point of your render. Taking the time to compose your shot thoughtfully can make a significant difference in the impact of your final image.
5. Rendering Settings: Choosing the Right Options
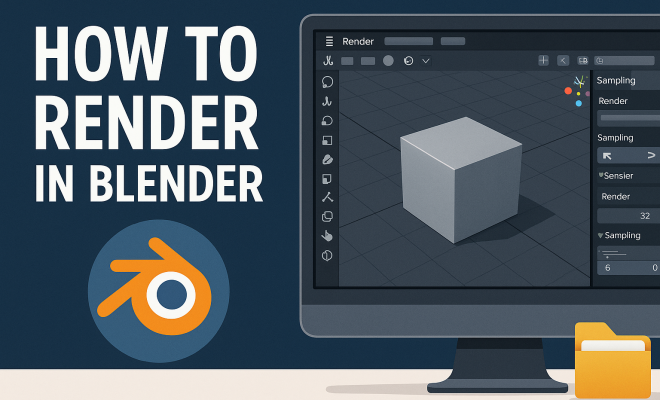
Once your scene is set, and you’re satisfied with your materials and lighting, it’s time to delve into rendering settings. In Blender, you’ll find a variety of options that can enhance your output quality. Start with the Render Properties tab where you can choose between Eevee and Cycles. If you opt for Cycles, you can adjust the sample count, which controls the number of rays each pixel uses to calculate color and light.
For high-quality images, a higher sample count is advisable, but this will also increase render time. You can also enable features like denoising, which reduces noise in your render, and filmic color management for better dynamic range. Make sure to set your resolution appropriately, usually 1920×1080 for HD renders, but higher for print-quality images. (See: Rendering in computer graphics.)
6. Post-Processing Techniques for Enhanced Renders
After rendering, many artists turn to post-processing to refine their images further. Blender’s Compositor allows for powerful adjustments such as color correction, adding effects, and even compositing multiple render layers. You can enhance the contrast, saturation, or brightness of your final render to make it pop.
Another common post-processing technique is the addition of depth of field or bloom effects. These can create a more cinematic feel and draw attention to specific areas of your render. Don’t forget to save your project often and keep your original render files separate from your post-processed images for flexibility in future edits.
7. Common Rendering Issues and Troubleshooting
Despite careful preparation, you may encounter common rendering issues. One frequent problem is rendering artifacts, such as noise or flickering. These issues can often be resolved by increasing the sample count or adjusting the light settings. Sometimes, materials may not appear as expected due to incorrect texture mapping, so double-check your UV unwrapping and texture settings.
Another common problem is excessive render times. If your renders are taking an unmanageable amount of time, consider optimizing your scene by reducing polygon counts, using simpler materials, or adjusting light settings. Utilizing render layers can also help speed up the process by rendering complex elements separately and compositing them later.
8. Learning Resources and Community Support
The Blender community is vast and filled with resources for learning how to render effectively. Websites like Blender Guru and CG Cookie offer tutorials tailored for all skill levels. YouTube is another treasure trove of Blender tutorials where you can find rendering techniques from industry professionals.
Additionally, engaging with forums such as Blender Artists or the Blender subreddit can provide valuable insights and support. Don’t hesitate to ask questions or share your work for feedback—community interaction can significantly enhance your learning curve.
9. Comparing Eevee and Cycles: Choosing the Right Engine
When deciding between Eevee and Cycles, consider the type of project you’re working on. If your goal is to create quick animations or work on a game asset, Eevee’s speed and real-time capabilities can be incredibly appealing. Its use of screen-space reflections and simplified lighting models makes it popular for non-photorealistic renders.
However, if you’re aiming for photorealism, Cycles is the better choice. Its ray tracing capabilities provide superior light interaction, allowing for more accurate shadows and reflections. This realism often comes at the cost of render speed, but for high-quality stills or cinematic sequences, the time investment can be worth it. As a rule of thumb, consider your audience and final output to make the best choice.
10. Advanced Rendering Techniques
Once you’re comfortable with the basics, there are several advanced techniques you can explore. One popular method is using HDRI (High Dynamic Range Imaging) for lighting your scenes. HDRI maps provide realistic ambient light and reflections, enhancing the overall realism of your renders. You can find free HDRI images online, which can be easily imported into Blender as a world texture.
Another technique involves using the Layered Rendering approach. This lets you render different elements of your scene separately—like foreground, background, and special effects. By compositing these layers together in post-processing, you maintain greater control over the final image, allowing for adjustments without needing to re-render the entire scene.
11. Understanding Render Time Optimization
If you find yourself waiting too long for renders, it’s essential to understand how to optimize render time effectively. Start by simplifying your scene. Reduce the polygon count through methods like decimating your models or using proxies for high-detail objects that are far from the camera. This can drastically cut down on computational load.
Consider using simpler shaders and textures too. While complex materials can create stunning visuals, they often require more processing power. Simplifying these can lead to significantly faster render times without a huge loss in quality, especially for preliminary renders or drafts. (See: Scientific study on rendering techniques.)
Lastly, make sure you’re utilizing render farms or cloud rendering services if you have access to them. These platforms can handle demanding rendering tasks much faster than a typical home computer, especially for larger projects.
12. Frequently Asked Questions
Q: Can I use Blender for commercial projects?
A: Yes, Blender is open-source and free to use for commercial purposes. You can create and sell your renders without any licensing costs.
Q: What computer specifications do I need for rendering in Blender?
A: While you can run Blender on a basic setup, a higher-end machine with a powerful CPU and GPU will greatly enhance rendering speed and performance. Consider at least 16GB of RAM, a good multi-core processor, and a dedicated graphics card for optimal experience.
Q: What are some common mistakes to avoid in Blender rendering?
A: Common pitfalls include poor lighting choices, neglecting to UV unwrap models properly, and not testing materials in different lighting scenarios. Also, remember to save frequently to avoid losing progress during long renders.
Q: How can I reduce noise in my renders?
A: To reduce noise, increase the sample count in the render settings, utilize Blender’s denoising features, and ensure that your lighting setup is balanced. Using clean textures and materials can also help minimize noise.
Q: How can I learn more about advanced rendering techniques?
A: Explore online courses, tutorials, or forums dedicated to advanced Blender techniques. Websites like Blender Nation and YouTube channels like CG Geek provide valuable insights and tutorials on complex rendering methods.
13. Tips for Rendering Animation in Blender
Rendering animations in Blender can be quite different from rendering a single image. First, optimize your scene by reducing unnecessary geometry and textures that won’t be visible in the final animation. Keyframe your objects and camera movements carefully—make sure to preview the animation in the viewport to catch any potential issues before rendering.
When rendering animation, choose the right output format. For full-quality renders, consider using a format like OpenEXR, which retains more detail and allows for extensive post-processing. If you’re looking for quick previews, PNG sequences can be a good alternative because they are less demanding on memory and allow for easier corrections after rendering.
14. Exploring Blender’s Render Layers and Passes
Using render layers and passes can greatly enhance your ability to composite final images. Render layers allow you to separate different elements of your scene (such as characters, background, or effects) into distinct layers. This separation is helpful for adjusting individual aspects without affecting the entire scene.
Render passes enable you to export different components of your render separately, like shadows, reflections, or ambient occlusion. By using compositing software or Blender’s own compositor, you can combine these passes to achieve a more refined final image. Understanding how to use these layers and passes can significantly streamline your workflow and improve your final outputs. (See: 3D printing and its implications.)
15. Advanced Lighting Techniques
Lighting can make or break your render. As you become more comfortable with Blender, explore advanced lighting techniques such as three-point lighting setups, which utilize key, fill, and back lights to create depth and dimension. This method allows for more dramatic and appealing visuals, particularly for character renders.
Another technique is using light groups, which lets you control the influence of specific lights on certain objects. This feature can be handy when you want to highlight particular aspects of your scene without affecting the overall lighting balance.
16. Performance Tips for Large Scenes
Working with large scenes can be taxing on your system, leading to slow performance and long render times. One way to manage this is by utilizing the Collections feature to organize your objects. Hide or disable visibility for collections that are not currently needed, which can help improve viewport performance.
Another tip is to use the Simplify feature in the render settings. This option allows you to reduce the overall complexity of your scene globally, such as limiting the maximum subdivision levels or simplifying textures. It’s a quick way to ensure that your system can handle the demands of larger projects more efficiently.
17. Rendering with Blender for Virtual Reality
If you’re interested in creating content for virtual reality (VR), Blender is equipped to handle VR rendering as well. You can set up stereoscopic rendering, which essentially creates two slightly different images for each eye, simulating depth perception. Blender supports various VR formats, so be sure to familiarize yourself with the requirements of the VR platform you intend to use.
Keep in mind that performance is crucial for VR experiences, as any lag can lead to discomfort for users. Consider optimizing your models and textures, and test your scenes frequently on actual VR hardware to ensure a smooth experience.
18. Final Thoughts on Blender Rendering
Rendering in Blender is an art form that combines technical skills with creativity. By understanding the various components involved—from scene setup to post-processing—you can create stunning visuals that truly express your artistic vision. Remember that practice is key; the more you experiment with different settings and techniques, the better your renders will become.
As you embark on your Blender rendering journey, keep this tutorial handy as a reference guide. Whether you aim for photorealistic images or stylized animations, the skills you develop will serve you well in your 3D endeavors. So grab your camera, set up those lights, and start rendering your way to stunning visuals!
“`
Trending Now
Frequently Asked Questions
What is the rendering process in Blender?
The rendering process in Blender involves generating a 2D image or animation from a 3D model using computer algorithms. It incorporates factors like lighting, textures, and camera angles to produce the final output, allowing digital creations to come to life.
What are the different render engines available in Blender?
Blender supports multiple render engines, notably Cycles and Eevee. Cycles is a ray tracing engine ideal for photorealistic renders, while Eevee is a real-time engine focused on speed, suitable for quick previews and animations.
How do I set up my scene for rendering in Blender?
To set up your scene for rendering in Blender, arrange your models, lights, and camera thoughtfully. Ensure models are positioned to highlight their features, and use various light sources to enhance the mood and impact of your final render.
What factors affect rendering quality in Blender?
Rendering quality in Blender is influenced by factors such as the choice of render engine, lighting setup, texture quality, camera angles, and scene composition. Each of these elements plays a crucial role in achieving a visually appealing output.
How can I improve my Blender renders?
To improve your Blender renders, focus on mastering lighting techniques, experimenting with different materials, and using high-resolution textures. Additionally, understanding the strengths of the rendering engine you choose can significantly enhance the quality of your final output.
Agree or disagree? Drop a comment and tell us what you think.