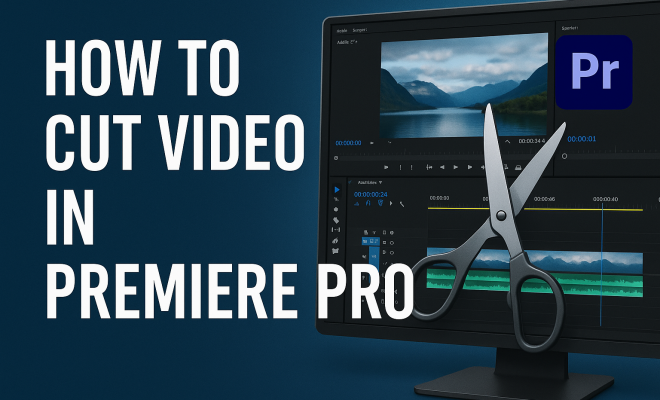
How to cut video in Premiere Pro
“`html
Adobe Premiere Pro is a powerhouse when it comes to video editing, widely used by professionals and amateurs alike. Whether you’re creating a vlog, a short film, or a corporate video, knowing how to cut video in Premiere Pro is essential for crafting a compelling story. In this article, we’ll explore seven invaluable tips that will help you navigate this sophisticated software effectively, making your editing workflow smoother and more efficient.
1. Understanding the Basics of the Premiere Pro Interface
Before you can cut video in Premiere Pro, it’s crucial to familiarize yourself with the interface. Premiere Pro features several key panels: the Project panel for managing your media, the Timeline for arranging your clips, and the Program Monitor for previewing your edits. Each panel plays a vital role in the editing process.
For beginners, the Timeline may seem overwhelming, but it’s where most of the magic happens. Here you’ll arrange your clips, trim them, and add effects. The more comfortable you become with the layout, the easier it will be to cut and piece together your footage efficiently.
Additionally, don’t overlook the importance of workspace customization. Premiere Pro allows you to modify your workspace according to your preferences. You can arrange panels to suit your workflow and even save your customized workspace for future projects. This flexibility can significantly enhance your editing experience, allowing you to focus on your creative process without distraction.
2. Importing Your Footage Properly
To cut video in Premiere Pro, you first need to import your footage correctly. Premiere Pro supports numerous file formats, including .mp4, .mov, and .avi. To import files, you can either drag and drop media directly into the Project panel or use the File menu by selecting Import. Organizing your clips into bins (folders within the Project panel) can help you manage larger projects more effectively.
It’s also a good practice to use high-resolution media, as this will yield better results when editing. Premiere Pro allows you to work in different resolutions, but starting with the highest quality footage will ensure that your edits don’t suffer from quality loss.
When importing, consider using metadata to help categorize your clips. Metadata can include information like shot location, camera settings, and even keywords relevant to the content. This practice can save you time in the future, especially in projects with extensive footage.
3. Utilizing the Razor Tool
One of the simplest ways to cut video in Premiere Pro is by using the Razor Tool. This tool allows you to slice your clips at specific points on the Timeline. To select it, you can either click on the Razor icon in the toolbar or press the C key on your keyboard. Once active, clicking on a clip will cut it at that point.
After making your cuts, you can select the portions you don’t want and delete them, allowing for precise editing. Keep in mind that the Razor Tool is most effective when you have already determined where you want to make your cuts, so it’s often beneficial to watch your footage before diving in.
Another strategic approach while using the Razor Tool is to employ the “Add Edit” function, which can be accessed via the Cmd/Ctrl + K shortcut. This makes it easier to cut multiple clips at the same time, especially when working with layered footage. It’s a handy trick for speeding up the editing process and ensuring that all relevant clips are cut at the same moment. (See: Adobe Premiere Pro on Wikipedia.)
4. Performing Ripple and Roll Edits
Beyond simple cuts, Premiere Pro offers advanced editing techniques like ripple and roll edits. A ripple edit allows you to adjust the timing of clips without leaving empty space in the Timeline. When you click and drag the edge of a clip to shorten or lengthen it, adjacent clips move accordingly, maintaining the overall flow of the sequence.
On the other hand, a roll edit shifts the in and out points of two touching clips simultaneously. This is a beneficial technique when you need to fine-tune the timing between two clips while keeping the overall duration of the sequence intact. To access these options, hover your mouse over the edit point between two clips, and the Roll Edit tool will appear, allowing for seamless editing.
Understanding the visual rhythm of your footage can enhance the effectiveness of ripple and roll edits. For instance, if you have a series of interview clips, matching the pacing of cuts to the speaker’s natural pauses can create a more polished and professional end product. Use visual cues and audio synchronization to make these edits more intuitive.
5. Working with Markers for Precision
Markers are a powerful feature in Premiere Pro that can significantly enhance your editing process. By placing markers at specific points in your footage, you can easily identify key moments you want to cut or highlight. To add a marker, simply press the M key while your playhead is on the desired frame.
Using markers allows you to create a roadmap of important scenes or transitions in your video. This is especially helpful when cutting longer videos, as you can quickly jump to each marker rather than scrubbing through the footage. Plus, you can label markers for additional context, making it easier to remember why you marked a particular spot.
Consider using different colors for markers to categorize your notes. For example, use one color for scenes that need cutting, another for moments that require sound adjustments, and yet another for visual effects cues. This color-coding can streamline your workflow and make navigation much easier, especially in complex projects.
6. Using Keyboard Shortcuts for Efficiency
Time is of the essence in video editing, and using keyboard shortcuts can dramatically speed up your workflow. Premiere Pro has a plethora of shortcuts that can help you cut video more efficiently. For example, use C to activate the Razor Tool, V to return to the Selection Tool, and Cmd/Ctrl + K to cut clips at the playhead position.
Customizing your keyboard shortcuts is also an option, allowing you to set them according to your editing style. By investing time in learning and practicing these shortcuts, you’ll find yourself navigating Premiere Pro like a pro in no time.
In addition to standard shortcuts, consider creating a cheat sheet that highlights the most frequently used commands in your workflow. This can be especially beneficial during the learning phase and can help you reduce the time spent searching for specific tools or functions.
7. Exporting Your Final Product
Once you’ve cut your video in Premiere Pro and added any desired effects, the final step is exporting your project. To export, go to File > Export > Media. Here, you can choose your preferred format, resolution, and settings. Make sure to select a format that suits your intended use; for instance, .mp4 is great for web upload while .mov might be preferred for high-quality renders.
Before exporting, preview your settings to ensure everything looks good. After exporting, it’s wise to watch your video to confirm that your cuts and edits have translated perfectly. This final check is essential to ensure your audience sees the project as you envisioned it. (See: Video editing with Premiere Pro – NYTimes.)
Another important aspect of exporting is choosing the right bitrate. A higher bitrate yields better quality but results in larger file sizes. Conversely, a lower bitrate minimizes file size but can compromise quality. Finding the right balance is crucial depending on the platform where your video will be displayed, be it YouTube, Vimeo, or a personal website.
Understanding Video Formats and Codecs
To cut video in Premiere Pro effectively, it’s also important to understand the different video formats and codecs. File format refers to the container that holds video, audio, subtitles, and other metadata. Common formats include .mp4, .mov, and .avi. Within these formats, codecs dictate how the data is compressed and decompressed.
For instance, the H.264 codec is a popular choice for exporting because it offers a good balance between quality and file size. If your project is intended for online streaming, H.264 in an .mp4 container is often recommended. Understanding these technical aspects can make a significant difference in the quality and efficiency of your video editing process.
Advanced Tips for Cutting Video in Premiere Pro
As you gain proficiency in cutting videos, consider these advanced techniques to elevate your editing skills:
- Nested Sequences: When working on complex projects with multiple layers, consider nesting sequences. This allows you to simplify your timeline and apply effects to entire sequences rather than individual clips.
- Multi-Camera Editing: If you’re working with footage from multiple cameras, Premiere Pro’s multi-camera editing feature makes it easy to switch between angles seamlessly. This feature is particularly useful for events like weddings or concerts.
- Using Adjustment Layers: For applying effects across multiple clips, use adjustment layers instead of applying effects to each clip individually. This not only saves time but ensures a consistent look.
Understanding Audio Editing in Premiere Pro
While cutting video is essential, don’t forget about the audio component of your projects. Audio can make or break a video, and Premiere Pro offers various tools for ensuring your sound is as polished as your visuals. You can cut, adjust, and mix your audio tracks just as easily as your video clips.
Utilizing the Audio Track Mixer allows you to control the levels of each audio track within your timeline. You can adjust volume, apply effects, and even automate changes over time. This is particularly useful for maintaining a balanced sound throughout your video, which is crucial for viewer engagement.
Consider also using the Essential Sound panel, which helps you quickly categorize and edit audio clips. Whether your audio is dialogue, music, or sound effects, the Essential Sound panel provides specific controls tailored to each type, allowing you to achieve professional-quality results with minimal effort.
Common Mistakes to Avoid When Cutting Video in Premiere Pro
When learning to cut video in Premiere Pro, it’s easy to make mistakes that can hinder your workflow. Here are some common pitfalls and how to avoid them:
- Not Saving Your Work: It sounds simple, but forgetting to save your project can lead to lost progress. Make it a habit to save frequently or enable auto-save in preferences.
- Ignoring Color Grading: Color grading can dramatically alter the mood and tone of your video. Don’t overlook this aspect; take time to learn color correction techniques to enhance your footage.
- Overusing Effects: While effects can enhance your video, overusing them can distract viewers. Aim for subtlety and ensure that your effects serve the story rather than overshadow it.
FAQ about Cutting Video in Premiere Pro
1. Can I cut video clips in Premiere Pro without losing quality?
Yes, as long as you start with high-resolution footage and use non-destructive editing methods, you can cut videos without losing quality.
2. Is there a way to automatically cut video at specific intervals?
While there’s no built-in feature for automatic cuts, you can use markers to identify intervals and then manually cut using the Razor Tool or keyboard shortcuts. (See: Video editing topics on ScienceDirect.)
3. How do I undo a cut I made mistakenly?
Simply press Cmd/Ctrl + Z to undo your last action, or you can use the Edit menu and select Undo to revert your last cut.
4. Can I customize the layout of the editing workspace?
Absolutely! Premiere Pro allows you to customize your workspace by dragging panels around to suit your workflow and saving that setup for future use.
5. How can I ensure my exported video looks good on social media?
When exporting, use the recommended settings for each platform. For example, YouTube recommends using H.264 codec with a bitrate of around 8 Mbps for 1080p video. Always check the platform’s guidelines for the best results.
Tips for Collaborating with Others in Premiere Pro
If you’re editing videos as part of a team, Premiere Pro offers collaborative features to streamline your workflow. Using Adobe Creative Cloud, you can share projects, assets, and media libraries with team members. This is especially useful for larger projects where multiple editors or content creators are involved.
Consider using Team Projects, a feature that allows multiple users to work on the same project simultaneously. Changes are tracked in real-time, so you can see edits made by others instantly. This feature reduces the hassle of version control and ensures that everyone is on the same page.
For effective collaboration, it’s essential to establish clear communication channels. Regular check-ins can help address issues early and keep the project moving forward. Also, using shared cloud storage for media files can prevent mismatches or missing assets, leading to a smoother editing experience.
Final Thoughts
Learning how to cut video in Premiere Pro may seem daunting at first, but with the right techniques, you can master this powerful tool in no time. By understanding the interface, utilizing tools like the Razor and Ripple Edit, and employing markers and shortcuts, you’ll streamline your editing process and create polished videos that captivate your audience. Remember, practice makes perfect, so don’t hesitate to experiment with different styles and techniques until you find what works best for you!
“`
Trending Now
Frequently Asked Questions
How do I trim a video in Premiere Pro?
To trim a video in Premiere Pro, select the clip on the Timeline and hover over the end until you see the red 'trim' icon. Click and drag inward to remove excess footage. You can also use the Razor Tool (C) to cut clips at specific points, allowing for more precise edits.
What file formats can I use in Premiere Pro?
Adobe Premiere Pro supports a variety of file formats, including .mp4, .mov, and .avi. You can import these files by dragging them into the Project panel or using the 'Import' option in the File menu, making it easy to work with different media types.
How can I customize my workspace in Premiere Pro?
To customize your workspace in Premiere Pro, go to the 'Window' menu and select 'Workspaces.' You can rearrange panels according to your workflow preferences, and even save your layout for future projects. This customization enhances your editing efficiency.
What is the Timeline in Premiere Pro?
The Timeline in Premiere Pro is where you arrange, edit, and manipulate your video clips. It's essential for trimming footage, adding effects, and creating your narrative. Familiarizing yourself with the Timeline is key to mastering video editing in the software.
How do I import footage into Premiere Pro?
To import footage into Premiere Pro, you can either drag and drop your media files directly into the Project panel or use the 'File' menu by selecting 'Import.' Organizing your clips into bins can help manage larger projects effectively.
Agree or disagree? Drop a comment and tell us what you think.