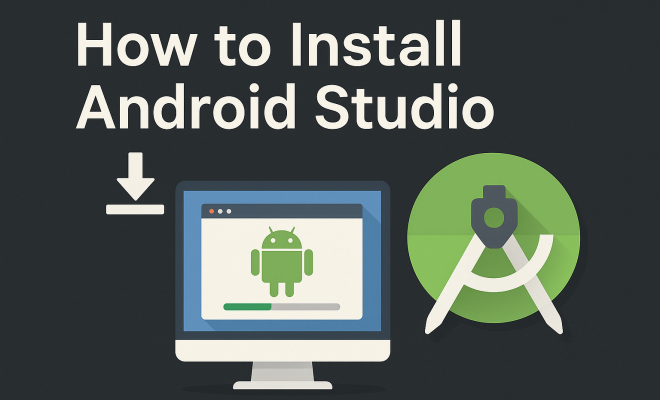
How to install Android Studio
“`html
In the world of mobile app development, Android Studio stands as the official integrated development environment (IDE) for Google’s Android operating system. Whether you’re a seasoned developer or a curious newbie, knowing how to install Android Studio is the first step toward creating amazing apps. In this guide, we’ll explore the entire process, from preparation to installation, along with some tips and tricks to ensure your development journey is smooth and successful.
1. Understanding Android Studio: What Makes It the Go-To IDE?
Before diving into the installation process, it’s essential to understand what Android Studio offers. Launched in 2013, it replaced the older Eclipse IDE as Google’s primary development platform. Thanks to its robust features, Android Studio has become the preferred choice among developers for building Android applications.
Some standout features include a powerful code editor with advanced code completion, a flexible build system, and a rich layout editor that allows developers to create user interfaces easily. Additionally, it integrates well with version control systems like Git, making collaboration seamless. Understanding these features will help you appreciate why you’re embarking on the journey to install Android Studio.
But what else makes Android Studio a pivotal tool in mobile app development? The IDE offers support for both Java and Kotlin, two of the most popular programming languages for Android development. Kotlin, in particular, has gained significant traction due to its concise syntax and interoperability with Java, making it an excellent choice for modern Android projects.
Additionally, Android Studio provides extensive debugging tools, performance analysis features, and a rich library of templates and samples, empowering developers to create apps efficiently and effectively. As you navigate the landscape of Android development, these tools will be invaluable in streamlining your workflow.
2. System Requirements: Is Your Machine Ready?
Before you proceed with the installation, ensure your computer meets the minimum system requirements for Android Studio. Here’s what you need:
- Windows: Windows 7/8/10 (64-bit)
- macOS: macOS High Sierra (10.13) or later
- Linux: 64-bit distribution with GLIBC 2.19 or higher
- RAM: Minimum of 4 GB (8 GB recommended)
- Disk Space: At least 2 GB of available disk space, plus additional space for Android SDK and emulators
- Screen Resolution: Minimum 1280 x 800 resolution
By checking these requirements, you can avoid common pitfalls during installation. If your machine falls short, consider upgrading your hardware to enjoy a smoother experience.
It’s interesting to note how these requirements have evolved over time. As Android development has advanced, so have the tools and libraries, which often demand more resources. Keeping your development environment updated with adequate specifications ensures that you can leverage the latest features and improvements without facing performance hiccups.
3. Downloading Android Studio: Where to Find It
The next step in the process to install Android Studio is to download the software. Head over to the official Android Studio website. Here, you’ll find the latest version available for your operating system. It’s critical to download the installer directly from the official site to avoid security risks associated with third-party downloads.
On the website, click on the download button, and you will be prompted to accept the terms and conditions. After accepting, the download will begin. Depending on your internet speed, this could take a few minutes. Ensure you note where the installer is saved on your system so you can easily access it during installation.
Additionally, it’s important to keep in mind that Android Studio is frequently updated with new features, performance enhancements, and bug fixes. By downloading the latest version, you ensure that you have access to all the recent improvements which can significantly enhance your development experience. (See: Android Studio on Wikipedia.)
4. Installation Process on Windows: Step-by-Step Guide
Now that you have the installer, it’s time to get your hands dirty. Here’s a detailed guide on how to install Android Studio on a Windows machine:
- Locate the Installer: Navigate to the folder where the installer was saved and double-click on it to launch the installation wizard.
- Choose Installation Type: You will be prompted to choose between a standard and custom installation. For most users, the standard installation is recommended as it installs the necessary components automatically.
- Install Android SDK: During the installation process, you will also be given the option to install the Android SDK, which is crucial for app development. Ensure this option is checked.
- Select Components: The setup wizard will allow you to select additional components to install, including the Android Virtual Device (AVD) and the Android Emulator. These are helpful for testing your applications.
- Complete the Installation: Follow the prompts, and once the installation is complete, you can launch Android Studio from your desktop or start menu.
After installation, it’s advisable to check for any updates to ensure you have the latest features and security patches.
If you encounter any issues during installation, it’s a good idea to consult the official troubleshooting guide available on the Android developer website. Understanding the common hurdles can save you time and frustration.
5. Installation Process on macOS: Step-by-Step Guide
If you’re a macOS user, installing Android Studio is just as straightforward but slightly different. Here’s how you can do it:
- Download the Installer: Similar to Windows, download the macOS version of Android Studio from the official site.
- Open the Installer: Once the download is complete, open the downloaded DMG file and drag the Android Studio icon to your Applications folder.
- Launch Android Studio: Open Android Studio from the Applications folder. You may be prompted with a security message. If so, right-click the app and select “Open” to bypass this.
- Follow the Setup Wizard: The setup wizard will guide you through the process of setting up the IDE for the first time. This includes downloading the Android SDK and setting the initial configuration.
- Check for Updates: Once installed, check for updates to ensure your IDE is up to date.
After completing these steps, you’ll be ready to start your app development journey on macOS.
It’s also worth noting that macOS users typically benefit from a more seamless integration with other Apple services and tools, enhancing their overall development experience.
6. Installation Process on Linux: Step-by-Step Guide
Linux users have a slightly different installation process. Here’s a comprehensive guide to help you install Android Studio on a Linux machine:
- Download the Tarball: From the Android Studio website, download the .zip or .tar.gz file for Linux.
- Extract the Files: Open your terminal and navigate to the directory where you downloaded the file. Use the command
tar -xvf android-studio-ide-*-linux.tar.gzto extract the files. - Move to the Installation Directory: Move the extracted folder to a preferred installation directory, such as
/usr/local/android-studio. - Run the Studio.sh Script: Navigate to the
bindirectory inside the Android Studio folder and run thestudio.shscript using./studio.shin the terminal. - Set Up the IDE: The setup wizard will guide you through the initial configuration, including downloading the Android SDK.
After successfully executing these steps, you should have Android Studio running smoothly on your Linux machine.
Linux users often have the added advantage of a highly customizable environment. If you’re familiar with the command line, you can tailor your installation and configurations to best suit your development needs.
7. Post-Installation Configuration: Setting Up Your Development Environment
Once you’ve installed Android Studio, it’s crucial to configure your environment for optimal performance. Here are some essential steps to follow:
- Install SDK Packages: Open Android Studio, go to SDK Manager, and install the latest SDK packages. This will ensure you have the latest tools for app development.
- Configure AVD: The Android Virtual Device (AVD) allows you to run and test your applications. Set up an AVD by navigating to the AVD Manager and creating a new device configuration.
- Explore Plugins: Android Studio supports a range of plugins that can enhance your development experience. Explore the plugin marketplace to find tools that suit your needs.
- Set Up Version Control: Incorporating version control systems like Git can help manage your project efficiently. Android Studio has built-in support for Git, making it easier to collaborate with other developers.
By configuring your development environment, you set the stage for a productive app development experience.
Additionally, consider customizing your IDE’s appearance and functionality through themes and keyboard shortcuts. This can significantly enhance your productivity and make your development space more enjoyable. (See: Android Studio in computer science research.)
8. Troubleshooting Common Installation Issues: What to Watch Out For
Even with detailed installation steps, issues can arise. Here are some common problems you might encounter and how to resolve them:
- Installation Fails: If the installation fails, ensure your system meets the minimum requirements. Check for enough disk space and compatible operating system versions.
- SDK Not Found: If Android Studio can’t find the SDK, you might need to manually set the path in the preferences. Navigate to File > Project Structure and set the correct SDK path.
- Emulator Issues: If the Android Emulator doesn’t start, ensure that virtualization is enabled in your BIOS settings. This is crucial for running the emulator efficiently.
- Permissions Issues: On Linux, you might encounter permission errors when trying to run the IDE. Use the
chmodcommand to change permissions or run the script withsudoif necessary.
By being aware of these issues, you can address them quickly and keep your development process on track.
9. Resources for Further Learning: Expanding Your Skills
Now that you know how to install Android Studio, the next step is to enhance your skills. Here are some resources that can help:
- Official Android Developer Documentation: A comprehensive source for all things Android development, including tutorials and best practices.
- Online Courses: Websites like Udemy, Coursera, and Pluralsight offer extensive courses on Android app development, often including hands-on projects.
- YouTube Tutorials: Channels dedicated to programming often feature step-by-step guides for beginners and advanced developers alike.
- Community Forums: Engaging in forums like Stack Overflow or Reddit’s r/androiddev can provide not only support but also insights from experienced developers.
- Books: Consider reading up-to-date books on Android development. Titles such as “Android Programming: The Big Nerd Ranch Guide” are highly recommended for both beginners and advanced users.
By leveraging these resources, you can deepen your understanding and become proficient in Android app development.
10. Frequently Asked Questions (FAQ)
1. What are the advantages of using Android Studio?
Android Studio provides a comprehensive suite of tools, including an advanced code editor, an emulator for testing apps, and the ability to integrate with version control systems. These features help streamline the development process and improve productivity.
2. Can I install Android Studio on an older computer?
While you can try to install Android Studio on older machines, it’s recommended to use a computer that meets or exceeds the minimum system requirements. Performance may suffer significantly on older hardware, leading to a frustrating development experience.
3. Is Android Studio free to use?
Yes, Android Studio is completely free to use. You can download it from the official website without any hidden fees or charges.
4. What languages can I use to develop Android apps?
Android Studio primarily supports Java and Kotlin. Kotlin is now favored for new Android projects due to its modern features and conciseness. You can also use C++ with the Android Native Development Kit (NDK) for specific tasks.
5. How often should I update Android Studio?
It’s a good practice to check for updates regularly, ideally each time you work on a project. Updates can include important bug fixes, performance improvements, and new features that can enhance your development experience.
6. What if I encounter issues during installation?
If you face any problems during installation, refer to the troubleshooting section of this guide or check the official Android developer documentation for common issues and solutions. Community forums can also be a great resource for help.
11. Advanced Features of Android Studio: Exploring Beyond the Basics
Once you’ve mastered the basics of installation and configuration, it’s time to explore some of the advanced features that Android Studio has to offer. These can significantly enhance your development workflow and allow you to create more sophisticated applications.
1. Instant Run
Instant Run allows you to see changes in your app almost instantly without needing to restart the entire application. This feature is particularly useful for UI updates and code changes, as it saves time and boosts productivity during development.
2. Android Profiler
The Android Profiler is an incredibly useful tool for optimizing your application’s performance. It provides real-time data on CPU usage, memory consumption, and network activity. By using the profiler, you can identify bottlenecks and make necessary adjustments to improve your app’s efficiency.
3. Layout Inspector
With the Layout Inspector, you can examine the UI hierarchy of your application while it’s running. This tool allows you to debug and fine-tune the layout of your app, ensuring that it looks great on all devices and screen sizes.
4. Firebase Integration
Android Studio offers seamless integration with Firebase, Google’s mobile platform. This allows you to easily add backend services like authentication, real-time databases, and cloud storage to your applications without requiring extensive server-side knowledge.
5. Code Templates and Samples
To help you get started quickly, Android Studio provides a variety of code templates and sample projects. You can use these as a foundation for your app, saving you time on common tasks and allowing you to focus on building unique features.
12. Best Practices for Android Development: Tips for Success
As you dive deeper into Android development, following best practices can help you create high-quality applications that are maintainable and user-friendly:
- Follow the Material Design Guidelines: Google’s Material Design offers principles and guidelines for creating visually appealing and user-friendly interfaces. Adhering to these can significantly improve the user experience of your app.
- Optimize for Different Screen Sizes: Given the variety of Android devices available, ensure your app is responsive and scales well across different screen sizes and resolutions.
- Manage Resources Efficiently: Be mindful of resource management, such as images and memory. Optimize your app’s performance by loading resources on demand and releasing them when not in use.
- Use ProGuard: ProGuard is a code shrinker that helps obfuscate your code and removes unused classes and methods. This can improve performance and protect your code from reverse engineering.
- Regular Testing: Implement thorough testing strategies, including unit tests and UI tests, to ensure your app functions correctly in various scenarios. This can help catch and fix bugs early in the development process.
13. Conclusion: Your Journey Begins Here
With Android Studio installed and configured, you’re well on your way to creating your first app. Whether you’re developing for fun or aiming for a future career in tech, the skills you gain will serve you well. Remember, the journey of app development is as significant as the destination — keep learning, experimenting, and growing!
“`
Trending Now
Frequently Asked Questions
What is Android Studio used for?
Android Studio is the official integrated development environment (IDE) for Google's Android operating system. It is used by developers to build, test, and debug Android applications, offering a powerful code editor, layout editor, and tools for performance analysis.
How do I install Android Studio?
To install Android Studio, download the installer from the official website, run it, and follow the setup instructions. Ensure your system meets the necessary requirements, such as having Java Development Kit (JDK) installed.
What programming languages does Android Studio support?
Android Studio supports Java and Kotlin, which are the primary programming languages for Android app development. Kotlin, in particular, has gained popularity due to its concise syntax and compatibility with Java.
Why should I use Android Studio?
Android Studio is favored for its advanced features like code completion, a flexible build system, and extensive debugging tools. It enhances productivity and efficiency for developers, making it the go-to IDE for Android development.
Is Android Studio free to use?
Yes, Android Studio is completely free to download and use. It is an open-source tool provided by Google, making it accessible for developers of all skill levels to create Android applications without any cost.
What’s your take on this? Share your thoughts in the comments below — we read every one.